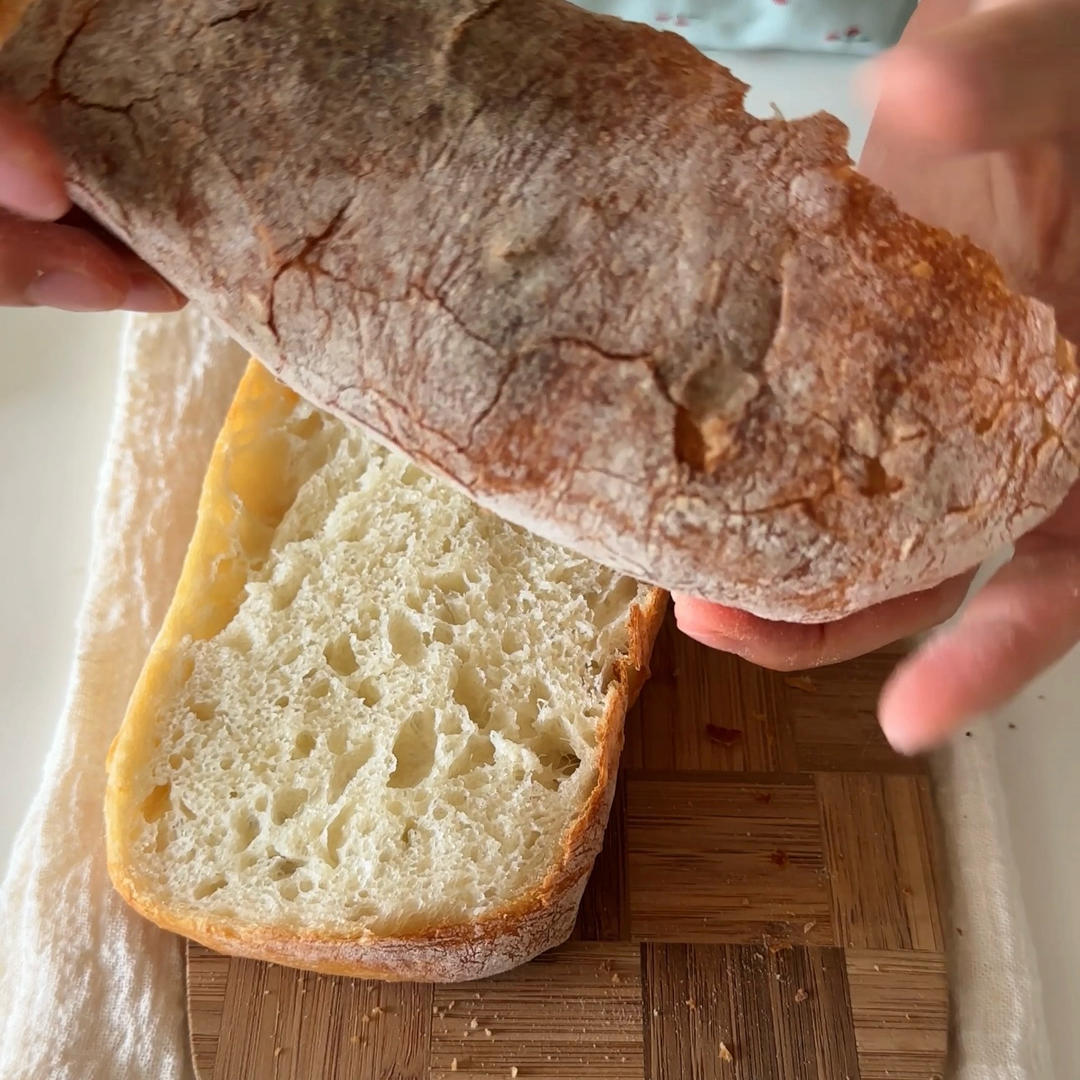
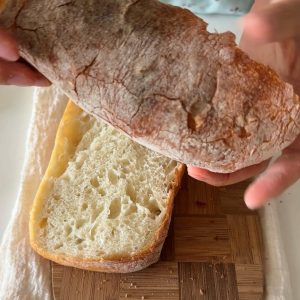
The first loaf of ciabatta I ever baked took two days and taught me a lesson: most ciabatta recipes are built on drama. Autolyse this, refrigerate that, coil-fold six times, and pray the wet dough does not glue itself to the counter. Then I found this version – “the world’s simplest ciabatta” – and it genuinely is. Six ingredients, one bowl, two stretch-and-folds, and about three hours from mixing to a loaf with a crackling crust and a soft, holey crumb.
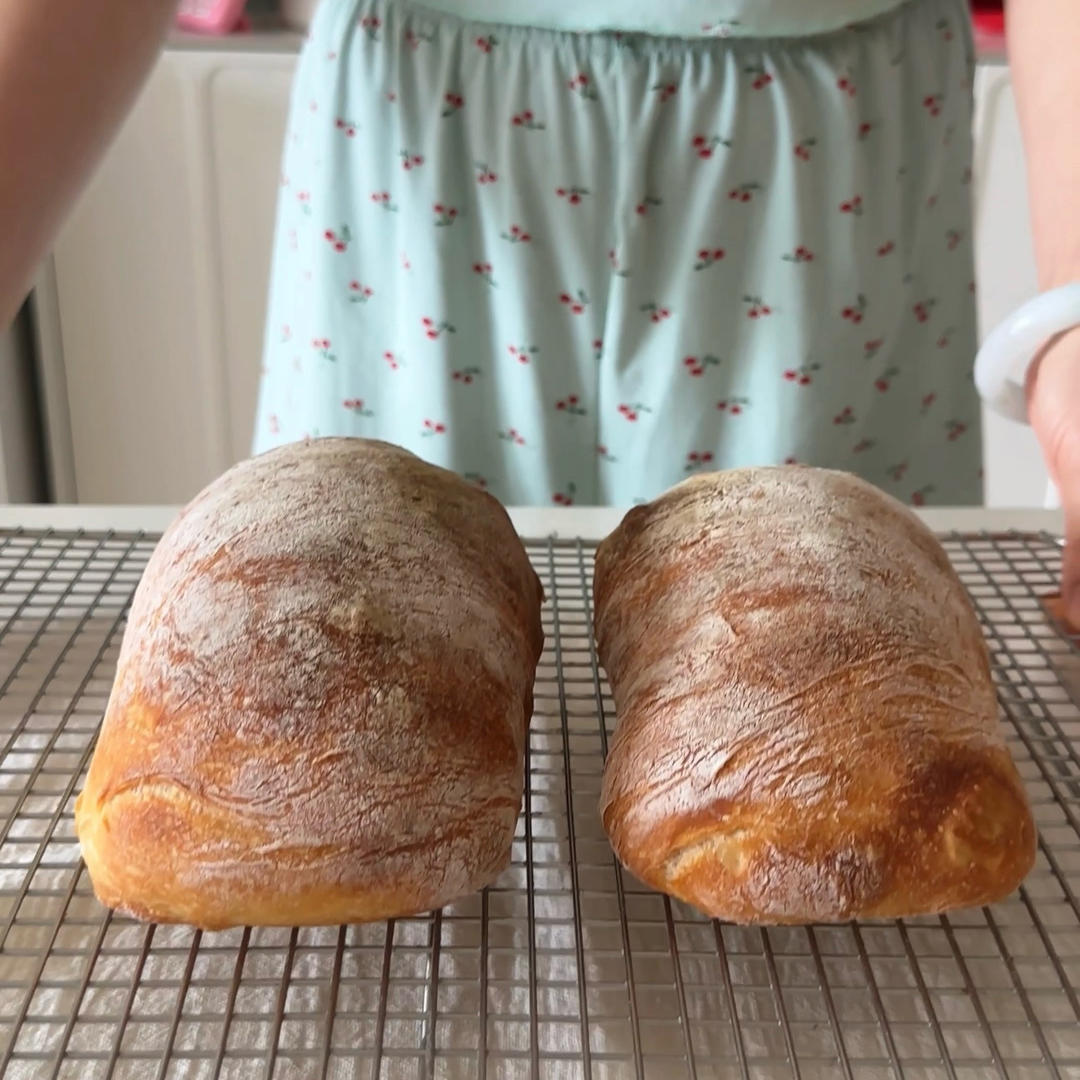
I will be honest about what this bread is and is not. It is not going to win an award against a 24-hour, coil-folded, stone-baked Italian masterpiece – the author says as much, and I agree. But what it is, reliably, is a real ciabatta: crunchy outside, airy and tender inside, made with your hands and a bowl on a random weekday, with no special equipment. That trade is exactly why this recipe lives on my “weekday bread” shelf.
The dough is very wet – about 85% hydration – which sounds scary and is actually the point. The water is what creates the open crumb, and the stretch-and-fold technique is what gives the wet dough enough structure to hold air. Do not add flour when it feels sticky; that is the dough working as designed. Trust the bowl, trust the folds, and you will get the loaf.
What Is Ciabatta (Qia Ba Ta)?
Ciabatta – “qia ba ta” in Chinese – is the Italian slipper bread: a flat, wide loaf with a crackling crust and a famously open, holey crumb. The name comes from its slipper-like shape, and the texture comes from a very wet dough (usually 70-90% hydration) that is folded rather than kneaded, then baked at high heat with steam. In China, where this recipe was shared, ciabatta has become a home-baking favorite precisely because the high-hydration, no-knead method suits home ovens and busy schedules. This same-day version skips the overnight ferment entirely.
If this quick version makes you want the full drama, my foolproof 24-hour no-knead ciabatta takes the same dough on the long road: an overnight ferment that develops even deeper flavor and an airier crumb. The quick version is for Tuesday; the long version is for the weekend.
1Easy No-Knead Ciabatta BreadA foolproof, no-knead artisanal ciabatta bread recipe that uses a simple 12-hour poolish and gentle folding to create a spectacular crispy crust and large, airy holes. No stand mixer required.Check out this recipe
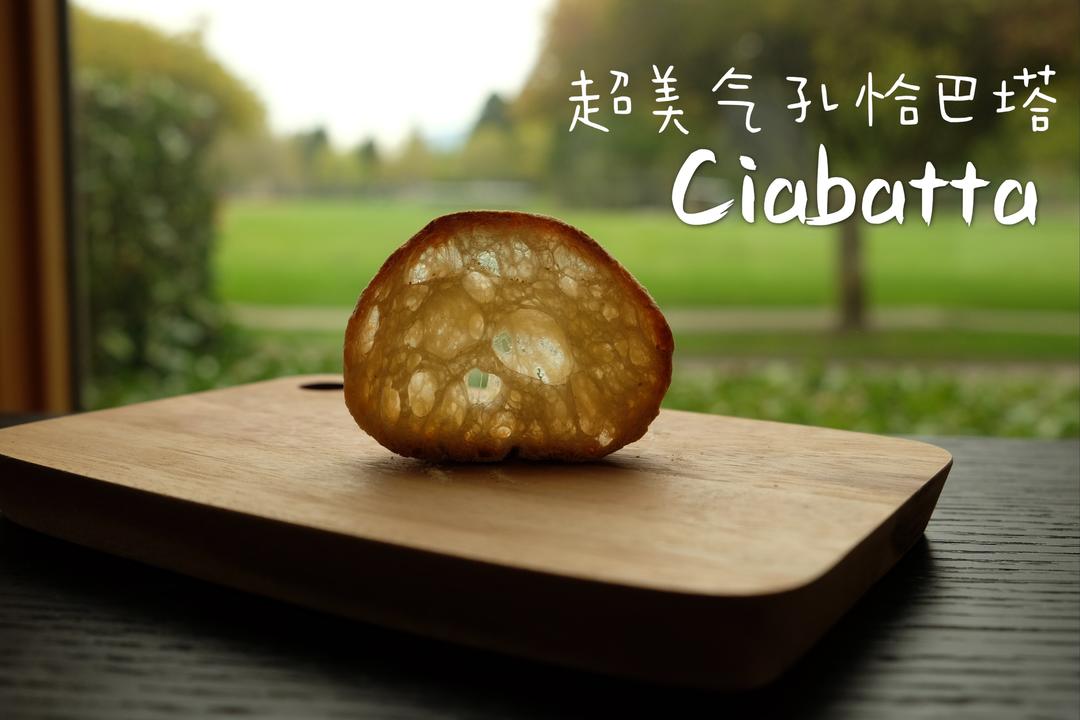
Why This Recipe Works
- No kneading at all: time and water do the work – a few stretch-and-folds build enough gluten for a beautiful open crumb.
- High hydration (about 85%): the wet dough creates steam inside the loaf, producing the big, irregular holes ciabatta is famous for.
- A warm, fast bulk ferment: 40 minutes at a warm spot is enough for this small batch, keeping the whole bake to one afternoon.
- Water spray in a 230°C (446°F) oven: the burst of steam keeps the crust elastic, so it expands fully before crisping to that shattering shell.
- A forgiving divide: make two big loaves or four small ones – the recipe scales down to whatever sandwich size you need.
Equipment Needed
- A large mixing bowl and a spatula
- A baking tray lined with parchment or dusted with flour
- A spray bottle with water
- A bench scraper or plastic scraper (very helpful with wet dough)
- A clean tea towel for covering
Ingredients
- 262 g (2 cups plus 2 tbsp) bread flour (high-gluten flour)
- 223 g (about 1 cup) room-temperature water
- 40 g (3 tbsp) warm water, for activating the yeast
- 4 g (1 1/4 tsp) instant dry yeast
- 3 g (3/4 tsp) sugar
- 5 g (1 tsp) salt
- 15 g (1 tbsp plus 1 tsp) olive oil
Ingredient Notes
Bread flour is essential – its higher protein gives the wet dough enough gluten to trap air. The olive oil does double duty: it adds flavor and lightly lubricates the dough, which helps the stretch-and-fold and keeps the crumb tender. Instant dry yeast can be mixed straight into the flour; if you only have active dry yeast, dissolve it in the warm water with the sugar and give it a few extra minutes to foam.
Prep & Mise en Place
Weigh everything before you start – this dough moves fast once the timer is running. Mix the yeast with the warm water and sugar first so it is blooming while you measure the rest. Have your bowl, spatula, bench scraper and a timer ready, and clear a warm spot for the dough to ferment. The whole timeline: 10 minutes to activate the yeast, 45 minutes of mixing and resting with two folds, 40 minutes of bulk ferment, shaping, 30 minutes of final proof while the oven preheats, then 20 minutes of baking.
Cooking Process
Step 1 – Activate the Yeast
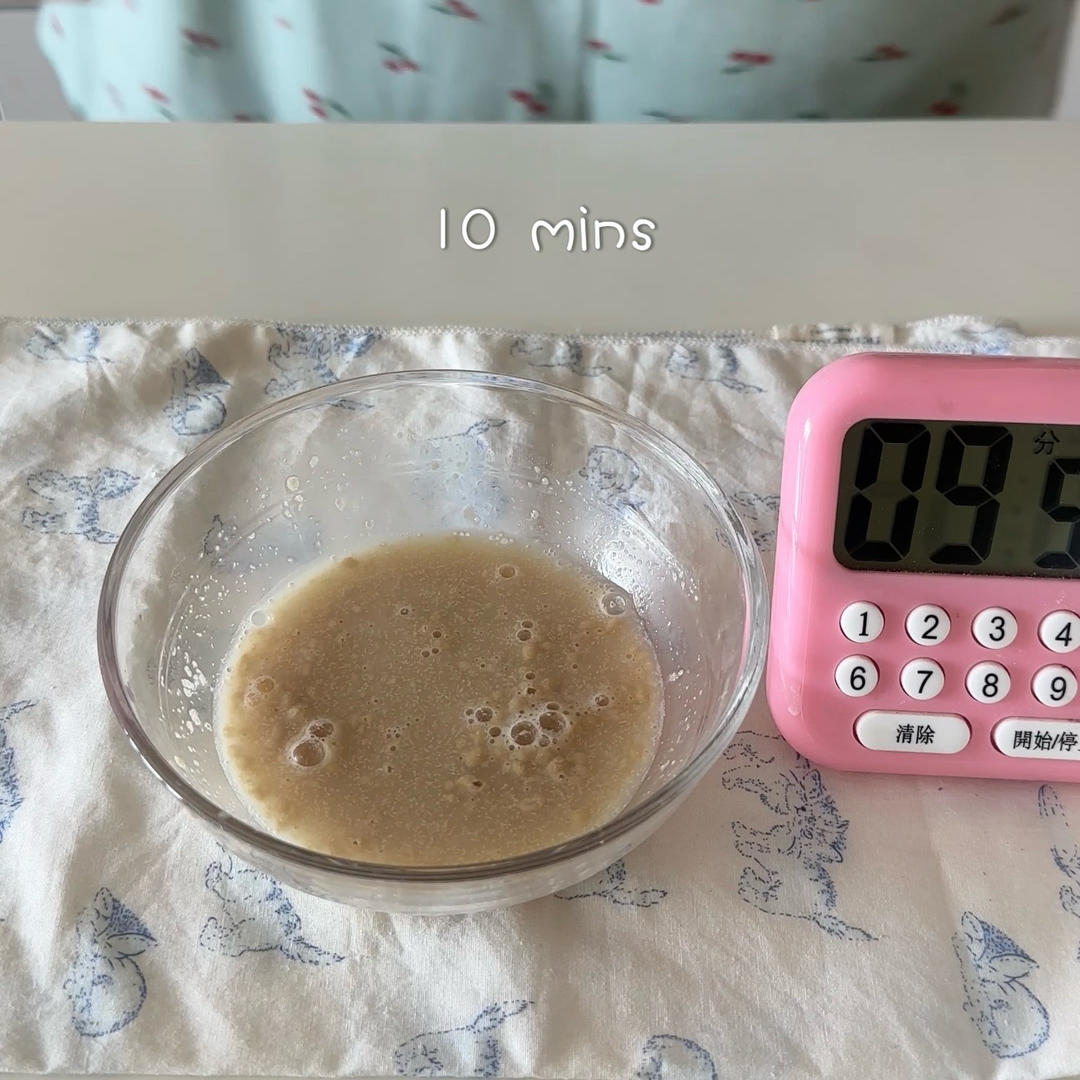
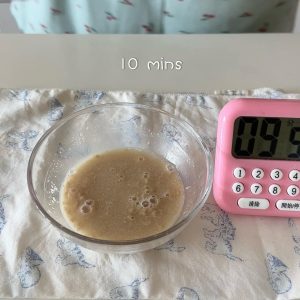
Stir the sugar and yeast into 40 g of warm water and let it sit for 10 minutes until it foams and smells faintly yeasty.
Step 2 – Mix Everything Together
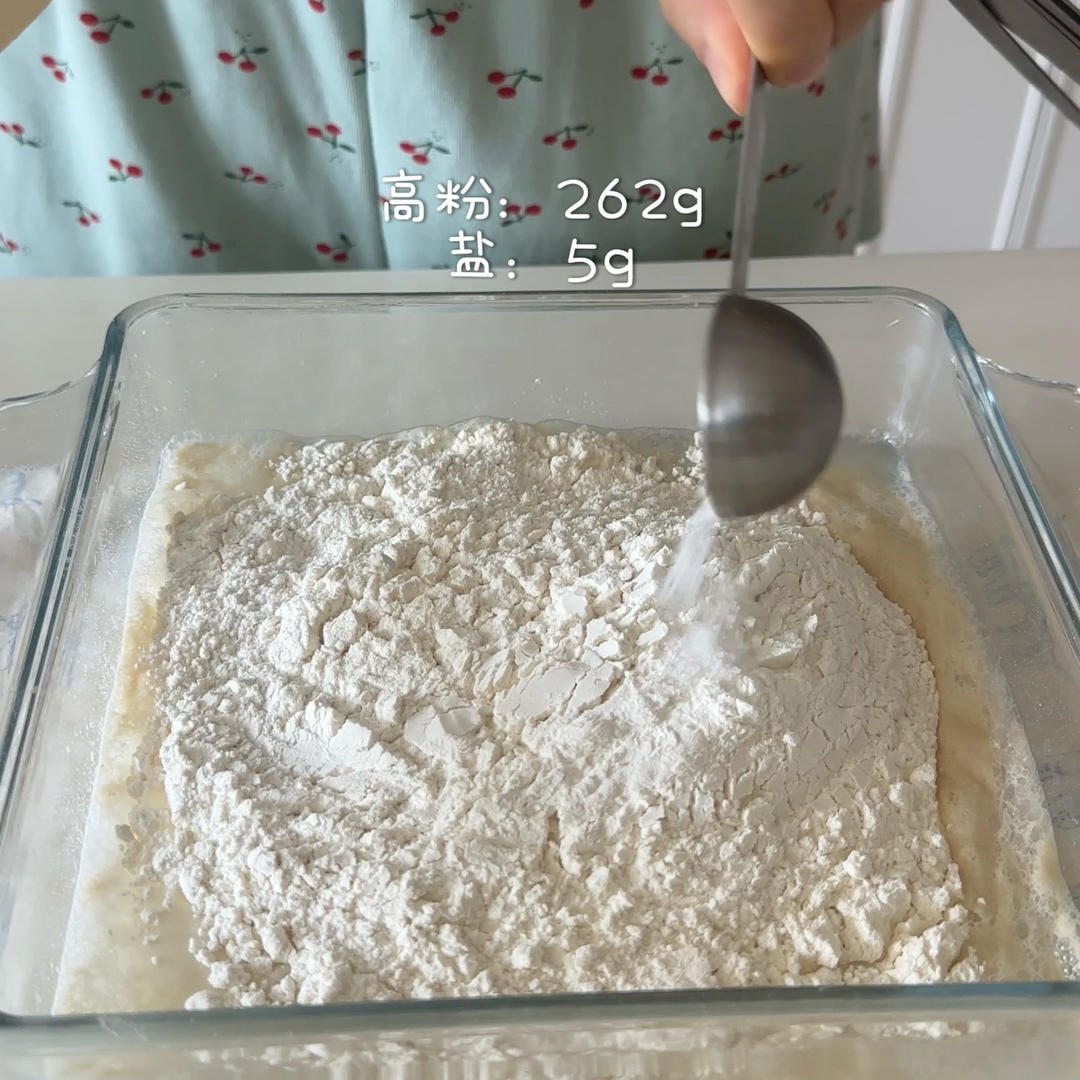
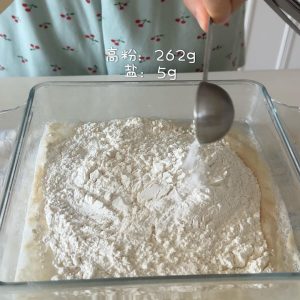
In a large bowl, combine the remaining room-temperature water with all the dry ingredients except the olive oil. Add the activated yeast and mix with a spatula.
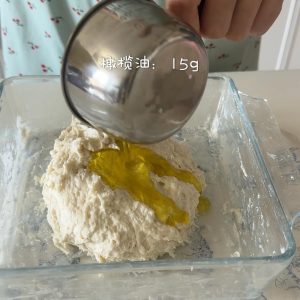
Step 3 – Add the Olive Oil
Mix until no dry flour remains, then pour in the olive oil. The dough will be shaggy and very wet – that is correct.
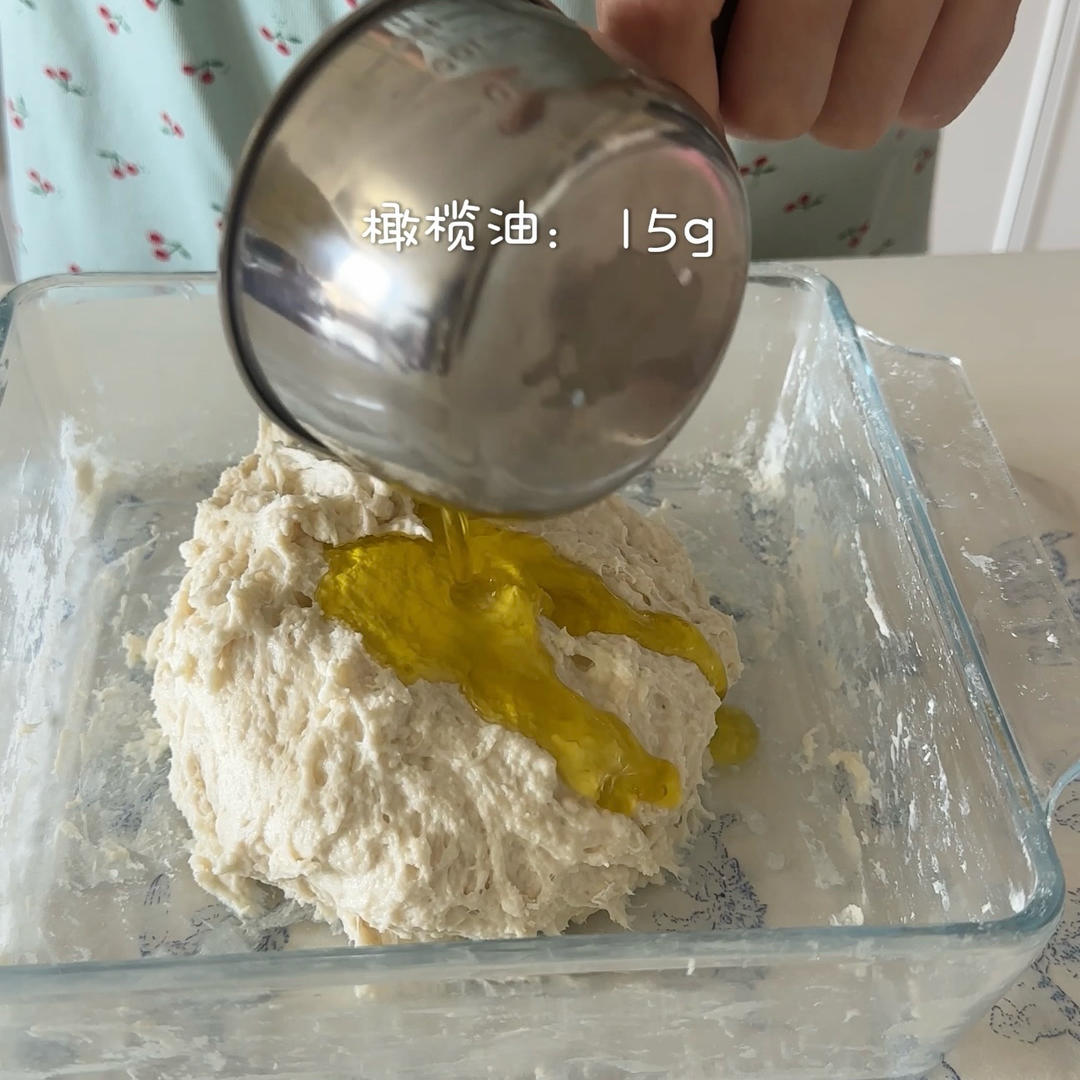
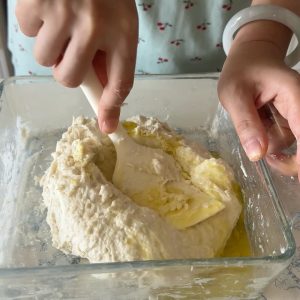
Step 4 – Fold Until the Oil Is Absorbed
Keep folding with the spatula until the oil is fully absorbed and the dough comes together into a sticky, elastic mass.
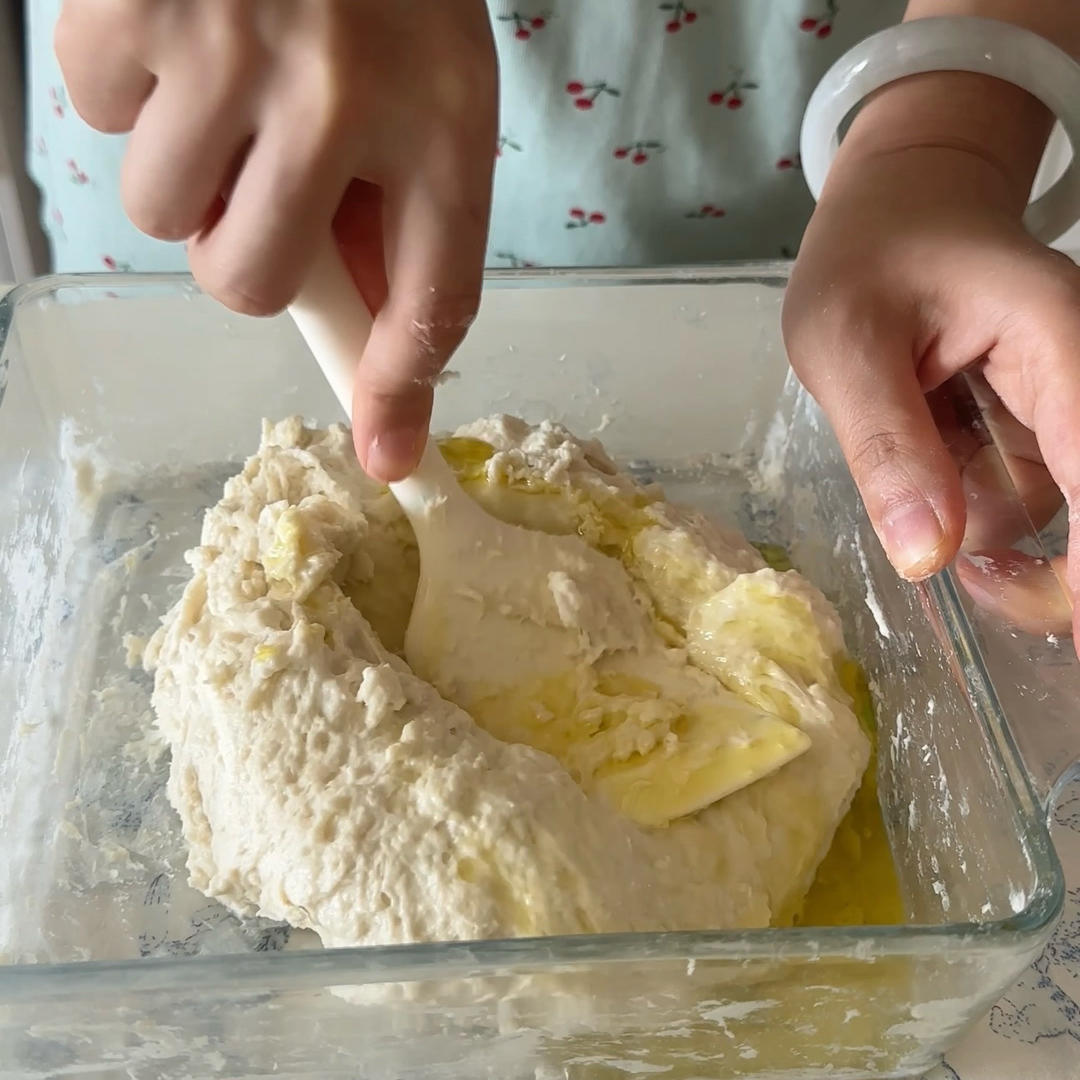
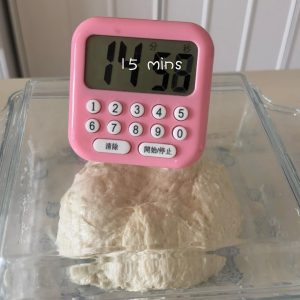
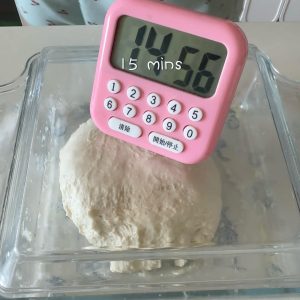
Step 5 – Rest 15 Minutes
Cover the bowl and let the dough rest for 15 minutes. This first rest lets the flour hydrate and starts gluten development without any effort from you.
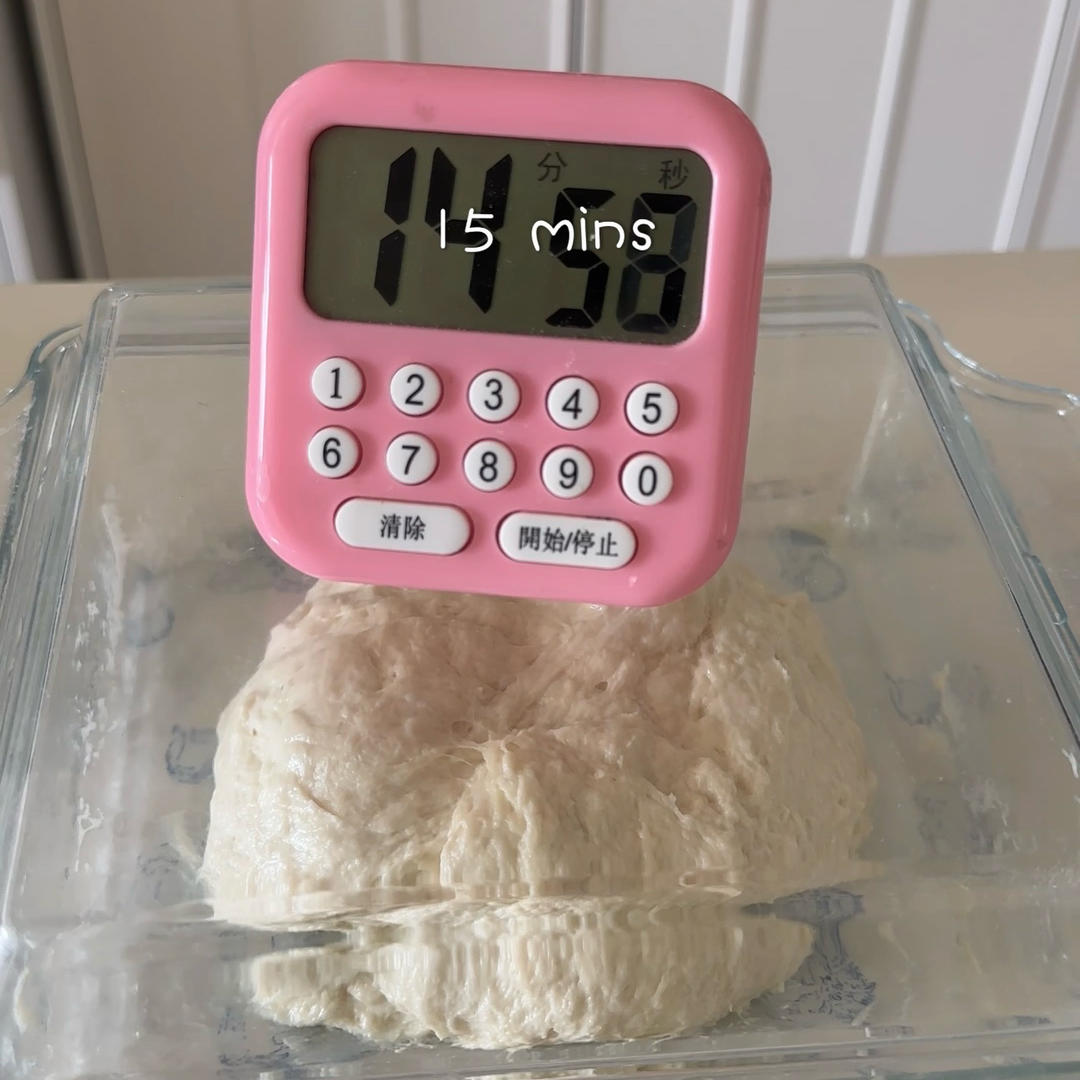
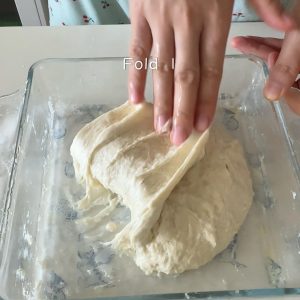
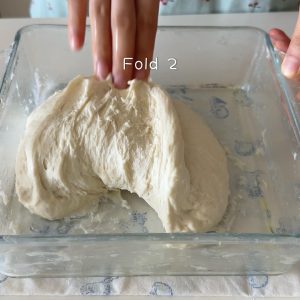
Step 6 – First Stretch and Fold
With a wet hand or bench scraper, lift one edge of the dough, stretch it up, and fold it over the center. Turn the bowl a quarter turn and repeat three more times, until you have folded all four sides.
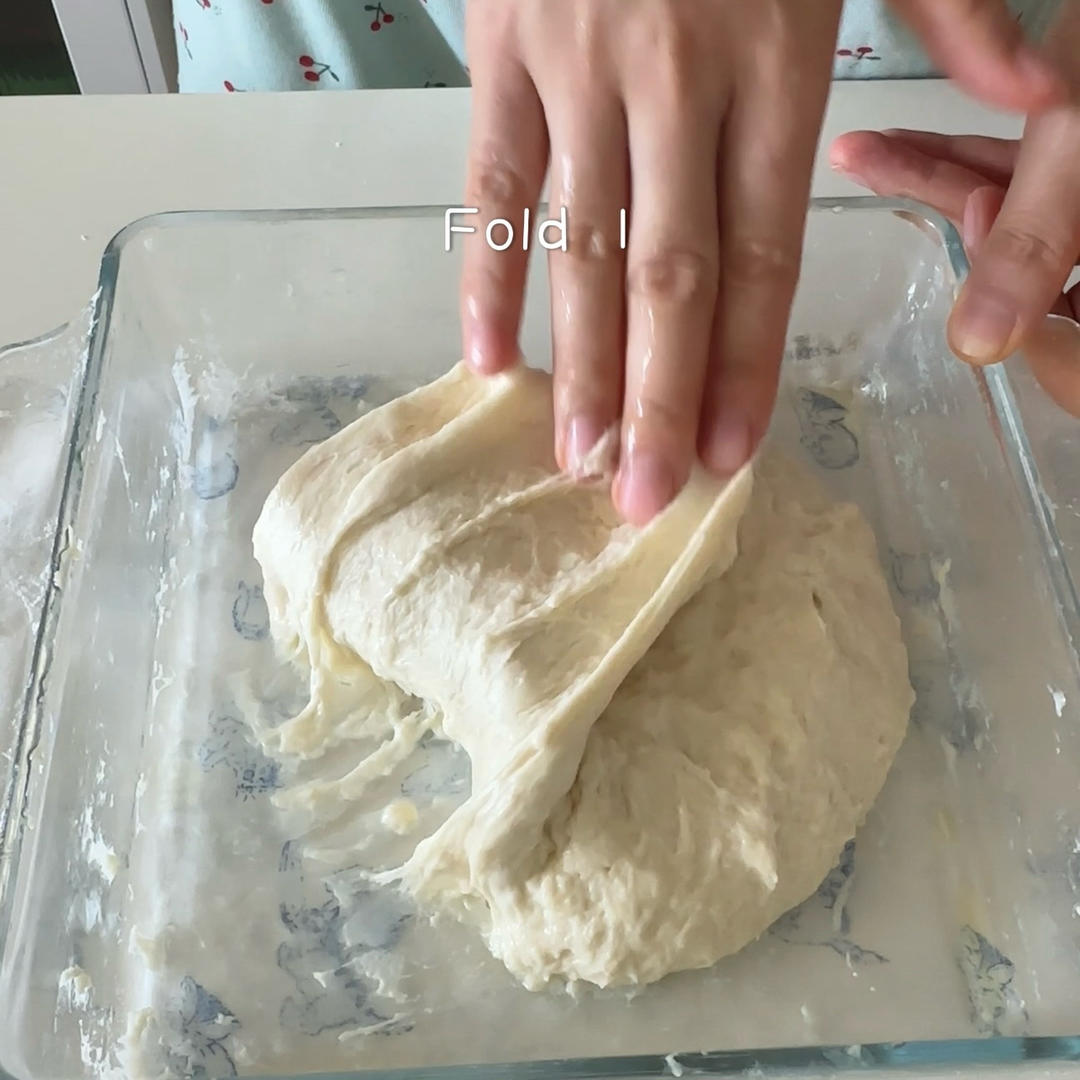
Why fold instead of knead? In a dough this wet, kneading just smears it across the counter. Stretch-and-folding aligns the gluten strands in layers – each fold traps air between the layers and builds tension without squeezing out the water. It is the same net effect as kneading, achieved gently, which is why wet doughs get open, irregular holes instead of a tight, even crumb.
Step 7 – Rest 15 More Minutes
Cover and rest again for 15 minutes. The dough will feel noticeably stronger and less sticky after each rest.
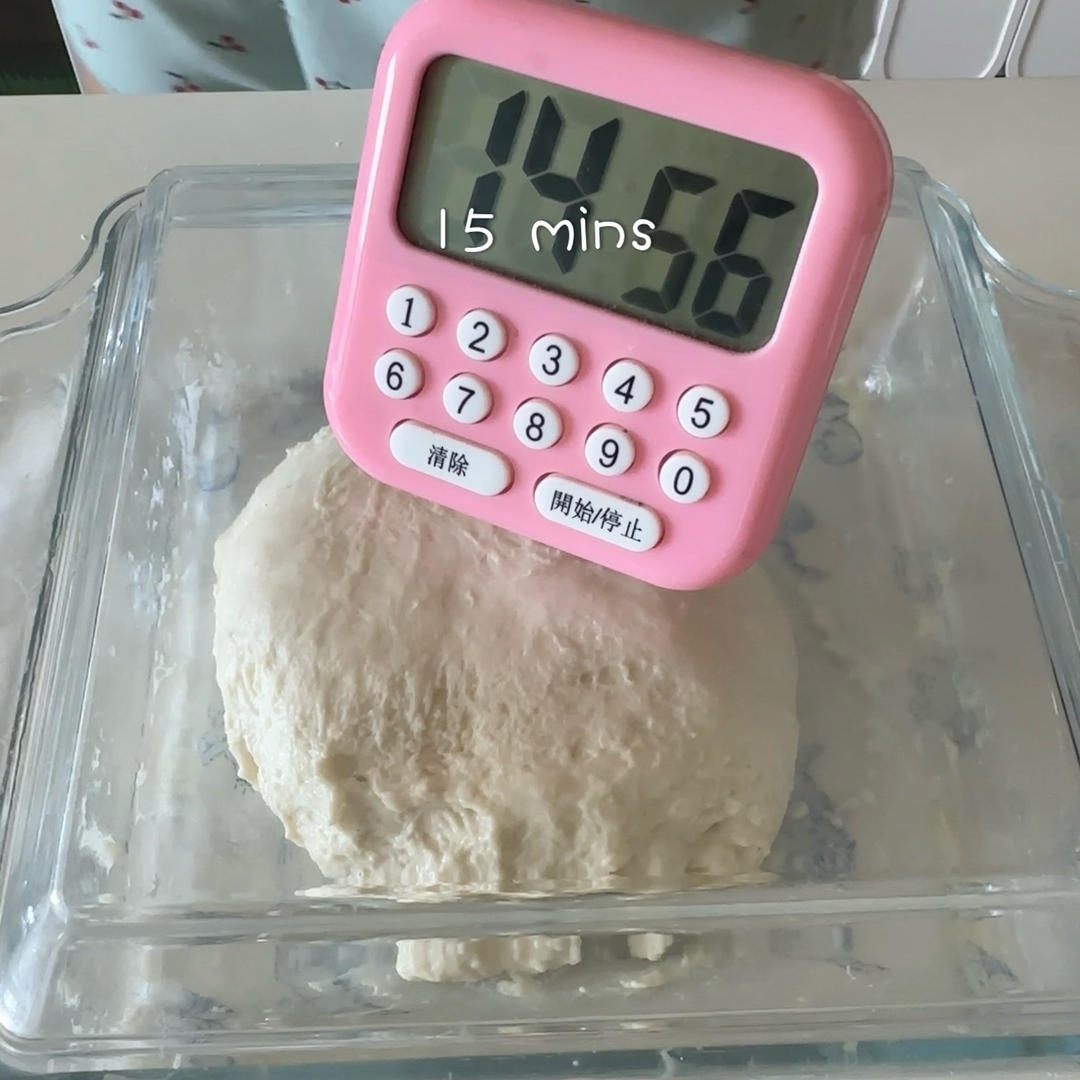
Step 8 – Final Stretch and Fold
Repeat the same stretch-and-fold all the way around the dough one more time. You now have a smooth, elastic dough with real structure.
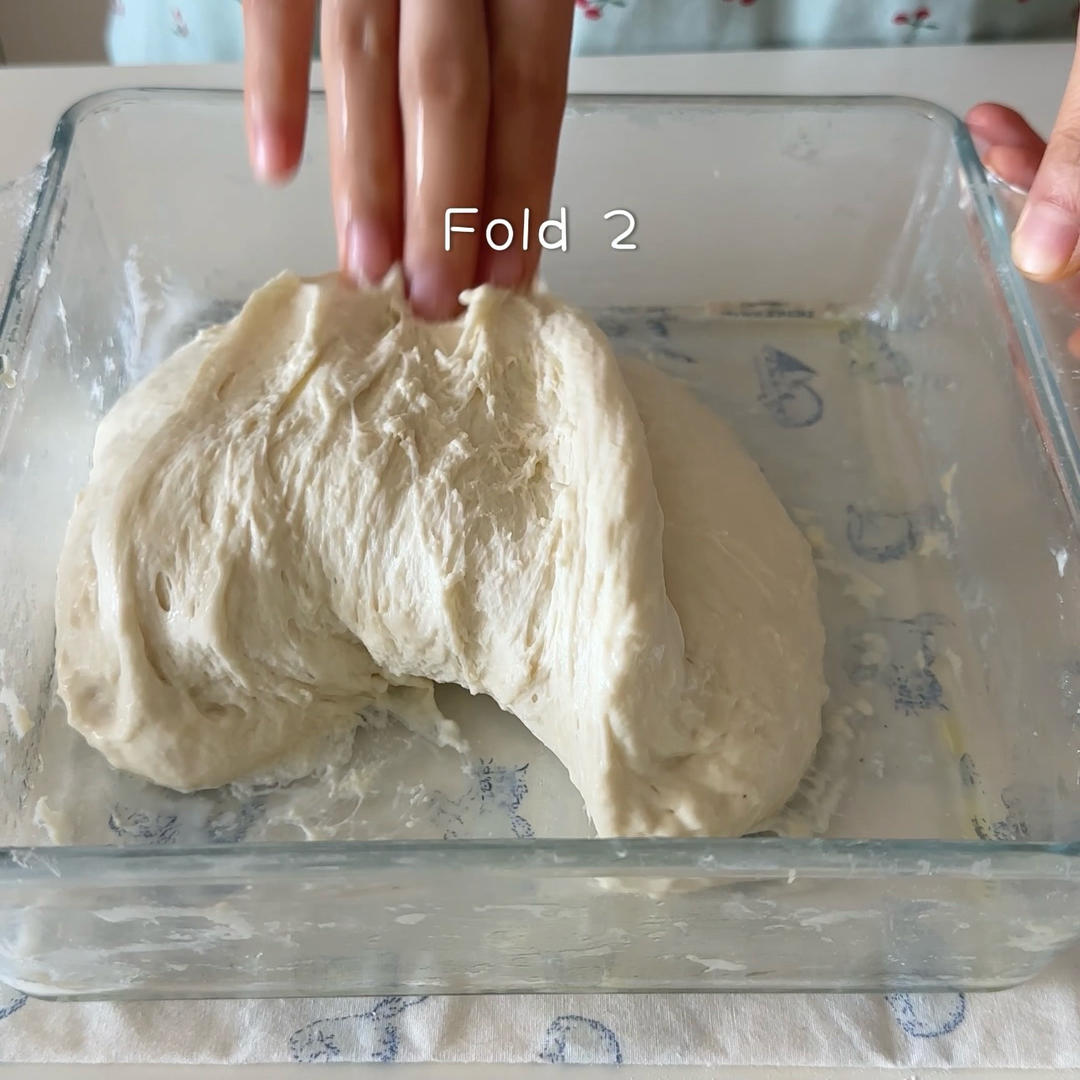
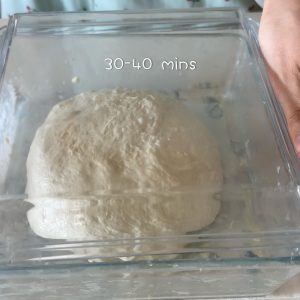
Step 9 – Shape Into a Ball and Bulk Ferment
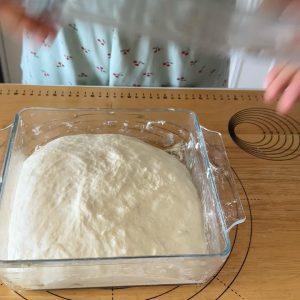
Tuck the dough into a rough ball in the bowl, cover it, and let it ferment in a warm spot for about 40 minutes, until visibly puffed and nearly doubled.
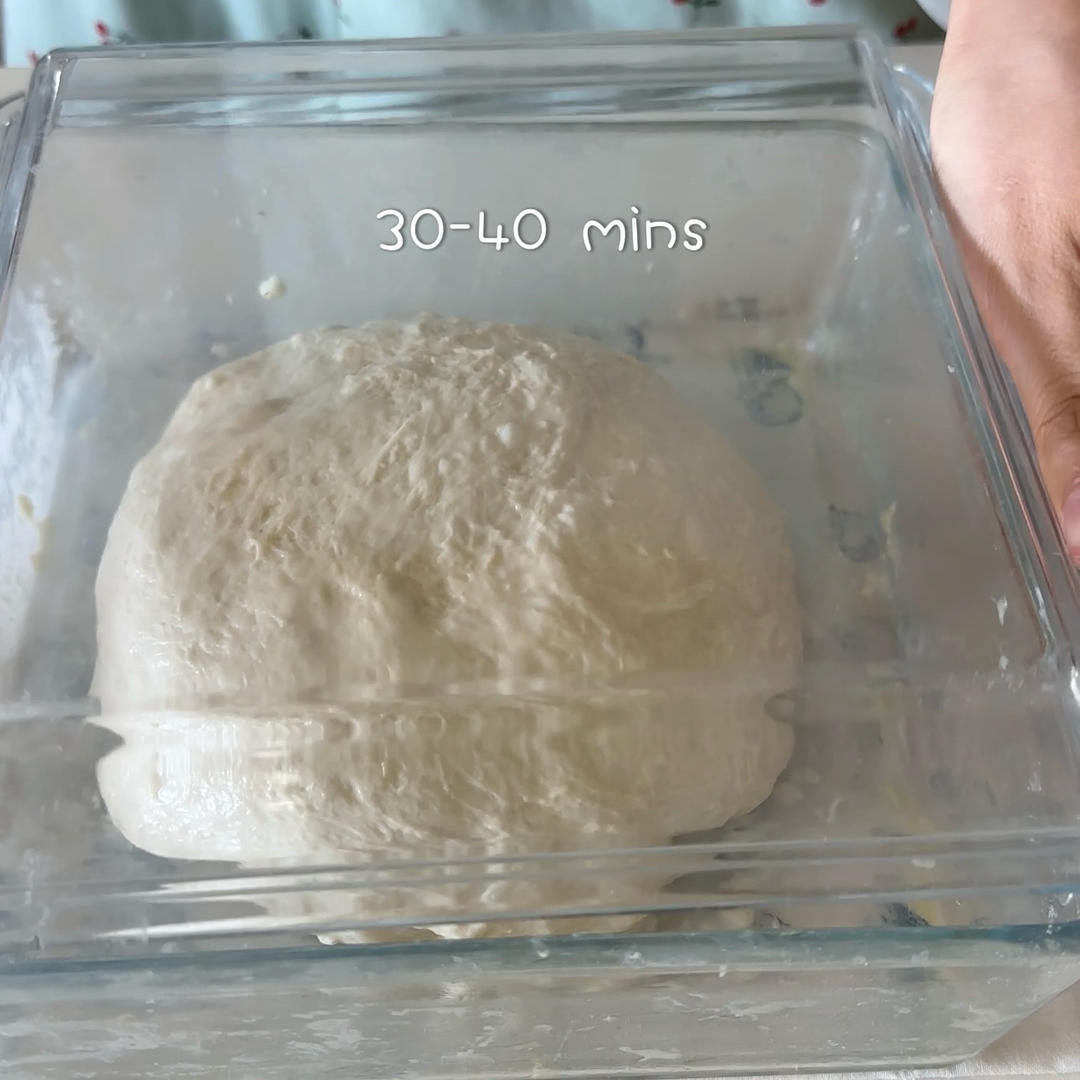
Step 10 – Turn Out Onto a Floured Board
When the dough has clearly grown, dust your work surface generously with flour and turn the dough out onto it, being careful not to deflate it.
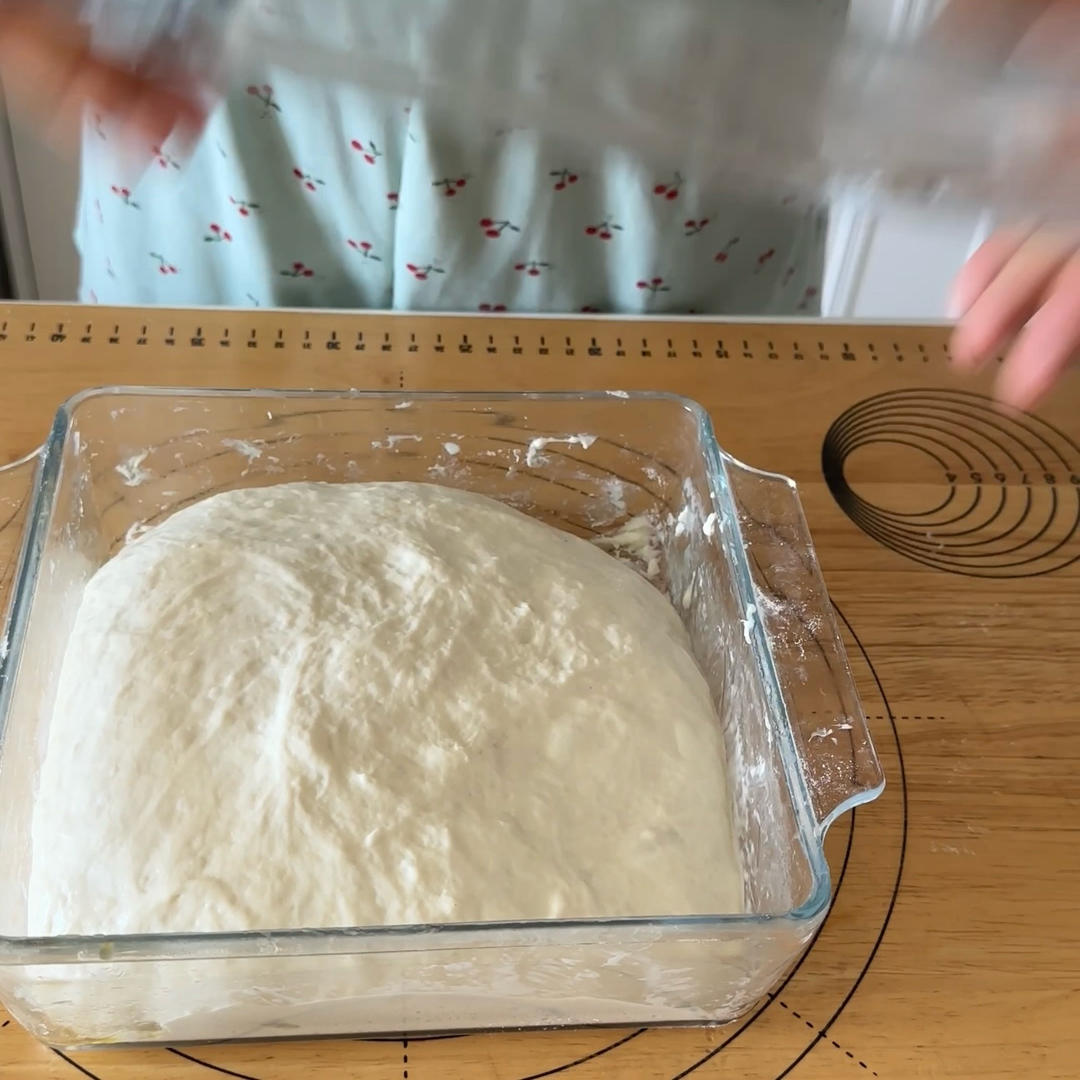
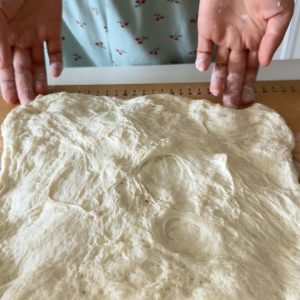
Step 11 – Shape Into a Rectangle
With floured hands, gently coax the dough into a rectangle, stretching it lightly rather than pressing out the air.
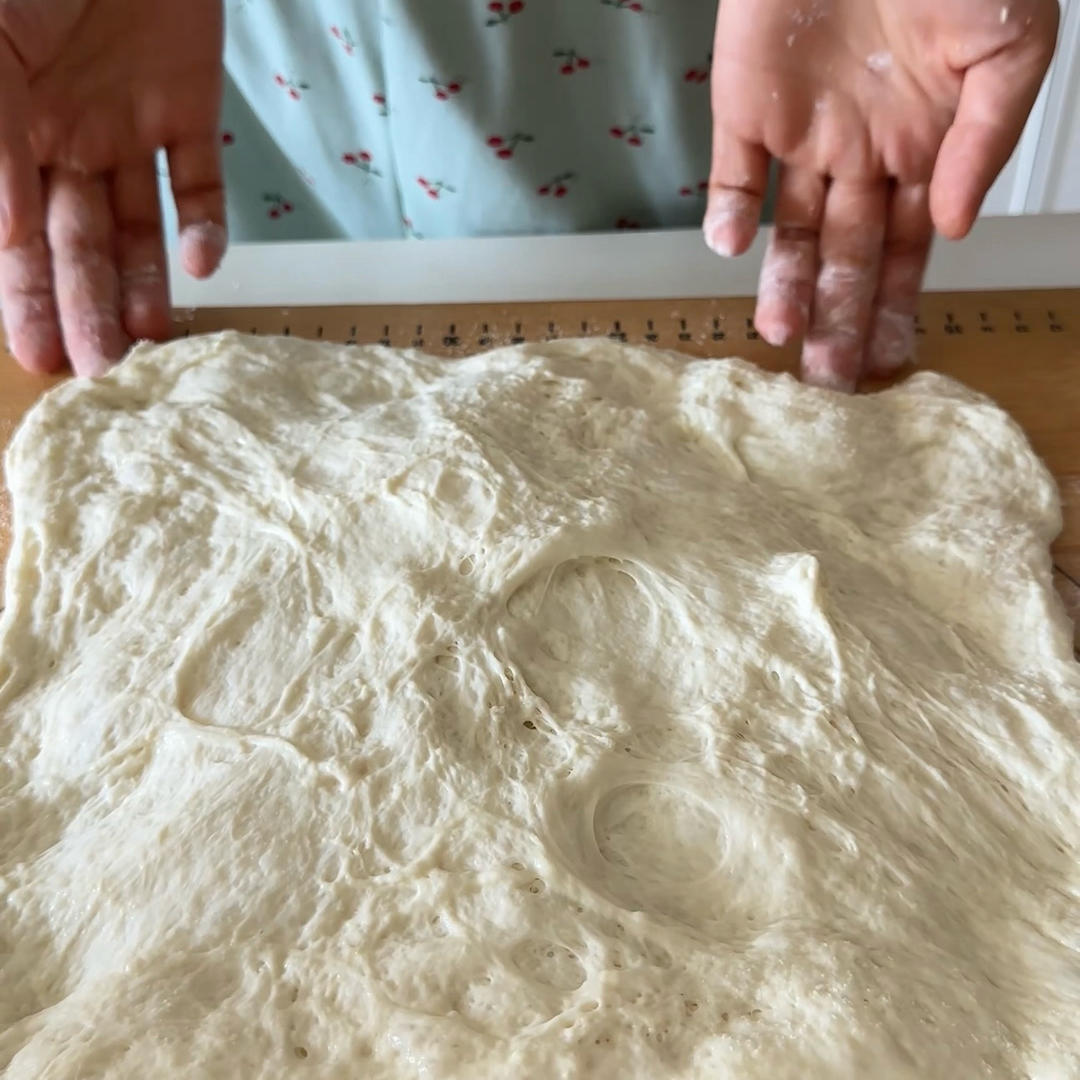
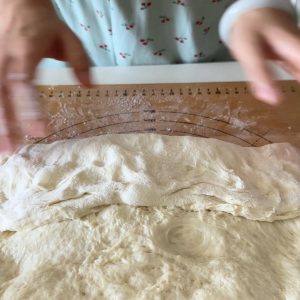
Step 12 – Fold From the Bottom
Fold the bottom edge of the rectangle up over the middle, like folding a blanket. This builds the slipper shape and preserves the gas bubbles.
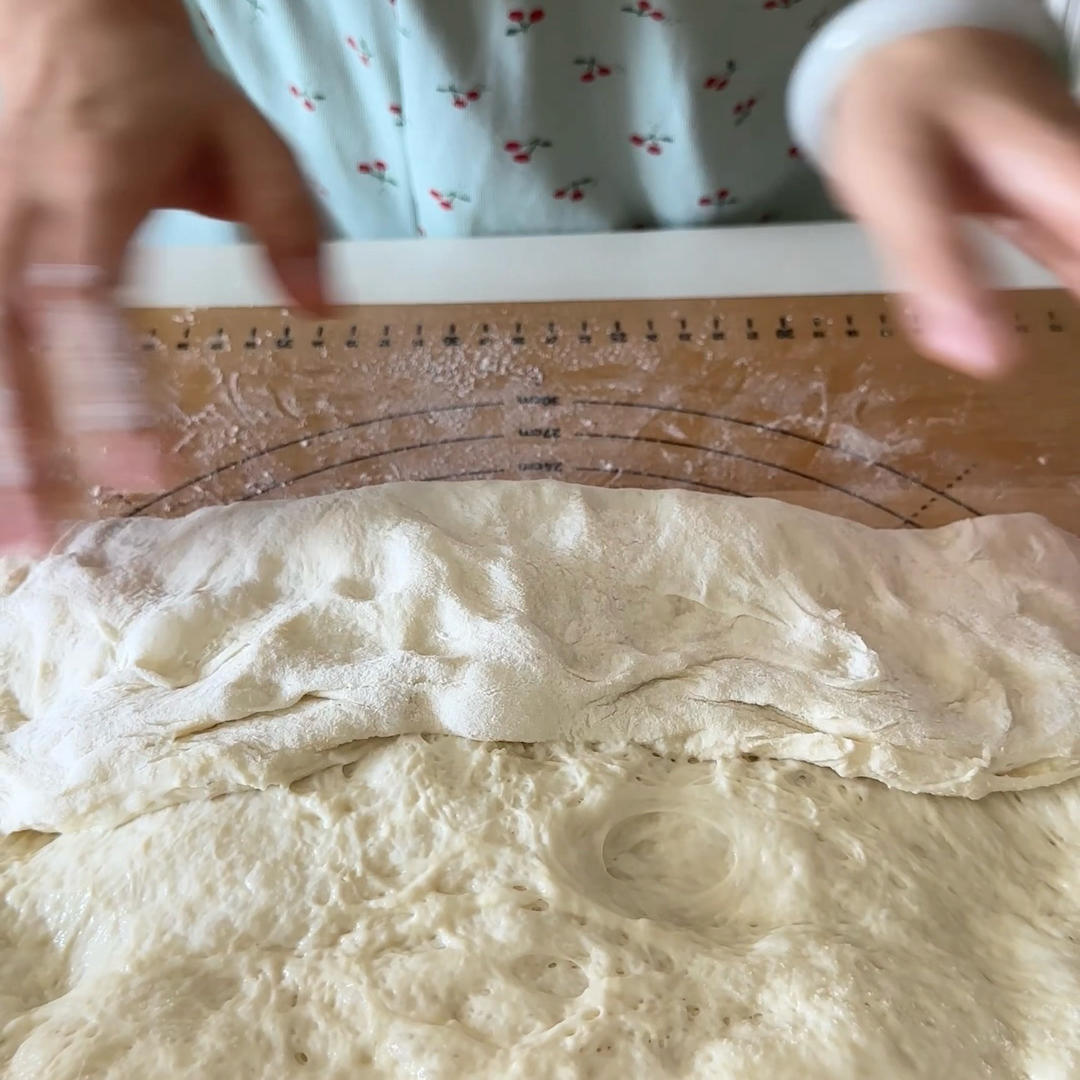
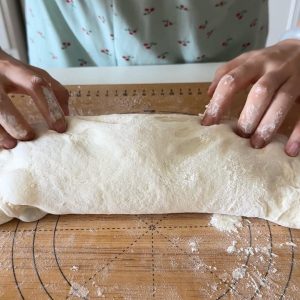
Step 13 – Fold From the Top
Fold the top edge down to overlap, completing the envelope fold. The dough will look like a long, soft log.
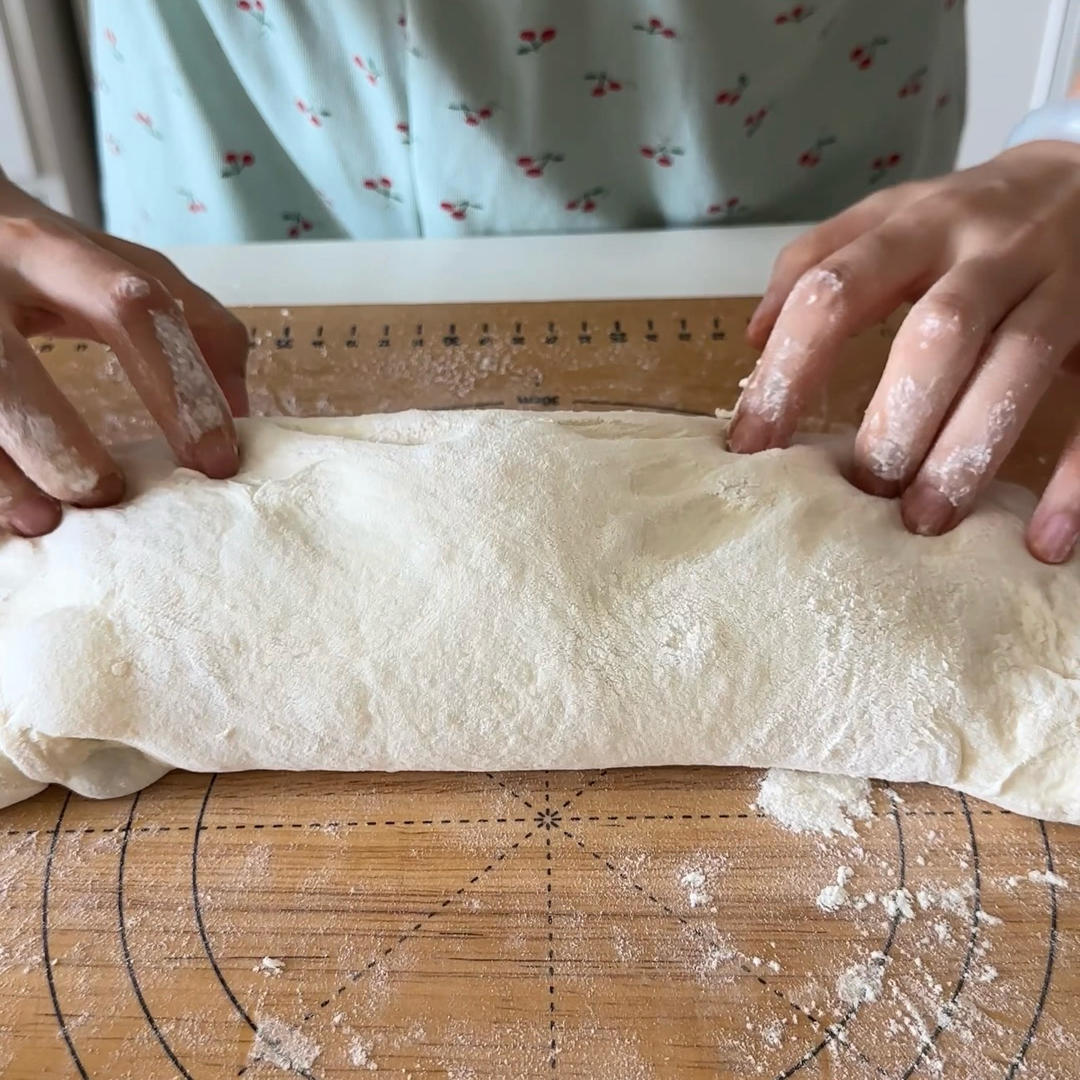
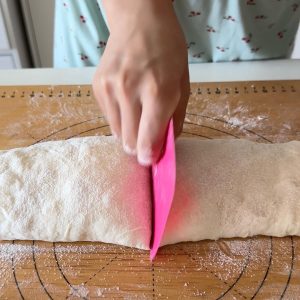
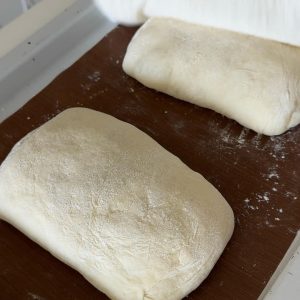
Step 14 – Divide Into Loaves
With a bench scraper, cut the log into 2 large loaves – or 4 smaller ones if you prefer sandwich-sized ciabatta. Try to slice rather than tear, to keep the bubbles intact.
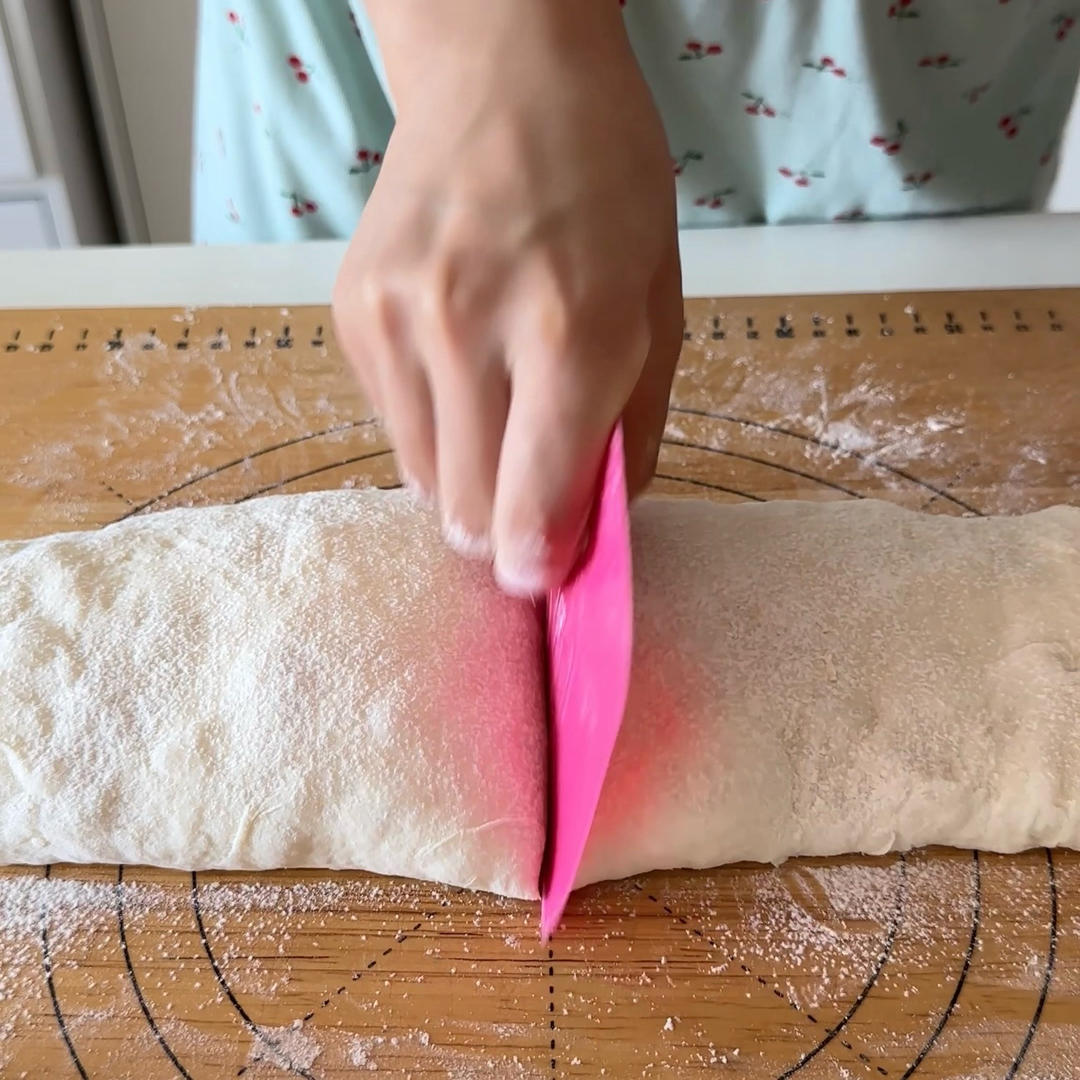
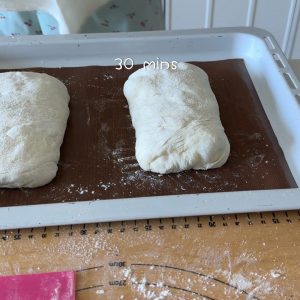
Step 15 – Proof on a Floured Tray
Place the loaves on a baking tray dusted with flour, cover with a towel, and proof for 30 minutes. Meanwhile, preheat the oven to 230°C (446°F) with a rack in the middle.
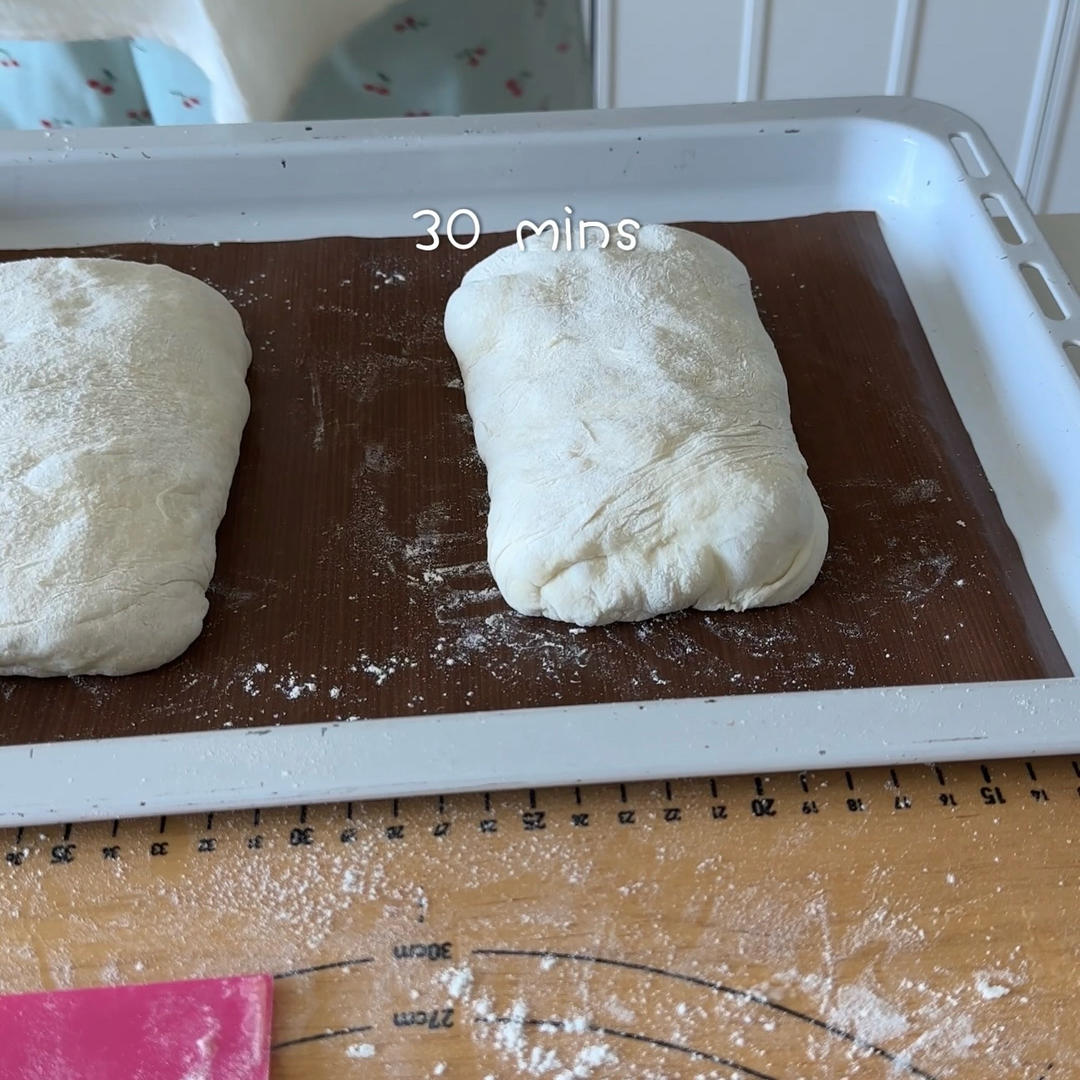
Step 16 – Check the Proof
After 30 minutes the loaves should look puffy, soft and slightly jiggly – proofed but not collapsed. If your kitchen is cold, give them 10 more minutes.
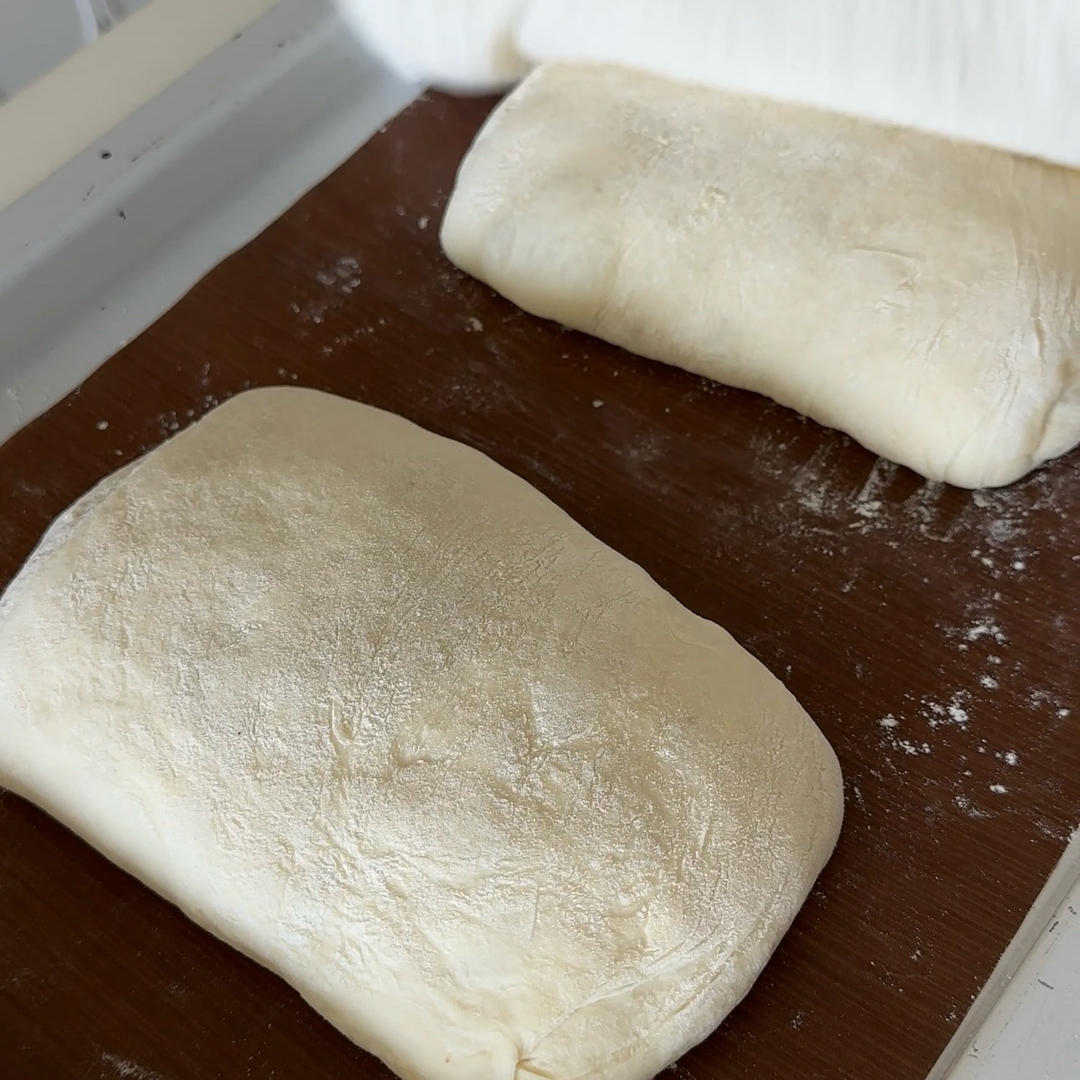
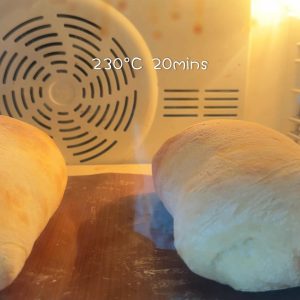
Step 17 – Spray Water and Bake
Spray the loaves and the oven walls generously with water, slide the tray in, and bake at 230°C (446°F) for about 20 minutes, until deeply golden.
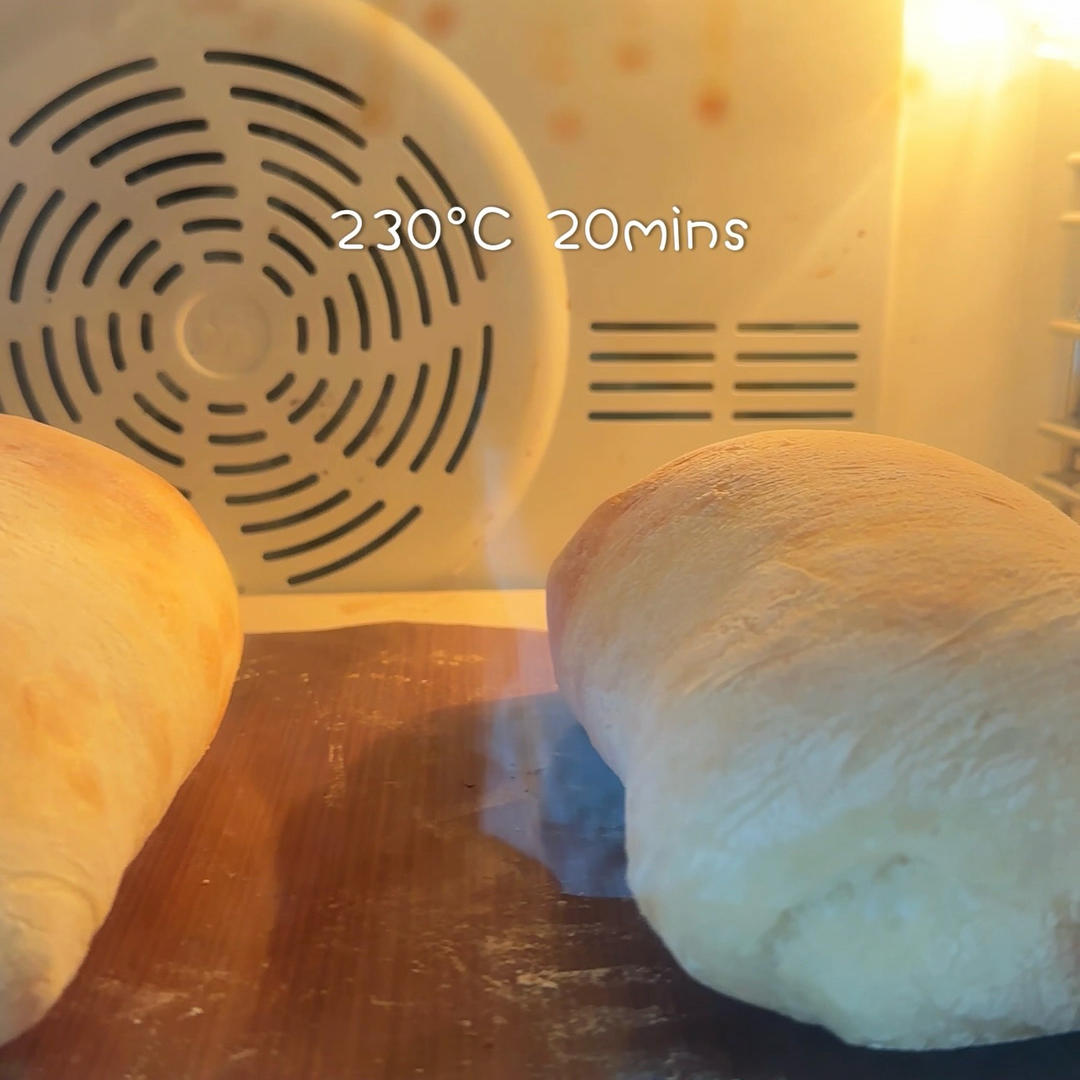
The water spray is the home-oven version of a professional steam-injected deck oven. Steam condenses on the cool loaf surface and keeps the crust soft and stretchy during the first minutes of baking, letting the loaf expand to its full size before the crust sets. When the oven then dries out, the crust crisps and crackles – the two-phase effect is exactly what creates that shattering shell over a soft, holey interior.
Step 18 – Bake Until Golden
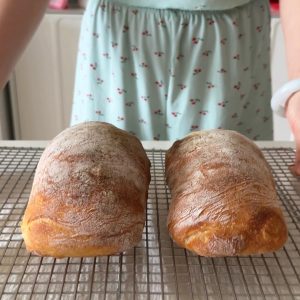
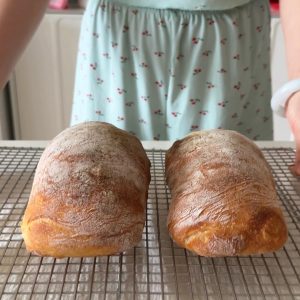
The loaves are ready when the crust is a deep, even gold and tapping the bottom gives a hollow, drum-like sound.
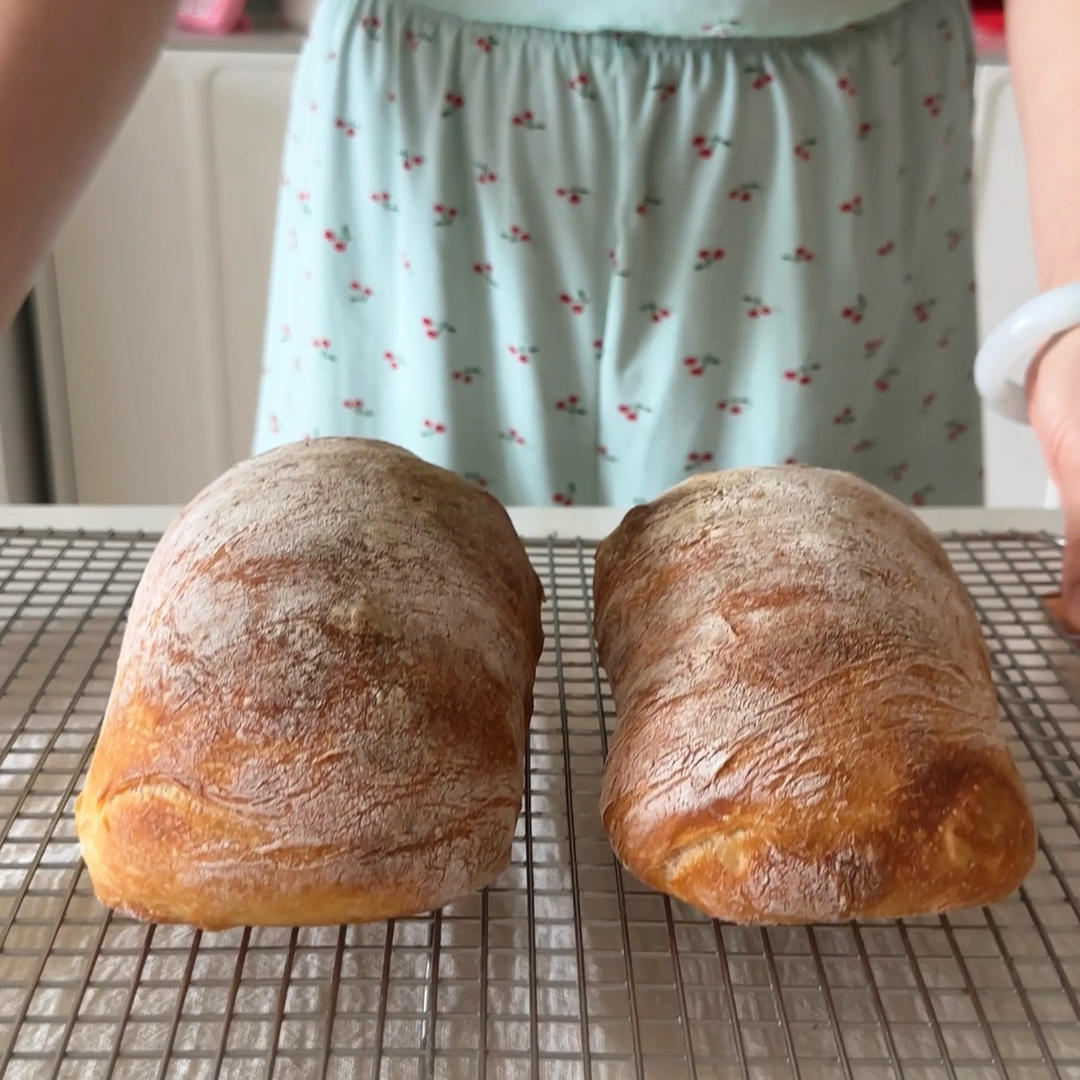
Step 19 – Cool for the Crispy Crust
Cool on a wire rack for at least 20 minutes – the crust crisps as it cools, and the crumb sets. Slice and enjoy: crispy outside, soft and airy inside.
Common Mistakes When Making Ciabatta
1. The dough is a gluey puddle. Cause: you added more flour, or skipped the folds. Fix: resist adding flour – the rests and two folds build the structure. Wet, sticky dough is the recipe, not the problem.
2. Flat, dense loaves. Cause: the bulk ferment or final proof was too short. Fix: give the dough a full 40-minute ferment in a warm spot and a 30-minute proof; it should look visibly puffy before baking.
3. No holes in the crumb. Cause: the dough was handled too aggressively, pressing out the gas. Fix: handle with floured hands, fold rather than knead, and slice rather than tear when dividing.
4. The crust is pale and soft. Cause: the oven was not hot enough, or no steam. Fix: preheat fully to 230°C (446°F) and spray water for the first minutes of baking.
5. The yeast never activated. Cause: water too hot or too cold. Fix: the water should feel bath-warm (about 35-40°C / 95-105°F) – hot enough to wake the yeast, not hot enough to kill it.
6. The loaf sticks to the towel or tray. Cause: not enough flour under the dough. Fix: dust the tray and the towel-side of the loaf generously; a bench scraper helps lift it.
Variations
This dough is a blank canvas. Fold in chopped olives, sun-dried tomatoes, or rosemary during the last stretch-and-fold for a Mediterranean loaf. For a whole-grain version, swap up to a third of the bread flour for whole wheat and add 10 g more water. If you prefer a leaner, chewier flatbread style, my no-knead Chinese meat pies use the same no-knead philosophy with a savory filling, and the old Beijing sesame paste flatbread is another floured-hands, no-mixer bread worth your afternoon.
Frequently Asked Questions
Can I use all-purpose flour? It works but gives a less airy crumb. Bread flour’s higher protein is what traps the gas that creates the holes.
Why is the dough so wet? High hydration is the ciabatta signature – water turns to steam in the hot oven, pushing open those irregular holes. Adding flour would give you a dinner roll, not ciabatta.
Can I double the recipe? Yes – it scales cleanly. Keep the same rest and fold schedule; you may need 5 extra minutes of bulk ferment.
How do I know when it is baked? Deep golden crust plus a hollow sound when you tap the bottom. If in doubt, give it 2-3 more minutes – a slightly dark crust is better than a doughy center.
Can I make this ahead? The baked loaves freeze well for up to 2 months. For a next-day bake, refrigerate the shaped loaves overnight and proof at room temperature for about an hour before baking.
How to Serve
Ciabatta is a sandwich bread at heart. Split a loaf, toast it cut-side down, and fill with grilled vegetables and mozzarella, or serve it alongside soups and stews for dunking. It pairs beautifully with the cloud-soft milk bread rolls on a bread board, and it is the right vehicle for my homemade meat floss and a smear of doubanjiang mayo if you want a fusion twist. For breakfast, slice it thick and make the classic panini – or try my Elvis panini for inspiration.
Storage & Reheat
Ciabatta is at its crackling best within 6 hours of baking. Store leftovers cut-side down on the counter, loosely wrapped, for up to 2 days; refresh in a 180°C (356°F) oven for 5 minutes to restore the crust. Freeze whole loaves for up to 2 months and reheat from frozen at 180°C (356°F) for 10 minutes. Do not refrigerate – it accelerates staling.
Allergen Notice
This recipe contains gluten (bread flour). It is vegan and dairy-free as written (the olive oil replaces butter). If you are baking for a gluten-sensitive guest, use a gluten-free bread flour blend and add 5 g more water.
Nutrition Disclaimer
Nutrition information is calculated using an ingredient database and should be considered an estimate. In cases where multiple ingredient alternatives are given, the first listed is calculated for nutrition. Garnishes and optional ingredients are not included. Nutrition information is an estimate and provided for informational purposes only.
About the Author & Recipe Development
I’m Lin, a professional chef who grew up in my family’s Sichuan restaurant and spent a decade in professional kitchens before writing recipes for home cooks. I came to bread late – my training was all woks and steamers – and ciabatta was the bread that convinced me home bakers could have bakery results. I tested this same-day version against the 24-hour method side by side, and while the overnight loaf wins on depth of flavor, the quick loaf won on “would I actually make this on a Tuesday?” The answer was yes, repeatedly. The two stretch-and-folds and the water spray are the non-negotiables; everything else is forgiving.
Authoritative References
The science of steam in bread baking – why it keeps the crust elastic before crisping – is explained in this overview of bread-making science from ScienceDirect. For food-safe flour handling, I follow the FDA guidance on handling flour safely.
World’s Easiest Ciabatta (Qia Ba Ta)

Equipment
- Large Mixing Bowl
- Baking Tray
- Spray Bottle with Water
- Bench Scraper
- Tea Towel
Ingredients
For the Dough
- 2 cup bread flour (high-gluten flour) 262 g, plus 2 tbsp
- 1 cup room-temperature water 223 g
- 3 tbsp warm water 40 g, for the yeast
- 1.25 tsp instant dry yeast 4 g
- 0.75 tsp sugar 3 g
- 1 tsp salt 5 g
- 1 tbsp olive oil 15 g, plus 1 tsp
Instructions
- Stir the sugar and yeast into 40 g warm water and let it sit for 10 minutes until foamy.

- Combine the remaining water with the dry ingredients and the yeast, mixing with a spatula.
- Mix until no dry flour remains, then pour in the olive oil – the dough will be shaggy and wet.
- Fold until the oil is absorbed and the dough becomes a sticky, elastic mass.
- Cover and rest 15 minutes so the flour hydrates.
- Stretch one edge up and fold over the center, turning the bowl a quarter turn each time – four folds total.
- Cover and rest another 15 minutes – the dough will feel stronger.
- Repeat the stretch-and-fold all the way around one final time.
- Tuck into a ball and ferment in a warm spot for about 40 minutes until puffed.
- Dust the surface generously and turn the dough out without deflating it.
- Gently coax the dough into a rectangle with floured hands.
- Fold the bottom edge up over the middle, like folding a blanket.
- Fold the top edge down to overlap into a long, soft log.
- Cut the log into 2 large loaves, or 4 smaller ones.
- Place on a floured tray, cover, and proof 30 minutes while the oven preheats to 230°C (446°F).
- After 30 minutes the loaves should be puffy, soft and slightly jiggly.
- Spray the loaves and oven walls with water, then bake at 230°C (446°F) for about 20 minutes.
- Bake until the crust is deep, even gold and the bottom sounds hollow when tapped.
- Cool on a rack at least 20 minutes – the crust crisps as it cools. Slice and enjoy.










Leave a Reply