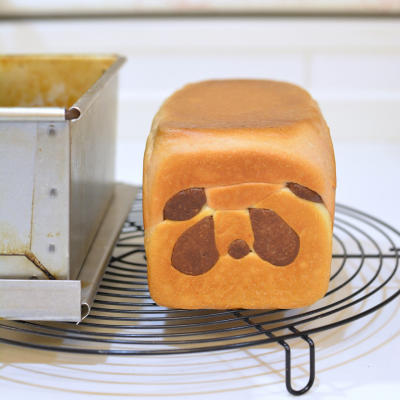
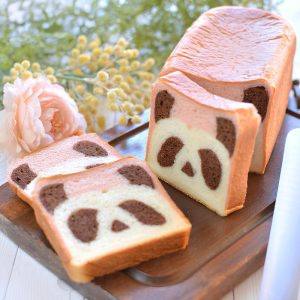
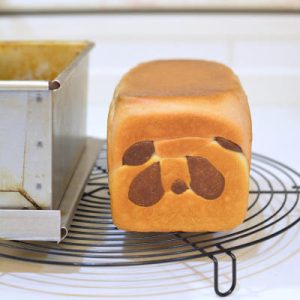
The first time I sliced into this panda bread, I actually laughed out loud. Cut it anywhere, at any angle, and there he is: a chubby panda face with cocoa eyes, a tiny brown nose, and pink-tinted cheeks, perfectly reproduced in every single slice. My kids fought over who got the “best” slice, then realized every slice was the best slice. That is the whole magic trick of xiong mao mian bao (熊猫面包), and it is nowhere near as hard as it looks.
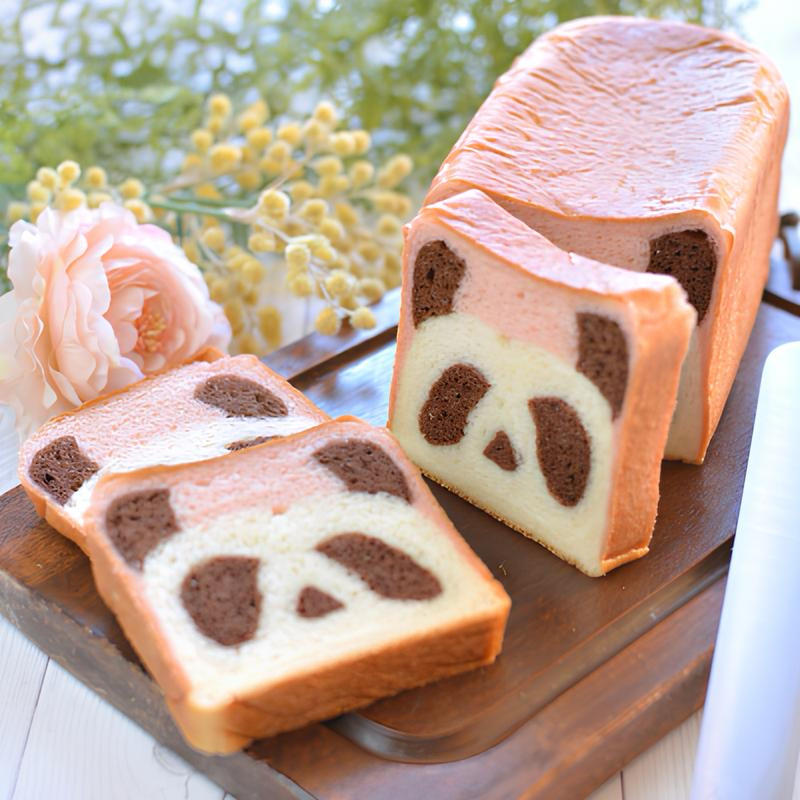
The bread itself is a plain, slightly sweet milk bread – the kind of soft, cloud-like loaf you already know how to make. The panda is built by assembling three colored doughs – white, pink from strawberry powder, and brown from cocoa – into a loaf-pan puzzle before baking. It is less sculpting and more careful stacking, which is exactly why it works: the colors bake into solid blocks, so every cut through the loaf reveals the same design.
I will warn you: the shaping step asks for patience and a little precision – the eyes need to sit evenly or the finished face looks lopsided. But the dough is forgiving, mistakes can be pinched back together, and the payoff is a loaf that turns an ordinary breakfast into an event. My advice is to read the shaping steps twice before you begin, and trust the author’s reminder that eye and ear dough portions should match in weight.
What Is Panda Bread (Xiong Mao Mian Bao)?
Panda bread is a Japanese-style shaped milk bread that became a viral favorite in China: a soft, slightly sweet pull-apart loaf whose interior – not just its crust – is decorated to look like a panda’s face. It belongs to the kawaii bread family that includes cat buns, bear buns and character loaves, all built on the same idea: color a few portions of a basic dough, assemble them into a pattern inside the loaf pan, and let the slicing do the revealing. The flavors here are subtle – a whisper of cocoa and strawberry – so the bread still tastes like an honest, milky loaf rather than a gimmick.
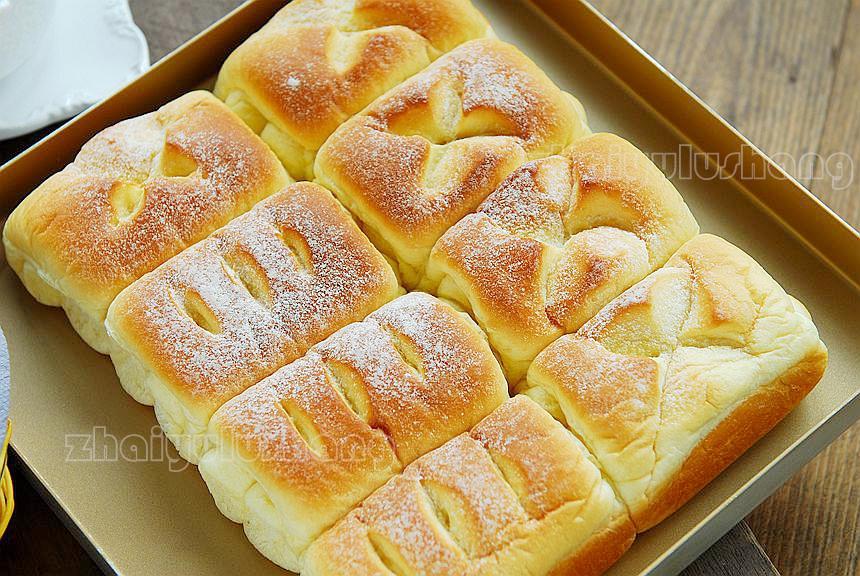
If you enjoy a soft, slightly sweet loaf you can build on, my cloud-soft milk bread rolls use the same milk-bread dough shaped into individual rolls – the perfect partner for this panda loaf on a breakfast board.
1Cloud-Soft Milk Bread Rolls (The Sponge Dough Method)Incredibly soft, cloud-like Japanese-style milk bread rolls made using the traditional Zhongzhong (sponge dough) method. These stay soft for days!Check out this recipe
Why This Recipe Works
- One basic dough, three colors: the milk bread dough is divided and tinted with cocoa and strawberry powder, so there is only one dough to master.
- Weighted portions keep the face even: the author’s exact weights (35 g eyes, 30 g ears) guarantee a symmetrical panda – approximate weights produce a lopsided one.
- Pressed seams, no trapped air: pinching each colored piece firmly stops air pockets from blurring the face during the rise.
- A cold-milk dough: 220-230 g of cold milk keeps the dough cool while kneading, which keeps the crumb fine and the colors vivid.
- A patient bake at 200°C (392°F): 30 minutes gives the loaf a deep golden crust without drying the interior – and the face stays crisp and defined.
Equipment Needed
- A loaf pan or bread mold (the dough is sized for a standard 450 g loaf pan)
- A stand mixer with a dough hook (hand-kneading works too, about 15-20 minutes)
- A rolling pin
- A kitchen scale – the portion weights really matter here
- A clean tea towel for proofing
Ingredients
- 300 g (2 1/3 cups) bread flour (high-gluten flour)
- 20 g (1 tbsp plus 2 tsp) sugar
- 5 g (1 tsp) salt
- 4 g (1 1/4 tsp) instant yeast
- 225 g (about 1 cup) cold milk (220-230 g in summer)
- 20 g (1 1/2 tbsp) unsalted butter, softened
- 5 g (1 tbsp) strawberry powder (or your favorite pink food coloring)
- 5 g (1 tbsp) cocoa powder
Ingredient Notes
Strawberry powder gives the pink dough its color and a faint berry scent; any vividly colored natural powder works – matcha for green, purple sweet potato powder for lavender. Cocoa powder makes the brown dough; use Dutch-processed for a deeper color. If you cannot find strawberry powder, a few drops of gel food coloring will do. Cold milk matters in warm weather – it keeps the dough from overheating in the mixer, which keeps the crumb fine. And use bread flour: this loaf needs enough gluten to rise tall with all those seams.
Prep & Mise en Place
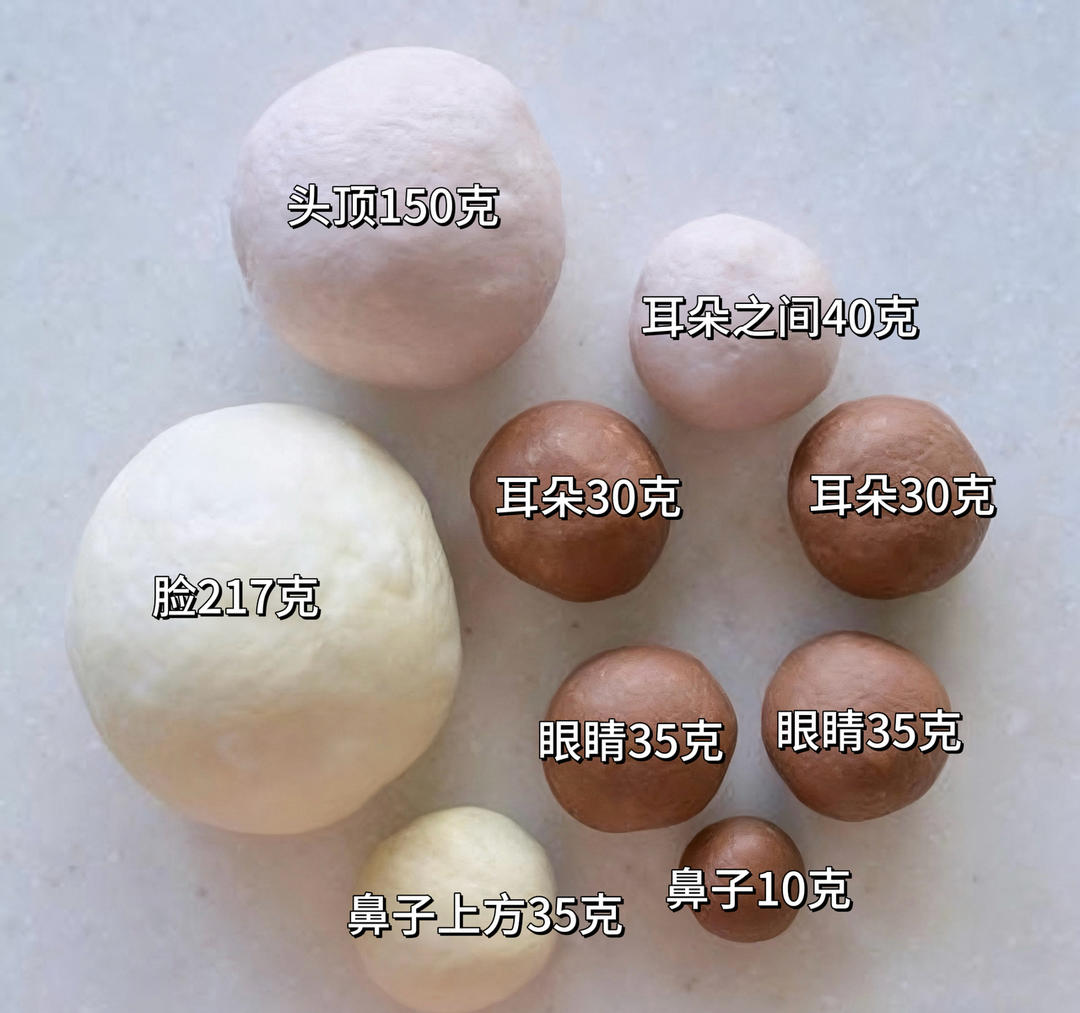
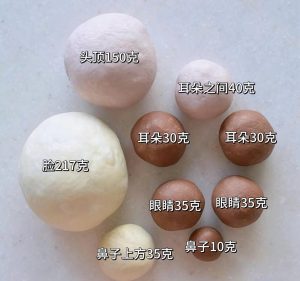
Weigh the milk, butter and dry ingredients, and soften the butter. Set up a clean work surface and a loaf pan lined with parchment. Before you begin shaping, write down the portion plan so you do not have to think mid-way: white dough splits into 217 g (body base) + 35 g (nose cover); pink splits into 150 g (head) + 40 g (cheeks/ears area); brown splits into 10 g (nose) + 35 g x 2 (eyes) + 30 g x 2 (ears). The author notes these are approximate – the rule is that the two eyes match and the two ears match.
Cooking Process
Step 1 – Make the Base Dough and Split It
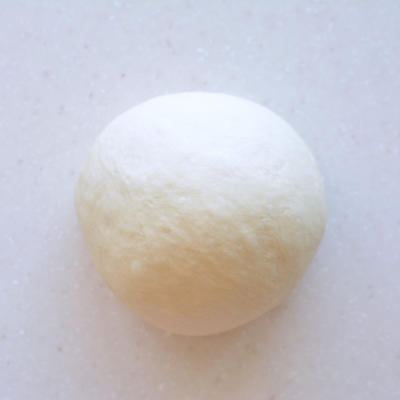
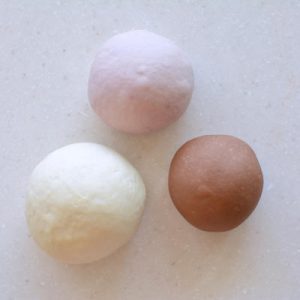
Knead all ingredients except the strawberry powder, cocoa powder and butter for about 10 minutes, then add the butter and continue until the dough is smooth and elastic. Divide the dough into three portions: about 252 g (white), 190 g (pink) and 130 g (brown).
Step 2 – Make the Brown Dough
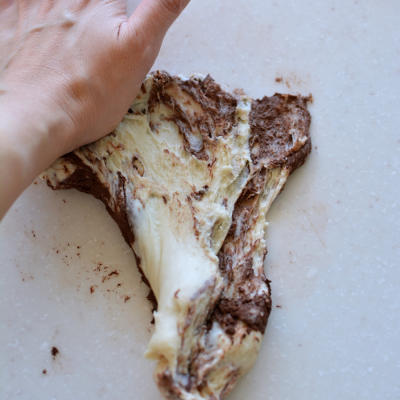
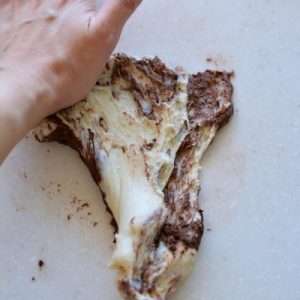
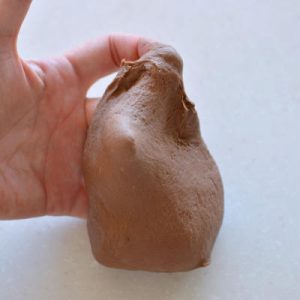
Mix the cocoa powder with a little water to form a paste, then knead it into the 130 g portion of dough until the color is completely even.
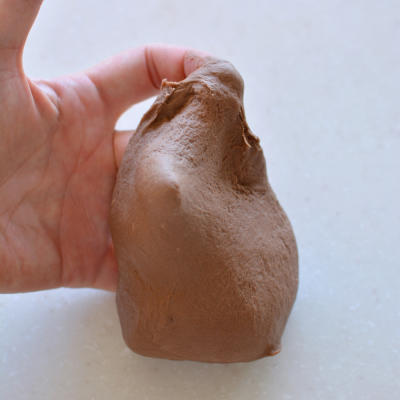
Step 3 – Check for the Gluten Window
Test a small piece of dough: it should stretch into a thin, translucent membrane without tearing. This windowpane means the gluten is fully developed for a soft, tall loaf.
Step 4 – Make the Pink Dough
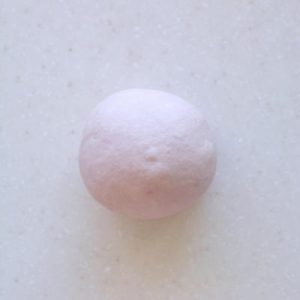
Mix the strawberry powder with a little water and knead it into the 190 g portion the same way, until the color is smooth and even.
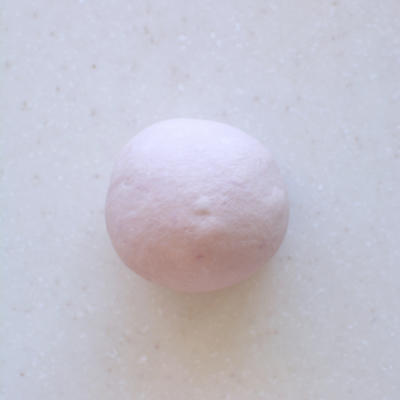
Step 5 – First Fermentation
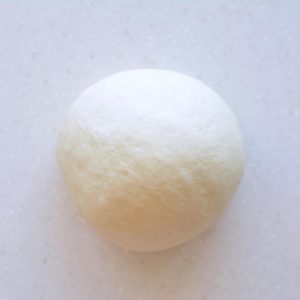
Now you have three colored doughs. Cover them with a bowl or damp cloth to keep them from drying out, and let them do the first fermentation.
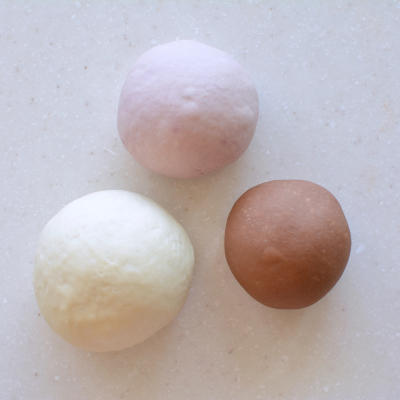
Step 6 – Divide and Rest
After the first fermentation, punch down and divide: from the white dough set aside 35 g and keep 217 g; from the pink set aside 40 g and keep 150 g; split the brown into 10 g, two x 35 g, and two x 30 g pieces. Round everything into balls and let them rest briefly.
Step 7 – Roll the Base and Add the Nose
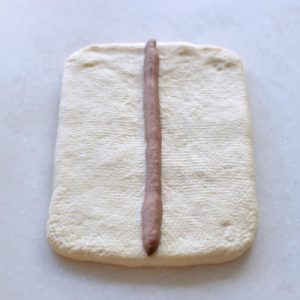
Roll the largest white piece (217 g) into a rectangle as long as the loaf pan. Roll the 10 g brown piece into a thin strip and lay it down the center of the pan as the nose.
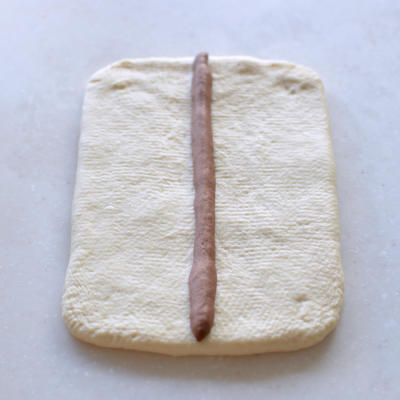
Step 8 – Cover Above the Nose
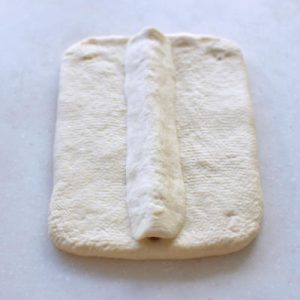
Roll the 35 g white piece into a thin strip and place it over the top of the nose, pinching it into a triangle shape and pressing firmly so no air is trapped between the layers.
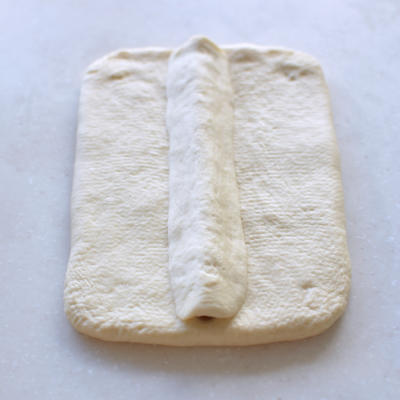
Step 9 – Shape the Eyes
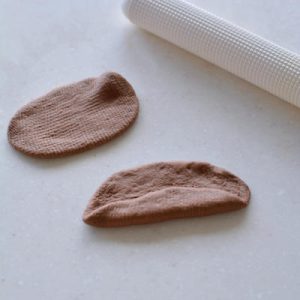
Roll each 35 g brown piece into a flat oval, fold it in half three times, then roll it out to match the length of the body – this creates the layered look of the eyes.
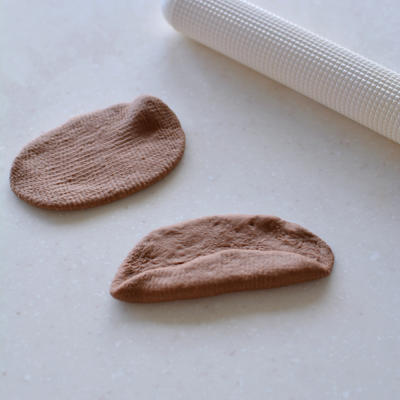
Step 10 – Place the Eyes Carefully
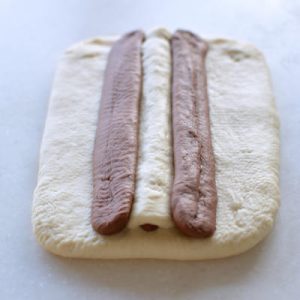
Lay both eyes over the dough on either side of the nose. Keep the spacing even – if the brown pieces sit too close together, the finished face will look crooked.
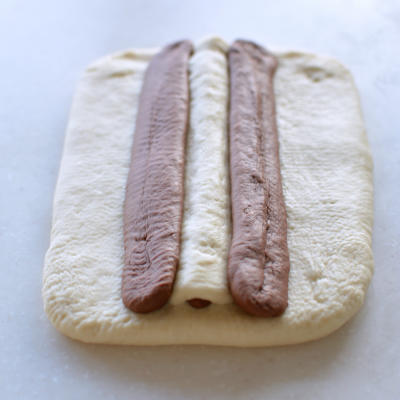
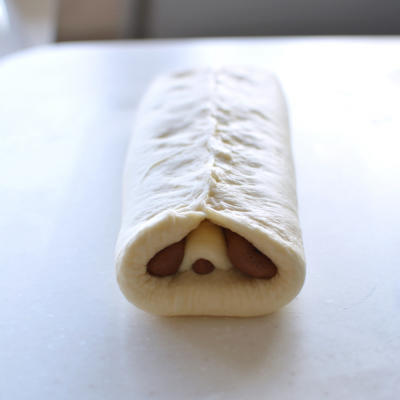
Step 11 – Fold the Sides and Seal
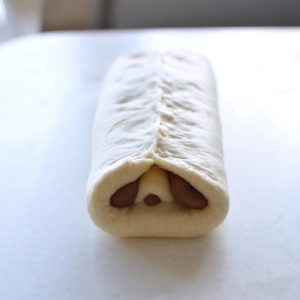
Fold the two sides of the base dough up over the eyes and pinch the seam tightly so the face is fully enclosed and sealed.
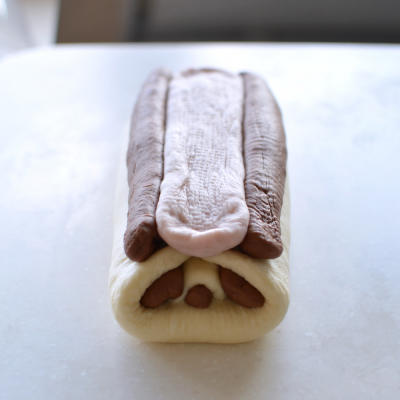
Step 12 – Build the Ears
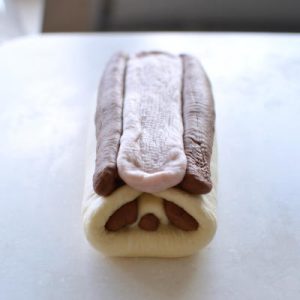
Roll the two 30 g brown pieces into long strips and lay them on top as ears, checking the balance. Roll the remaining 40 g pink piece into a strip, flatten it, and press it between the ears, pressing out any air.
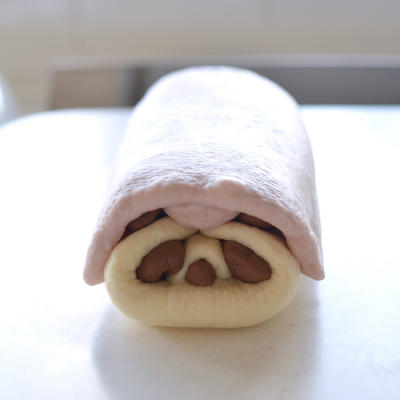
Step 13 – Add the Head Dough
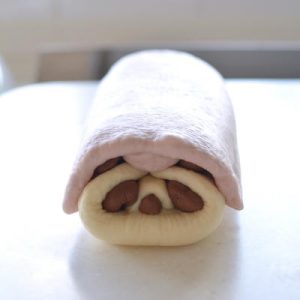
Finally, roll out the 150 g pink piece and cover the whole top – this is the panda’s head. Press it down gently to seal against the ears and eyes.
Step 14 – Shaping Complete
The assembled loaf should look like a tidy, sealed block with the face hidden inside. If anything looks lopsided, this is the moment to gently nudge it back into place.
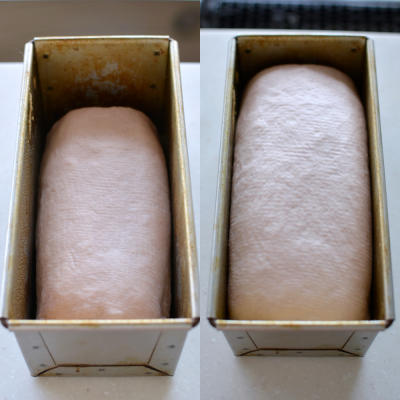
Step 15 – Final Proof in the Mold
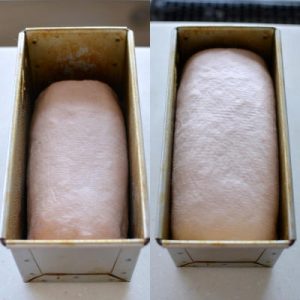
Place the loaf in the lined mold and let it proof until puffy and risen – the dough should swell noticeably but not overflow the pan.
Step 16 – Bake, Cool, and Slice
Bake in a preheated 200°C (392°F) oven for 30 minutes. Remove from the mold immediately and cool completely – on a wire rack, upright – before slicing, so the panda face is clean and defined.
Common Mistakes When Making Panda Bread
1. The panda face is crooked. Cause: the two eyes or two ears weighed differently. Fix: weigh them – the author’s rule is that matching parts must match in weight.
2. Blurry, blobby features. Cause: air trapped between the dough layers. Fix: press each piece firmly as you stack, and pinch seams shut so the rise cannot push them apart.
3. The colors bleed into each other. Cause: the doughs were still warm or too wet when assembled. Fix: keep the doughs covered and dry-flour your hands; a little extra dusting keeps the layers clean.
4. A dense, heavy loaf. Cause: the dough never reached the windowpane. Fix: knead until a piece stretches into a translucent membrane before shaping.
5. The face looks washed out after baking. Cause: over-proofing stretched the design. Fix: proof only until puffy – about 60-90% of the usual loaf proof, since the layers already hold structure.
6. The crust browns too dark. Cause: 200°C (392°F) is hotter than most milk bread bakes. Fix: if your oven runs hot, tent the loaf with foil for the last 10 minutes.
Variations
The panda is just a template. Swap the pink for matcha powder to make a green-tea bear, use purple sweet potato powder for a lavender bunny, or keep it monochrome with a plain white-and-cocoa koala. You can also double the recipe and shape two smaller loaves. If you are in a bread-roll mood instead, my fluffy coconut bread strips and milk cream cheese bread are both soft, family-friendly bakes that use the same gentle dough handling – or try my Chinese butterfly pastry for a completely different, layered technique.
Frequently Asked Questions
Can I use food coloring instead of strawberry powder? Yes – a few drops of gel color in the 190 g portion work the same way. Natural powders give a subtler, prettier color.
Why does every slice show the same face? Because the design is built as horizontal columns inside the loaf. Every cut perpendicular to those columns reveals the same cross-section – that is the trick behind all character breads.
Can I knead by hand? Yes, about 15-20 minutes. Use cold milk and take a 5-minute rest halfway if the dough gets warm.
Do I have to weigh the portions exactly? The face proportions depend on it. Weighing the eyes and ears in matching pairs is the difference between a cute panda and a Picasso.
Why bake at 200°C when milk bread usually bakes cooler? The taller, denser loaf needs the higher heat to brown the outside before the center finishes; just watch it and tent with foil if it darkens too fast.
How to Serve
Panda bread is breakfast and a present at the same time. Slice it thick, toast gently, and serve with milk for the full kids’ breakfast experience – or wrap a whole loaf in cellophane with a ribbon for the best homemade gift a child can receive. It sits beautifully next to pork floss rolls and a plate of butter-sugar toast on a weekend brunch board, and pairs just as well with a quiet cup of tea as with a glass of milk. For tea-time treats, my fluffy matcha chiffon cake and pumpkin steamed buns round out the table.
Storage & Reheat
Store the loaf in an airtight container at room temperature for up to 3 days – it is softest on day one. Toast slices lightly to revive them. The loaf freezes beautifully for up to 2 months: slice first, then freeze the slices separated by parchment, and toast straight from frozen. Do not refrigerate, which dries the crumb. As with all milk breads, keep it well wrapped and eat within the day if your kitchen is warm.
Allergen Notice
This recipe contains gluten (bread flour) and dairy (milk, butter). It contains no egg. For a dairy-free version, use cold oat or soy milk and a plant-based butter; the crumb will be slightly less rich but still soft.
Nutrition Disclaimer
Nutrition information is calculated using an ingredient database and should be considered an estimate. In cases where multiple ingredient alternatives are given, the first listed is calculated for nutrition. Garnishes and optional ingredients are not included. Nutrition information is an estimate and provided for informational purposes only.
About the Author & Recipe Development
I’m Lin, a professional chef who grew up in my family’s Sichuan restaurant and spent a decade in professional kitchens before writing recipes for home cooks. Character breads were never part of my training – I learned to make this loaf the same way I learn everything: by baking it over and over. The first attempt came out with eyes like a surprised owl. The second had a nose that drifted sideways. By the third, I understood that this recipe is really about three numbers: matching weights for the eyes, matching weights for the ears, and pressing every seam until no air remains. My kids now request “panda day” at least twice a month, and I am happy to oblige.
Authoritative References
For safe handling of milk and dairy in bread making, I follow the USDA dairy product safety guidance. The role of gluten development – why the windowpane test predicts a soft, tall loaf – is explained in this overview of gluten and dough development from ScienceDirect.
Panda Bread (Xiong Mao Mian Bao)

Equipment
- Loaf Pan or Bread Mold
- Stand Mixer with Dough Hook
- Rolling Pin
- Kitchen Scale
- Tea Towel
Ingredients
For the Dough
- 2.33 cup bread flour (high-gluten flour) 300 g
- 1 tbsp sugar 20 g, plus 2 tsp
- 1 tsp salt 5 g
- 1.25 tsp instant yeast 4 g
- 1 cup cold milk 225 g, 220-230 g in summer
- 1.5 tbsp unsalted butter 20 g, softened
- 1 tbsp strawberry powder 5 g, or pink food coloring
- 1 tbsp cocoa powder 5 g
Instructions
- Knead all ingredients except the colorings and butter for about 10 minutes, add the butter, then divide into 252 g, 190 g and 130 g portions.

- Mix the cocoa powder with a little water and knead it into the 130 g portion until the color is even.
- Test a small piece of dough – it should stretch into a thin, translucent membrane without tearing.
- Mix the strawberry powder with a little water and knead it into the 190 g portion until the color is even.
- Cover the three colored doughs and let them do the first fermentation.
- After the first fermentation, divide: white 35 g and 217 g, pink 40 g and 150 g, brown 10 g, two x 35 g and two x 30 g. Round into balls and rest.

- Roll the largest white piece into a rectangle the length of the mold, and lay the 10 g brown strip down the center as the nose.
- Roll the 35 g white piece thin, place it above the nose, and press into a triangle with no trapped air.
- Roll each 35 g brown piece into a flat oval, fold in half three times, then roll out to the length of the body.
- Lay both eyes on either side of the nose with even spacing – too close and the face looks crooked.
- Fold the two sides of the base dough up over the eyes and pinch the seam tightly.
- Roll the two 30 g brown pieces into strips for the ears, then press the flattened pink strip between them.
- Roll out the 150 g pink piece and cover the whole top as the head, pressing gently to seal.
- The assembled loaf should look like a tidy, sealed block with the face hidden inside.
- Place in the lined mold and proof until puffy and risen.
- Bake at 200°C (392°F) for 30 minutes, then unmold and cool completely before slicing to reveal the panda face.


Leave a Reply