The first few times I made salted egg yolk pumpkin, the yolks clumped into hard orange nuggets and the pumpkin went soggy before it ever got crispy. It is a frustrating dish – every component seems simple, but the timing is exacting. The yolks need gentle heat or they seize; the pumpkin needs a fast blanch and a thorough starch coat or it sweats and turns to mush in the pan.
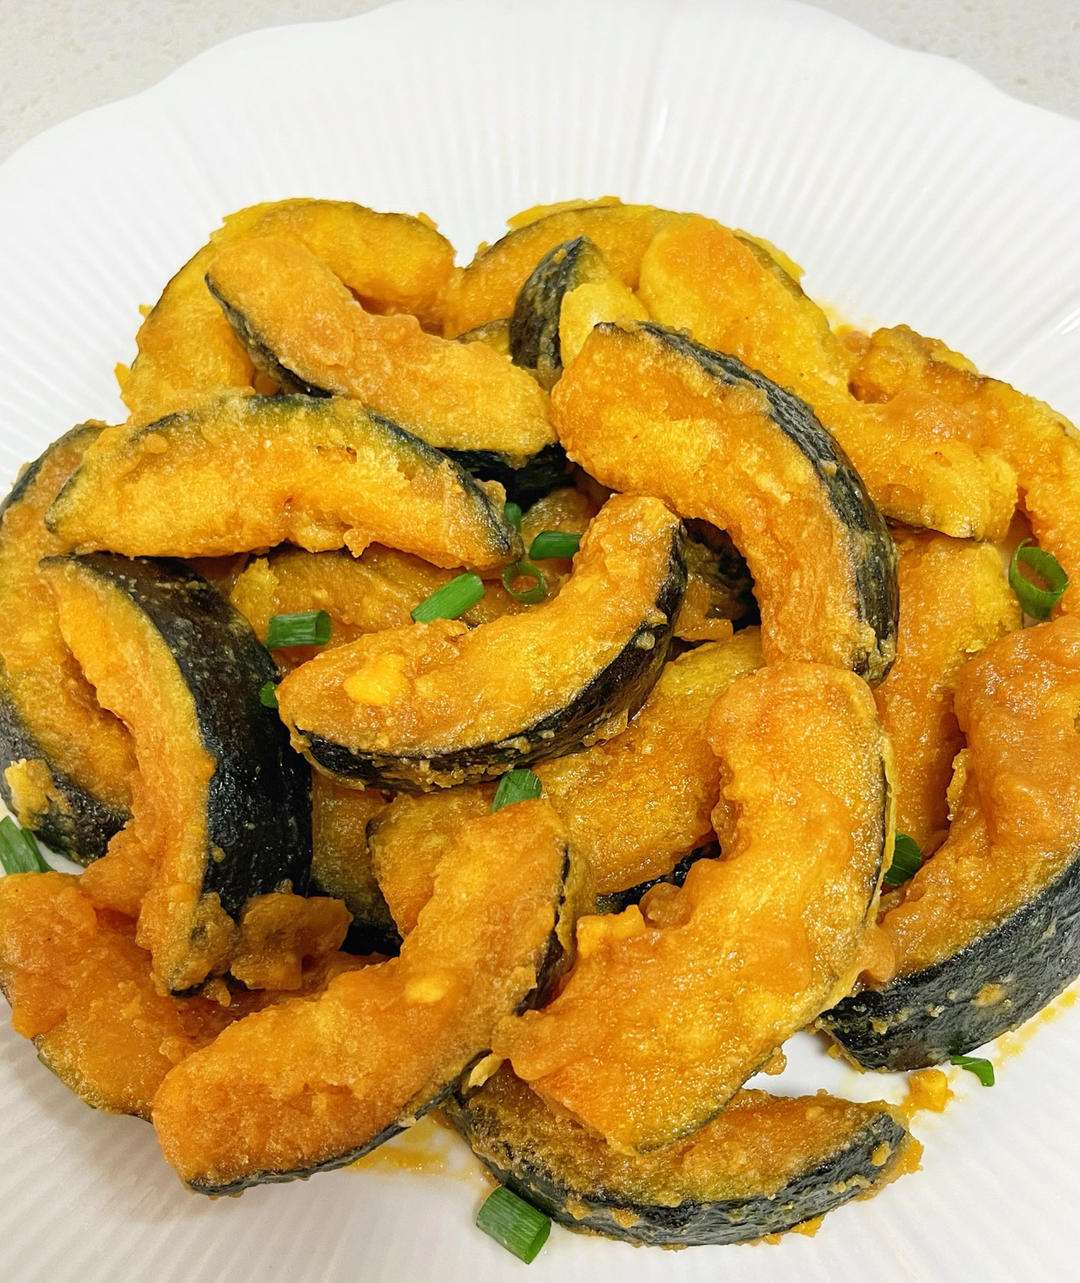
Get it right, though, and you have one of the best vegetable dishes in the Chinese repertoire: crackling golden cubes of kabocha under a velvety, salty-sweet yolk coating that is equal parts creamy and granular. It is the kind of dish that disappears from the table before the rice bowls are filled, and once you understand the two temperature rules – a quick blanch, a low yolk fry – it is genuinely simple.
What Is Salted Egg Yolk Pumpkin (Xian Dan Huang Nan Gua)?
Xian dan huang nan gua (咸蛋黄焗南瓜) is a beloved Chinese home-cooking and restaurant dish: kabocha (or another sweet, dense pumpkin) cut into bite-size pieces, quickly blanched, coated in a thin layer of starch, and fried until golden and crisp. Meanwhile, salted duck egg yolks are mashed and slowly cooked in a little oil until they dissolve into a foamy, sandy sauce. The crispy pumpkin goes into the yolk pan last and is tossed until every piece wears a glossy, savory-sweet coat.
The key character comes from the salted egg yolks – rich, umami-heavy, and subtly salty from their brine-curing – which turn fluffy and custard-like when warmed in oil. Home cooks usually blanch and fry the pumpkin fresh, while restaurant versions sometimes double-fry for extra crunch. The style here is the classic home method from the original recipe: one quick fry, yolks kept over gentle heat so they never scorch.
Pumpkin and egg are a natural pair in Chinese cooking – if you like this crispy version, my steamed egg custard in pumpkin (nan gua zheng dan) shows the silky, savory side of the same ingredients.
1Steamed Egg in Pumpkin (Nan Gua Zheng Dan)A healthy, comforting dish featuring a sweet Kabocha squash filled with a savory, silky egg custard. Perfect for breakfast or a light meal.Check out this recipe
Why This Recipe Works
- A fast blanch, not a long boil. The pumpkin is blanched just long enough to soften slightly and warm through, then drained well. This pre-cooks the interior so the fry can focus on the crust – no raw center, no mushy outside.
- A thin, even starch coat. Tossing the drained, still-damp pumpkin in starch creates a dry shell that fries shatter-crisp and seals moisture inside. Too much starch turns gummy; the original recipe calls for just enough to cover – “as shown.”
- Yolks cooked over low heat. Salted egg yolks go grainy and bitter if rushed. Cooking them gently in a little oil lets them melt into a smooth, sandy foam that clings to the pumpkin instead of pooling.
- Salt is optional. The yolks carry their own salt, so the recipe needs none – a pinch only if your yolks are on the mild side.
- Sweet pumpkin balances salty yolk. Kabocha’s natural sweetness is the counterweight to the yolk’s savoriness, which is why this dish reads as salty-sweet and never cloying.
Equipment Needed
- A wok or a wide skillet for frying – a 12-inch (30 cm) pan gives the pumpkin room to crisp
- A small saucepan or small wok for the yolk sauce
- A fine-mesh strainer for the blanched pumpkin (shake off as much water as possible)
- A fork or small whisk for mashing the yolks
- A slotted spoon for transferring fried pumpkin
Ingredients
- 1 large kabocha (Bebe) pumpkin, about 900 g (2 lb) – choose one that feels dense and heavy
- 4 salted duck egg yolks (from salted duck eggs), about 60 g (2 oz)
- Cornstarch or potato starch, about 3 tbsp (24 g) for coating
- 2 tbsp (30 ml) neutral oil for the yolk sauce, plus 250 ml (1 cup) for frying
- Salt, only if your yolks are mild
Ingredient Notes
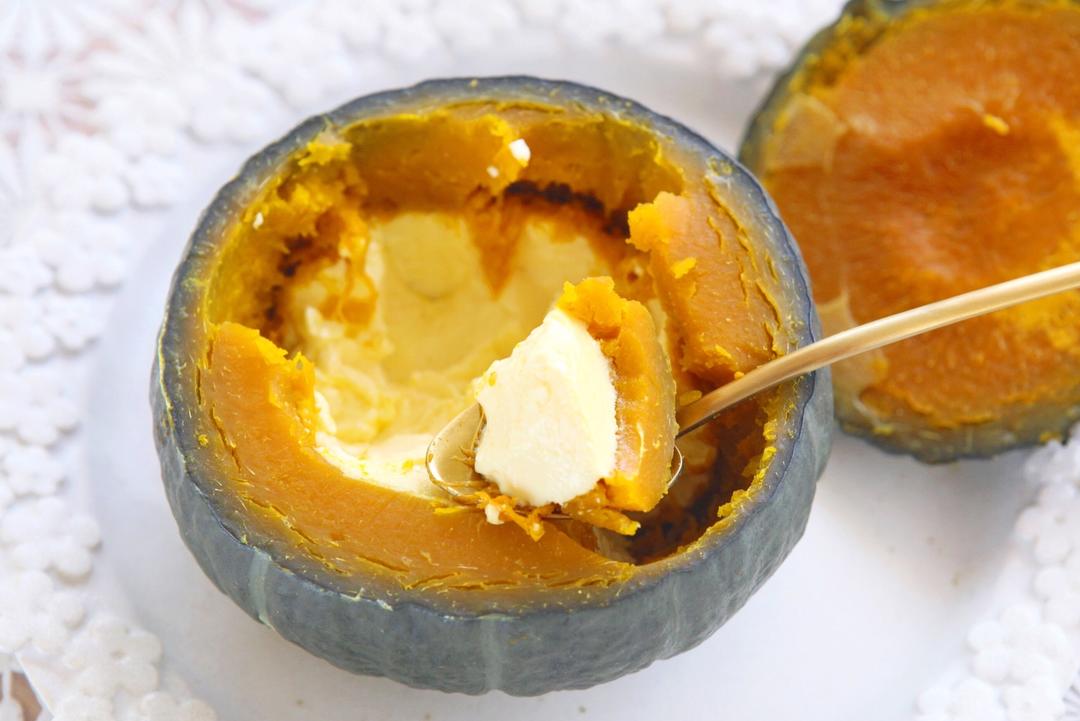
Kabocha (Bebe) pumpkin: The original recipe specifically calls for the small, green-skinned kabocha with deep orange flesh. Its texture is the whole point – fluffy, dense, and sweet, it holds its shape through blanching and frying. Butternut squash is the closest supermarket substitute; avoid watery varieties like jack-o’-lantern carving pumpkins, which will collapse. If you end up with more pumpkin than you need, a baked pumpkin souffle inside a kabocha is a stunning way to use the shell.
Salted duck egg yolks: You can buy whole salted duck eggs and crack them open yourself, or buy the yolks pre-packaged in vacuum pouches at Asian grocers. For the best texture, use the cooked yolks from a salted egg (the brine-cured, not raw, kind). The yolk count is flexible – the original author uses 3 to 5; four yolks for one large pumpkin is a balanced ratio.
Starch: Cornstarch or potato starch both work. Potato starch fries slightly crispier; cornstarch is what most home pantries have. Do not substitute flour – it forms a doughy shell that traps steam.
Prep & Mise en Place
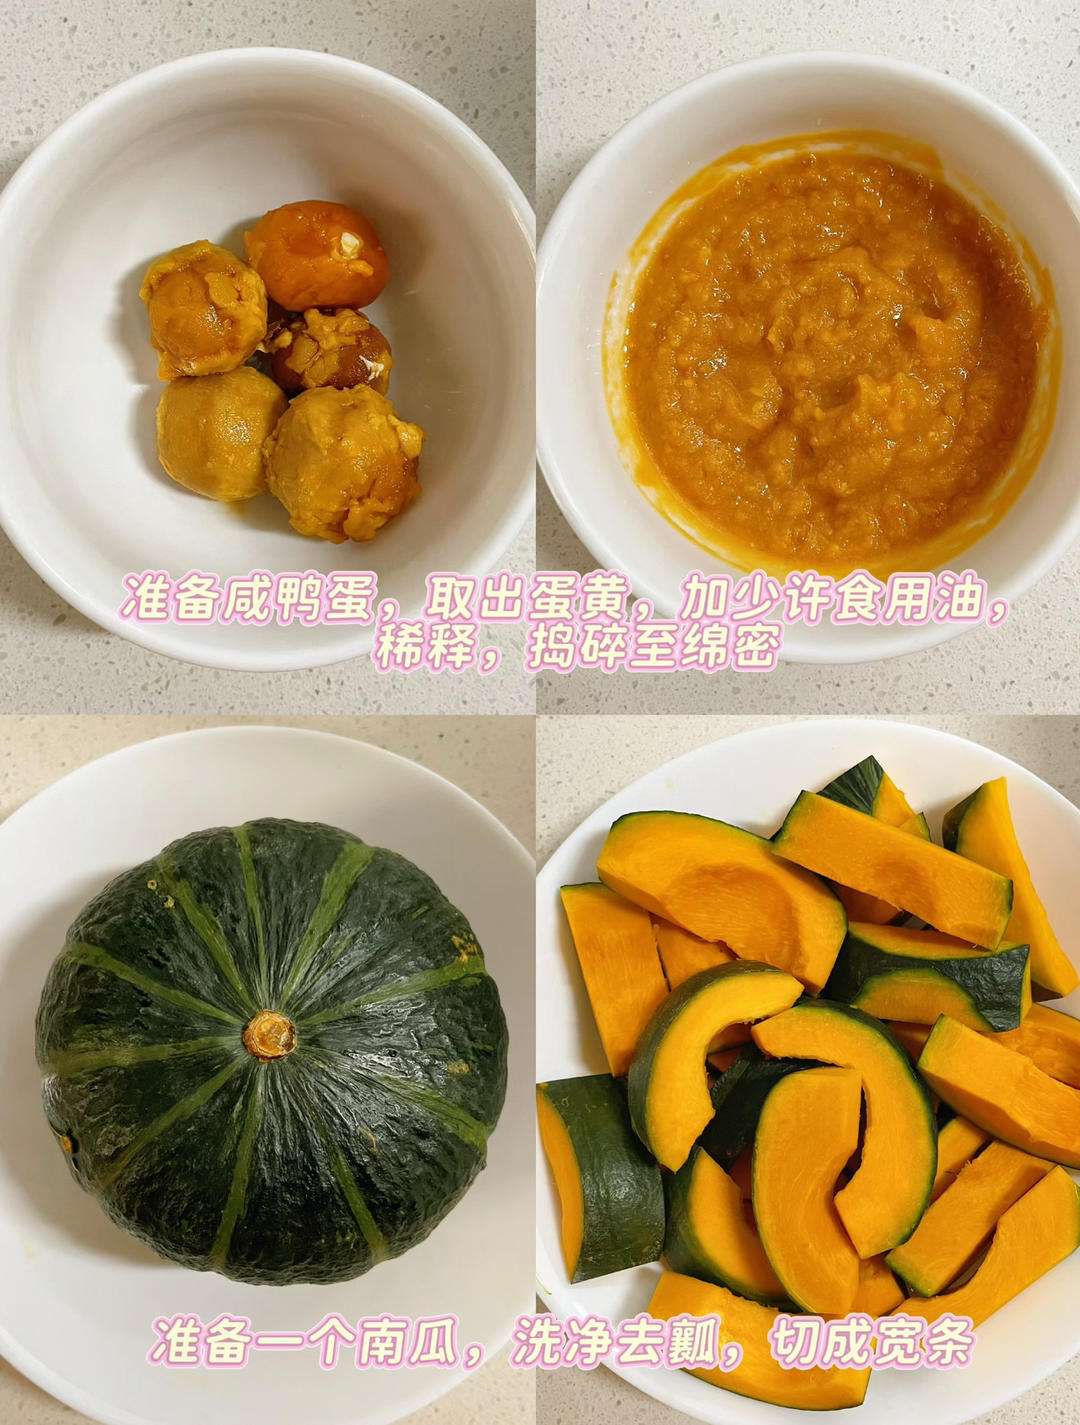
Cut the pumpkin in half, scoop out the seeds, and cut the flesh into bite-size pieces about 3 cm (1.2 in) – large enough to stay intact through the fry, small enough to coat in one mouthful. The skin of kabocha is edible and adds a nice chew, so you can leave it on; trim any very tough patches.
Separate the yolks from four salted duck eggs and mash them with a fork, adding a few drops of oil to help them loosen into a smooth paste. Have your starch measured in a bowl and a fine-mesh strainer ready. The entire cook is under 15 minutes, so everything needs to be within arm’s reach of the burner.
Cooking Process
Step 1 – Mash the Salted Egg Yolks
Take the yolks out of 3-5 salted duck eggs and mash them in a small bowl with a fork, working in a few drops of neutral oil until the paste is smooth and creamy with no large lumps. Small pieces are fine – they melt in the pan – but big chunks will stay grainy. Set aside.
Step 2 – Blanch the Pumpkin Briefly
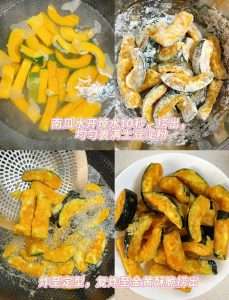
Bring a pot of water to a rolling boil, drop in the pumpkin pieces, and blanch for 1-2 minutes – just until a knife tip pierces the flesh with slight resistance. Drain immediately in a fine-mesh strainer and let the pieces steam-dry for a minute. Do not over-blanch; the fry will finish the cooking.
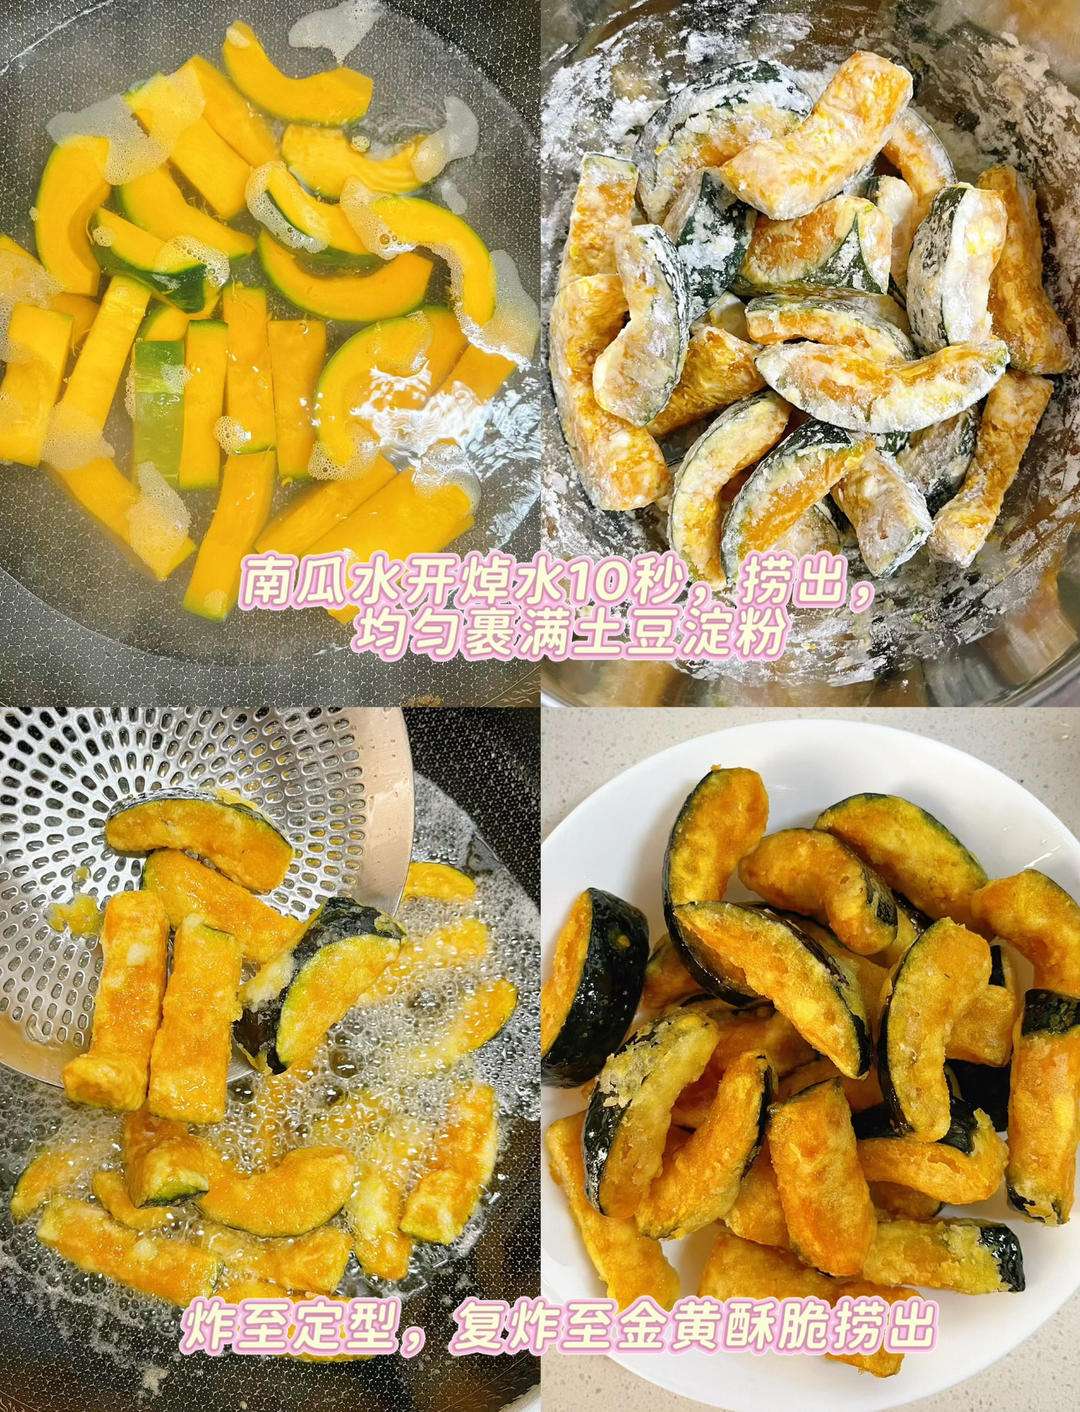
The blanch-and-coat sequence is the standard move for crisp Chinese vegetable fritters. The starch layer hits the hot oil and dehydrates instantly into a brittle shell – essentially a miniature Maillard crust – while the steam inside the pumpkin keeps the flesh moist. Too much surface water, and the shell steams instead of crisping.
Step 3 – Coat With Starch
While the pumpkin is still damp but not dripping, toss it with about 3 tablespoons (24 g) of cornstarch or potato starch in a bowl until every piece wears a thin, even, powdery coat. Shake off the excess in the strainer. If a piece looks patchy, dust a little more starch directly onto it.
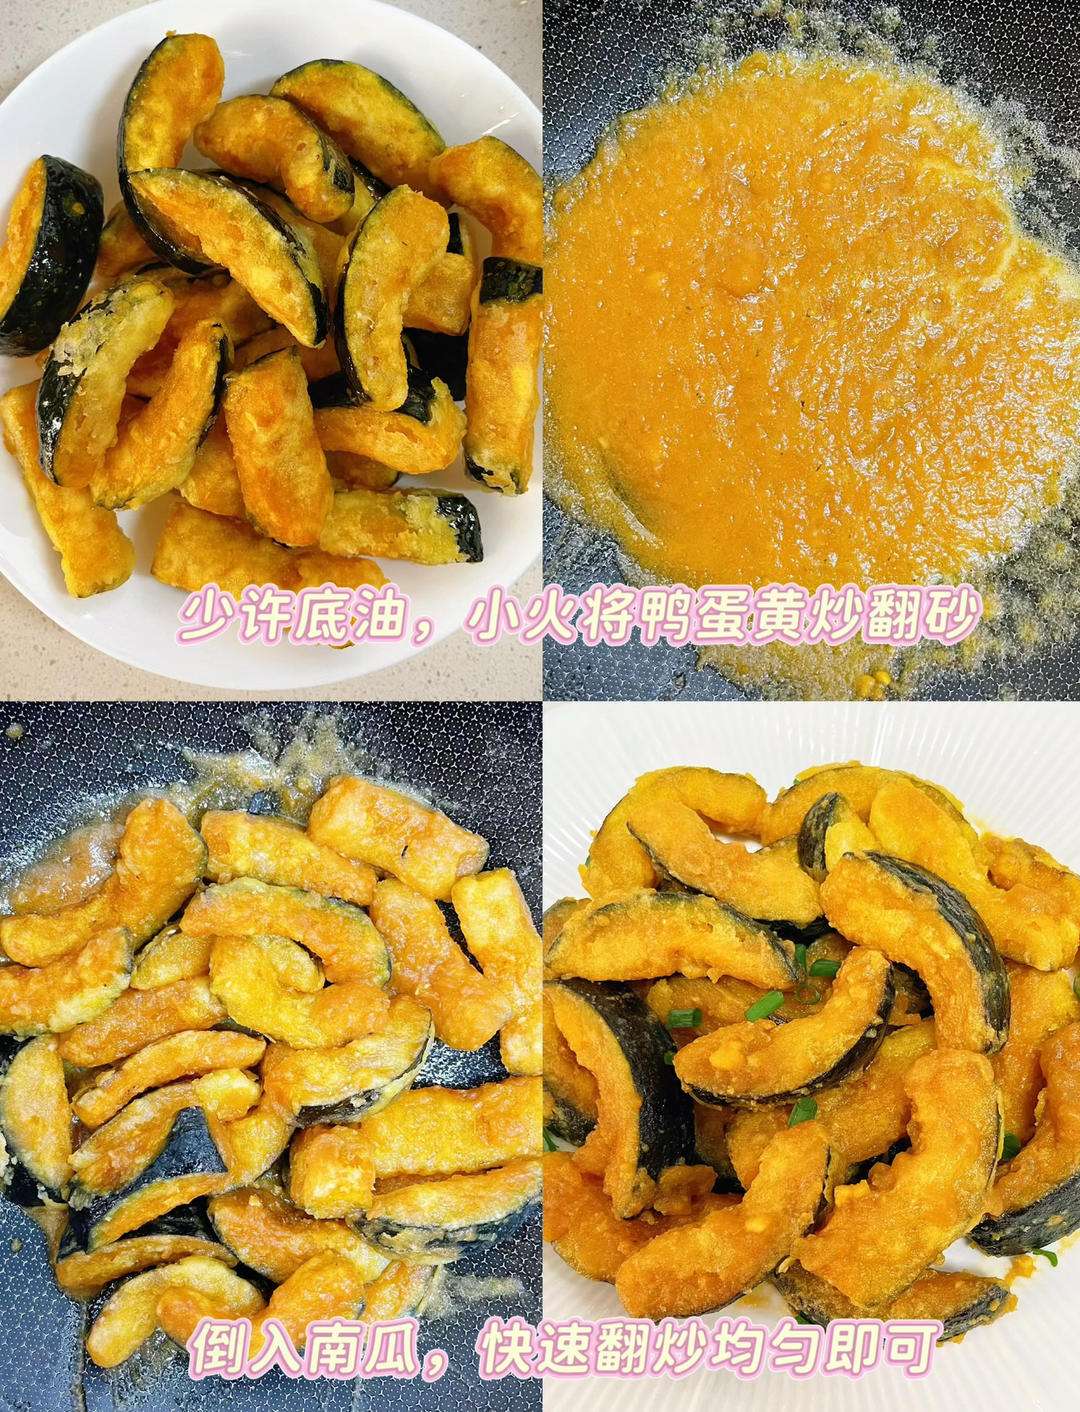
Step 4 – Fry Until Golden and Crisp
Heat about 1 cup (250 ml) of neutral oil in a wok to 170-180°C (340-355°F) – a chopstick dipped in should bubble steadily. Fry the pumpkin in batches so the pan is never crowded, 3-4 minutes per batch, turning occasionally, until the pieces turn golden and float with a crisp shell. Transfer to a plate lined with paper towels. Reserve about 2 tablespoons of the oil for the yolk sauce.
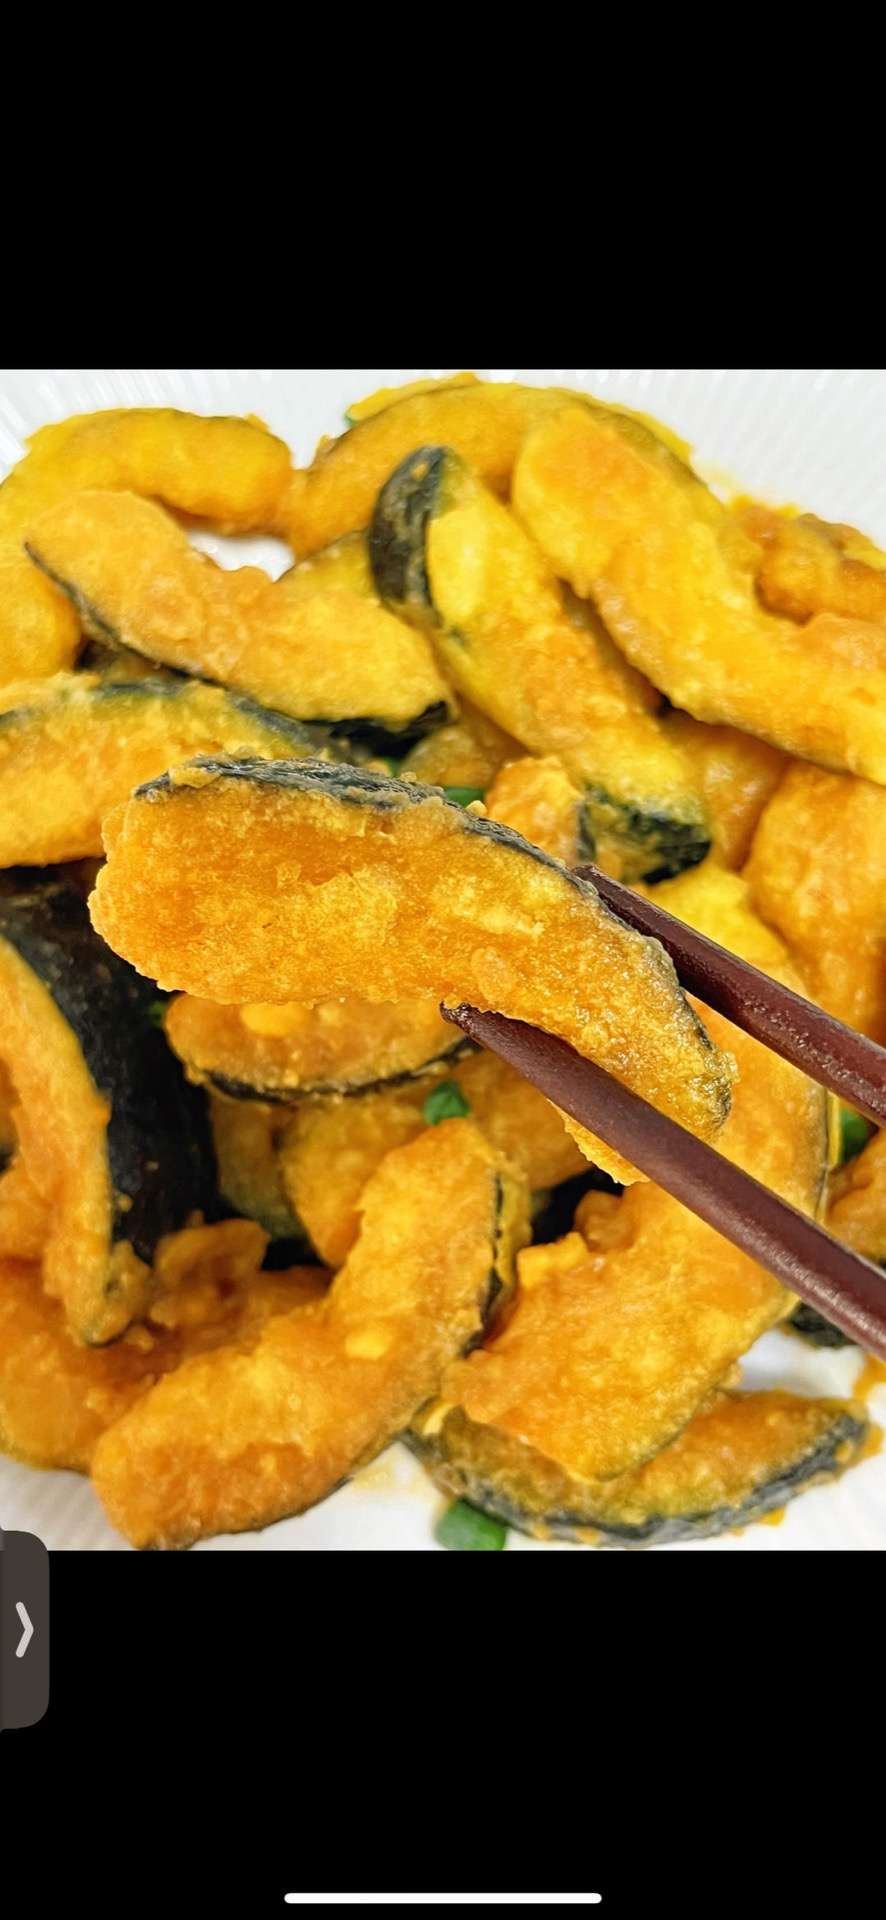
Frying at 170-180°C (340-355°F) drives moisture out of the starch shell quickly enough to create crunch before the pumpkin’s sugars caramelize and darken. If the oil is too cool, the coat absorbs oil and turns greasy; too hot, and the outside burns before the center warms.
Step 5 – Cook the Yolk Paste Gently
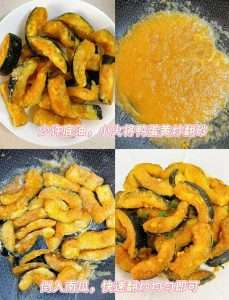
Pour 2 tablespoons of the reserved oil into a clean pan over the lowest heat. Add the mashed yolks and stir constantly for 1-2 minutes. The paste will first melt, then bubble into a light, foamy, sandy sauce. The moment it foams uniformly, it is ready – move fast, because it can scorch within seconds at this stage.
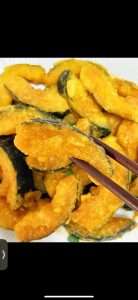
Add the fried pumpkin to the pan and toss gently for 30-45 seconds until every piece is coated in the golden yolk foam. Serve immediately, while the crust is still crackling. A pinch of salt goes in only if your yolks are mild.
Common Mistakes When Making Salted Egg Yolk Pumpkin
1. Soggy, steamed pumpkin. Cause: too much surface water after blanching, or too little starch. Fix: drain thoroughly in a strainer and let the pieces steam-dry, then coat evenly and shake off excess – the starch must be dry before it hits the oil.
2. Scorched, bitter yolks. Cause: cooking the yolk paste over medium or high heat, or walking away from the pan. Fix: yolks want the lowest heat and constant stirring; pull the pan off the burner the instant the foam turns uniformly golden.
3. Gummy starch coating. Cause: using too much starch or a thick floury paste. Fix: a thin, dusty coat is all you need – toss, shake off the excess, and do not let the pieces sit and sweat.
4. Raw center, burnt shell. Cause: skipping the blanch, or frying at too high a temperature. Fix: the blanch pre-cooks the interior; keep the oil between 170-180°C (340-355°F) and fry in uncrowded batches.
5. Yolk sauce that will not coat the pumpkin. Cause: too much oil in the yolk pan, so the foam pools instead of clinging. Fix: use just 2 tablespoons, and make sure the fried pumpkin goes in while the yolk foam is still light and airy.
6. Clumpy yolk paste. Cause: rushing the mash, or using raw rather than cooked salted yolks. Fix: mash to a smooth paste with a few drops of oil before cooking, and use brine-cured cooked yolks for the melting texture.
Variations
Milder or sweeter: Some cooks add a pinch of sugar with the yolks for a more dessert-like sweet-salty balance; others finish with a few drops of Shaoxing wine to cut richness. Both are traditional tweaks and neither changes the method.
Vegetable swaps: The same yolk sauce transforms other dense vegetables – try it with fried lotus root slices, cauliflower florets, or parsnips. The technique is identical: blanch, coat, fry, toss. If you love the crispy-fried vegetable treatment, my Sichuan crispy fried pork (xiao su rou) uses the same starch-coating logic on meat.
Breakfast twist: Leftover yolk sauce is extraordinary on pumpkin steamed buns – spread it on like butter while the buns are warm.
Seafood version: Salted egg yolk prawns and squid are restaurant classics made the same way – cook the seafood quickly, then toss in the yolk foam. Keep the fry short so the protein stays tender.
No deep-fry shortcut: In a hurry, you can pan-fry the coated pumpkin in a shallow layer of oil, flipping once, for 4-5 minutes per side. The crust is slightly less shattering but the dish still works.
Frequently Asked Questions
Can I use raw egg yolks instead of salted ones? No – the salted, cured yolks are essential. Their brining gives the savory umami and the crumbly texture; fresh yolks will simply scramble. Buy whole salted duck eggs or vacuum-packed salted yolks at an Asian grocery.
Can I make the yolk sauce ahead? The sauce is best made fresh – it stiffens and loses its foam when cooled. The fried pumpkin, however, can be fried an hour ahead and kept on a wire rack, then tossed with freshly made yolk sauce at serving time.
Why did my yolks turn into hard nuggets? Heat too high, or the yolks were not mashed fine enough. Always cook yolks over the lowest heat with constant stirring, and mash them smooth before they hit the pan.
What pumpkin should I use? The original calls for Bebe kabocha – dense, sweet, and fluffy. Butternut squash is a good substitute; skip watery carving pumpkins entirely.
Is this dish very salty? It should be pleasantly savory, not salty. The yolks provide the seasoning, and kabocha’s sweetness balances it. If yours tastes too salty, your yolks may be heavily brined – rinse them briefly before mashing next time.
Can I use this sauce on other desserts? The sweet-salty yolk coating is surprisingly good over a slice of pumpkin chestnut pound cake – a dessert-table experiment worth trying if you have sauce left over.
How to Serve
Serve the pumpkin immediately as a side with steamed rice – it is rich enough that a modest portion alongside a simple stir-fry is perfect. It pairs naturally with other autumn-flavored dishes: a savory chicken and pumpkin mash on the same table makes a cozy two-pumpkin dinner, and for something heartier, a bowl of steamed duck in a pumpkin bowl turns it into a feast. A scoop of golden egg fried rice alongside makes a complete plate. Leftover pieces are still lovely cold as a snack, which is how many home cooks sneak a few before dinner.
Storage & Reheat
This dish is best eaten the day it is made – the crust softens overnight. If you have leftovers, refrigerate in an airtight container for up to 2 days and reheat in a single layer in a 200°C (400°F) oven for 5-7 minutes to revive some crunch; avoid the microwave, which turns the coating rubbery. Do not freeze – the starch coating breaks down completely on thawing. When reheating, bring the pieces to an internal temperature of at least 74°C (165°F) for food safety.
Allergen Notice
This recipe contains egg (salted duck egg yolks). It is free of gluten, soy, nuts, dairy, and shellfish. If using store-bought salted egg yolks, check the label for additives.
Nutrition Disclaimer
Nutrition information is calculated using an ingredient database and should be considered an estimate. In cases where multiple ingredient alternatives are given, the first listed is calculated for nutrition. Garnishes and optional ingredients are not included.
About the Author & Recipe Development
I am Lin, a professional Chinese chef who spent a decade in high-volume restaurant kitchens before writing about Chinese cooking. Salted egg yolk dishes were a station staple in the restaurants where I trained – the rule there was the same as in this recipe: yolks never leave the lowest flame, and the fryer temperature is checked before the first piece goes in. This version follows a popular home recipe from the Chinese recipe site xiachufang, and I kept its two signature moves – the quick blanch and the gentle yolk fry – because they are exactly what separates a crackling dish from a soggy one.
Authoritative References
USDA Food Safety and Inspection Service – Safe Temperature Chart for egg-handling and leftover-reheating guidance.
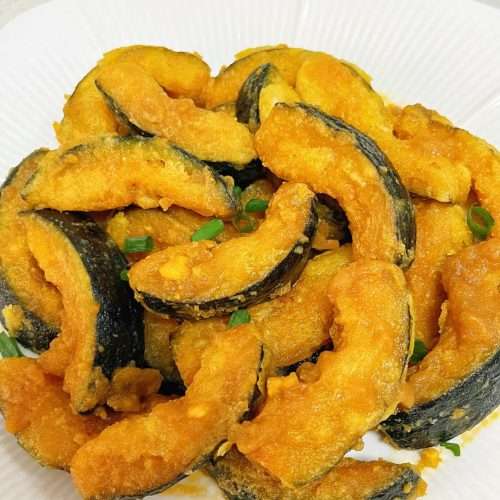
Crispy Salted Egg Yolk Pumpkin (Xian Dan Huang Nan Gua) Recipe

Equipment
- Wok or wide skillet
- Small Saucepan
- Fine-mesh strainer
Ingredients
For the Dish
- 1 large kabocha (Bebe) pumpkin, dense and heavy about 900 g / 2 lb
- 4 salted duck egg yolks from salted duck eggs; 3-5 works
- 3 tbsp cornstarch or potato starch, for coating 24 g
- 2 tbsp neutral oil, for the yolk sauce 30 ml
- 250 ml neutral oil, for frying about 1 cup
- salt, only if the yolks are mild optional
Instructions
- Mash 3-5 salted duck egg yolks with a fork and a few drops of oil into a smooth, creamy paste. Set aside.

- Blanch the pumpkin pieces in boiling water for 1-2 minutes until just tender. Drain well and let steam-dry for a minute.

- While still damp, toss the pumpkin with about 3 tbsp (24 g) cornstarch or potato starch until each piece wears a thin, even coat. Shake off excess.
- Heat about 1 cup (250 ml) neutral oil to 170-180°C (340-355°F). Fry the pumpkin in batches for 3-4 minutes until golden and crisp. Drain on paper towels. Reserve 2 tbsp oil.

- In a clean pan over the lowest heat, warm 2 tbsp oil, add the mashed yolks, and stir constantly for 1-2 minutes until the paste melts and foams. Add the fried pumpkin and toss gently 30-45 seconds to coat. Serve immediately.


Leave a Reply