Growing up in my parents’ restaurant in Sichuan, I learned one thing very early on: the best dishes are always the ones my dad called “xià fàn” (下饭), or “rice-killing.” My parents, who met in the kitchen, and my father, a 30-year chef, judged a dish by how many extra bowls of rice it made you eat.
This Homestyle Braised Pork Belly, or Bazi Rou (把子肉), is the king of rice-killer dishes. It’s a specialty from Shandong province, but my dad had his own homestyle version that he’d make for staff meals. It’s a dish I’ve tinkered with ever since my culinary school days and during my travels as a chef across China.

The pork belly becomes impossibly soft, the fat melts in your mouth—not greasy at all—and it’s all braised in this incredibly fragrant, savory-sweet sauce made with beer. The best part? The hard-boiled eggs and green peppers soak up all that flavor, too.
This is a simplified, homestyle recipe, but it delivers all the complex, comforting flavor you’d expect. This is the dish you make when you want a hug in a bowl. And trust me, you’ll need that extra scoop of rice.
🥣 What is Bazi Rou (把子肉)?
Bazi Rou (把子肉) is a classic braised pork dish originating from Shandong province in Eastern China. The name is quite rustic; “Bàzi” (把子) can mean “handle” or “bundle.”
Traditionally, this dish was made with very large, thick-cut pieces of pork belly that were tied up in bundles with straw or string. These bundles were then slow-braised for hours in a rich, dark soy sauce-based broth until the pork was fall-apart tender. It was, and still is, a famous and beloved “gai fan” (盖饭) dish—a popular one-dish meal of meat served over rice.
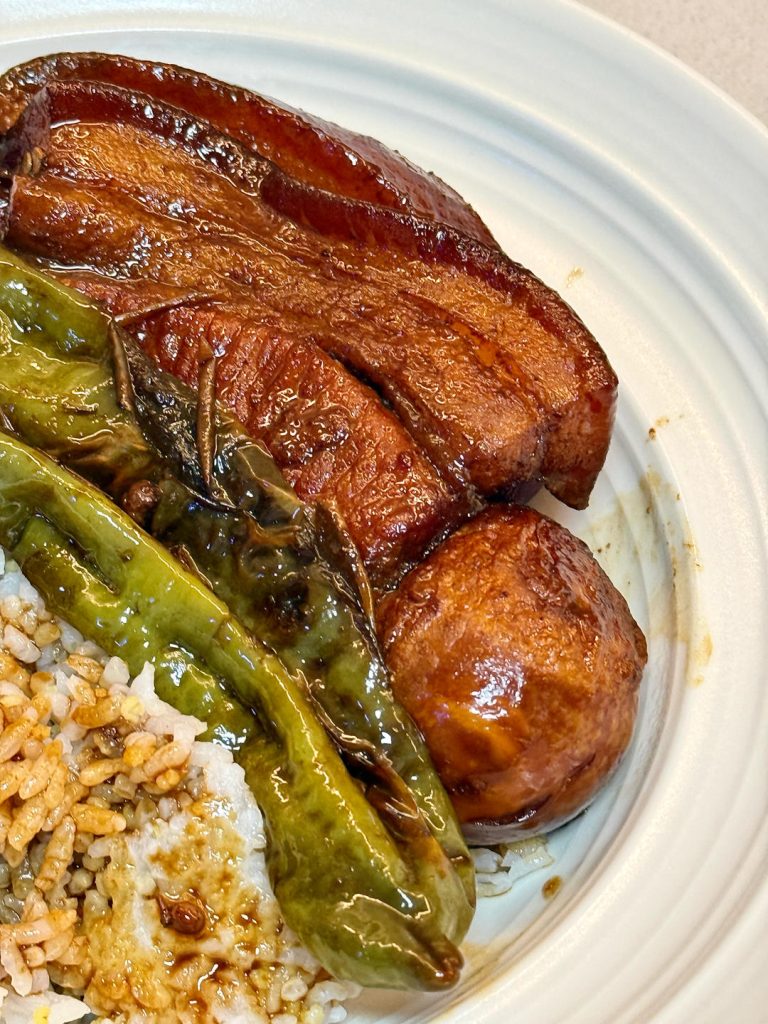
My recipe is a simplified, homestyle (家常, jiācháng) version. We skip the complicated step of tying the pork, but we keep all the essential flavors and, most importantly, the spirit of the dish: thick-cut pork, a rich sauce, and that melt-in-your-mouth texture.
❤️ Why You’ll Love This Recipe
- Melt-in-Your-Mouth, Not Greasy: The first step is to sear the pork belly without oil. This renders out the excess fat, which we use to cook the other ingredients. The final braised pork is incredibly rich but never feels heavy or greasy.
- Incredible One-Pot Sauce: The combination of beer, soy sauces, oyster sauce, and sweet bean sauce creates a savory, complex, and slightly sweet sauce that is absolutely addictive. The beer also helps to tenderize the meat and adds a wonderful, subtle maltiness.
- A Complete One-Pot Meal: The pork, hard-boiled eggs, and green peppers all cook together in the same pot. The eggs and peppers soak up the delicious braising liquid, making them just as much a star as the pork.
- Pure Comfort Food: This is pure, unadulterated homestyle cooking. It’s the kind of food that warms you from the inside out and feels like a special treat, even though it’s simple to make.
🛒 Key Ingredients Explained
While the full list is in the recipe card, here are the key players that make this Bazi Rou special.
- Pork Belly: This is non-negotiable! You must use skin-on pork belly. The skin and distinct layers of fat are essential for the final texture. Look for a piece you can cut into thick, 1-inch slices.
- Hard-Boiled Eggs: A classic addition. We pan-fry them in the rendered pork fat to create a “tiger-skin” (虎皮, hǔ pí) texture. This slightly tough, blistered outer layer is fantastic at soaking up the braising sauce.
- Green Peppers: I use standard green bell peppers, but you could also use jalapeños (if you want heat) or milder Anaheim peppers. They are added at the end to provide a fresh, slightly sharp vegetable flavor that cuts through the richness.
- Beer: This is our secret weapon for the braising liquid. A light-colored lager or pilsner works best. It tenderizes the meat (thanks to the enzymes and acidity) and adds a complex, malty background note.
- Sweet Bean Sauce (甜面酱, Tiánmiànjiàng): This is a key flavor! This is not hoisin sauce. Sweet bean sauce is a thick, dark, salty-sweet paste made from fermented wheat flour. You can find it at any Asian supermarket (brands like Lee Kum Kee or Sishon are common).Substitution Note: If you absolutely cannot find it, you can substitute with 1 tablespoon of hoisin sauce, but the flavor will be sweeter and less complex.
- Aromatics: A classic Chinese braising team: star anise, a small piece of cinnamon (or cassia), bay leaves, and a few dried red chilies. These build the fragrant (巨香) base of the sauce.
🍳 Equipment
You don’t need any special tools for this recipe. The most important thing is a good, heavy-bottomed pot that can go from stovetop searing to a long, slow simmer.
- A Heavy-Bottomed Pot or Wok: I use a large wok for the initial searing, but a Dutch oven or heavy-bottomed stainless steel pot is perfect for the braising part.
🔪 How to Make Bazi Rou: Step-by-Step
This dish comes together in distinct stages, which is a classic Chinese cooking technique to build layers of flavor.
Step 1: Mise en Place (Prep Your Ingredients)
Before you turn on the heat, get everything ready. This is the most important rule from my dad’s kitchen.
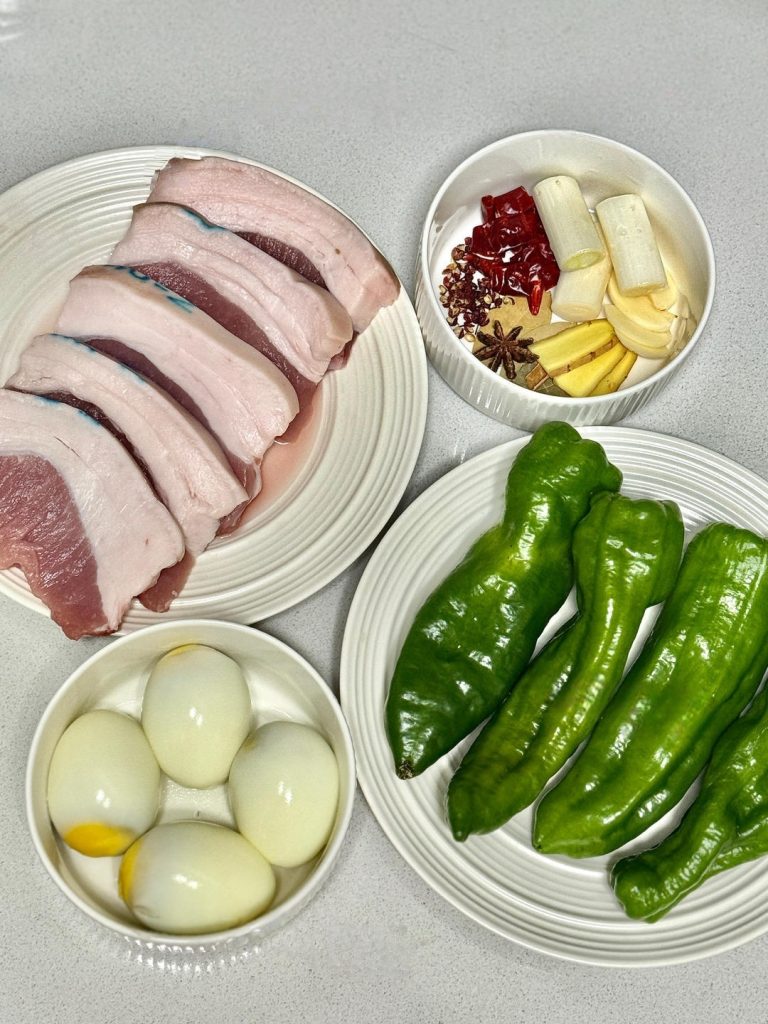
- Slice the pork belly into thick, 1-inch pieces.
- Peel your hard-boiled eggs.
- Cut the green peppers into large, rustic chunks.
- Slice the ginger, garlic, and scallion whites.
- Gather all your spices and sauces.
Step 2: Render the Pork (The Key to “Not Greasy”)
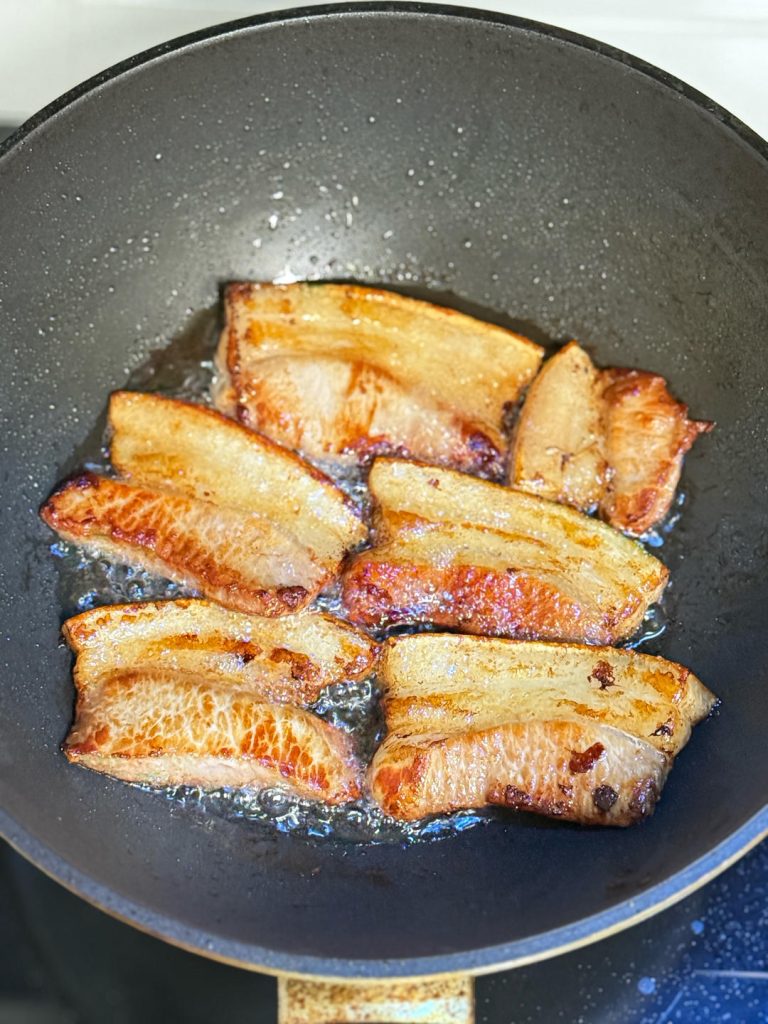
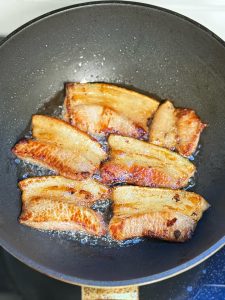
Place your thick-cut pork belly slices in a cold, dry wok or pot. Turn the heat to medium. By starting cold, the fat will melt out slowly without the meat burning.
Cook, turning occasionally, until the pork is golden brown on all sides and you’ve rendered out a good amount of fat. This takes about 5-7 minutes. Remove the pork pieces with a slotted spoon and set them aside.
Step 3: Create “Tiger Skin” Eggs and Peppers
Leave about 1-2 tablespoons of the rendered pork fat in the pot (pour any excess off and save it for cooking vegetables later!).
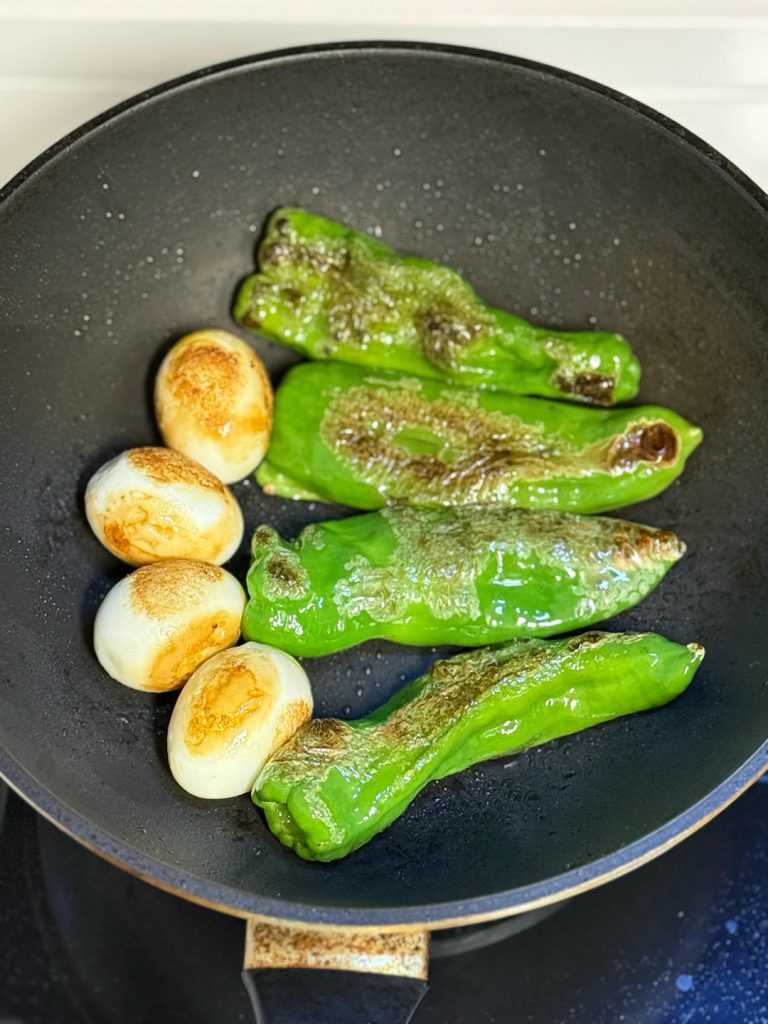
Add the hard-boiled eggs and the green peppers to the hot fat. Fry, turning often, until the eggs are blistered and golden and the peppers have a “tiger skin” (charred and blistered) appearance. This will take 3-4 minutes. Remove them and set them aside with the pork.
Step 4: Bloom the Aromatics & Build the Sauce
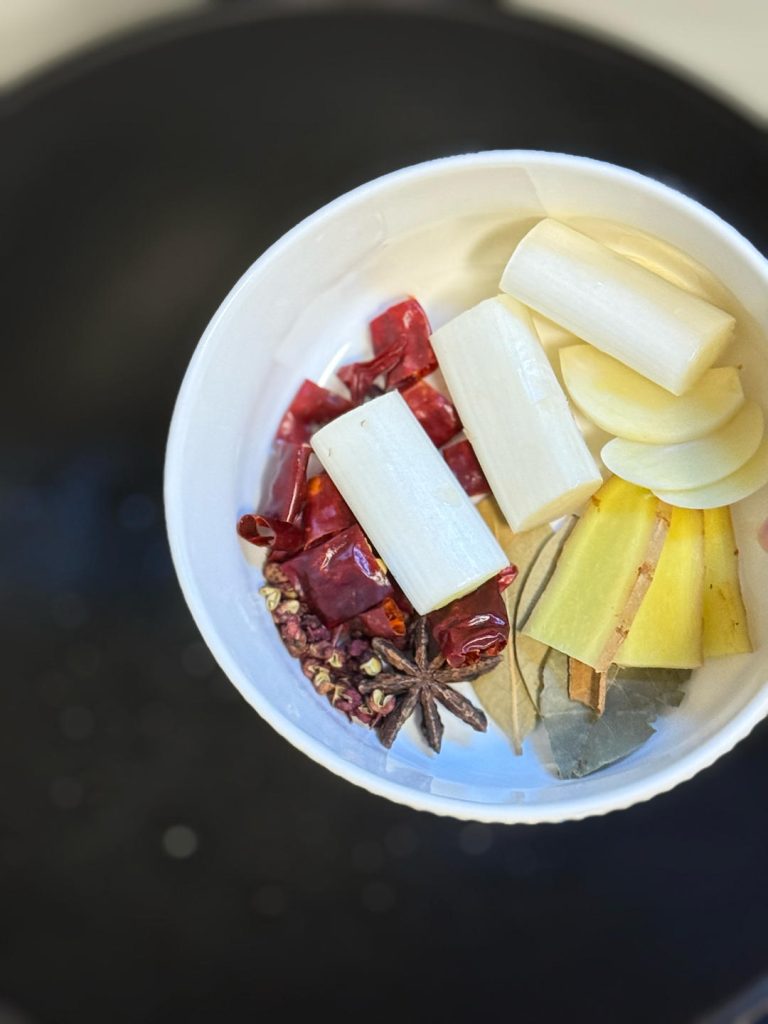
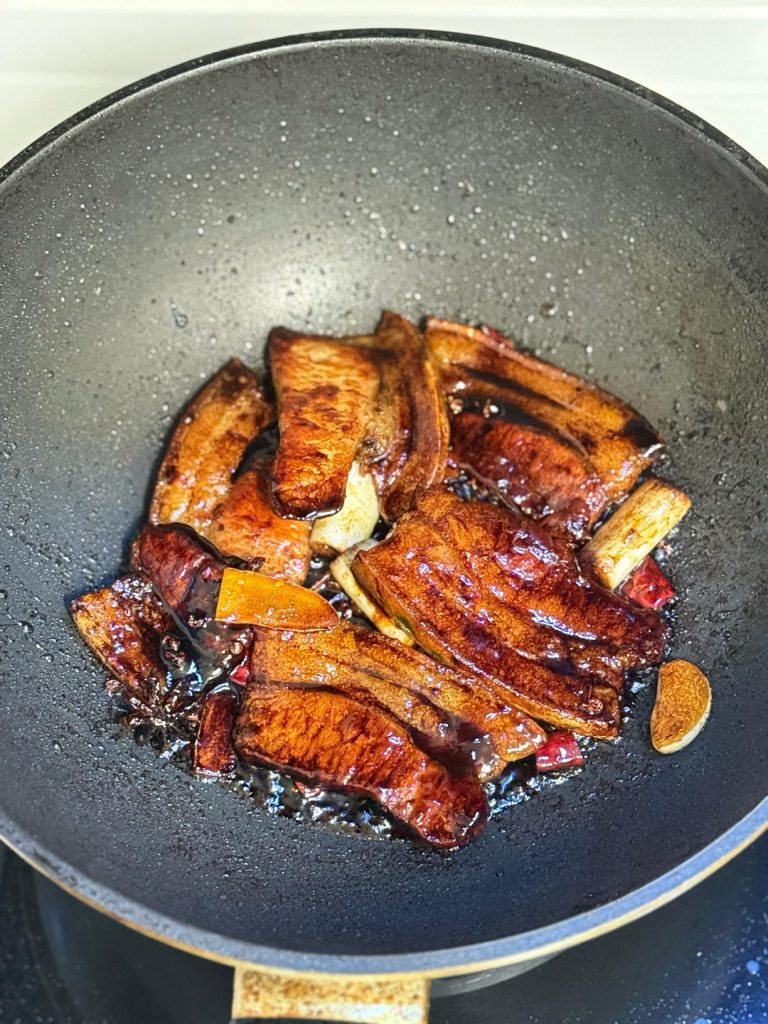
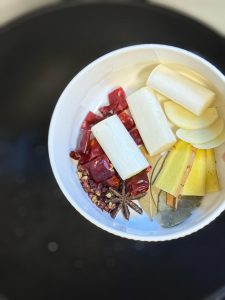
Add the aromatics (star anise, cinnamon, bay leaves, Sichuan peppercorns, dried chilies, ginger, garlic, and scallion whites) to the same pot. Stir-fry for about 30 seconds until they are incredibly fragrant.
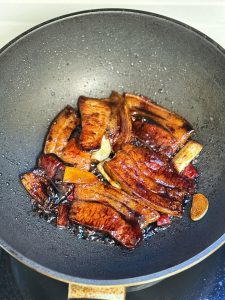
Return the seared pork belly to the pot. Add the light soy sauce, dark soy sauce, oyster sauce, and sweet bean sauce. Stir-fry over medium-high heat for 1-2 minutes, tossing the pork to coat it in the sauces. This step, called “shàngsè” (上色), gives the pork its beautiful reddish-brown color.
Step 5: The Braise
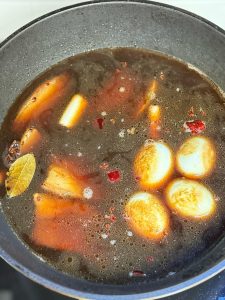
Now, add the “tiger skin” eggs back into the pot. Pour in the half bottle of beer and add just enough water to almost cover the pork.
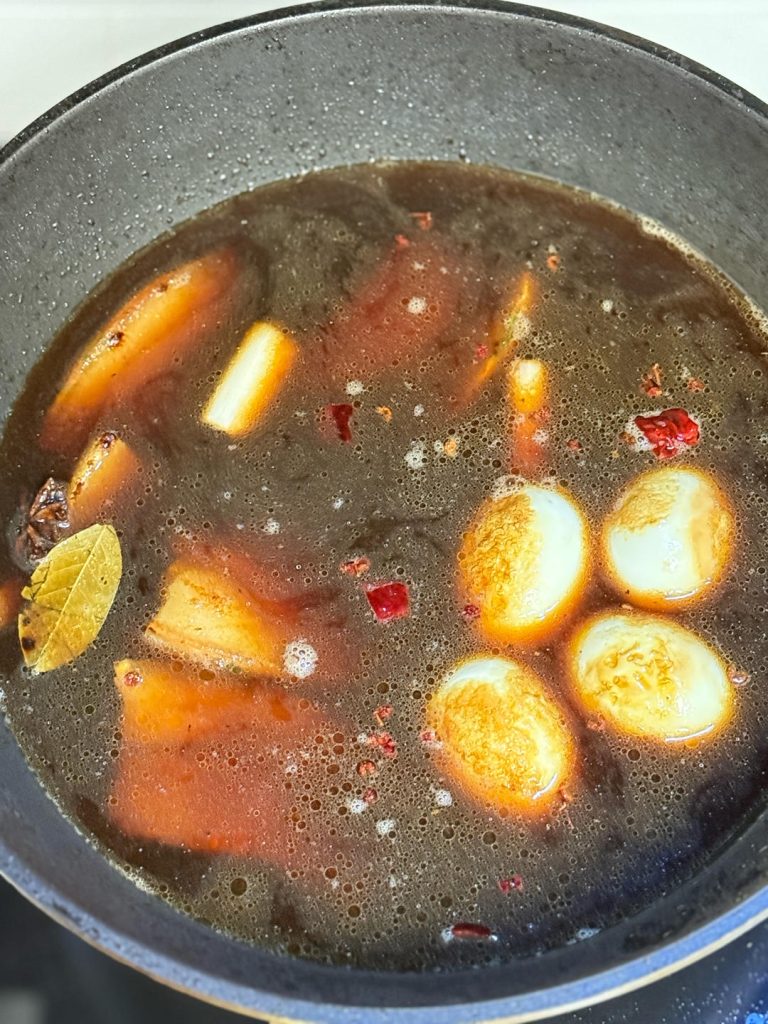
Bring the liquid to a rolling boil, then immediately turn the heat down to low, cover the pot, and let it simmer gently for 50 minutes. You want a low, gentle bubble, not a rapid boil.
Why we braise: This slow, moist cooking method breaks down the tough connective tissues in the pork belly and skin, converting them into gelatin. This is what gives the pork that “melt-in-your-mouth” texture and makes the sauce rich and lip-sticking.
Step 6: Finish with Peppers & Reduce
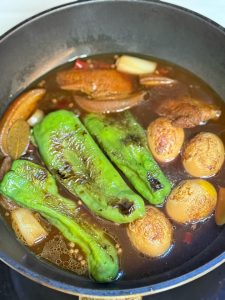
After 50 minutes, the pork should be very tender. Uncover the pot and add the cooked green peppers back in.
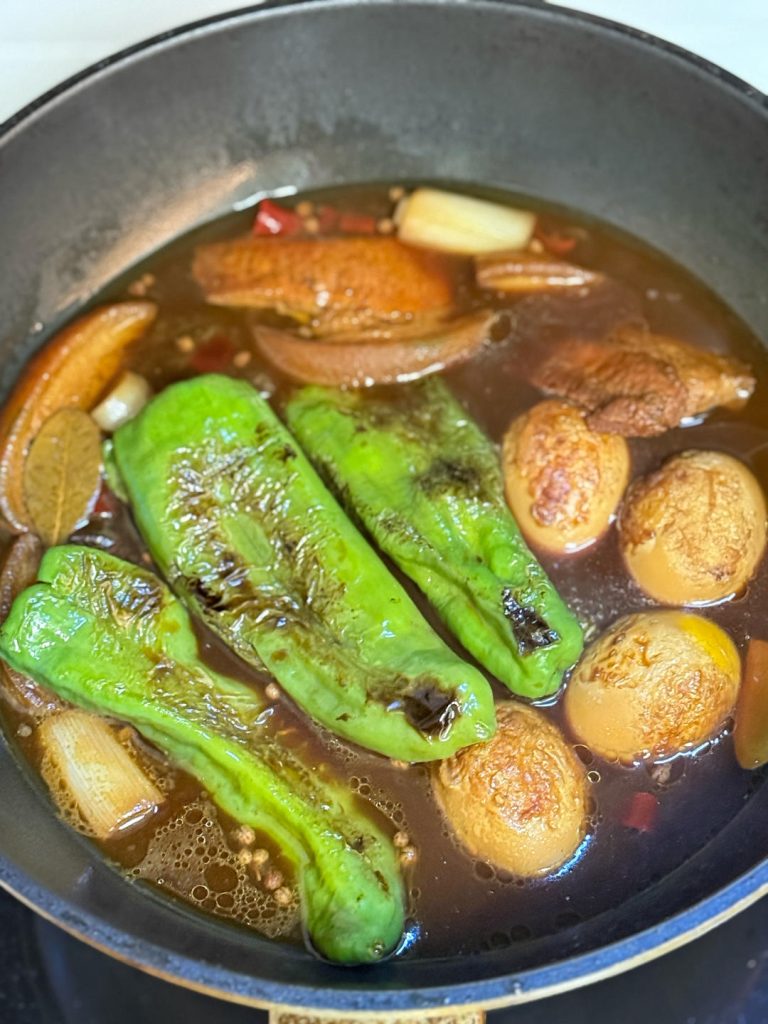
Let everything simmer together, uncovered, for another 10 minutes. This allows the peppers to soften and absorb the sauce without turning to mush.
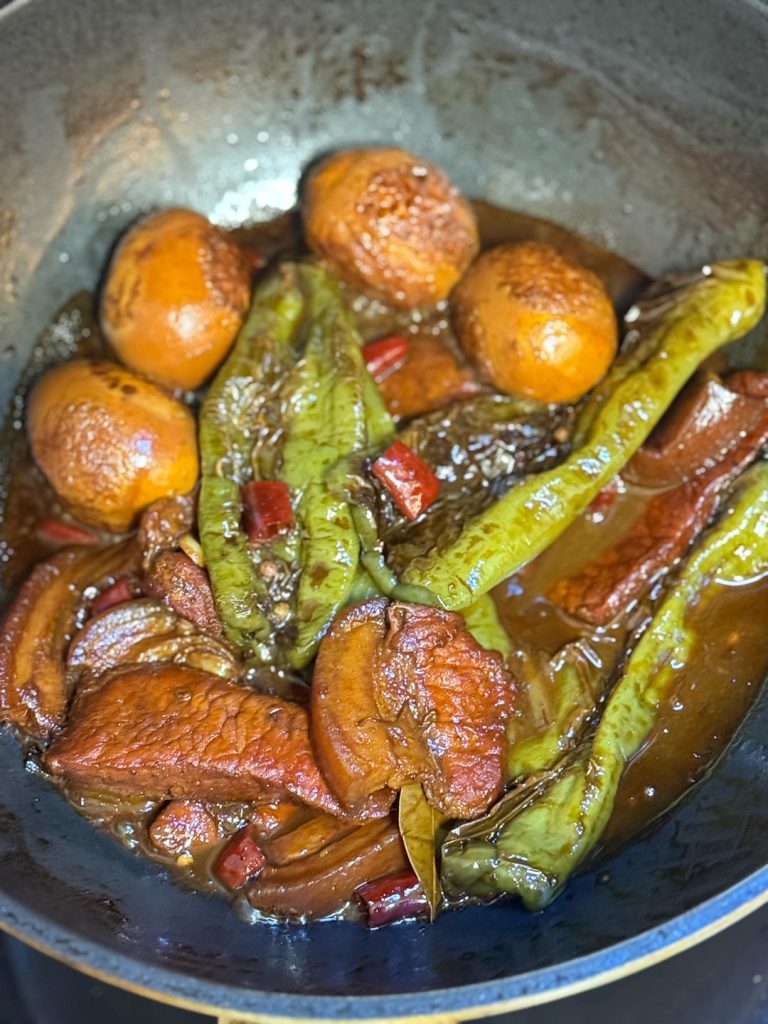
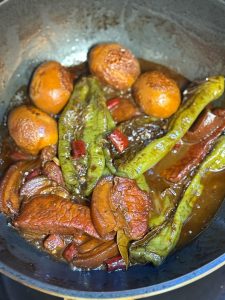
Finally, turn the heat up to high. Let the sauce boil and reduce, stirring occasionally, until it thickens into a glossy, dark gravy that coats the pork.
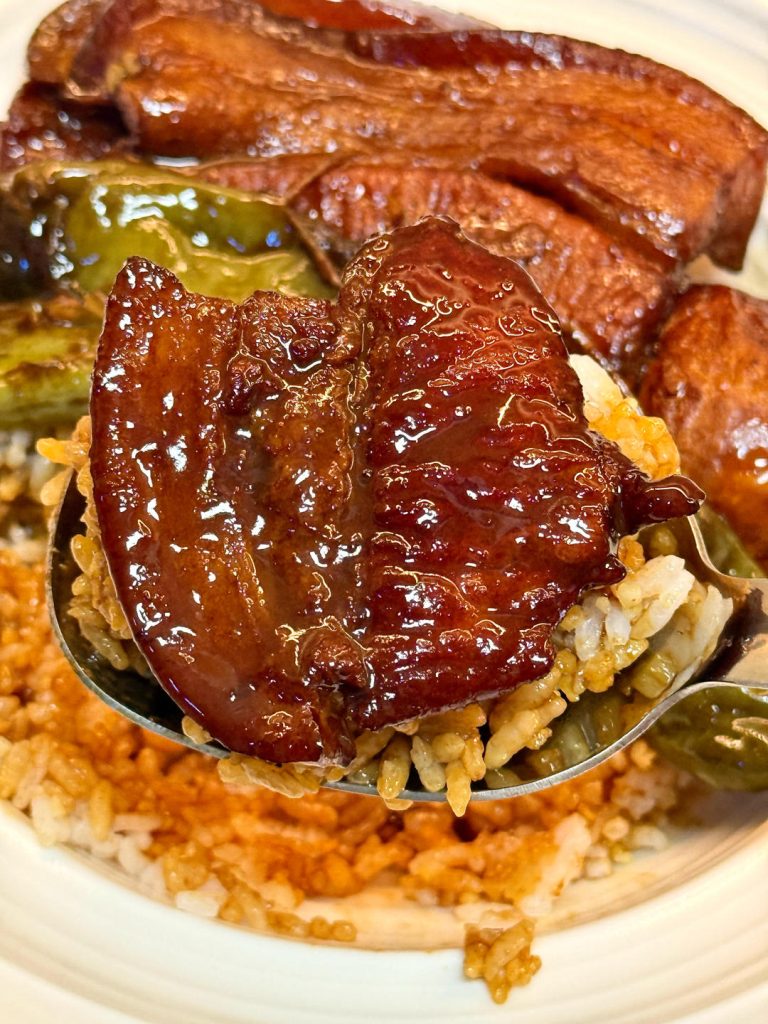
CRITICAL TIP: Do not reduce the sauce all the way! The final recipe instruction says, “remember to leave plenty of sauce.” This sauce is liquid gold for your rice. You want it thick, but you want plenty of it.
💡 Tips for Success
- Cut the Pork THICK: I cannot stress this enough. Thinly sliced pork belly will become dry and tough. You need 1-inch (2.5 cm) thick pieces for the fat to render properly and the meat to braise to tenderness.
- Don’t Fear the Fat: The fat is the point of this dish. When braised this long, it doesn’t taste greasy; it tastes creamy and rich, like pork-flavored butter.
- Be Patient with the Braise: Don’t rush the 50-minute simmer. This is where the magic happens. If you check it and it’s not tender, give it another 10-15 minutes.
- Sauce is Gold: I’ll say it again: do not over-reduce the sauce at the end. When you’re serving, make sure everyone gets a big spoonful of sauce over their rice.
🚫 Common Mistakes When Making Braised Pork Belly
Even though Bazi Rou is a homestyle dish, there are a few common pitfalls that can keep it from reaching that truly melt-in-your-mouth texture. Avoid these mistakes, and you’ll get restaurant-quality results every time.
1. Starting with a Hot Pan
One of the biggest mistakes is adding pork belly to a preheated pan. Always start the pork in a cold, dry pot. This allows the fat to render out slowly and evenly before the meat browns, preventing scorching and excessive greasiness later on.
2. Cutting the Pork Too Thin
Thin slices cook faster, but they won’t braise properly. Pork belly must be cut into thick, 1-inch (2.5 cm) pieces so the fat can fully render and the connective tissue has time to break down. Thin cuts tend to dry out and lose that signature creamy texture.
3. Boiling Instead of Gently Simmering
A hard, rolling boil is the enemy of tender braised pork. Aggressive heat tightens the meat fibers and can make the pork feel firm or rubbery. Once the liquid comes to a boil, always reduce the heat to maintain a low, gentle simmer.
4. Rushing the Braise
Braised pork belly is not a dish to hurry. If the pork isn’t tender after 50 minutes, it simply needs more time. Low heat and patience are what transform pork belly into that soft, spoon-cut texture that defines a great Bazi Rou.
5. Reducing the Sauce Too Much at the End
It’s tempting to cook the sauce down until it’s very thick, but over-reducing can make it overly salty and leave you short on sauce. The final gravy should be glossy and slightly thickened—but still abundant. Remember, this is a true “rice-killing” dish, and the sauce is half the experience.
❓ Frequently Asked Questions (FAQ)
1. Can I make this non-alcoholic?
Yes. If you prefer not to use beer, you can replace it with an equal amount of low-sodium chicken broth, beef broth, or even just water. You may want to add 1 teaspoon of sugar and 1 teaspoon of rice vinegar to mimic the complexity.
2. My pork came out tough. What did I do wrong?
This usually means one of two things: it wasn’t braised for long enough, or the simmer was too aggressive (a rolling boil instead of a gentle bubble), which can seize up the meat. Just put the lid back on, ensure a low simmer, and give it another 20-30 minutes.
3. Can I use a different cut of pork, like pork shoulder?
You can, and it would be a delicious braised pork dish, but it won’t be Bazi Rou. The unique, melting texture comes from the specific layers of fat, skin, and meat in pork belly. Pork shoulder will give you a more stringy, “pulled” texture.
🍚 How to Serve and Store
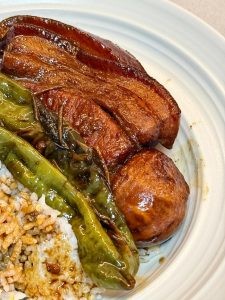
Serving: This dish demands a big bowl of fluffy, steamed white rice. It is the perfect vessel for the rich sauce.
- For a balanced meal, I love serving this with a simple, garlicky green vegetable, like Chinese Stir-fried Lettuce with Garlic.
- If you’re making a multi-course meal, a light, cleansing soup like Easy Seaweed Egg Drop Soup would be a perfect starter to balance the richness of the pork.
Storing: Like many braises, Bazi Rou tastes even better the next day. The flavors meld, and the sauce gets even richer.
- Store leftovers in an airtight container in the refrigerator for up to 4 days.
- Reheat gently in a pot over low heat, or in the microwave. The sauce may have gelled (that’s a good sign!), and it will melt as it warms.
🩺 Food Safety and Preparation
- Always handle raw pork safely. Wash your hands, cutting boards, and utensils with hot, soapy water after they come into contact with raw meat.
- When reheating leftovers, ensure the dish reaches an internal temperature of 165°F (74°C) to be safe.
- Allergen Note: This recipe contains wheat (soy sauce, sweet bean sauce, beer), soy, and shellfish (oyster sauce). Use gluten-free tamari, gluten-free oyster sauce, and gluten-free beer for a GF-adaptable version.
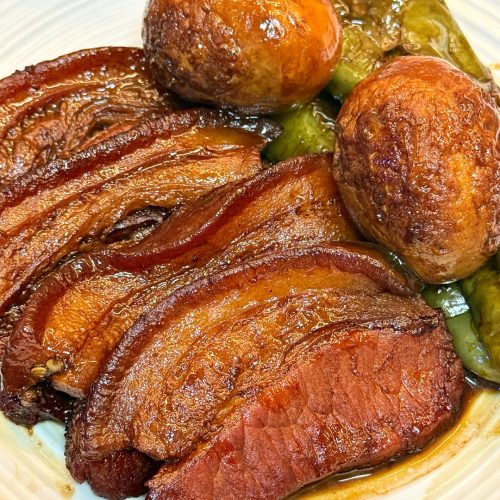
Homestyle Braised Pork Belly (Bazi Rou 把子肉)

Equipment
- Large Wok or Dutch Oven (heavy-bottomed pot)
- Slotted Spoon
- Measuring Spoons and Cups
Ingredients
Main Ingredients
- 1.5 lbs pork belly, skin-on, cut into 1-inch thick slices (approx 700g)
- 4 green bell peppers, cut into large chunks
- 4 hard-boiled eggs, peeled
- 0.5 bottle lager beer (about 1.5 cups / 350ml)
- Water, as needed (about 1-2 cups)
Sauce
- 3 tbsp light soy sauce (e.g., Kikkoman or Pearl River Bridge)
- 1 tbsp dark soy sauce
- 1 tbsp oyster sauce
- 1 tbsp sweet bean sauce (甜面酱) (see notes for subs)
Aromatics
- 2 star anise
- 1 small cinnamon stick (or a small piece of cassia bark)
- 3 bay leaves
- 1 tsp Sichuan peppercorns (optional, but adds fragrance)
- 4-5 dried red chilies (optional, for mild warmth)
- 3 slices ginger
- 1 whole garlic clove, smashed
- 3 scallions, white parts only, cut into 2-inch lengths
Instructions
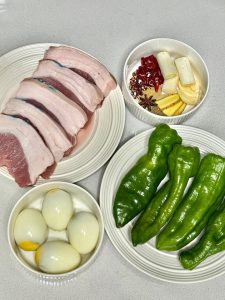
- Prep: Have all your ingredients prepped and ready: pork sliced, eggs peeled, peppers chunked, aromatics and sauces measured.

- Sear Pork: Place the pork belly slices in a cold, dry wok or Dutch oven. Turn the heat to medium and cook, turning, until golden brown and the fat has rendered (5-7 minutes). Remove pork with a slotted spoon, leaving the fat in the pot.
- Fry Eggs & Peppers: Add the peeled hard-boiled eggs and green pepper chunks to the hot pork fat. Fry on medium-high heat, moving them around until the eggs are golden and blistered ("tiger skin") and the peppers are lightly charred (3-4 minutes). Remove and set aside.
- Fry Aromatics: Leave ~1 tbsp of fat in the pot. Add all the aromatics (star anise, cinnamon, bay leaves, peppercorns, chilies, ginger, garlic, scallion whites). Stir-fry on medium heat for 30 seconds until very fragrant.
- Add Pork & Sauces: Return the seared pork to the pot. Add the light soy sauce, dark soy sauce, oyster sauce, and sweet bean sauce. Stir-fry for 1-2 minutes to coat the pork and caramelize the sauces.
- Braise: Add the fried eggs (but not the peppers yet). Pour in the beer and enough water to almost cover the pork. Bring to a boil, then reduce the heat to low, cover, and simmer for 50 minutes.
- Add Peppers: Uncover the pot, add the green peppers back in. Continue to simmer (uncovered) for another 10 minutes.
- Reduce Sauce: Turn the heat to high. Cook, stirring gently, to reduce the sauce until it’s a thick, glossy gravy that coats the pork (about 5-10 minutes). Crucially: Do not over-reduce! Leave plenty of sauce for the rice.
- Serve: Serve hot over steamed rice, spooning plenty of the extra sauce over everything.

Notes
- Sweet Bean Sauce: If you can’t find sweet bean sauce (甜面酱), you can substitute with 1 tbsp of Hoisin sauce, though the flavor will be slightly different (sweeter).
- Pork Belly: Do not use lean pork. The skin-on pork belly is essential for the “melt-in-your-mouth” texture.
- Sauce: This dish is meant to be saucy! The name “Bazi Rou” is often associated with “Gai Fan” (rice bowls), where the sauce is a key component. Don’t be afraid to leave it saucy.




Leave a Reply