Growing up in my family’s kitchen in Sichuan, breakfast was a serious affair. While steamed buns were a staple, the days my dad made Xian Bing (鲜肉发面馅饼) were always a celebration. There is something magical about biting into a golden, crispy crust and hitting a pillow-soft dough that instantly gives way to a savory, juice-filled pork center.

Unlike the “Chinese Meat Pie” recipes that use a chewier dumpling-style dough, this version uses a leavened (yeast) dough. However, the secret weapon here is the hydration. This is an 80% hydration dough—meaning for every 100g of flour, we use 80g of water.
Why does high hydration matter?
- No Kneading Required: The dough is so wet it mixes in minutes with chopsticks. No stand mixer or elbow grease needed.
- Texture: It creates an incredibly airy, fluffy interior that contrasts perfectly with the pan-fried crust.
- Forgiveness: Because the dough is soft, it stretches easily without tearing when you wrap the filling.
I have tested this recipe multiple times to ensure the ratios work for home kitchens. It bridges the gap between a pan-fried dumpling and a fluffy bun, giving you the best of both worlds.
What is Xian Bing (Chinese Meat Pie)?
Xian Bing (馅饼) literally translates to “stuffed savory cake/pie.” While there are many regional variations, this specific version is a “Fa Mian” (发面) type, meaning it uses yeast. It is a popular street food and breakfast item across China.
Think of it as a savory doughnut filled with a meatball that releases its own soup as it cooks. It pairs beautifully with a bowl of Hot and Sour Soup or simple soy milk.
Why This Recipe Works
- High Moisture Dough: By using warm water and skipping the kneading, we allow the gluten to develop passively during fermentation. This results in a tender crumb that stays soft even after cooling.
- Baking Powder Boost: We add a touch of baking powder alongside the yeast. This gives the dough an extra “puff” when it hits the hot pan, ensuring the wrapper doesn’t taste dense or doughy.
- Flavor-Locking Filling: We mix the pork filling separately and chill it. This helps the fat solidify slightly, making it easier to wrap and ensuring the juices release inside the pie while cooking, not on your counter.
Key Ingredients & Substitutions
The “Liquid” Dough
- All-Purpose Flour: Standard AP flour (approx. 10-11% protein) works best here. You don’t need fancy bread flour.
- Instant Yeast: Look for “Instant” or “Rapid Rise” yeast designated for low-sugar doughs if possible, but standard Red Star or Fleischmann’s works perfectly.
- Warm Water: It should be roughly 100°F (38°C)—warm to the touch but not hot.
- Baking Powder: Use aluminum-free baking powder for the cleanest flavor.
The Juicy Pork Filling
- Pork Belly or Fatty Ground Pork: To replicate the authentic juiciness, I highly recommend grinding your own pork belly (skin removed). If buying store-bought ground pork, look for 80/20 or 70/30 fat content. Lean pork will result in a dry filling.
- Dark Soy Sauce: This provides that rich, caramel color. If you don’t have it, substitute with more light soy sauce and a pinch of brown sugar, though the color will be lighter.
- Chinese Thirteen Spice (13-Xiang): A complex spice blend found in Asian markets.
- Substitute: You can use Five Spice Powder mixed with a tiny pinch of white pepper.
- Chicken Juice/Concentrate: The original recipe calls for “Chicken Juice” (鸡汁). In the West, Better Than Bouillon (Chicken) or a concentrated chicken stock cube dissolved in a teaspoon of water is the perfect substitute.
- Scallions (Green Onions): We use a generous amount (80g). Use the white and light green parts for the best oniony punch.
Recipe Notes Before You Begin
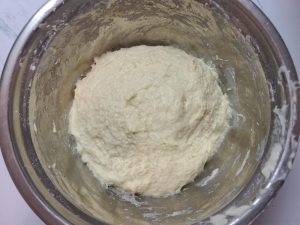
- The Dough Will Be Sticky: Do not panic. This dough is supposed to look like a thick, sticky batter. Do not add more flour during mixing. The secret to handling it is Oil.
- Oil Your Hands (Gloves Recommended): I cannot stress this enough. When handling this dough, you must generously oil your hands or wear disposable food-safe gloves coated in oil. This makes the sticky dough manageable.
- Prep the Filling First: I recommend making the filling first and putting it in the fridge while the dough rises. Cold filling is firmer and easier to wrap.
How to Make No-Knead Chinese Meat Pies
Step 1: Prepare the Juicy Filling
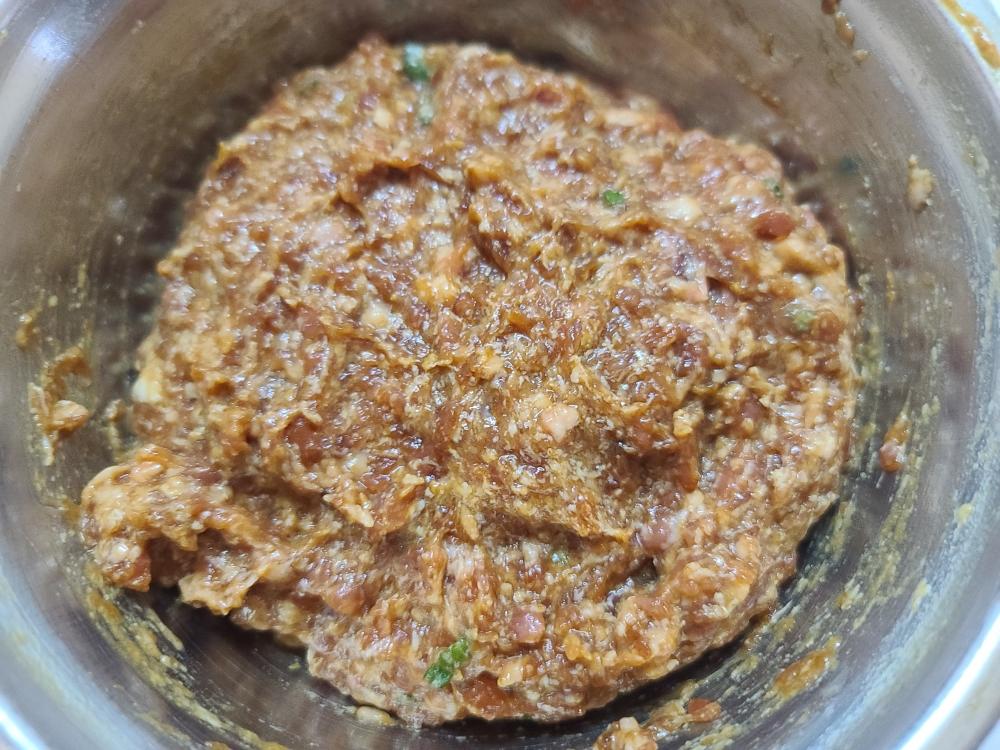
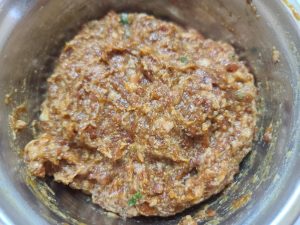
- In a large bowl, combine the ground pork (or minced pork belly) with the light soy sauce, dark soy sauce, oyster sauce, salt, chicken essence (optional), 13-spice powder, and chicken stock concentrate.
- Stir vigorously in one direction until the mixture becomes sticky and paste-like. This develops the protein myosin, which helps the filling hold together.
- Stir in the sesame oil and vegetable oil to lock in the moisture. Finally, fold in the chopped scallions.
- Cover and refrigerate. Why? Cold fat is solid, making the filling easier to scoop and wrap later.
Step 2: Mix the Dough
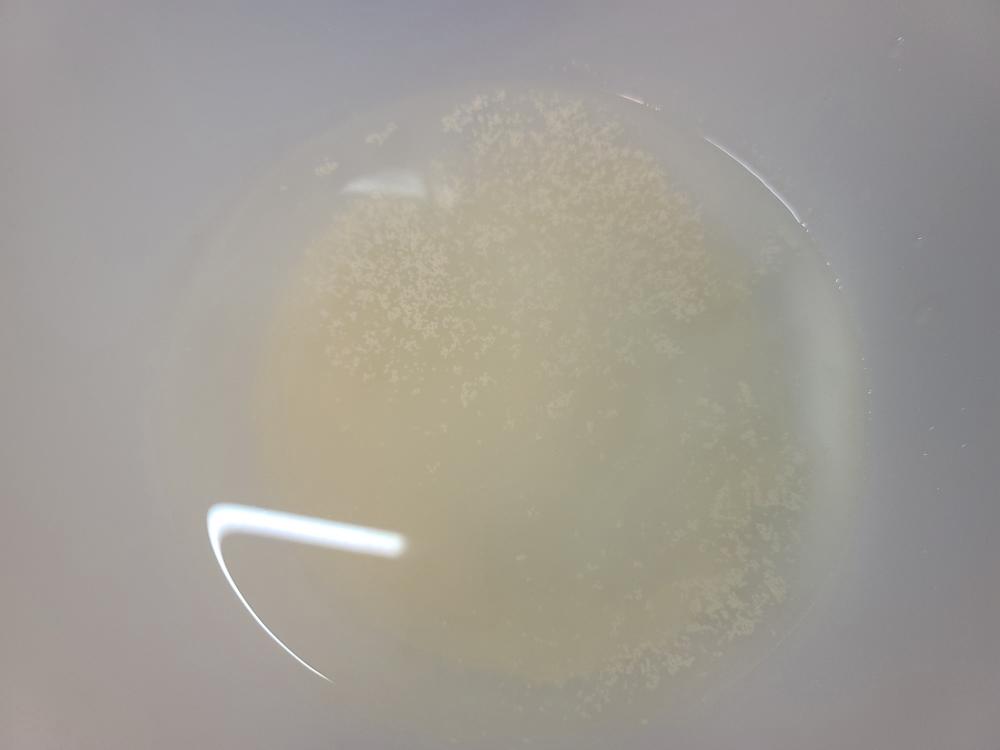
- In a bowl of warm water (400g), dissolve the sugar and instant yeast. Let it sit for a minute to activate.
- In a large mixing bowl, combine the flour (500g) and baking powder.
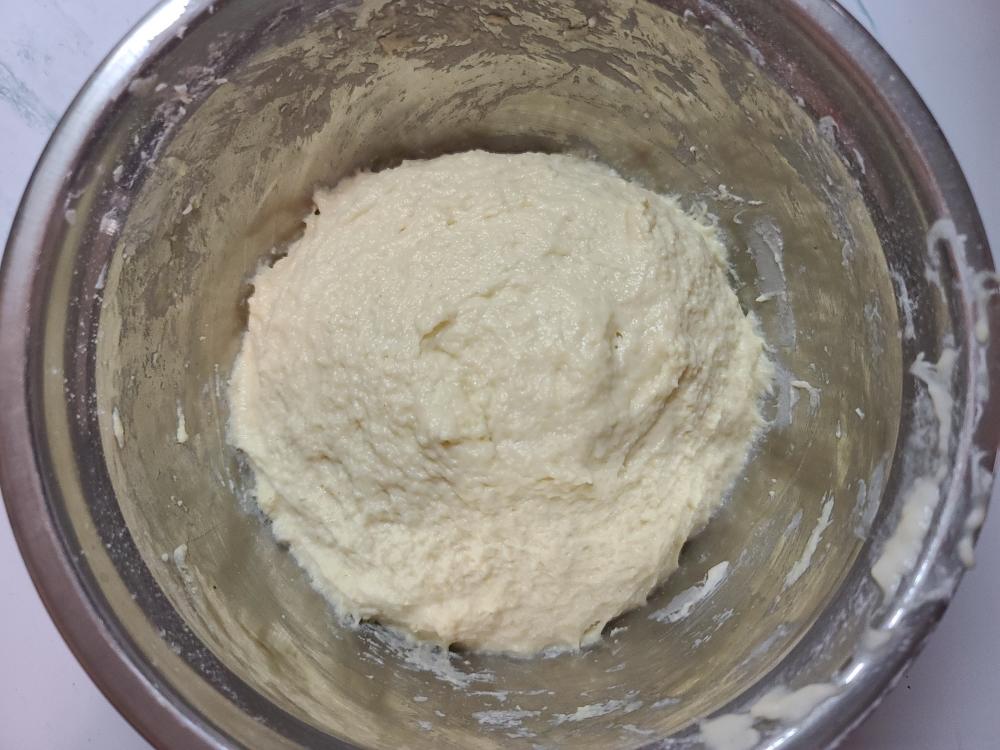
- Pour the yeast water into the flour. Using sturdy chopsticks or a spatula, stir until no dry flour remains. This should take about 1-2 minutes. The dough will look shaggy and very wet. Do not knead.
Step 3: Proofing
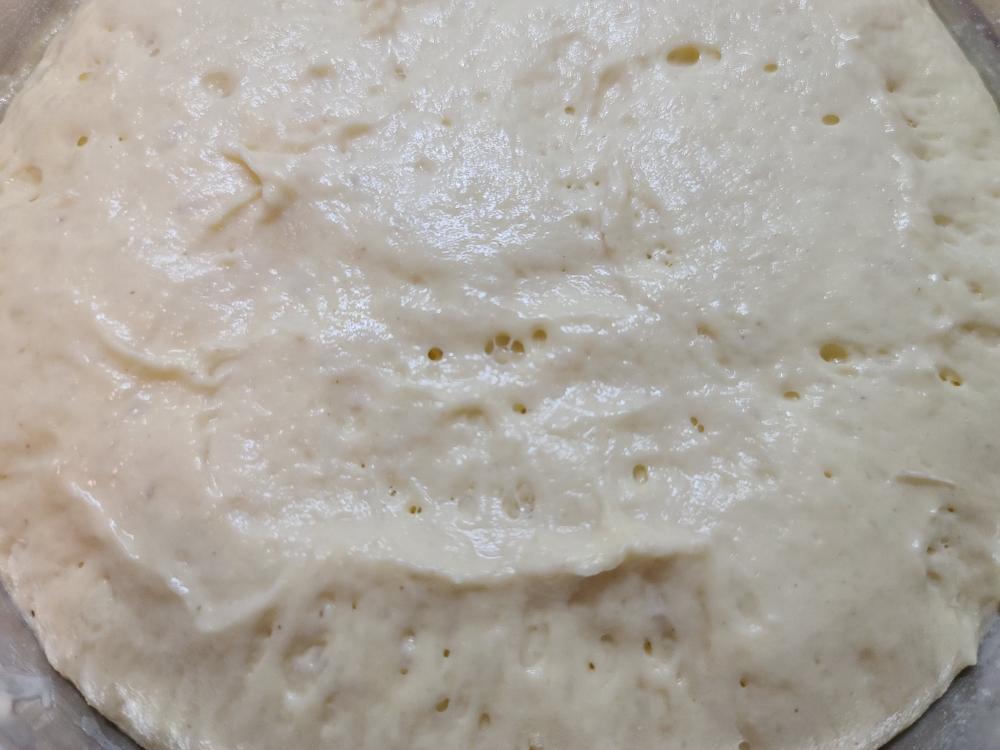
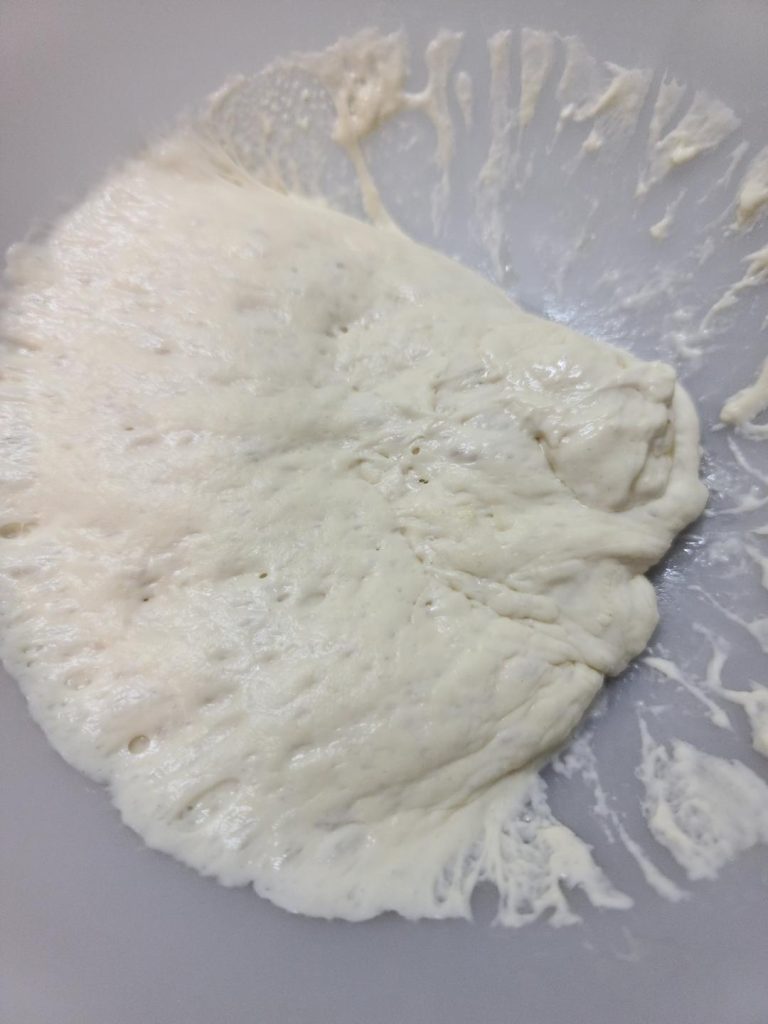
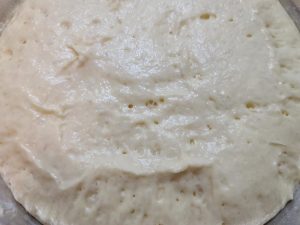
- Cover the bowl with plastic wrap or a damp towel. Let it rest in a warm place until it has tripled in size.
- Visual Cue: The top should be filled with bubbles and look like a honeycomb structure inside. If it hasn’t risen enough, the pies won’t be fluffy. Be patient!
Step 4: Assemble (The Oil Technique)
- Generously oil your work surface and your hands.
- Do not punch down the dough or knead it. We want to keep those air bubbles!
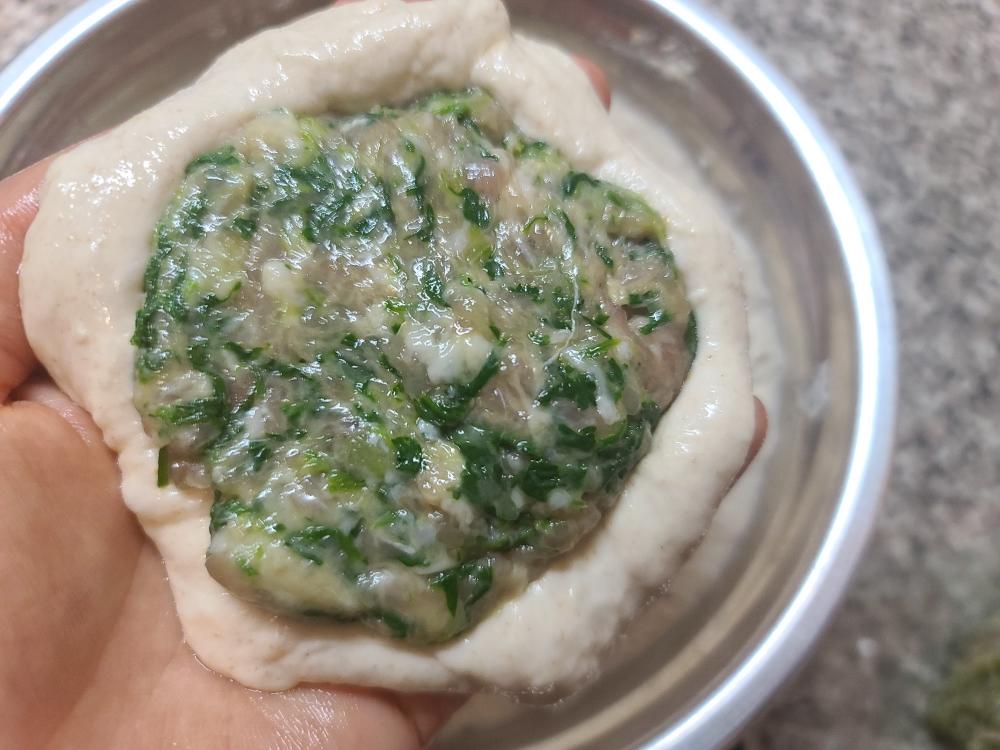
- Pinch off a piece of dough (about 90g for a large pie). Because the dough is oily and stretchy, you can simply flatten it in your palm—no rolling pin needed.
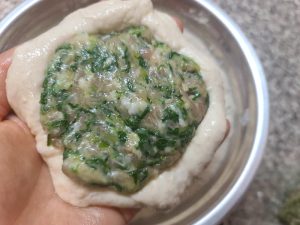
- Place a generous scoop of the pork filling (approx. 65-70g) in the center.
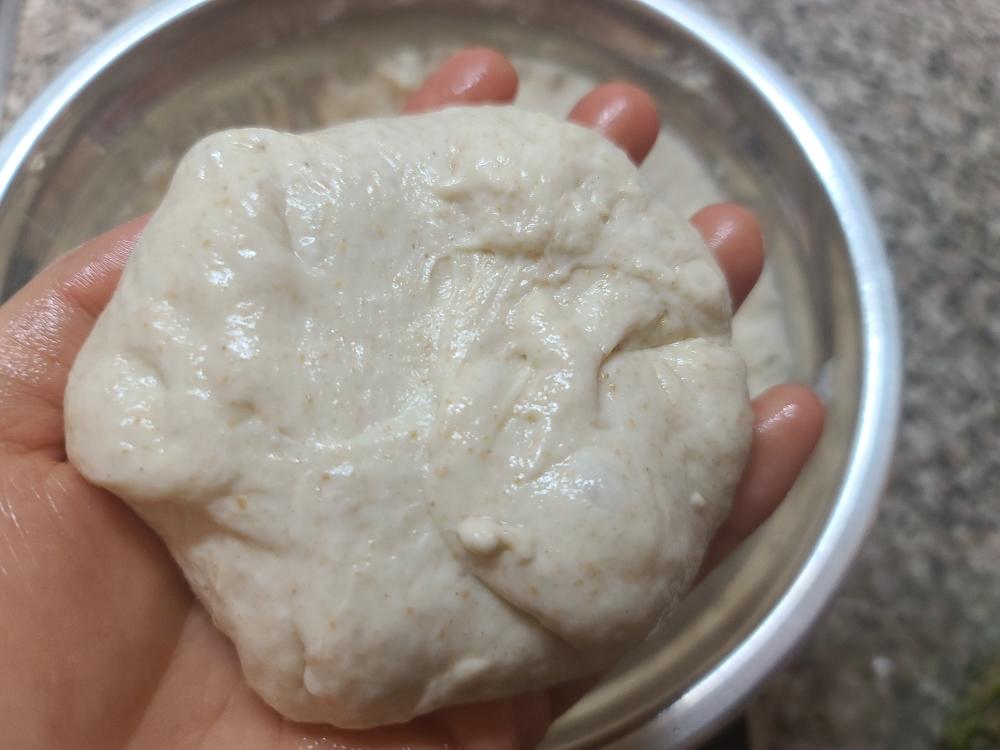
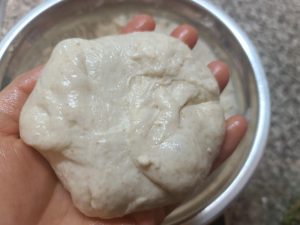
- The Pull-and-Pleat: Gently pull the edges of the dough up and over the filling, gathering them in the center. Pinch to seal tightly. The dough is very stretchy, so this is easier than it looks.
- Place the sealed pie, seam-side down, on your oiled work surface. Repeat for remaining dough.
Step 5: Pan-Fry to Crispy Perfection
- Preheat a cast-iron skillet or electric griddle over medium-low heat. Add a generous amount of oil (more than you would for a stir-fry).
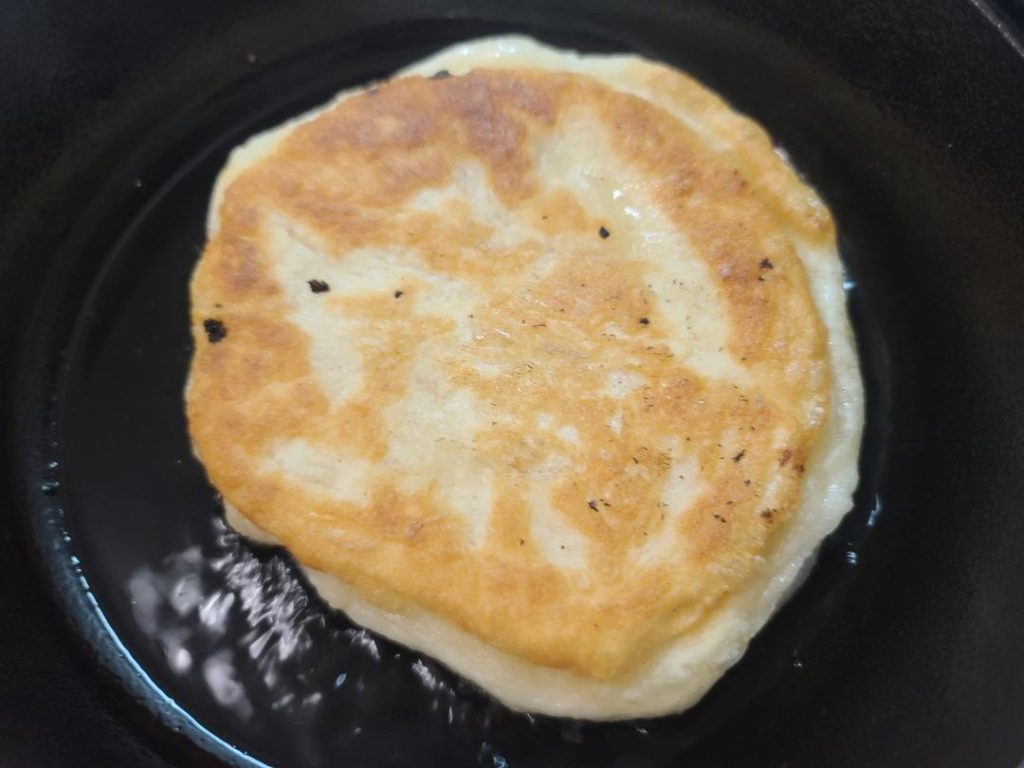
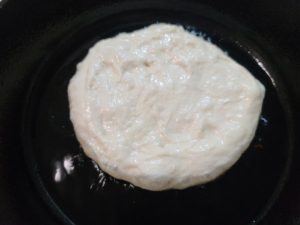
- Place the pies into the pan. Using your oiled fingers, gently press them flat to increase the surface area.
- Cover the pan with a lid (this helps the dough cook through and the cheese melt/meat cook). Fry for about 3 minutes or until the bottom is golden brown.
- Flip the pies. Fry the other side (uncovered is fine now) for another 3 minutes until golden and crispy.
- Safety Check: Ensure the internal temperature of the pork reaches 160°F (71°C). You can check with an instant-read thermometer.
Serving Suggestions
These meat pies are a meal in themselves, but to create a balanced Chinese table, I recommend serving them with:
- A refreshing, acidic side like Smashed Cucumber Salad.
- A warming bowl of Tomato Egg Drop Soup.
- For a dipping sauce (though not strictly necessary), mix black vinegar with fresh ginger slivers.
Troubleshooting & FAQ
Q: My dough is an impossible sticky mess!
A: This is normal! You likely didn’t use enough oil on your hands. Wash your hands, dry them, coat them thoroughly in vegetable oil, and try again. Do not add more flour, or the pies will become tough.
Q: Can I use a different filling?
A: Absolutely. While this recipe uses pork, you can use beef, or a mixture of egg and chive. If you like spicy food, try adding the filling from our Mapo Tofu (cooled down) for a spicy kick.
Q: How do I store leftovers?
A: These are best eaten fresh. However, you can store cooked pies in the fridge for 3 days. Reheat them in a toaster oven or air fryer to bring back the crispiness. Microwave reheating will make the crust soggy.
Nutrition Information (Per Pie):
- Calories: 380 kcal
- Carbohydrates: 38g
- Protein: 12g
- Fat: 20g
- Saturated Fat: 6g
- Cholesterol: 35mg
- Sodium: 450mg
- Potassium: 200mg
- Fiber: 1g
- Sugar: 2g
- Vitamin A: 100 IU
- Vitamin C: 2mg
- Calcium: 20mg
- Iron: 2mg
Recipe Notes:
Reheating: These pies are best eaten fresh but can be stored in the refrigerator for up to 3 days. To reheat, warm them in a toaster oven, air fryer, or dry skillet to restore the crispiness of the crust. Microwaving is not recommended as it will make the crust soggy..
The Dough Texture: This is an 80% hydration dough, meaning it is meant to be extremely soft and sticky (almost like a thick batter). Do not panic and do not add extra flour during the mixing or shaping process. The key to handling it is to generously oil your hands and work surface. This high moisture content is what creates the signature crispy-chewy crust and soft interior.
Filling Technique: When mixing the pork filling, it is vital to stir vigorously in one direction (clockwise or counter-clockwise) until the mixture becomes sticky and paste-like. This develops the protein structure (myosin), ensuring the filling holds together and traps the savory juices inside the pie.
Make-Ahead Tip: You can prepare the filling a day in advance. Chilling the filling helps the fats solidify, making it much easier to wrap.
Food Safety & Preparation Notes
- Pork Safety: Always ensure ground pork is cooked to an internal temperature of 160°F (71°C) as recommended by the USDA.
- Allergens: This recipe contains Wheat (Gluten), Soy, and Sesame.
- Yeast: Ensure your yeast is not expired. If it doesn’t bubble in the warm water, start over, or your dough will be flat and dense.
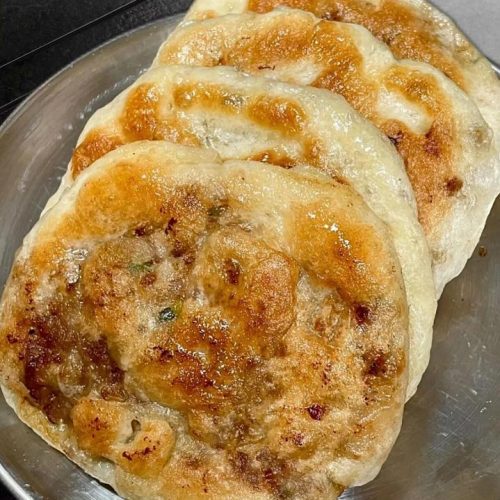
No-Knead Chinese Meat Pies (Xian Bing)

Equipment
- Cast Iron Skillet or Electric Griddle
- Mixing bowls
- Chopsticks or Spatula
Ingredients
The High-Hydration Dough
- 500 g all-purpose flour (approx. 3 3/4 cups)
- 5 g instant yeast (approx. 1 tsp)
- 10 g sugar (approx. 2 tsp)
- 400 g warm water (approx. 1 3/4 cups, roughly 100°F/38°C)
- 5 g baking powder (approx. 1 tsp)
The Juicy Pork Filling
- 500 g fatty ground pork or pork belly (approx. 1.1 lbs, skin removed)
- 20 g light soy sauce (approx. 1 1/2 tbsp)
- 5 g dark soy sauce (approx. 1 tsp)
- 10 g oyster sauce (approx. 2 tsp)
- 3 g salt (approx. 1/2 tsp)
- 10 g chicken stock concentrate (approx. 1-2 tsp, or Better Than Bouillon)
- 1 g Chinese 13-spice powder (approx. 1/4 tsp, or Five Spice)
- 30 g vegetable oil (approx. 2 tbsp, plus more for coating hands)
- 5 g sesame oil (approx. 1 tsp)
- 80 g scallions (approx. 1 cup, finely chopped)
Instructions
- Prepare the Filling: In a bowl, combine the ground pork, light soy sauce, dark soy sauce, oyster sauce, salt, chicken concentrate, and spices. Stir vigorously in one direction until the meat becomes sticky and paste-like.

- Stir in the vegetable oil and sesame oil to lock in moisture. Fold in the chopped scallions. Cover and refrigerate while you make the dough (cold filling is easier to wrap).
- Activate Yeast: In a bowl containing the 400g warm water, add the sugar and instant yeast. Stir and let sit for 1 minute.
- Mix Dough: In a large mixing bowl, whisk together the flour and baking powder. Pour in the yeast water mixture. Use chopsticks or a spatula to stir until no dry flour remains (approx 1-2 mins). The dough will be very wet and sticky. Do not knead.
- Ferment: Cover the bowl securely. Let it rise in a warm place until tripled in size. The dough should look full of bubbles and honeycomb-like inside.
- Assemble: Generously oil your hands and your work surface. Do not use flour. Gently pull a piece of dough (about 90g) without deflating it too much. Flatten it in your palm.
- Place a large scoop of filling (approx 65g) in the center. Pull the edges of the dough up and over the filling to the center, pinching tightly to seal. Place seam-side down on the oiled surface.
- Pan Fry: Preheat a skillet with a generous amount of oil over medium-low heat. Place the pies in the pan and gently press them flat with oiled fingers.
- Cover the pan and fry for about 3 minutes until the bottom is golden brown.
- Flip the pies. Fry uncovered for another 3 minutes or until golden on both sides and the pork is cooked through (internal temp 160°F).

Notes
The Dough Texture: This is an 80% hydration dough, meaning it is meant to be extremely soft and sticky. Do not add extra flour. The key to handling it is to generously oil your hands and work surface.
Filling Technique: When mixing the pork filling, stir vigorously in one direction until sticky. This develops the protein structure, keeping the juices inside.
Reheating: Reheat in a toaster oven or dry skillet to restore crispiness. Safety Reminders:
Internal Temperature: Ensure the pork filling reaches 160°F (71°C).
Hot Oil: Be careful when placing pies in the hot skillet to avoid splatter.
Allergens: Contains Wheat, Soy, and Sesame. Nutrition Disclaimer: Nutrition information is calculated using an ingredient database and should be considered an estimate.



Leave a Reply