There is a category of baking I call “afternoon cookies” — the ones you decide to make at 3 p.m. and are eating by 4. These yogurt cookies (酸奶饼干) sit right at the top of that list. They are crisp at the edge, faintly tender in the middle, and carry a clean lactic tang that keeps them from tasting flat the way butter-and-sugar cookies sometimes do.
The first time I made them I was skeptical. Yogurt in a cookie usually means cakey, and cakey is not what I want when I bite into something with a sugar crust. But the ratio here is smart: enough butter for snap, enough thick yogurt for flavor and a little chew, and just 5 grams of baking powder to lift them so they shatter instead of crunch dully.
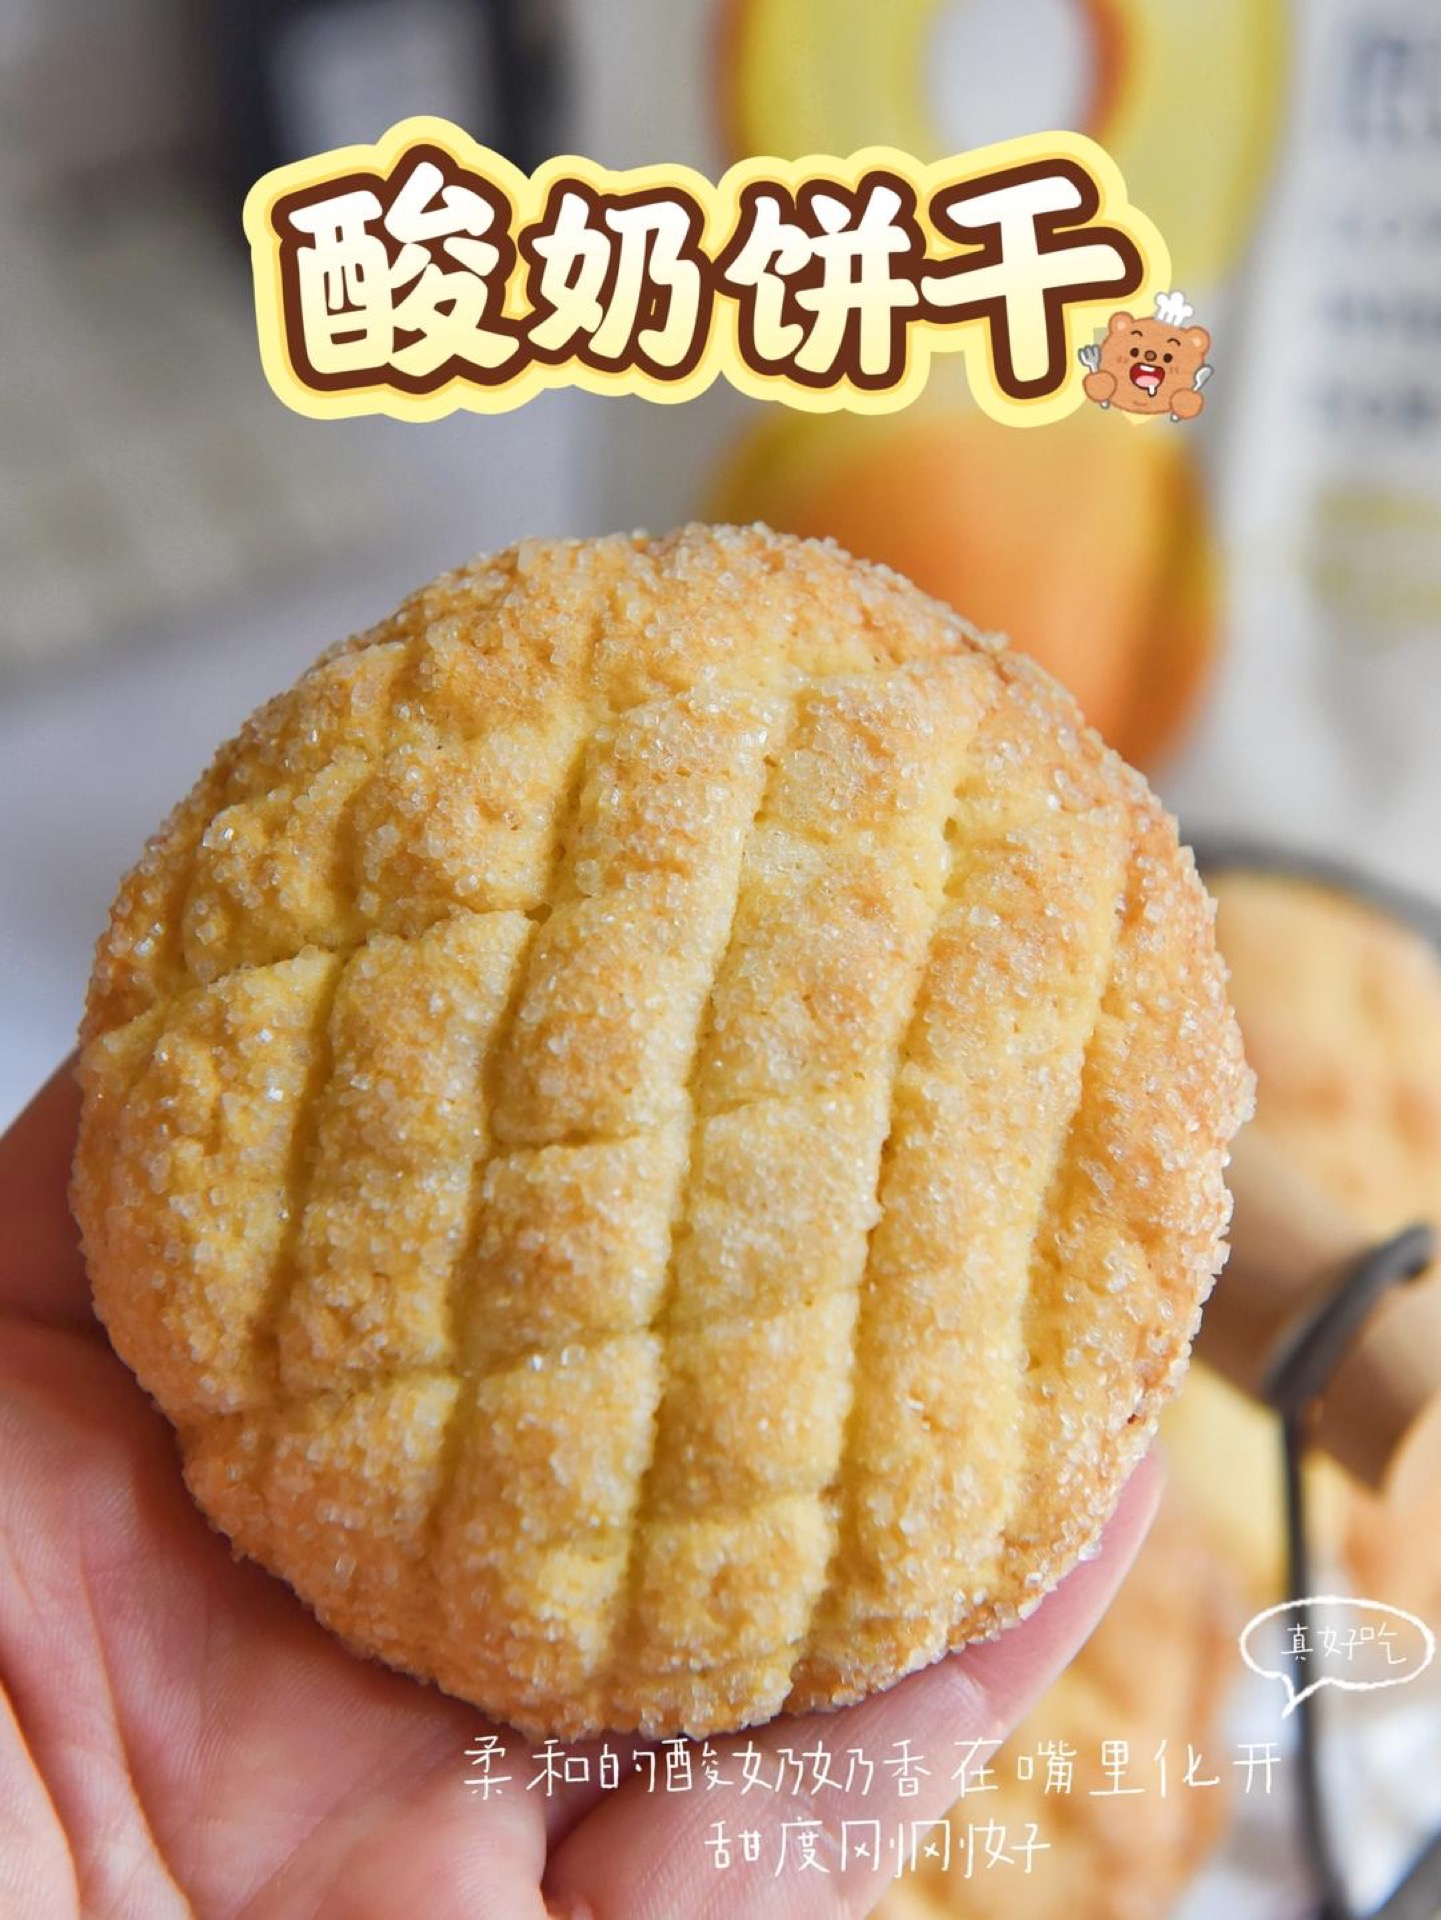
What Is 酸奶饼干?
酸奶饼干 translates literally as “yogurt biscuit” or “yogurt cookie.” In Chinese home baking, 饼干 covers everything from crisp tea biscuits to soft sandwich cookies, and this version belongs to the crisp, short, sugar-topped family. It is a modern home-baking recipe rather than a traditional one — the kind that spread through Chinese baking blogs and video channels because it needs almost nothing and works every time.
If you have ever struggled with cookies that spread into puddles or bake up tough, this is the recipe to reset your confidence. It is forgiving in a way that most cookie doughs are not.
What makes it distinctly Chinese-home-baking is the flour: 低筋小麦粉, low-protein cake flour, which keeps the crumb short and sandy rather than chewy. If you want more context on how flour choice changes texture, my notes on balancing salt, sweet, and acid apply to baking as much as to stir-frying.
Why This Recipe Works
- Thick yogurt, not runny. Greek-style or strained yogurt gives flavor without adding so much water that the dough turns sticky.
- Cake flour keeps it short. Low protein means less gluten development, so the cookies snap instead of toughen.
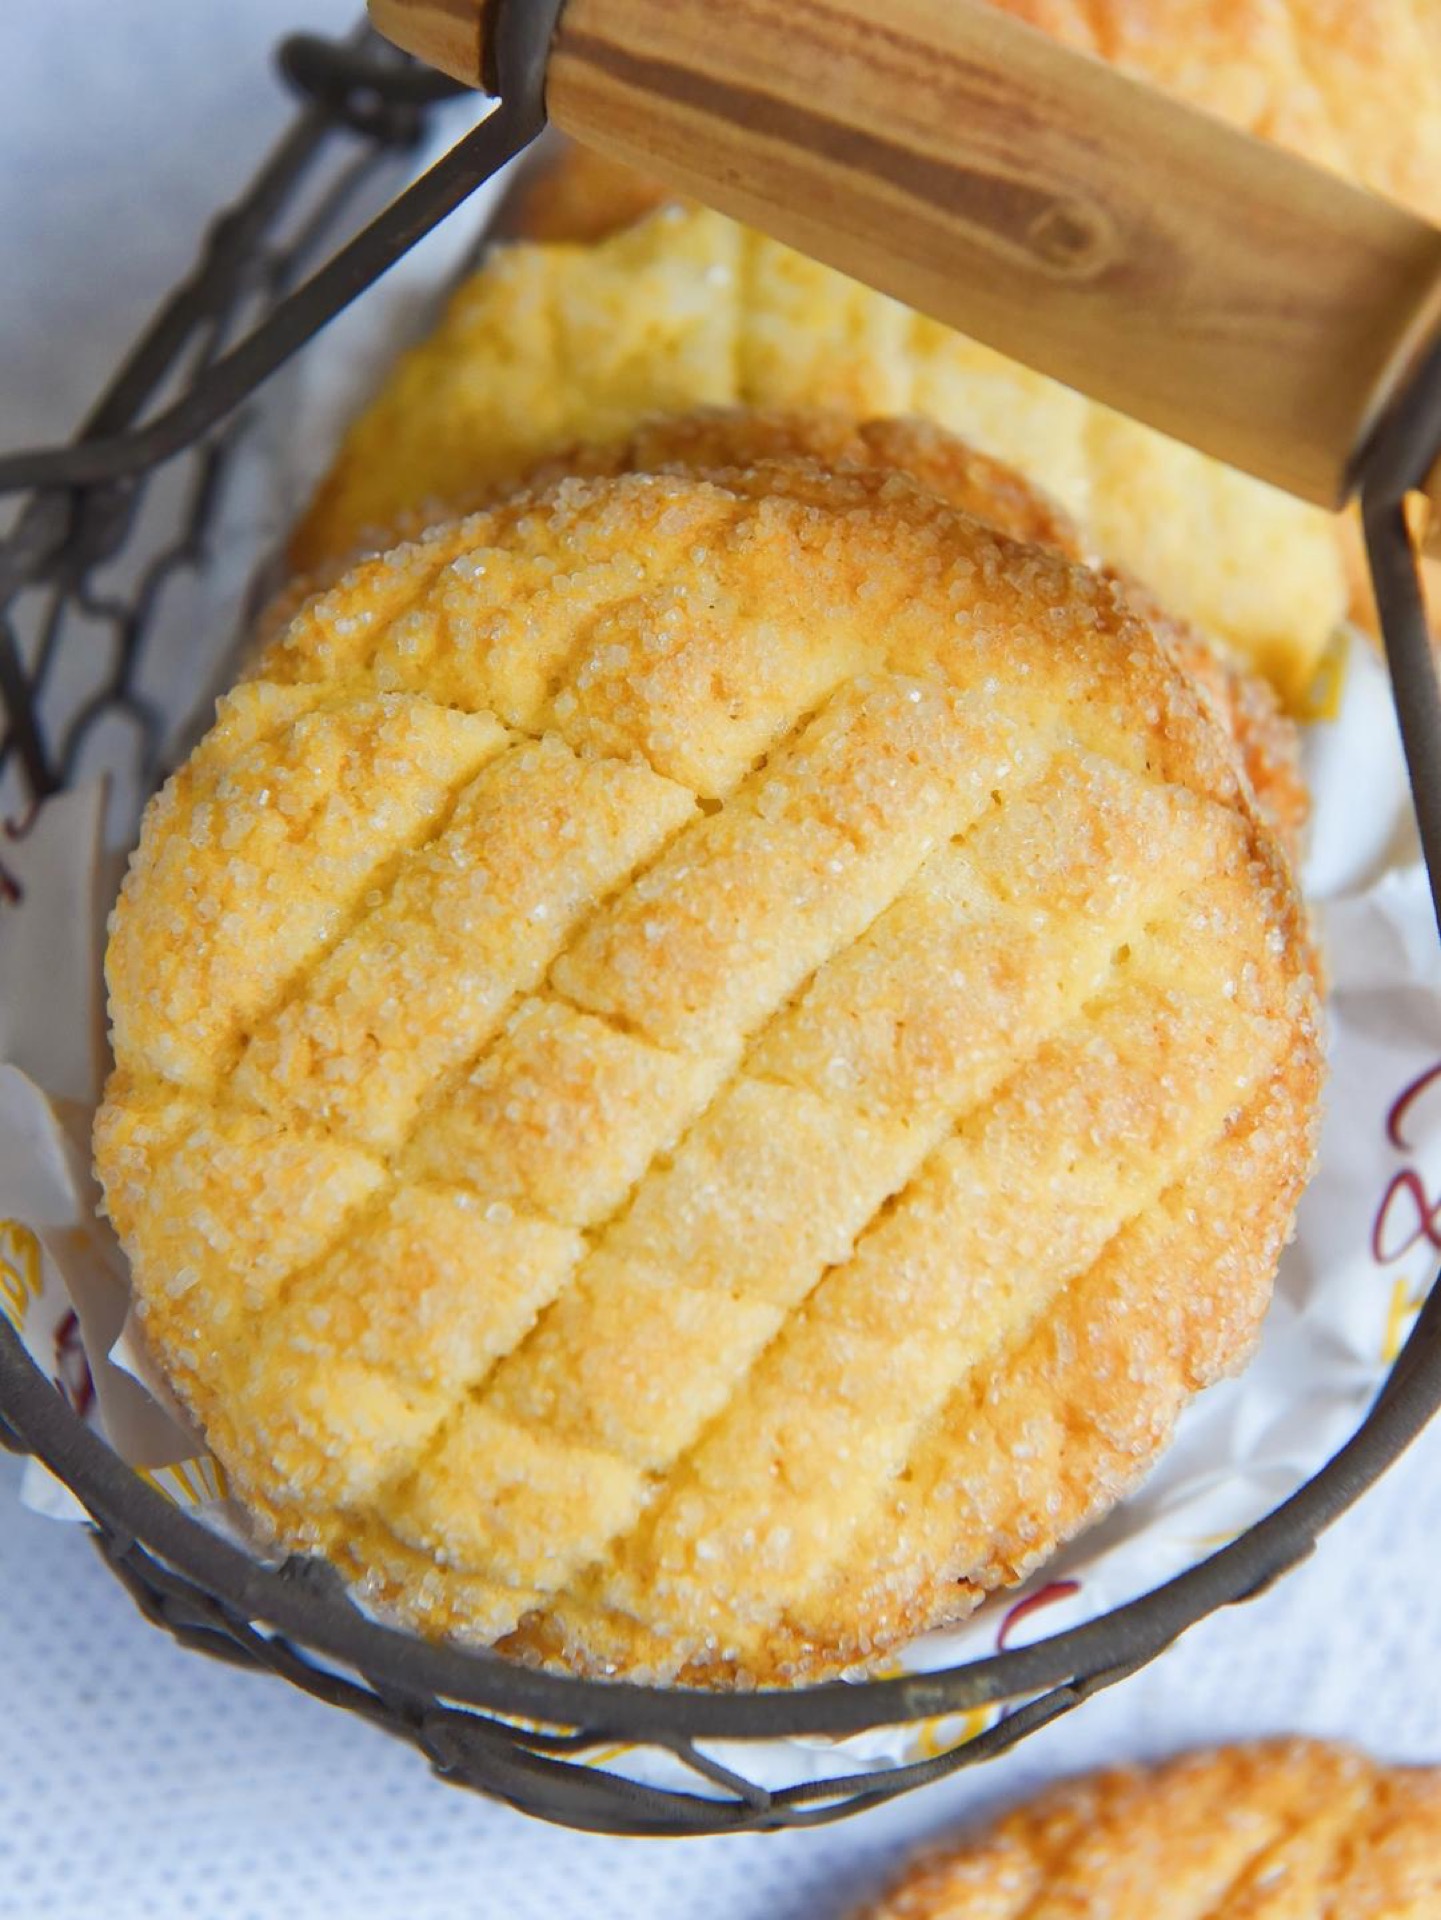
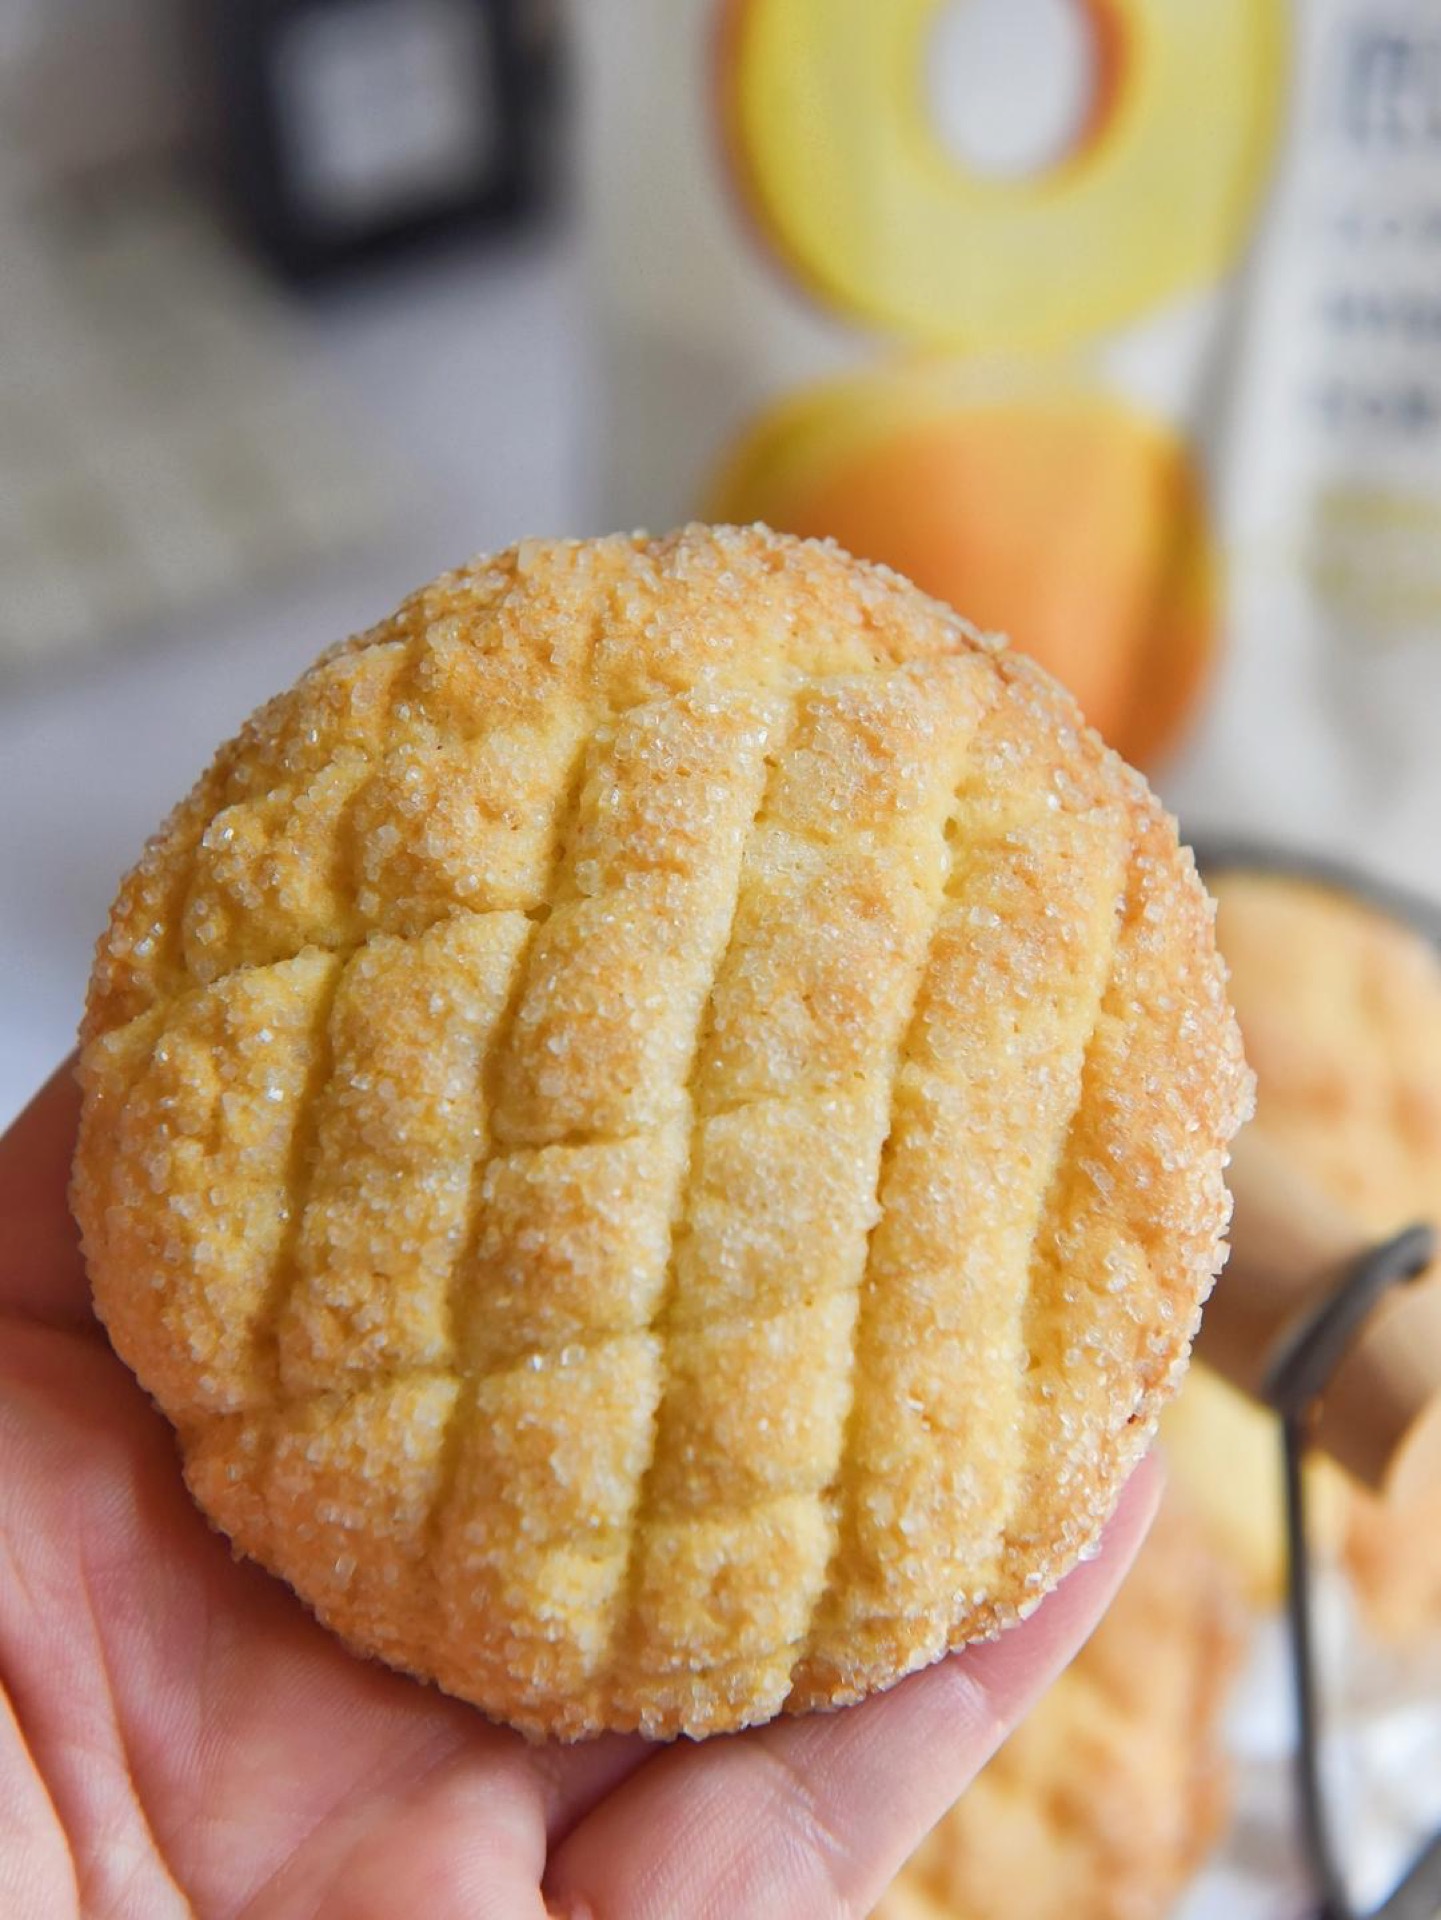
- Rolling in granulated sugar. This is the whole trick. The sugar melts slightly, then re-crystallizes into a glassy, crackly top.
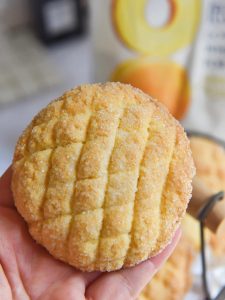
- Scoring the surface. Those lines are not just decoration — they give the cookie a place to expand and crack, which is where the shatter comes from.
- No chilling required. The dough is stiff enough to portion straight away, so the whole thing takes about half an hour.
Equipment Needed
- A digital kitchen scale — baking by weight here is genuinely easier than cups
- Two mixing bowls (one large, one small)
- A whisk or fork
- A silicone spatula or wooden spoon
- A baking sheet lined with parchment
- A fork, bench scraper, or small knife for scoring
- A wire rack for cooling
If you are building out a kitchen, my list of best kitchen tools covers the basics I actually reach for, and the same logic applies to baking gear.
Ingredients
- 1 large egg, at room temperature
- 120 g thick yogurt (Greek-style or strained plain yogurt)
- 100 g unsalted butter, softened — cultured butter if you can find it
- 70 g granulated sugar, plus extra for coating
- 300 g cake flour (低筋面粉 / low-protein flour)
- 5 g baking powder
Ingredient Notes
Yogurt. This is the single most important choice. If your yogurt pours, the dough will be slack and the cookies will spread. Strain regular yogurt through a coffee filter for an hour if that is all you have. Full-fat yogurt tastes better here than low-fat.
Butter. Cultured or fermented butter (发酵黄油) has a faint tang that echoes the yogurt and makes the cookie taste more layered. Regular unsalted butter works fine — just do not use margarine, which bakes up greasy.
Flour. Cake flour is the target. All-purpose will work in a pinch but the cookies will be slightly chewier and less sandy. Do not substitute bread flour.
Sugar. The 70 g in the dough is a moderate sweetness — these are not dessert-sweet cookies. Keep the extra sugar for coating coarse; fine sugar dissolves too fast and loses the crackle.
Baking powder. Check the date. Old baking powder is the most common reason these come out flat and hard. If you are unsure, a quick reference on building flavor from scratch is a good reminder that fresh ingredients matter everywhere.
Prep & Mise en Place
Pull the egg and butter out about an hour ahead. Room-temperature butter creams smoothly; cold butter leaves lumps that bake into greasy pockets. Weigh everything before you start — this recipe moves fast once the mixing begins, and you do not want to be hunting for the baking powder with butter on your hands.
Line your baking sheet with parchment and preheat the oven to 160–170°C (320–340°F). I use 165°C (330°F) in my oven, which runs slightly hot. If yours runs true, go 170°C. Put a shallow dish of coarse sugar next to your work surface.
Honest caveat: these cookies go from pale to over-baked quickly because they are thin and low in fat relative to a shortbread. Stay in the kitchen for the last five minutes.
Cooking Process
Step 1: Gather and Weigh Everything
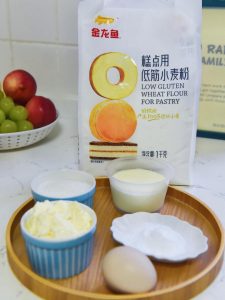
Set out one room-temperature egg, 120 g of thick yogurt, 100 g of softened butter (cultured if you have it), 70 g of granulated sugar, 300 g of cake flour, and 5 g of baking powder. Weighing rather than scooping makes a real difference here, especially with the flour.
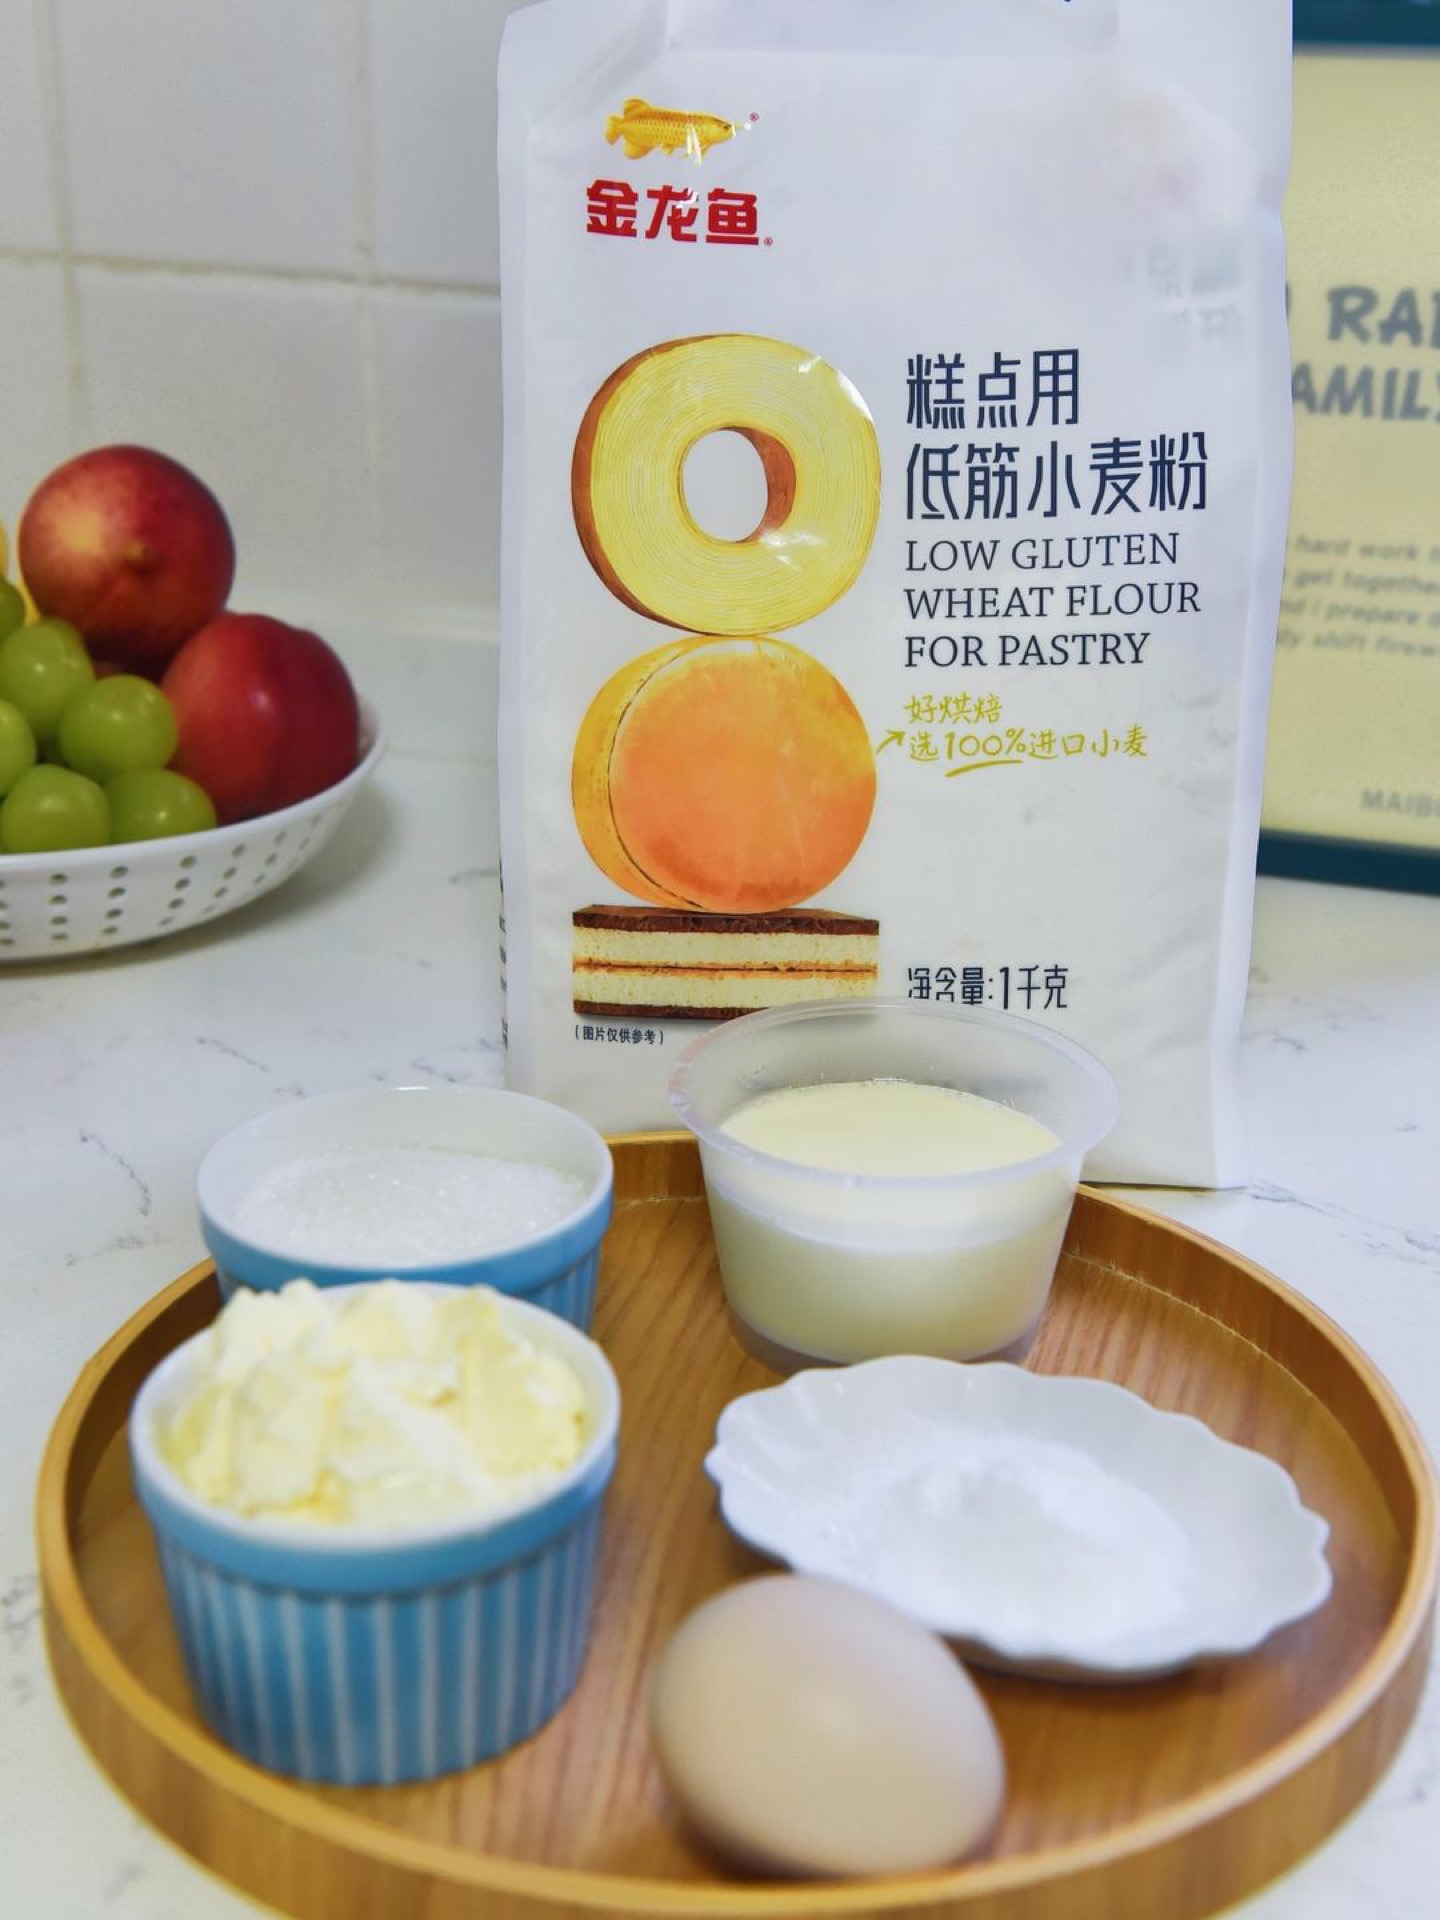
Step 2: Whisk the Wet Ingredients
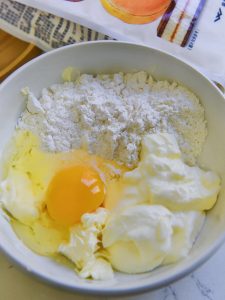
In a large bowl, whisk the egg, yogurt, butter, and sugar together until smooth and slightly pale. You are not trying to whip air in — just get a uniform, glossy mixture with no streaks of butter. It should look like a loose, creamy batter.
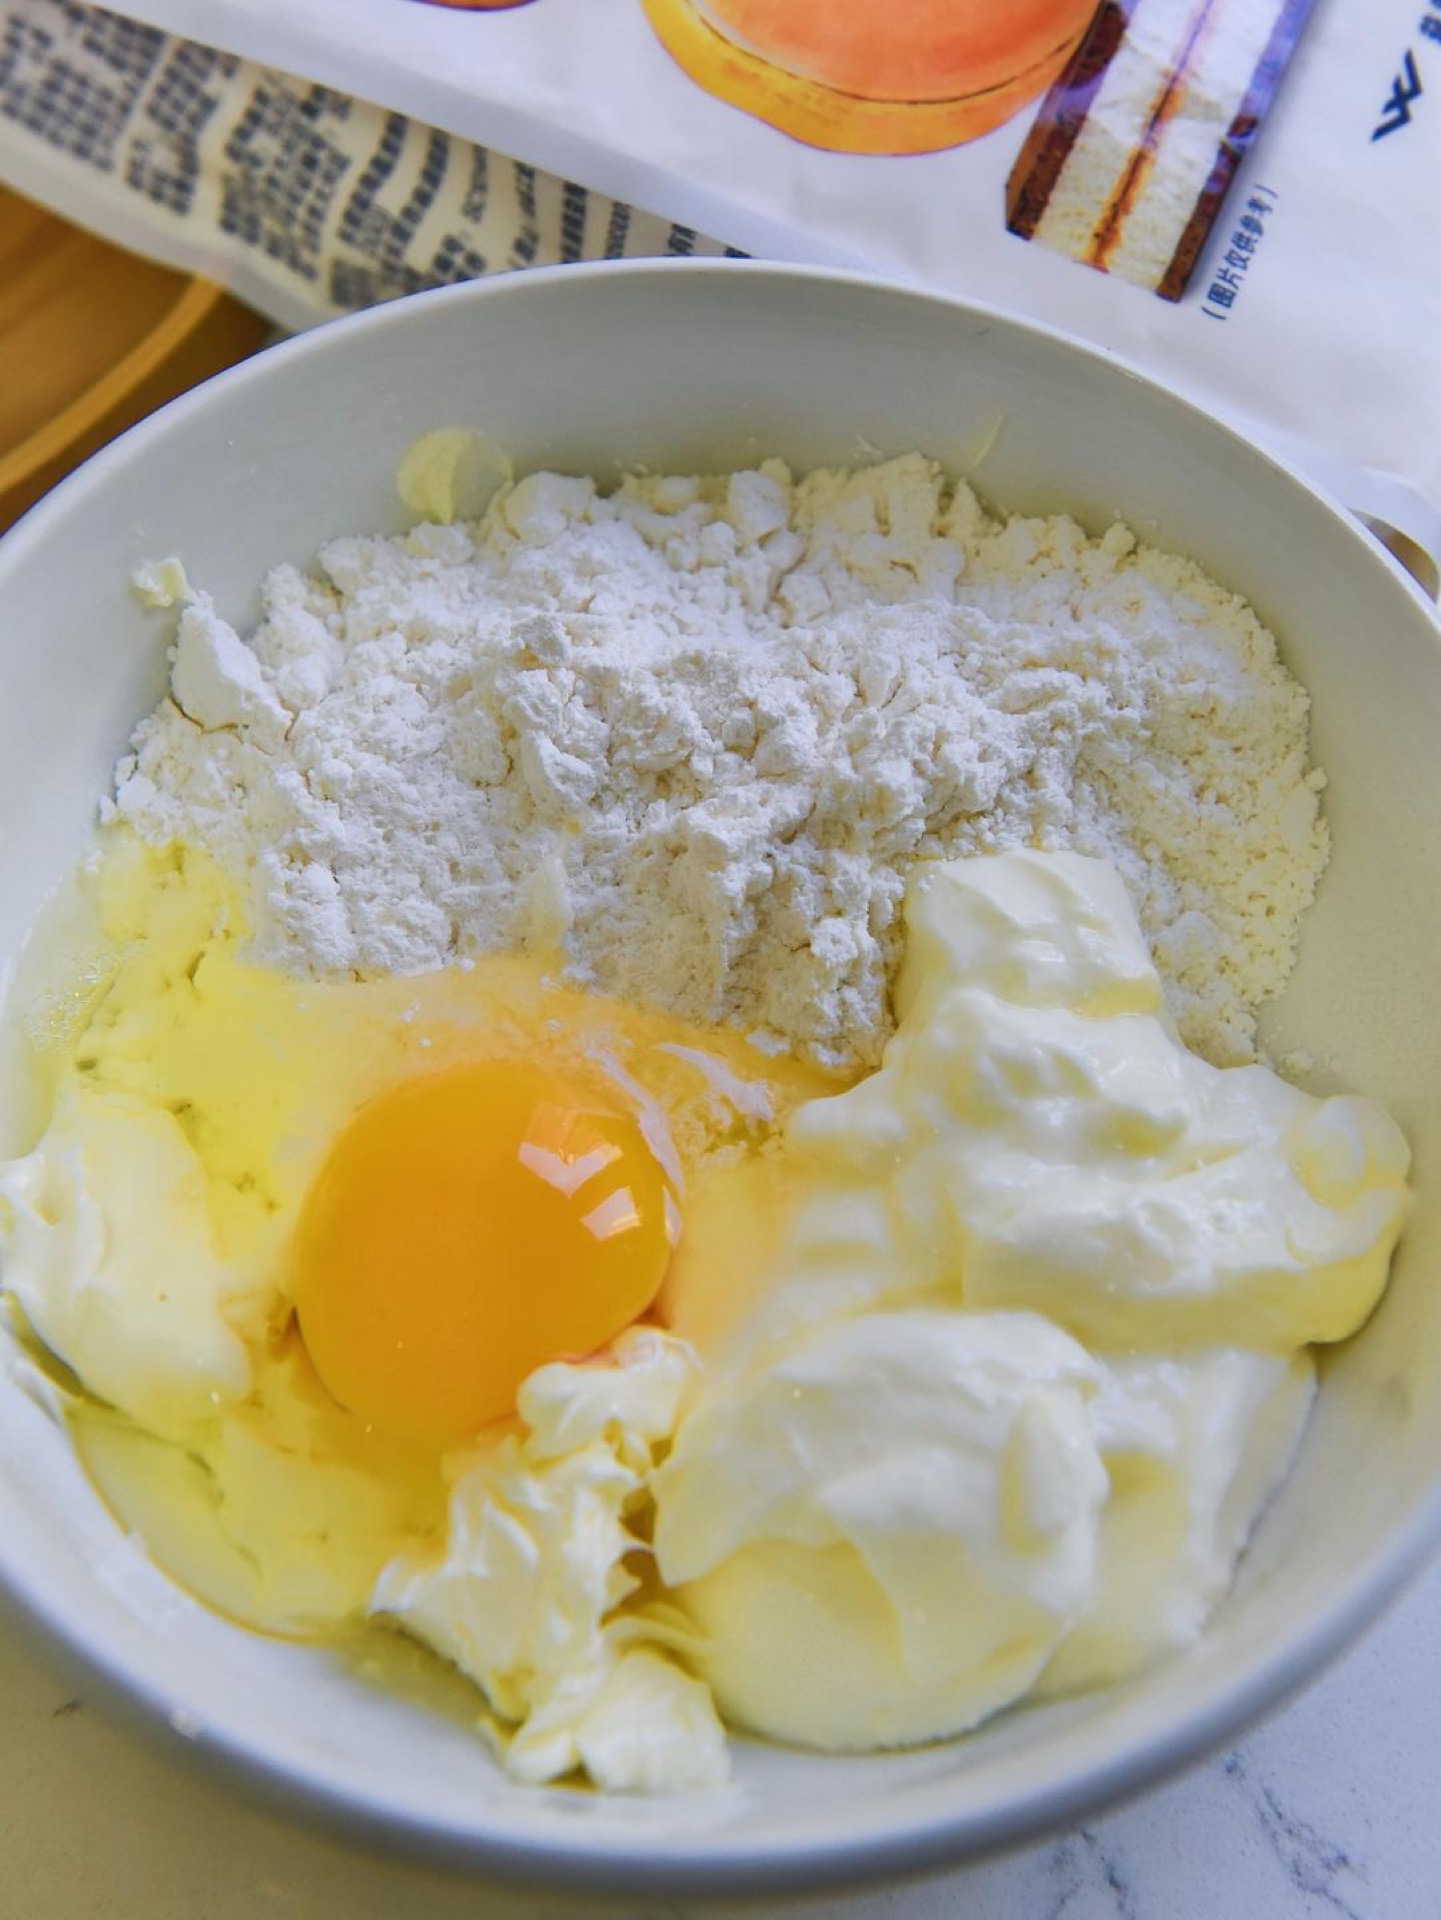
Step 3: Add the Flour and Baking Powder
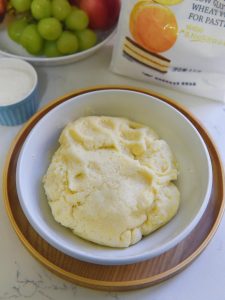
Sift the cake flour and baking powder over the wet mixture, then fold and press with a spatula until a soft, slightly tacky dough forms. Stop as soon as the flour disappears. Overworking the dough develops gluten and the cookies turn tough instead of crisp.
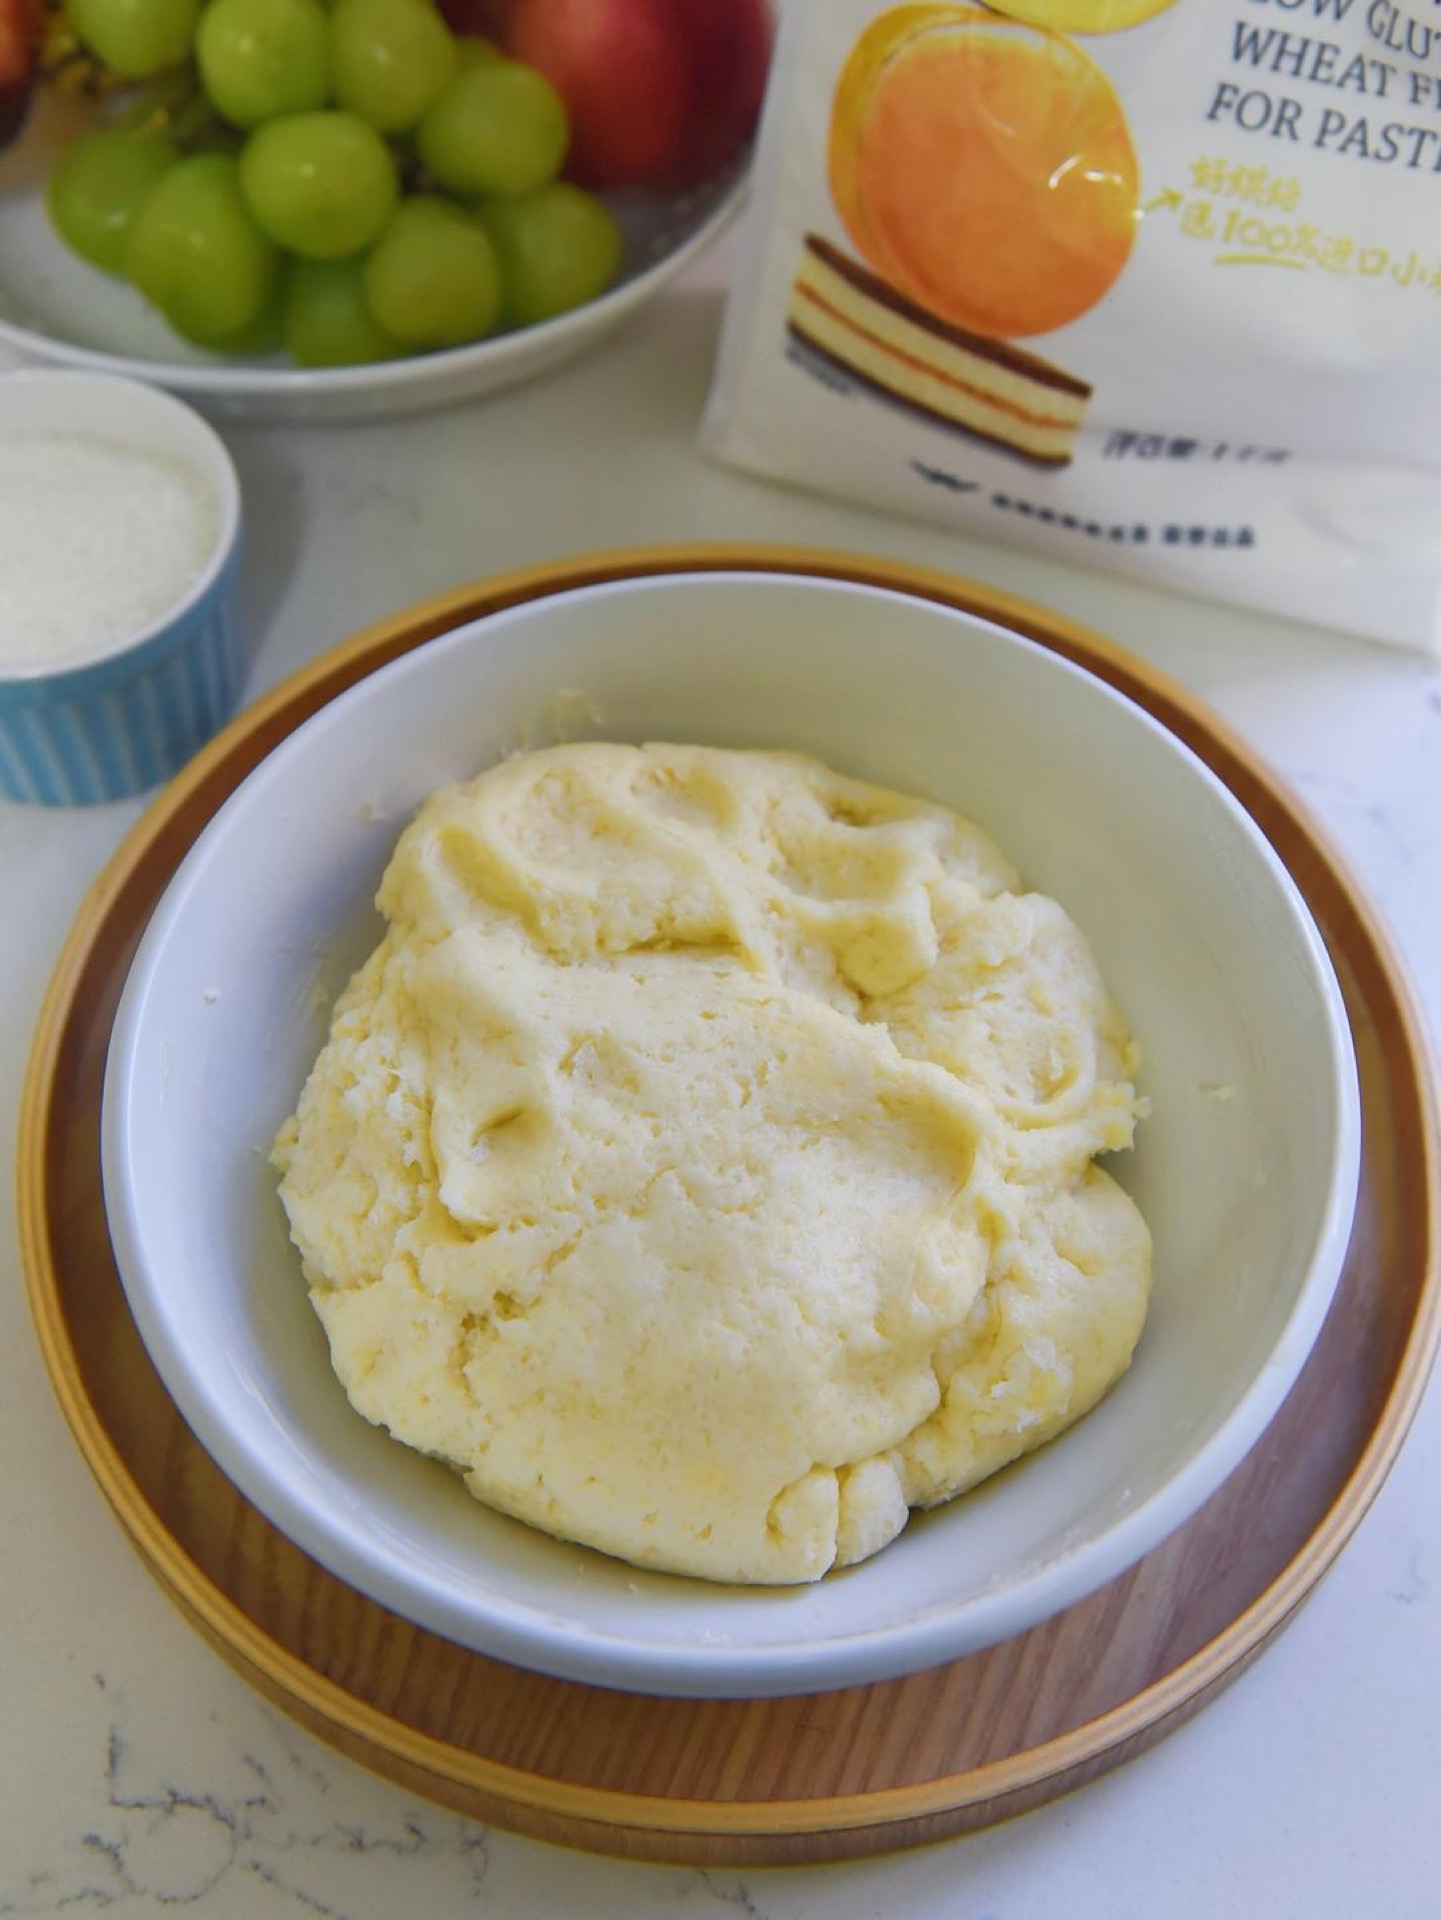
Step 4: Portion and Roll
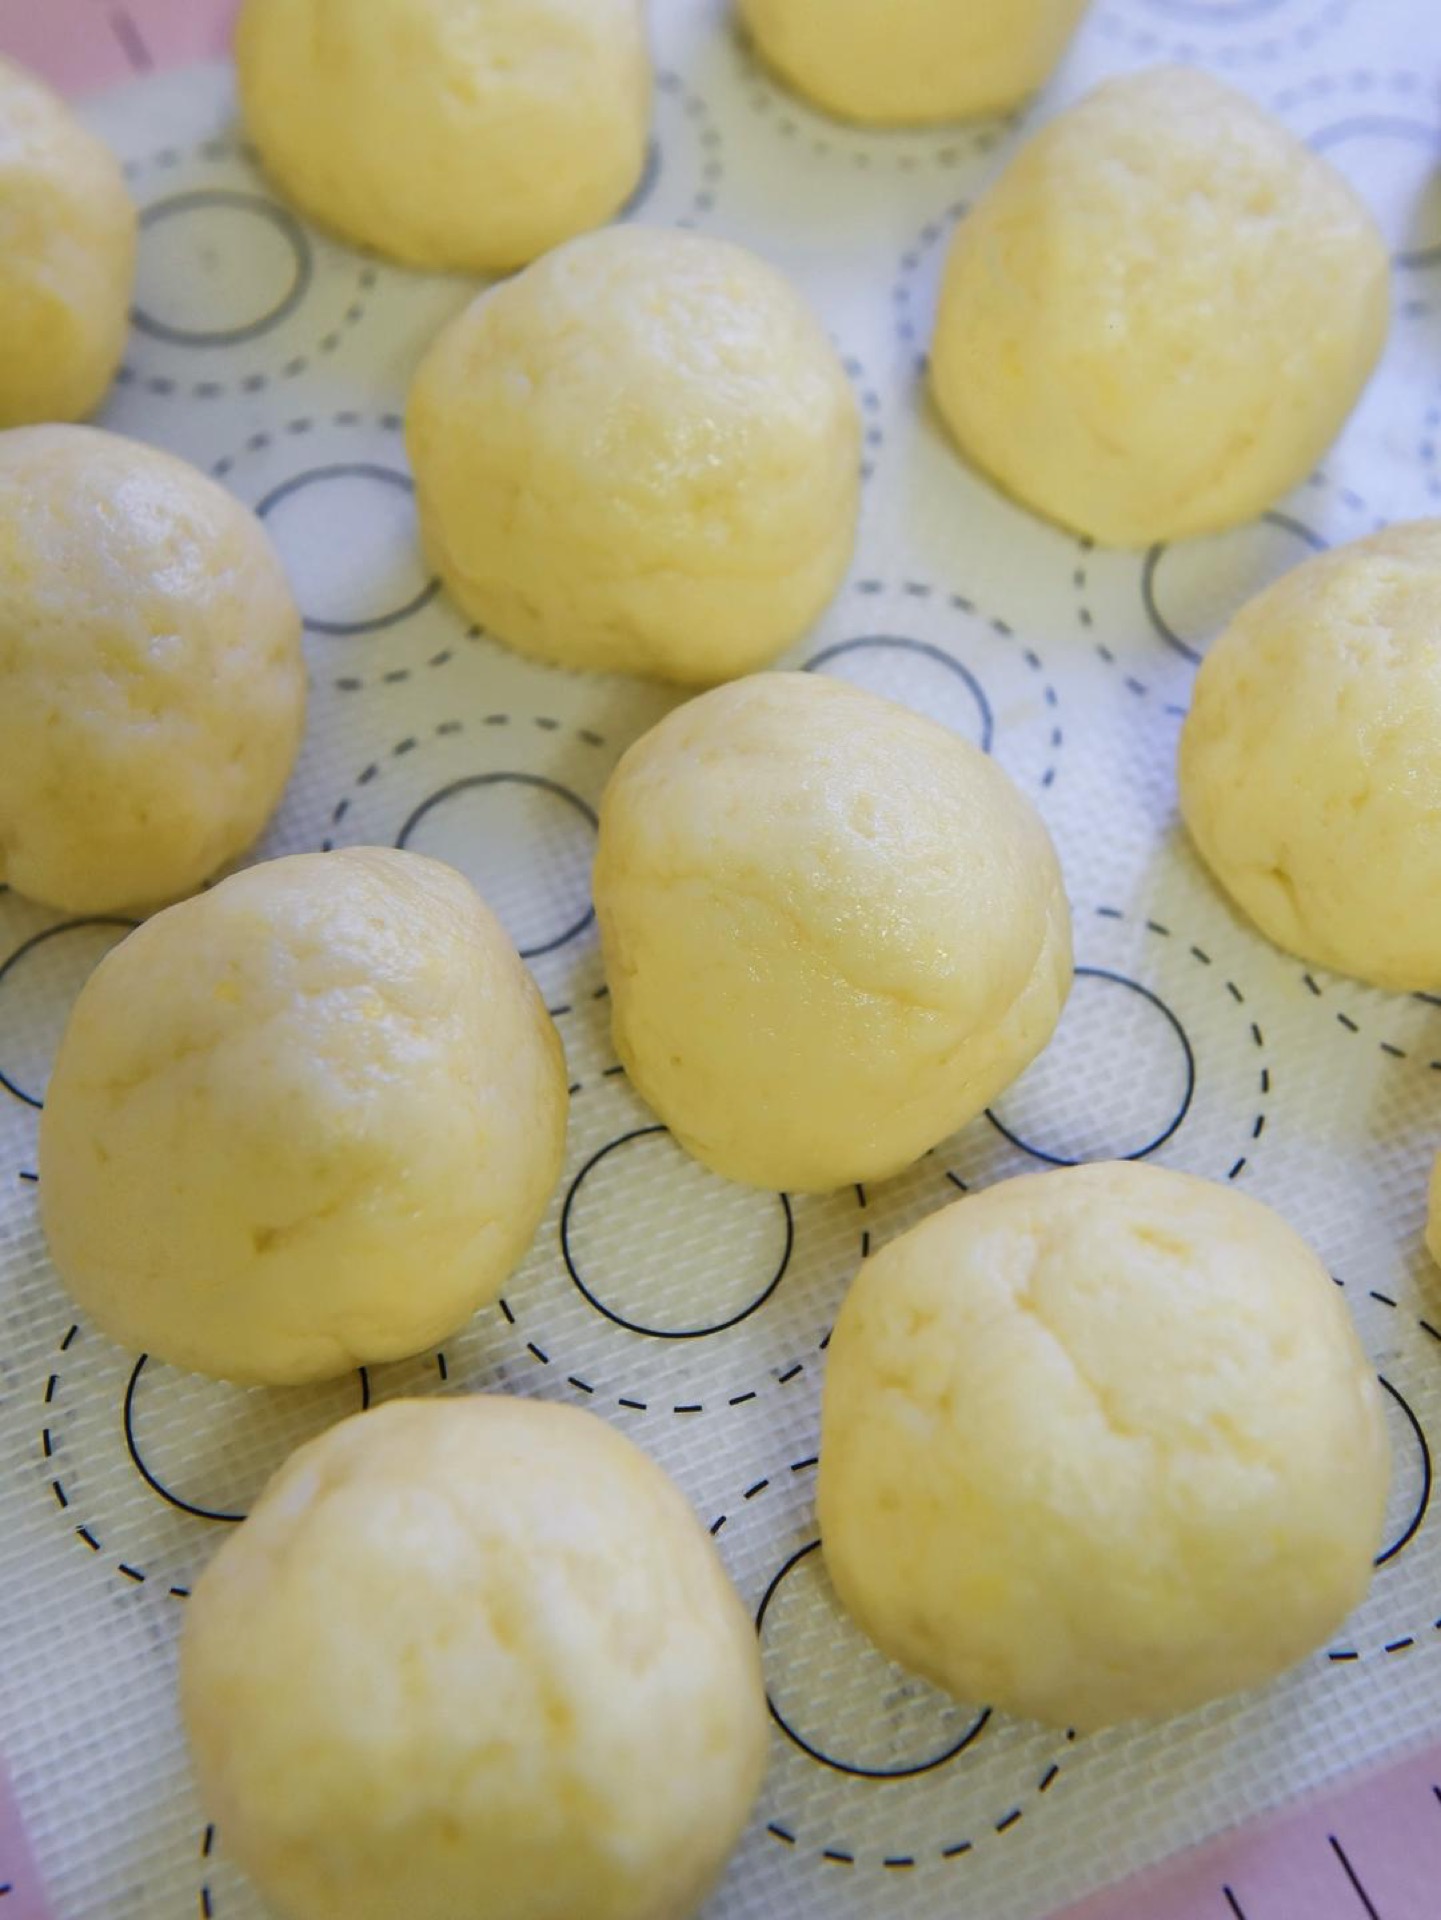
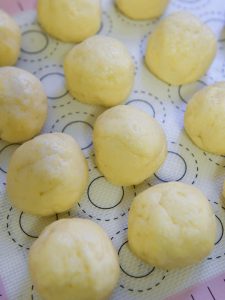
Divide the dough into portions of about 50 g each and roll each one into a smooth ball between your palms. You should get roughly 12 cookies. If the dough sticks, dust your hands very lightly with flour — but not much, or the sugar coating will not adhere.
Step 5: Flatten and Coat in Sugar
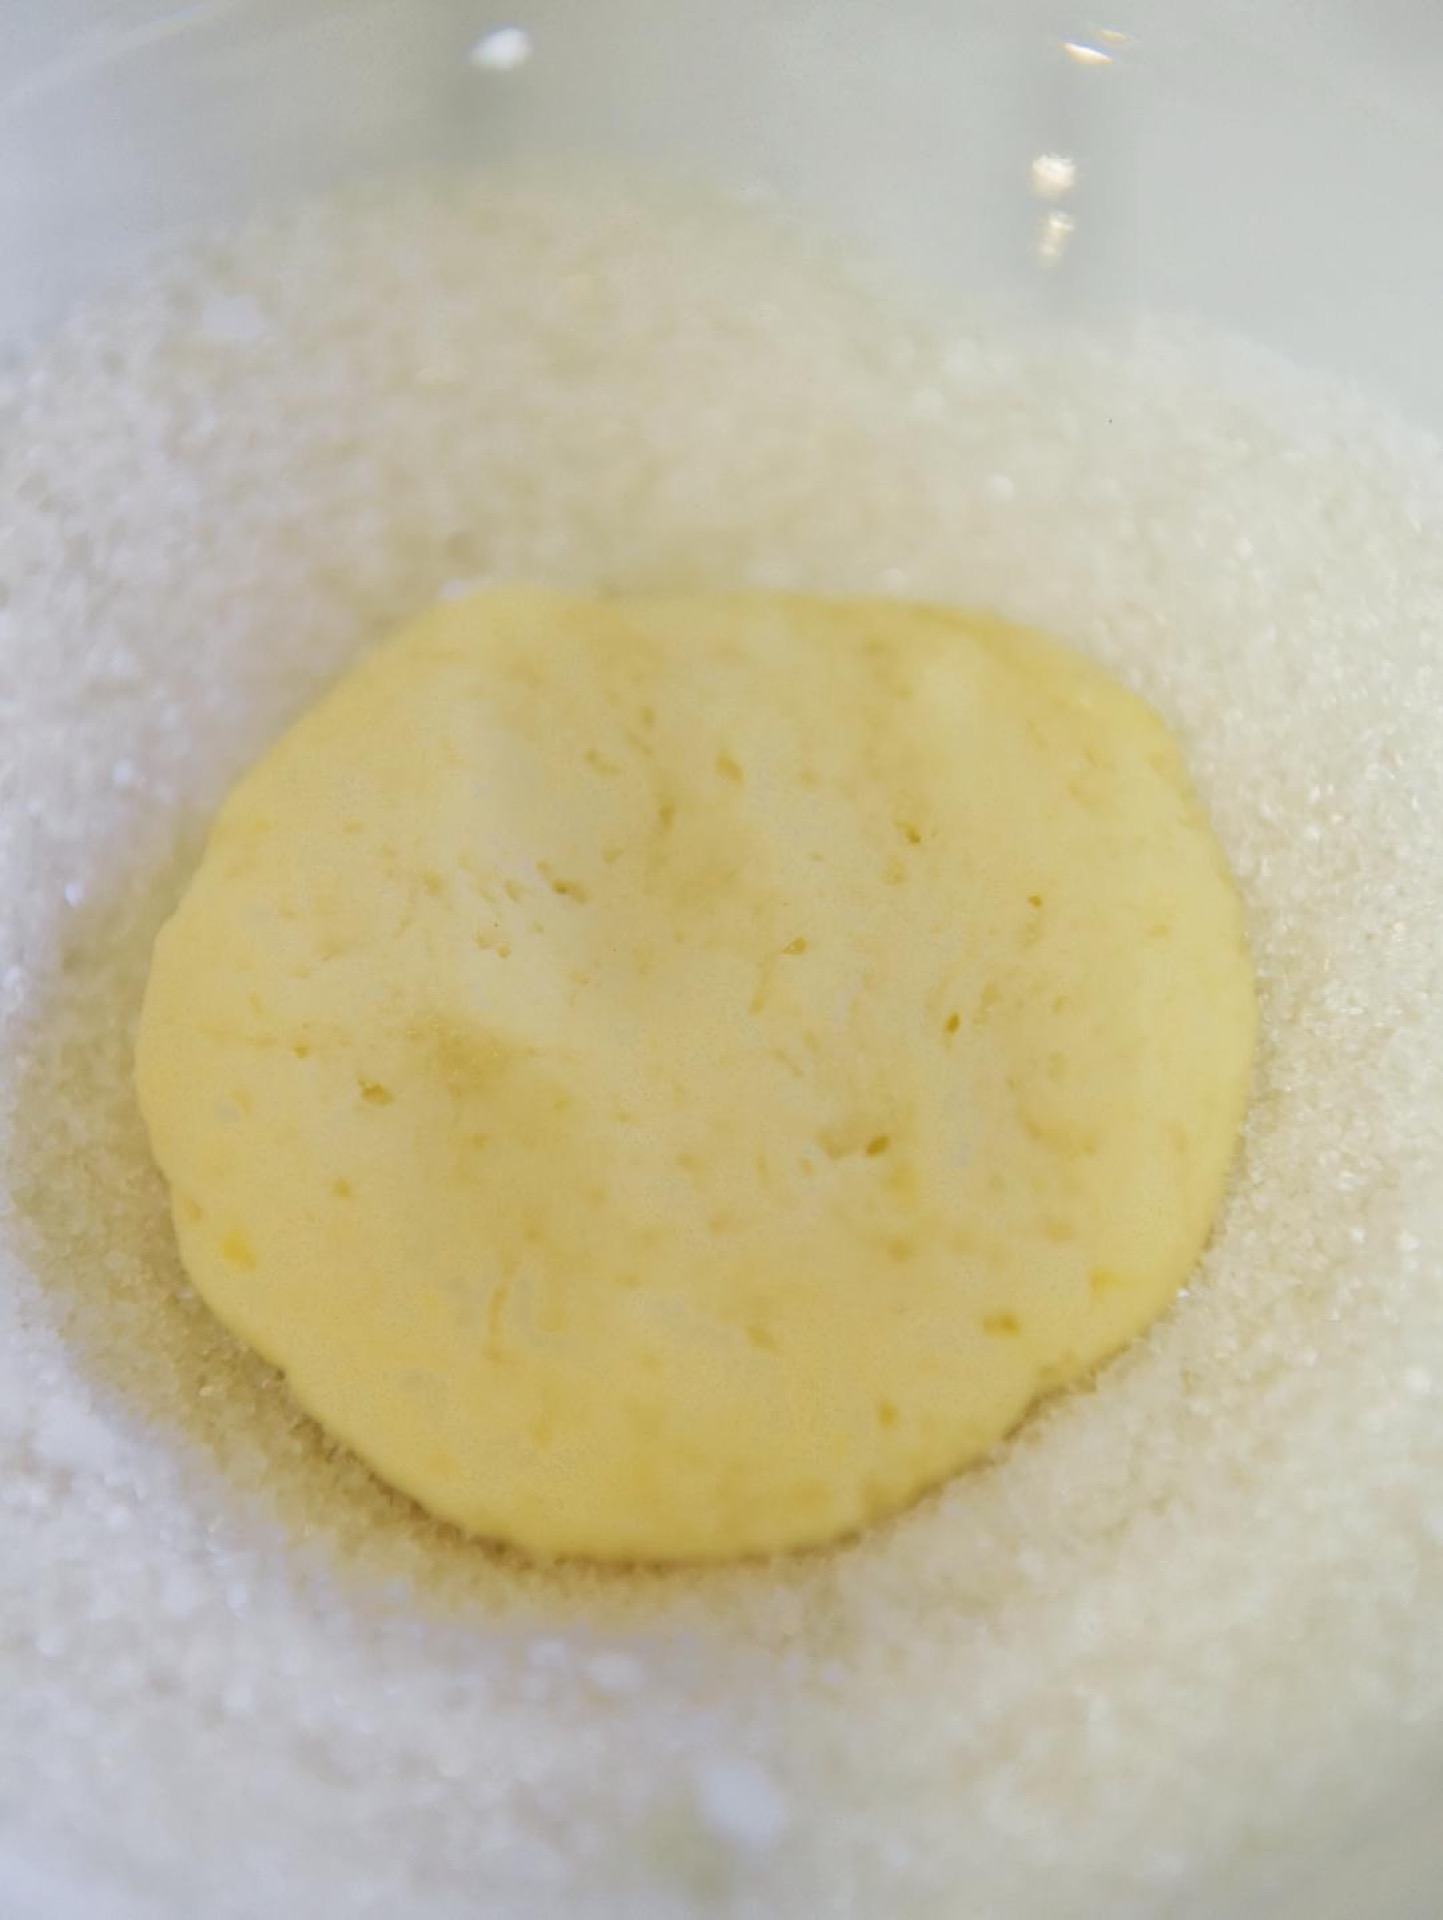
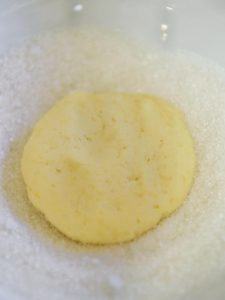
Press each ball flat with your palm to about 1 cm thick, then press the top into the dish of granulated sugar so it is evenly coated. Place them sugar-side up on the lined baking sheet, spaced about 4 cm apart. They spread a little, not a lot.
Step 6: Score the Tops
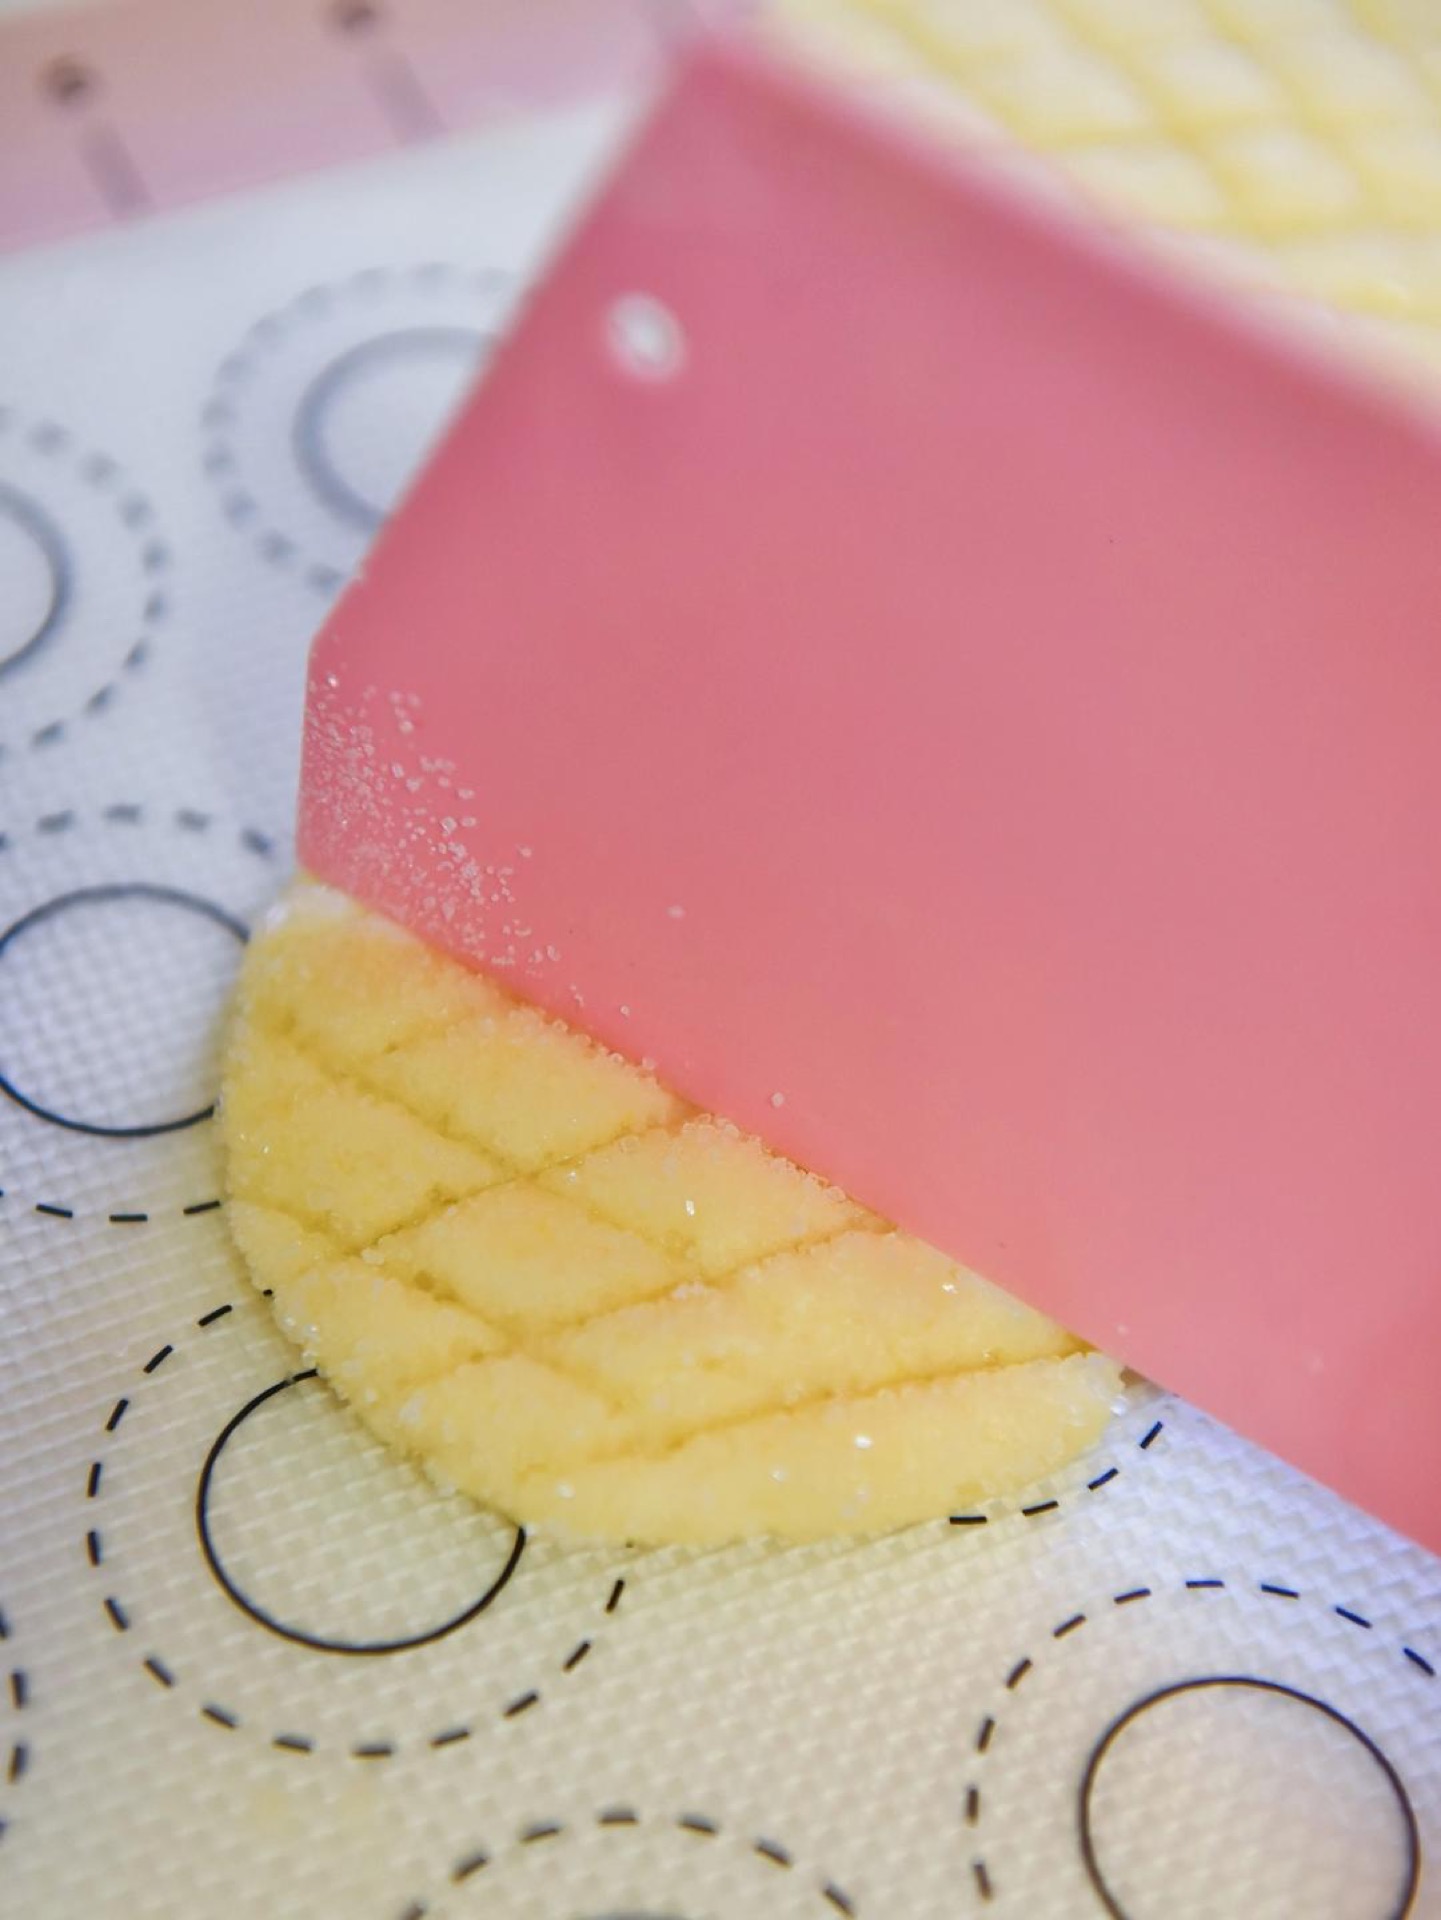
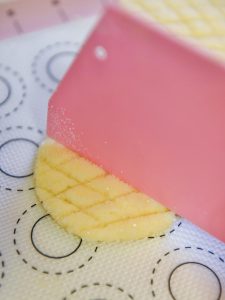
Use a fork, a bench scraper, or the back of a small knife to press a pattern into the top of each cookie. A simple crosshatch or three parallel lines both work. Press firmly enough to cut about 3 mm deep — shallow marks disappear in the oven, deep ones cause the cookie to break apart.
Step 7: Bake
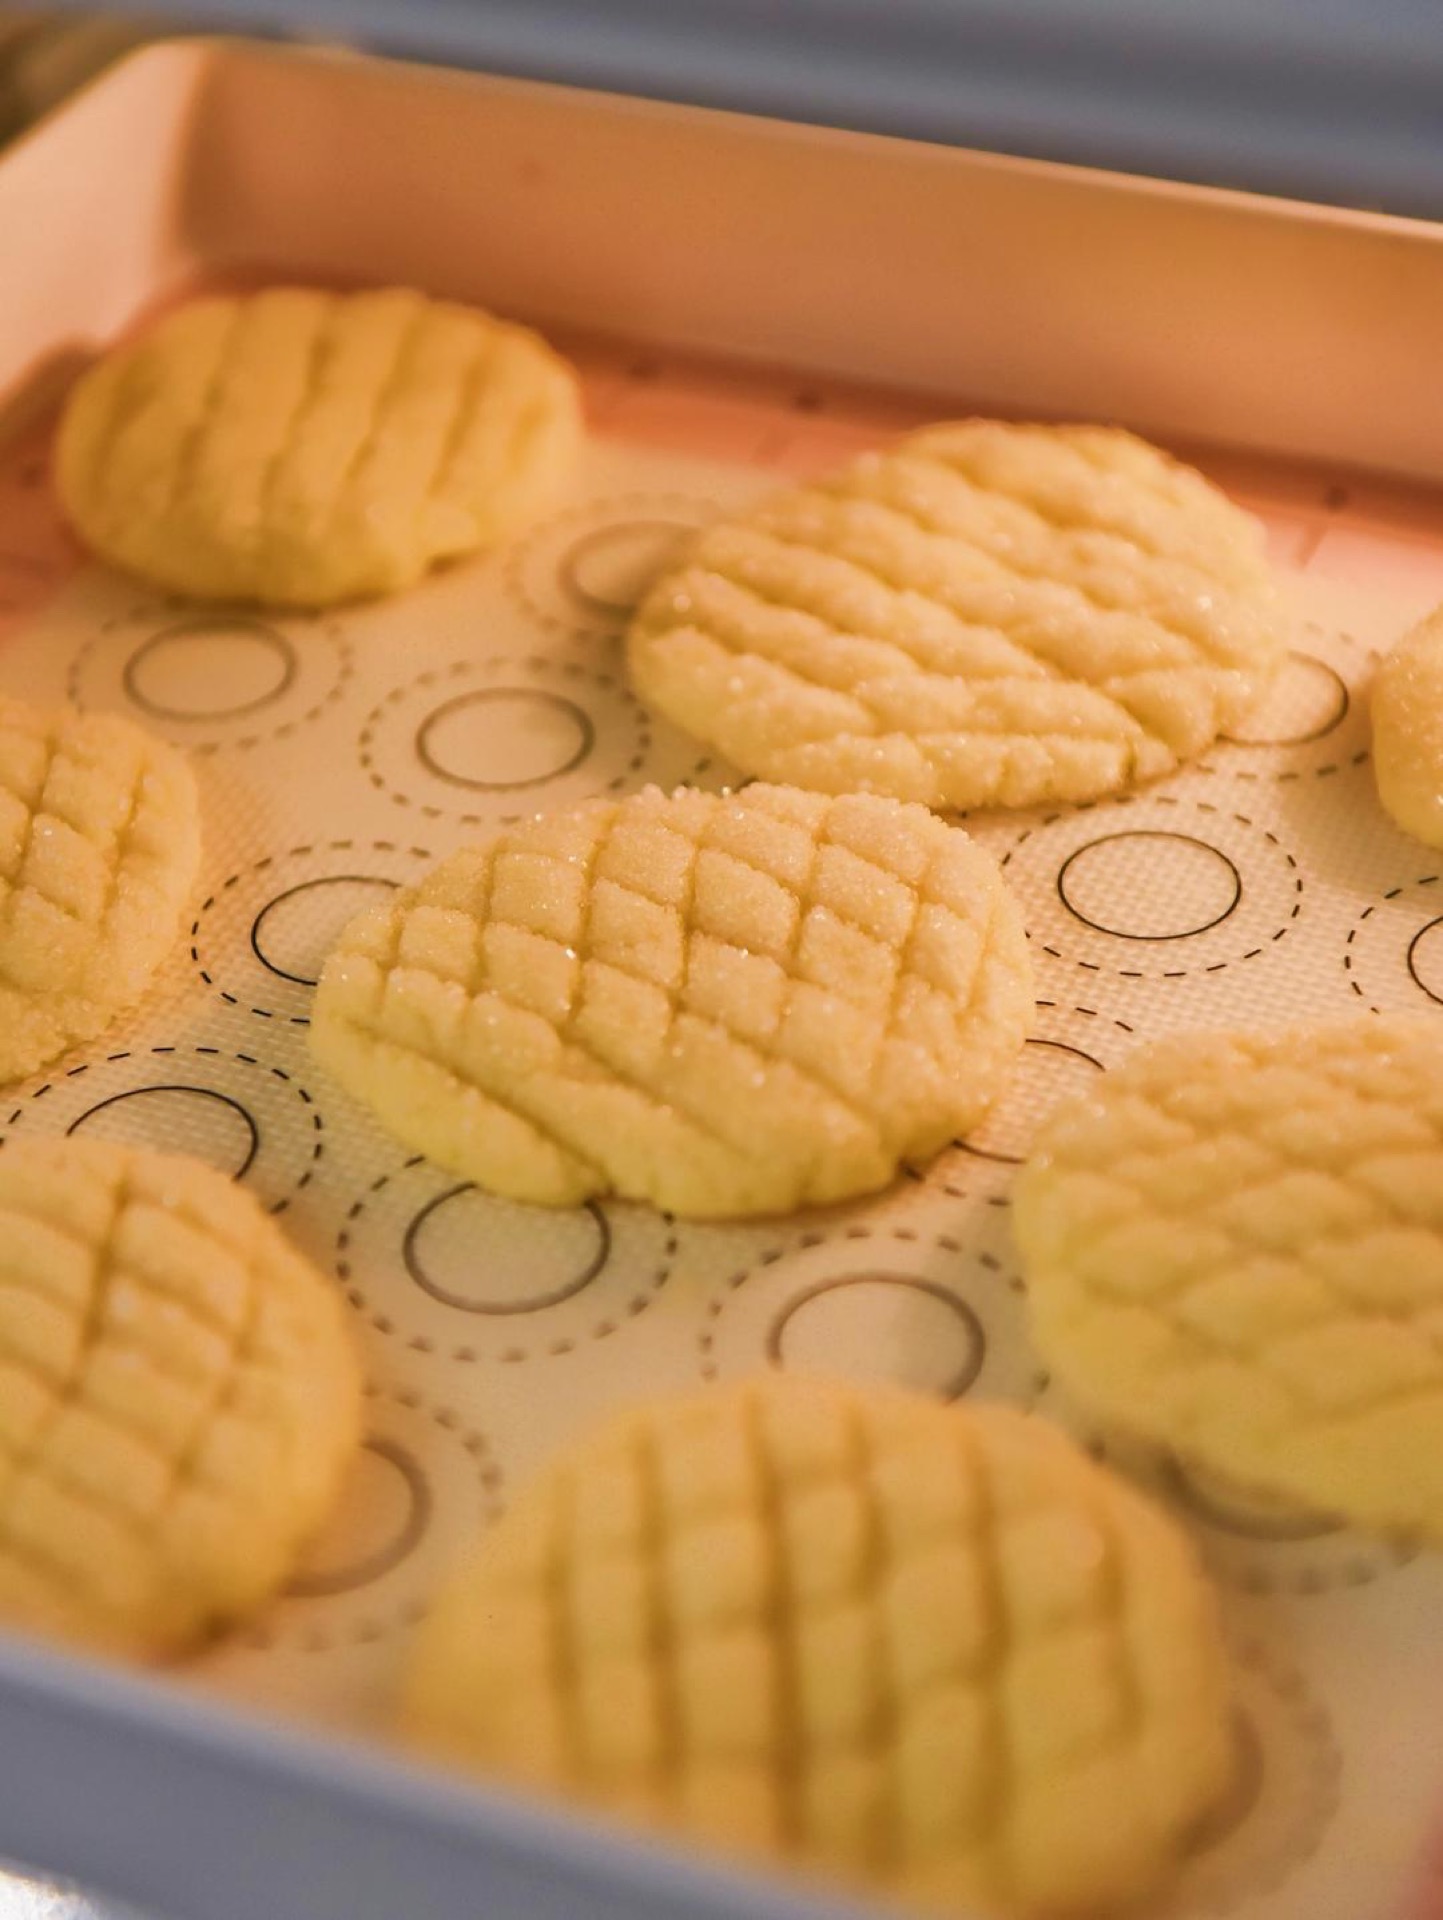
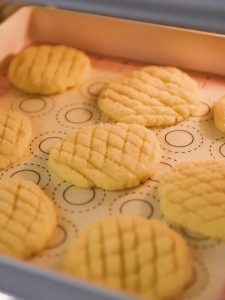
Bake at 160–170°C (320–340°F) with both top and bottom heat for 12–15 minutes, until the edges are set and pale gold and the tops look dry. The centers will still feel slightly soft if you press them — that is correct. They firm up as they cool.
Step 8: Cool and Check the Texture
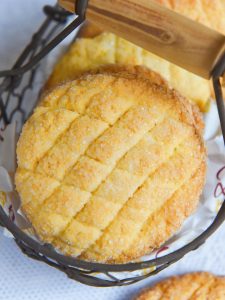
Let them sit on the tray for 5 minutes, then move to a wire rack. Once fully cool, they should be milky-sweet, crisp through, and full of wheat aroma with a clean yogurt tang. The sweetness lands just right — not cloying — and there is nothing in them you would not recognize.
Step 9: Taste
Bite into one. The yogurt’s dairy sweetness hits first, then the toasted-butter cookie flavor follows, and the layers keep going. They do not stick to your teeth at all — the mark of a properly short, crisp cookie.
Common Mistakes When Making Yogurt Cookies
1. Using thin, drinkable yogurt. This is the number one failure. The dough turns wet, the cookies spread into flat discs, and the texture goes from crisp to leathery. Strain it or use Greek yogurt.
2. Skipping the sugar coating. Without it you lose the crackly top entirely. The cookie still tastes fine but the texture is one-dimensional.
3. Overmixing the dough. Once the flour goes in, every extra stir builds gluten. Fold until it just comes together and stop, even if a few dry patches remain.
4. Rolling the balls too large. Bigger than 50 g and the outside browns before the center sets, giving you a burnt edge with a doughy middle. Weigh them if you are unsure.
5. Baking until they look done. These cookies finish setting on the tray. If you pull them when they are golden all over, they will be hard once cooled. Take them out when the edges are set and the centers still give slightly.
Variations
Lemon-yogurt version. Add the zest of one lemon to the sugar before whisking. The citrus sharpens the tang and makes them taste brighter.
Whole-wheat blend. Swap 60 g of the cake flour for whole-wheat pastry flour. The cookies get a nuttier flavor and a slightly rougher crumb — good with tea.
Sesame sugar coating. Mix a tablespoon of toasted white sesame seeds into the coating sugar. This is a nice nod to Chinese baking traditions, and the toasted note plays well with the yogurt.
Jam thumbprint. Skip the scoring, press a shallow well in the center with your thumb, and fill with a quarter teaspoon of jam before baking. Reduce the sugar coating to just the edges.
If you enjoy the idea of matching textures to technique, the same principle of layering crisp and tender shows up in paper-thin spring pancakes.
Frequently Asked Questions
Can I use regular yogurt instead of Greek? Yes, but strain it first. Line a sieve with a coffee filter or paper towel, add the yogurt, and let it drain for 45–60 minutes. You want it to hold its shape on a spoon.
Why did my cookies spread too much? Almost always thin yogurt, warm dough, or a baking sheet that was not fully cool. Chill the portioned dough for 15 minutes before baking and make sure your baking powder is fresh.
Can I make the dough ahead? Yes. Wrap it tightly and refrigerate for up to 2 days, or freeze the portioned balls for up to 2 months. Bake from frozen, adding 2–3 minutes.
My cookies came out hard instead of crisp. What happened? Usually overbaking or overmixing. Both create a tough, dense structure rather than a short, shattering one. Pull them earlier next time.
Can I reduce the sugar? You can drop the dough sugar to 55 g, but the coating sugar is structural — it is what makes the crackly top. Do not skip it.
How to Serve
These are best within an hour of cooling, with hot tea or black coffee. The contrast between the tangy, crisp cookie and a bitter drink is the whole point. They also work on a dessert plate next to fresh fruit, or crumbled over yogurt for a slightly absurd but very good breakfast.
If you are putting together a larger spread, they sit comfortably alongside lighter savory dishes like fish sauce cabbage or a simple spicy enoki stir-fry as a palate cleanser.
Storage & Reheat
Store fully cooled cookies in an airtight container at room temperature for up to 5 days. They will soften slightly after day two — if you want to bring the crisp back, spread them on a sheet and warm them at 150°C (300°F) for 3–4 minutes, then cool completely.
For longer storage, freeze baked cookies in a zip bag for up to 2 months. Thaw at room temperature, uncovered, so they do not steam themselves soft.
Raw portioned dough freezes beautifully. Freeze on a tray until solid, then transfer to a bag. Bake straight from frozen at the same temperature, adding 2–3 minutes.
Allergen Notice
This recipe contains wheat (gluten), eggs, and dairy (butter and yogurt). It is not suitable for anyone with those allergies. If you are cooking for someone with a dairy allergy, note that yogurt and butter are both central to the texture and cannot be simply swapped without changing the result.
Nutrition Disclaimer
Nutrition information is estimated from standard ingredient databases and is provided as a courtesy. Actual values vary depending on the exact brands, yogurt thickness, and portion size. It should not be used for medical or dietary decisions.
About the Author & Recipe Development
I am Lin, and I grew up in my parents’ restaurant kitchen in Chengdu, where every dish on the menu had to earn its place. That standard followed me into home baking. I test recipes until they work reliably in an ordinary kitchen with ordinary equipment, and I write down what actually goes wrong, not just what should go right.
This yogurt cookie recipe went through four rounds. The first version used thin yogurt and the cookies spread into sad, flat discs. The second used all-purpose flour and they were chewy rather than crisp. The third was good but the sugar coating dissolved instead of crackling. The version here is the one I keep making, and it has never failed me since.
For more on building flavor and texture intentionally, see my notes on tenderness and velveting — the same principles of controlling protein and moisture apply to baking.
Authoritative References
- USDA FoodData Central — nutrition values for wheat flour, butter, yogurt, and eggs
- King Arthur Baking Company — flour protein content and its effect on cookie texture
- Harold McGee, On Food and Cooking — sugar crystallization and the chemistry of a crackly crust
- FDA — allergen labeling guidance for wheat, egg, and dairy
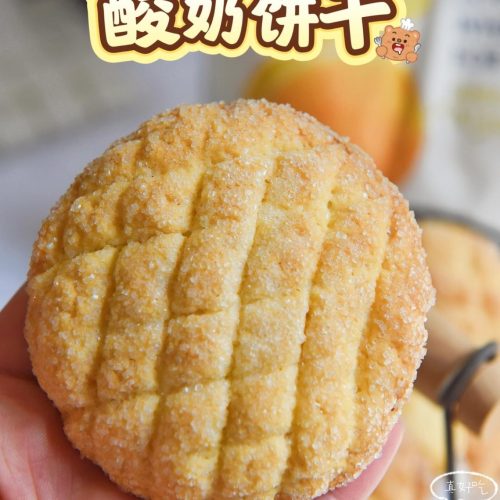
Yogurt Cookies (酸奶饼干): Tangy, Crispy, Foolproof Baking

Equipment
- Digital kitchen scale
- Mixing bowls
- Whisk
- Silicone Spatula
- Baking Sheet
- Parchment paper
- Fork or bench scraper
- Wire Cooling Rack
Ingredients
Dough
- 1 large egg room temperature
- 120 g thick yogurt Greek-style or strained; full-fat preferred
- 100 g unsalted butter softened; cultured butter preferred
- 70 g granulated sugar for the dough
- 300 g cake flour low-protein / 低筋面粉
- 5 g baking powder check freshness
- granulated sugar extra, for coating
Instructions
- Set out one room-temperature egg, 120 g of thick yogurt, 100 g of softened butter, 70 g of granulated sugar, 300 g of cake flour, and 5 g of baking powder. Weigh everything before you start.

- In a large bowl, whisk the egg, yogurt, butter, and sugar until smooth and slightly pale. You want a uniform, glossy mixture with no butter streaks.
- Sift the cake flour and baking powder over the wet mixture and fold until a soft, slightly tacky dough forms. Stop as soon as the flour disappears.
- Divide the dough into portions of about 50 g each and roll into smooth balls between your palms. You should get roughly 12.
- Press each ball flat to about 1 cm thick, then press the top into granulated sugar to coat. Place sugar-side up on a parchment-lined sheet, spaced 4 cm apart.
- Use a fork, bench scraper, or the back of a small knife to press a pattern about 3 mm deep into each cookie top.
- Bake at 160–170°C (320–340°F) with both top and bottom heat for 12–15 minutes, until the edges are set and pale gold. The centers will still feel slightly soft.
- Let the cookies sit on the tray for 5 minutes, then move to a wire rack. Once cool they should be crisp through with a clean yogurt tang and toasted-butter aroma.
- Bite into one. The yogurt’s dairy sweetness hits first, then the cookie’s toasted flavor follows. They should not stick to your teeth at all.







Leave a Reply