The bread my sister orders at the bakery and I now make at home is this one – taro paste star buns, soft milk dough wrapped around sweet violet taro paste and shaped into five-pointed stars that puff into a pull-apart tray. A home cook wrote it in six steps with the shaping as the whole craft and the taro paste as the flavor. I made it as written, and it is the bakery favorite that turned out to be a beginner’s project.
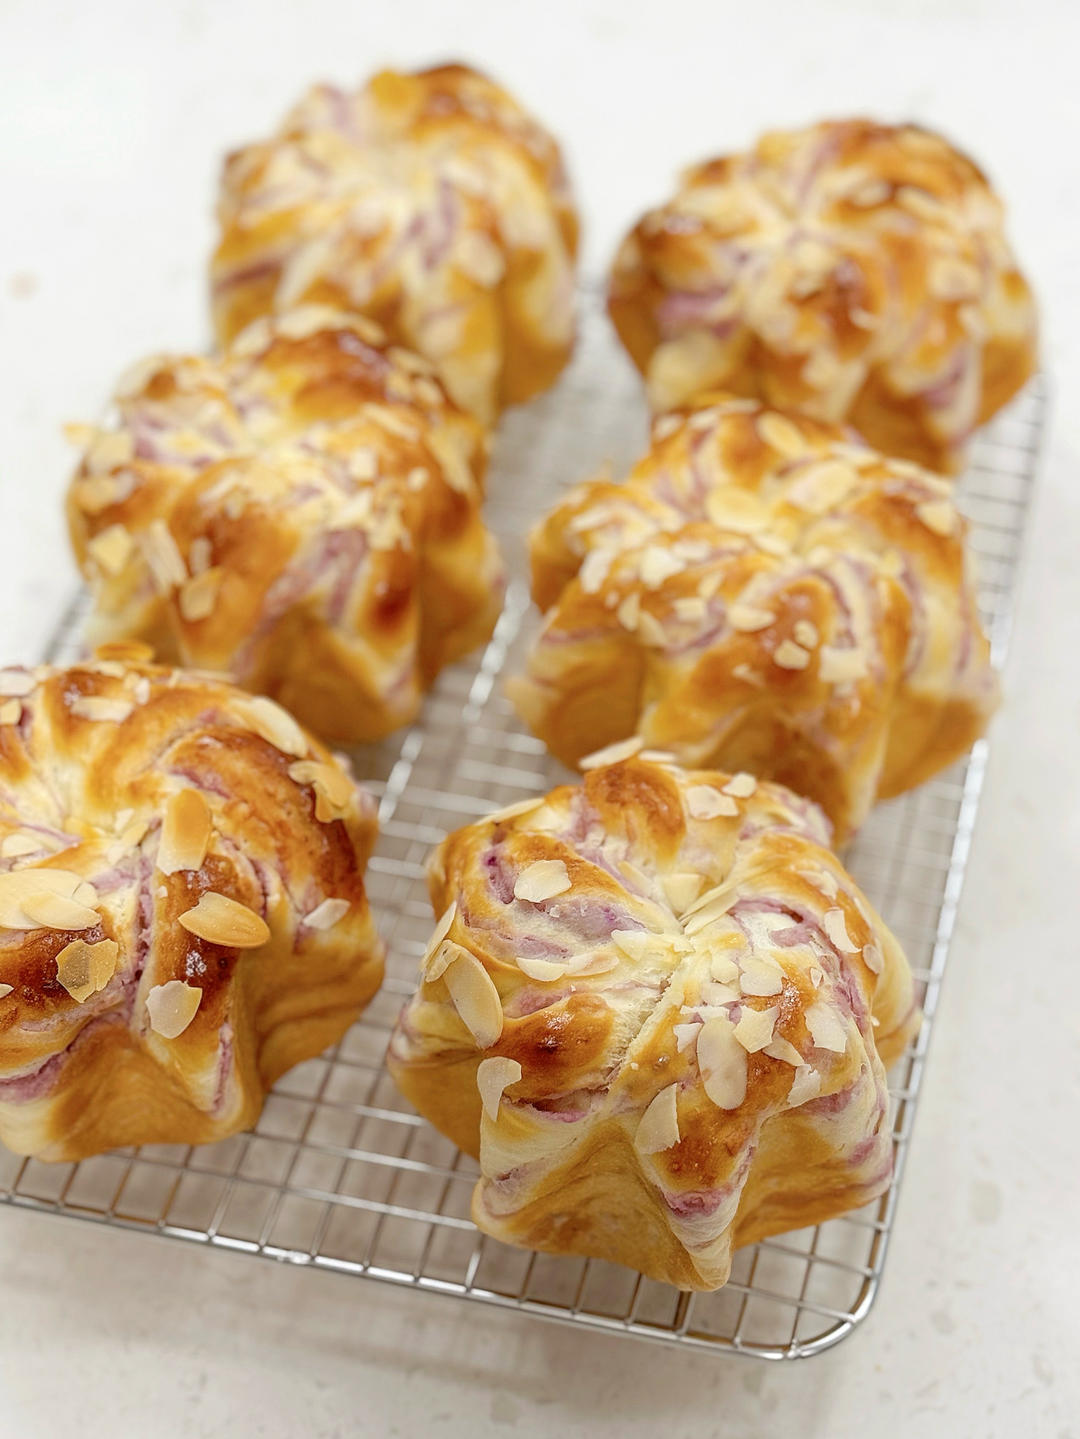
Nai xiang yu ni xing xing bao (奶香芋泥星星包) is milk-fragrant taro paste star buns – a soft, enriched milk dough wrapped around sweet taro paste and shaped into five-point stars, proofed and baked until puffed and golden. The original is a 6-step recipe with the star shaping as its craft.
What Are Taro Paste Star Buns?
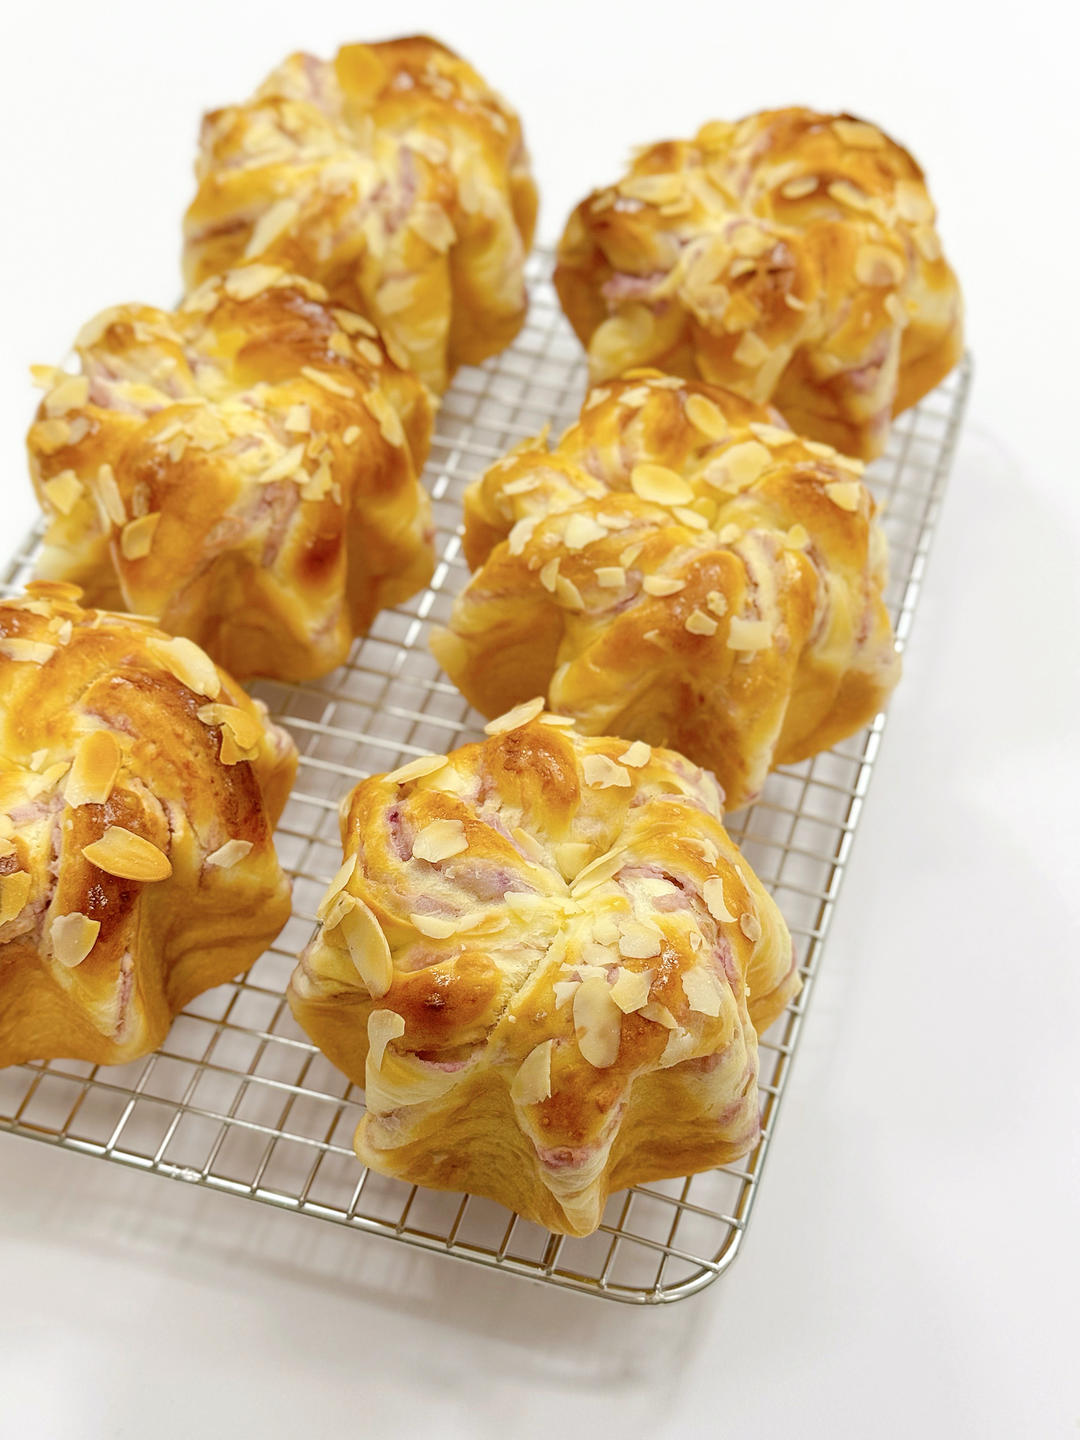
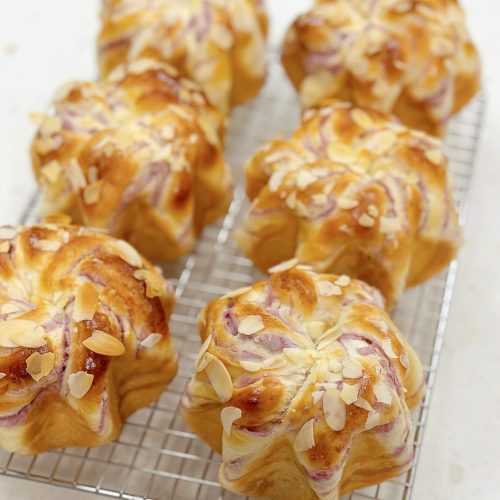
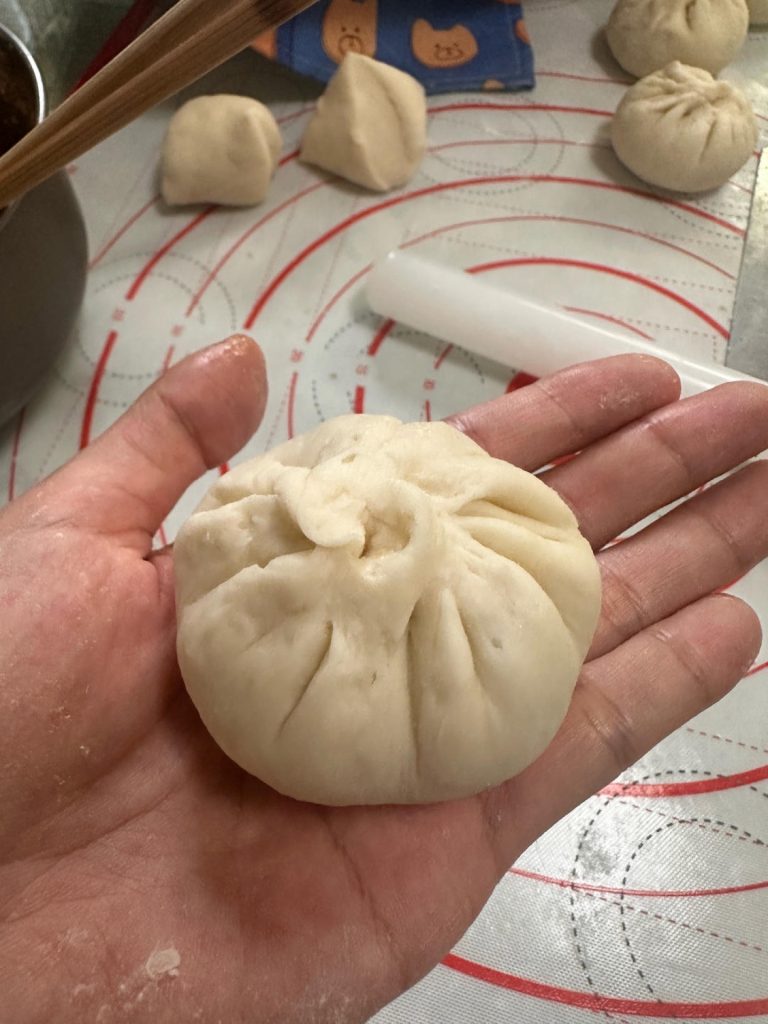
These are filled pull-apart buns shaped like stars: a soft milk dough – flour, milk, egg, sugar, butter, and yeast – is rolled, wrapped around a portion of sweet taro paste (cooked taro mashed with butter, sugar, and milk), sealed, and shaped into a five-pointed star by pinching the edges. The stars proof in a tray, bake until golden and puffed, and pull apart star by star, the violet taro paste showing at the center.
The method is the shaping. The filled dough is flattened and the edges pinched into five points – the star form – and the recipe’s six steps walk through dough, filling, shaping, proofing, and baking. It is a bakery-favorite look achieved with a beginner’s patience.
For the tender sponge side of the same sweet-bake shelf, my steam-baked milk chiffon cake is the airy cousin of these filled buns.
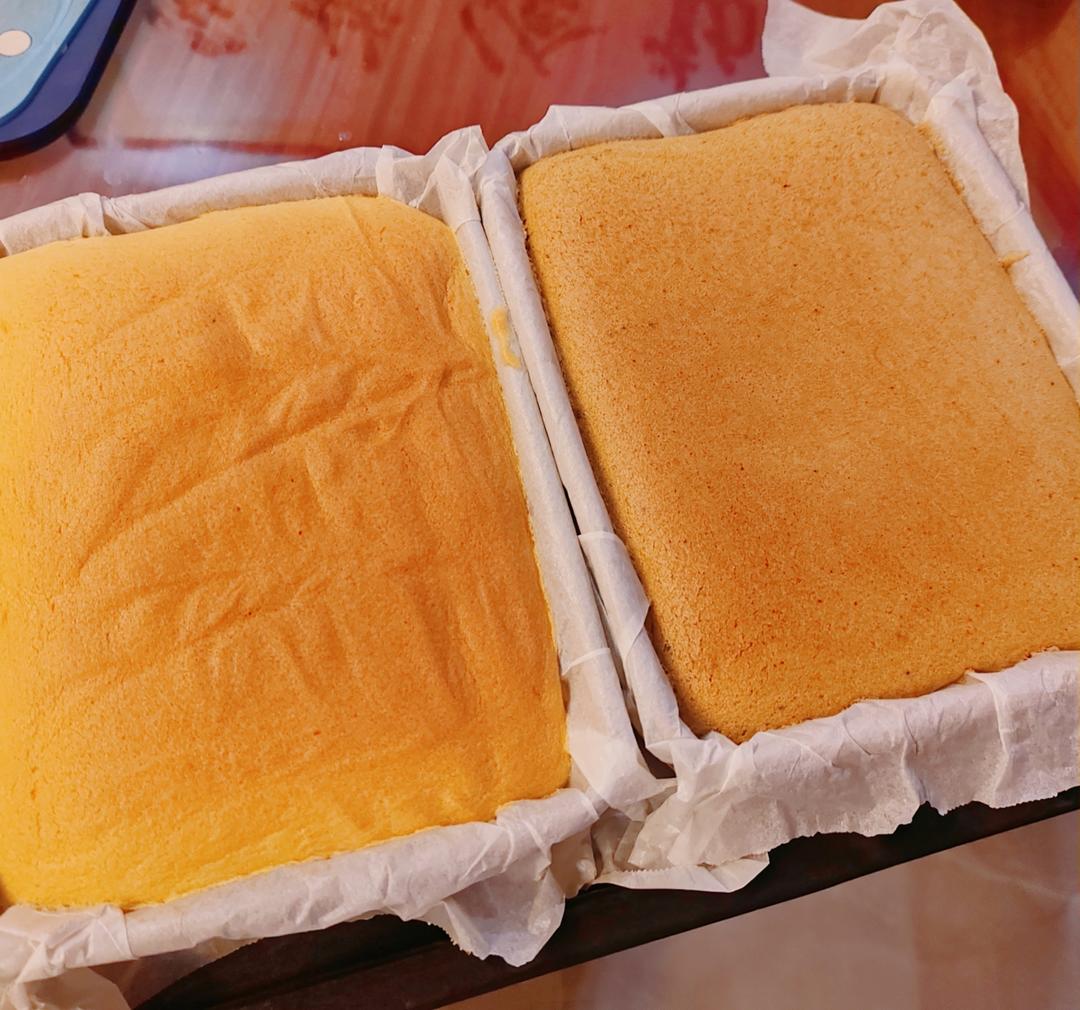
1Steam-Baked Milk Chiffon Cake (Zheng Kao Niu Nai Dan Gao)A custard-soft chiffon cake made with water buffalo milk, baked low and slow in a water bath so the top never cracks and the crumb stays silky. A gentle, foolproof Chinese home-baking classic.Check out this recipe
Why This Version Works
- Soft milk dough. The enriched dough – milk, egg, and butter – that puffs tender around the filling.
- Sweet taro paste. Cooked taro mashed with butter, sugar, and milk – the violet flavor at every star’s center.
- The star shaping. Five pinched points per bun – the bakery look, made with patience.
- Proof and bake. Puffed and golden – the recipe’s finish.
- Pull-apart by design. The stars tear from the tray one by one – the buns’ whole appeal.
Equipment Needed
- A bowl or mixer for the dough
- A tray for the buns
- A brush for the egg wash
Ingredients
- For the dough: 300 g (2 1/4 cups) bread flour, 3 g (3/4 tsp) yeast, 40 g (3 tbsp) sugar, 3 g (1/2 tsp) salt, 1 egg, 150 g (2/3 cup) milk, 30 g (2 tbsp) butter
- For the taro paste: cooked taro, mashed, with butter, sugar, and milk to taste
- Egg wash, for the top
Ingredient Notes
The dough: Bread flour, yeast, sugar, salt, egg, milk, and butter – the soft enriched base. My steam-baked milk chiffon cake is the sponge cousin.
Taro paste: Cooked taro mashed with butter, sugar, and milk – the sweet violet filling. My matcha chiffon cake is another colored-sweet bake.
Egg wash: For the golden, glossy tops after the proof.
Prep & Mise en Place
Make the taro paste: cook and mash the taro with butter, sugar, and milk. Knead the dough to a smooth windowpane and proof until doubled.
The sequence: divide the dough, wrap each piece around the taro paste, pinch into stars, proof on the tray, brush with egg, and bake golden.
Cooking Process
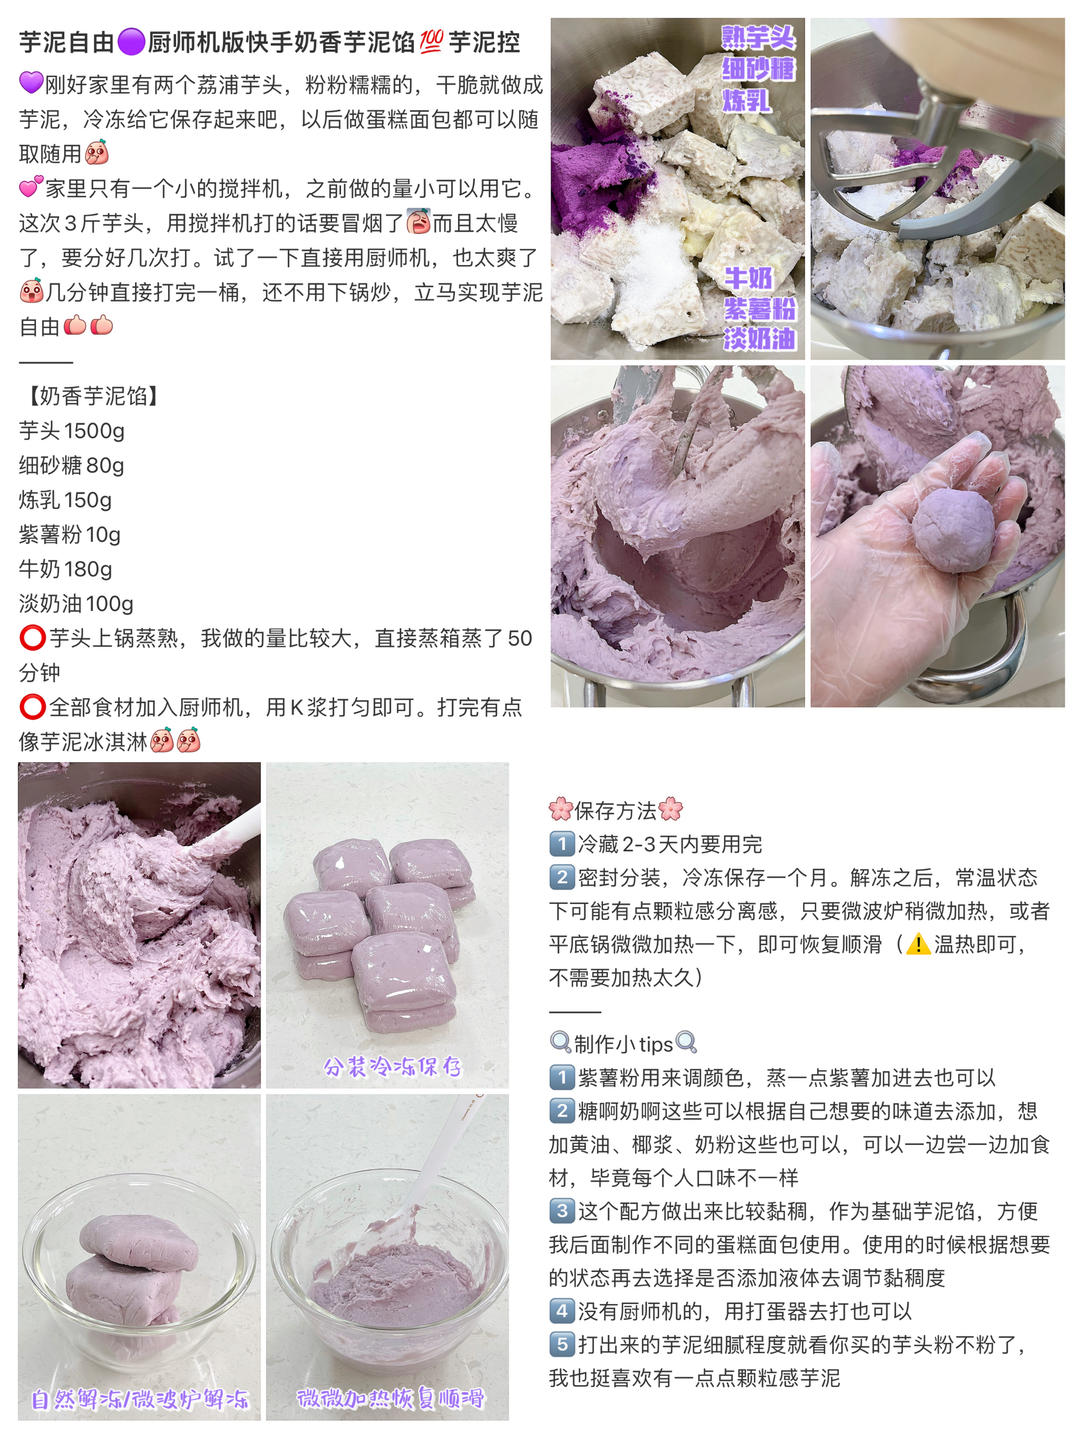
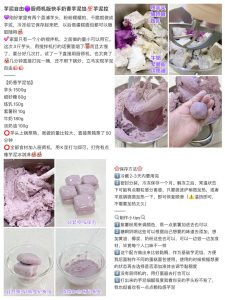
Step 1 – Milky taro filling: 1500 g cooked taro, 80 g fine sugar, 150
Milky taro filling: 1500 g cooked taro, 80 g fine sugar, 150 g condensed milk, 10 g purple potato powder, 180 g milk, cream…
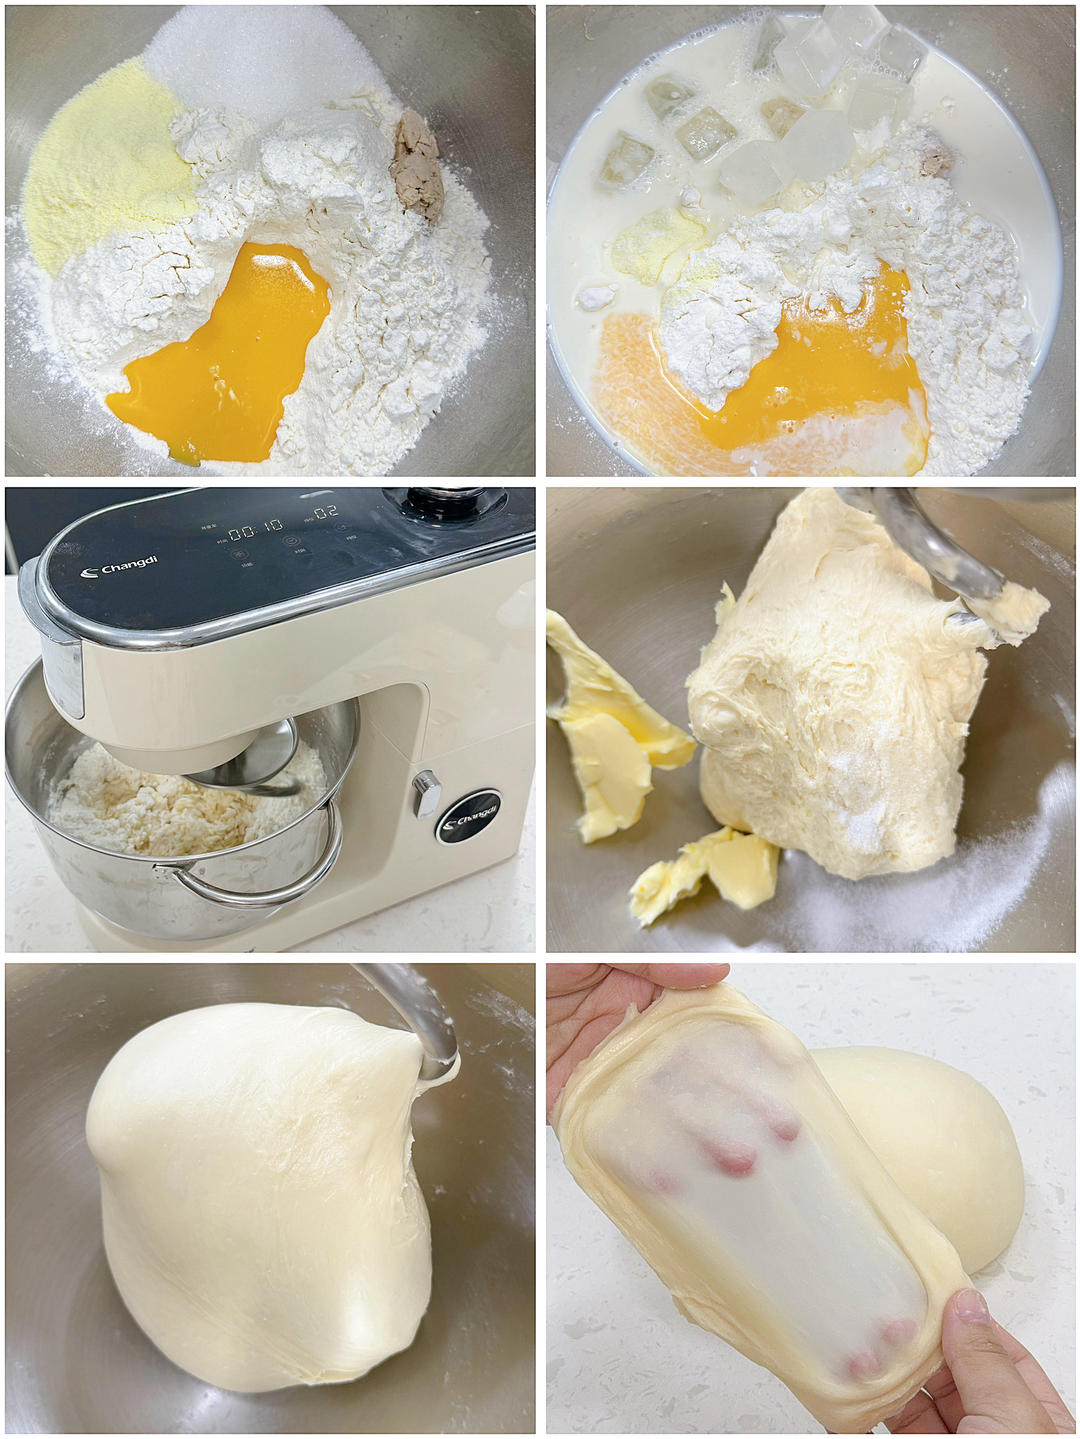
Step 2 – Mix all except butter and salt to the extension stage (thick
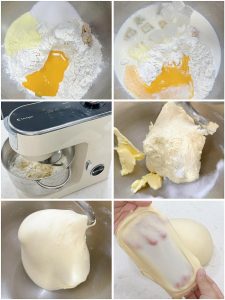
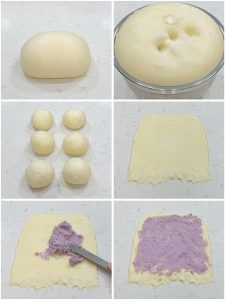
Mix all except butter and salt to the extension stage (thick membrane); add butter and salt, knead until a thin membrane forms.
Step 3 – First proof until doubled
First proof until doubled. A flour-dipped finger poke that doesn’t spring back means done. Divide the proofed dough into 6 equal pieces.
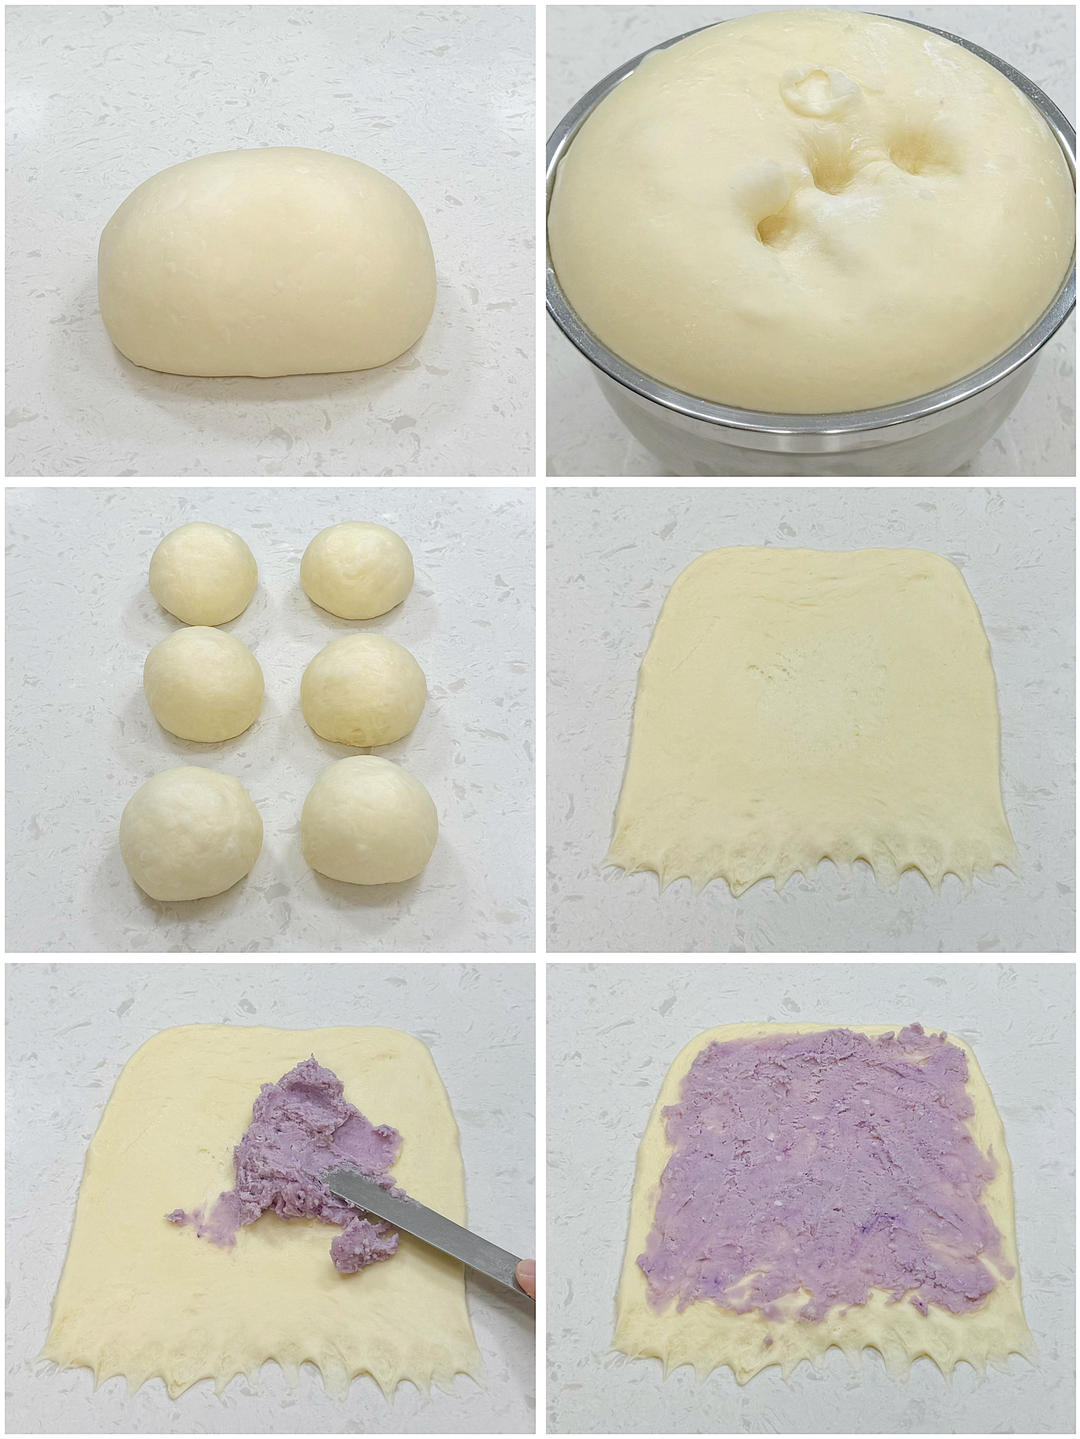
Step 4 – Roll each piece to about 30 cm, cut in half lengthwise, cros
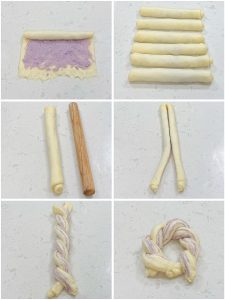
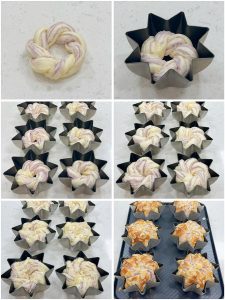
Roll each piece to about 30 cm, cut in half lengthwise, cross the two strands with cut sides up, join the ends, pinch the seam, and place…
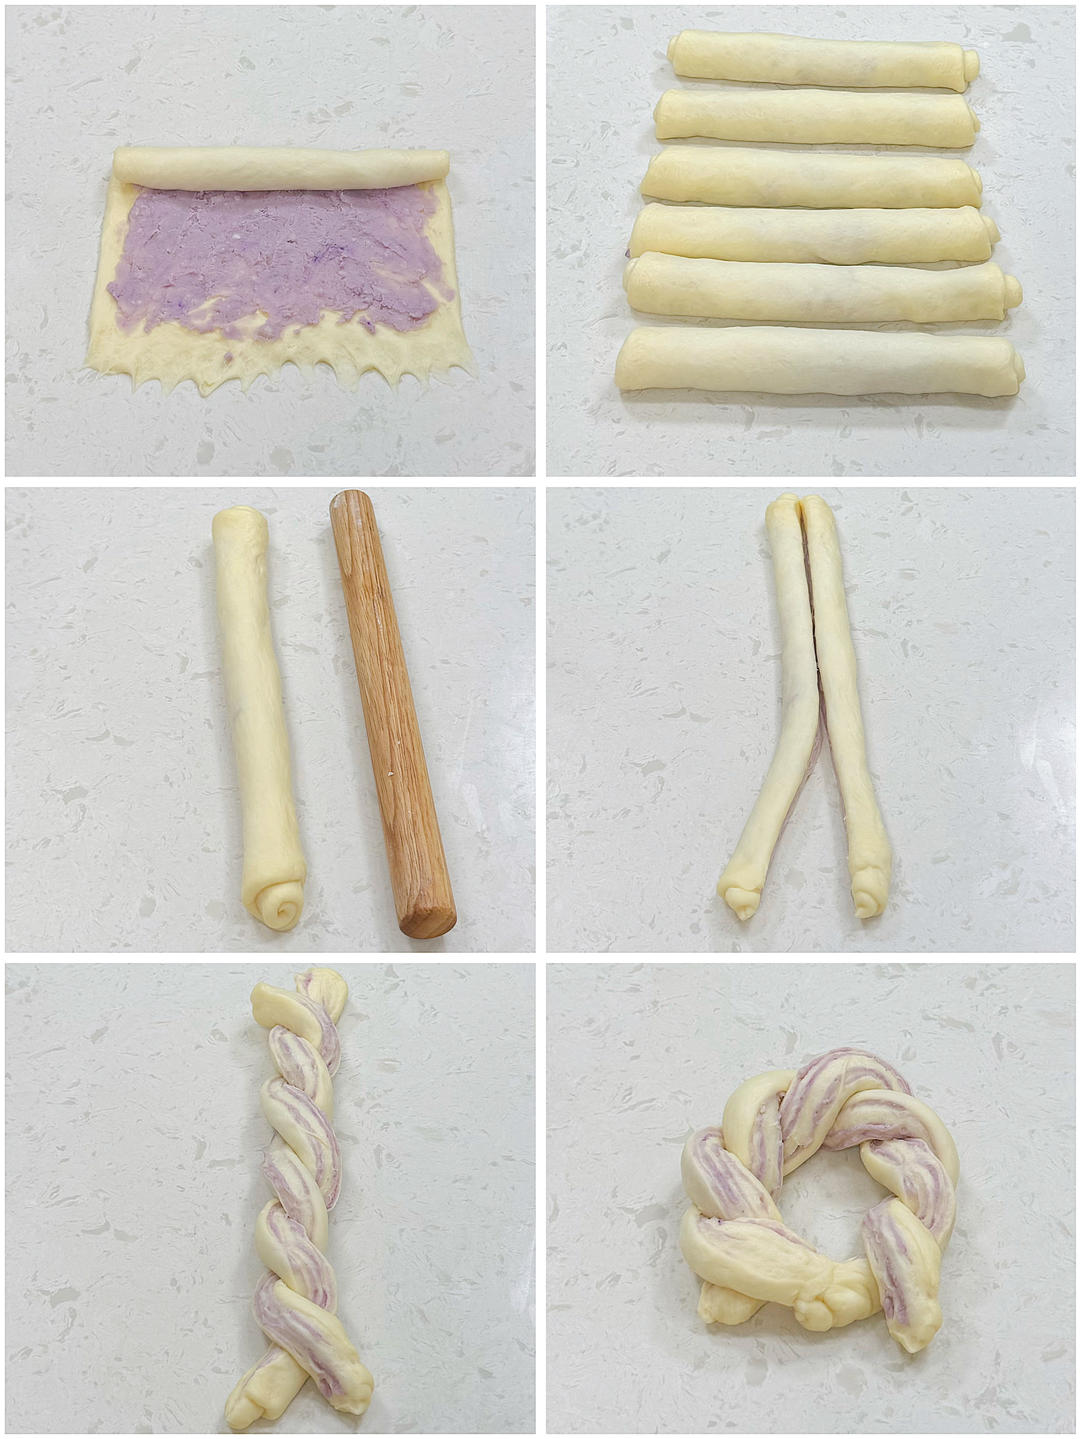
Step 5 – Second proof until doubled; brush the surface with egg wash
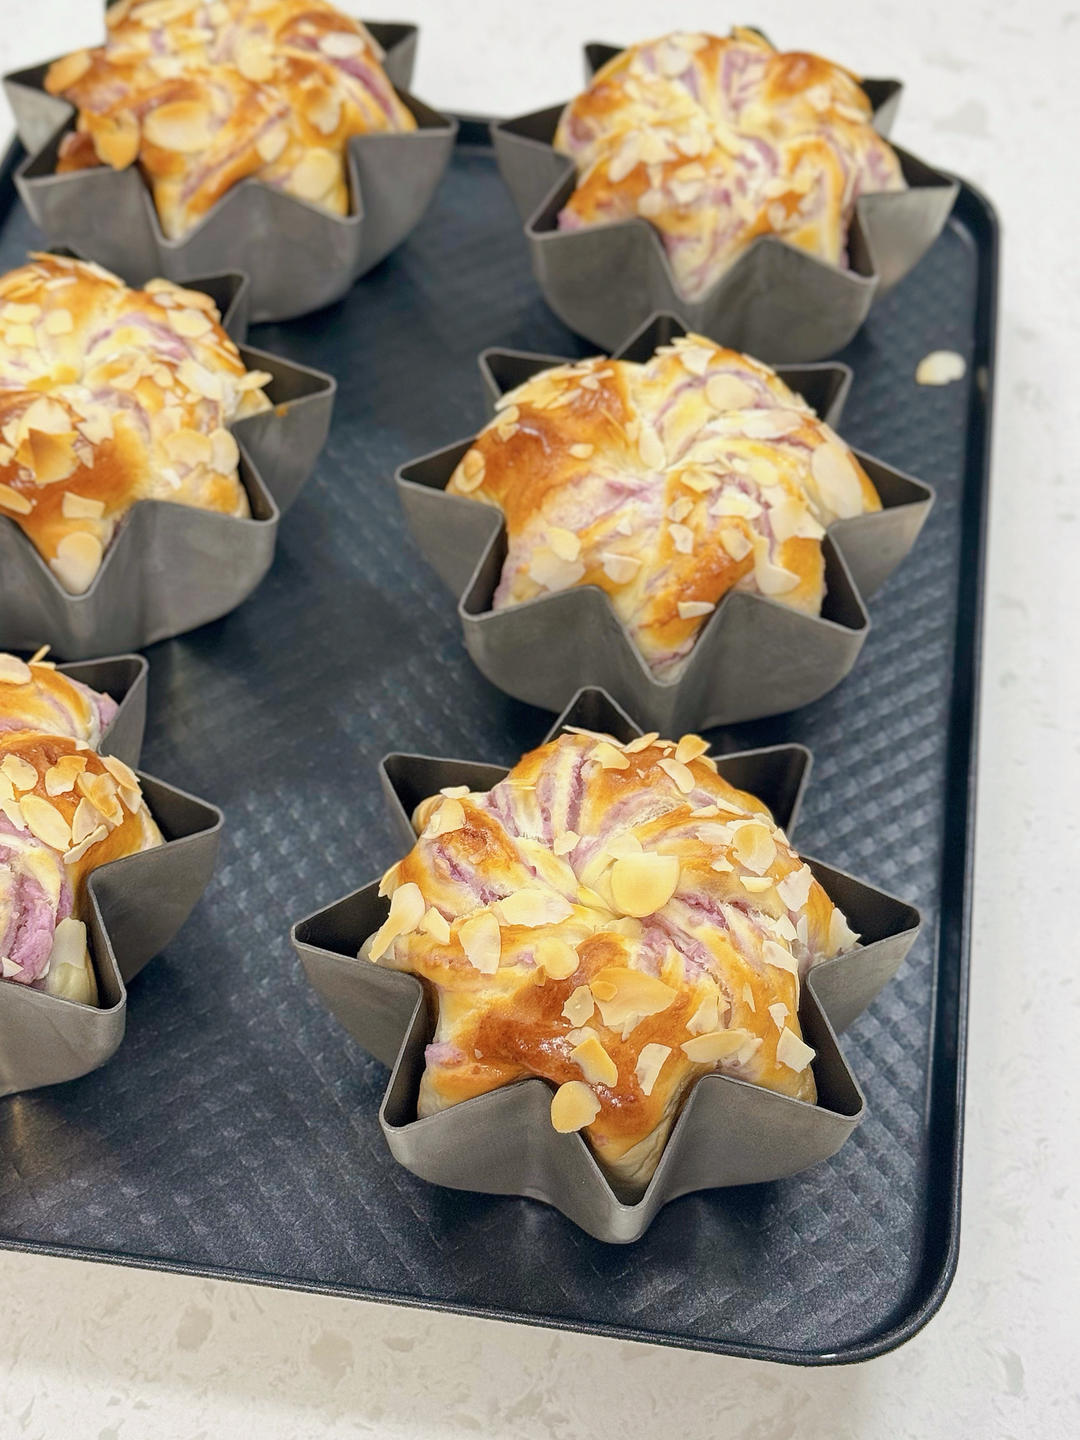
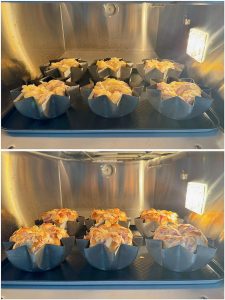
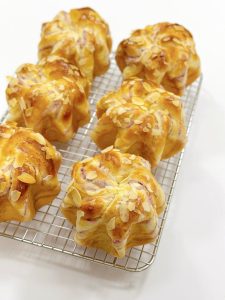
Second proof until doubled; brush the surface with egg wash and scatter almond slices. Bake: SP50, top 200°C / bottom 220°C.
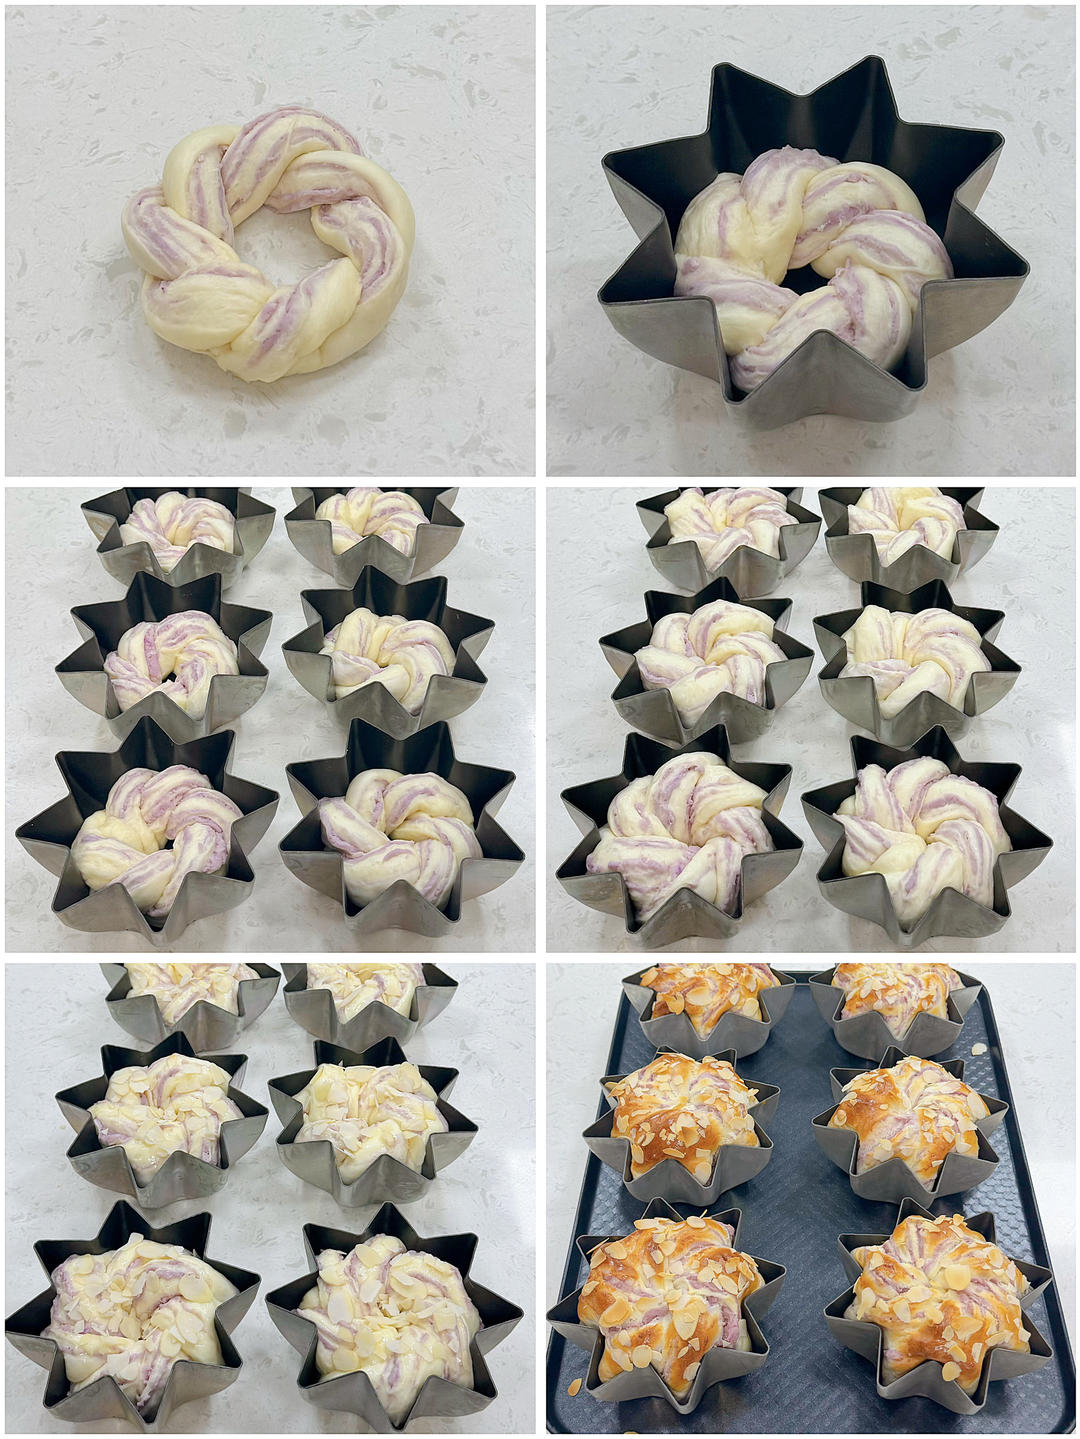
Step 6 – The Braided Buns
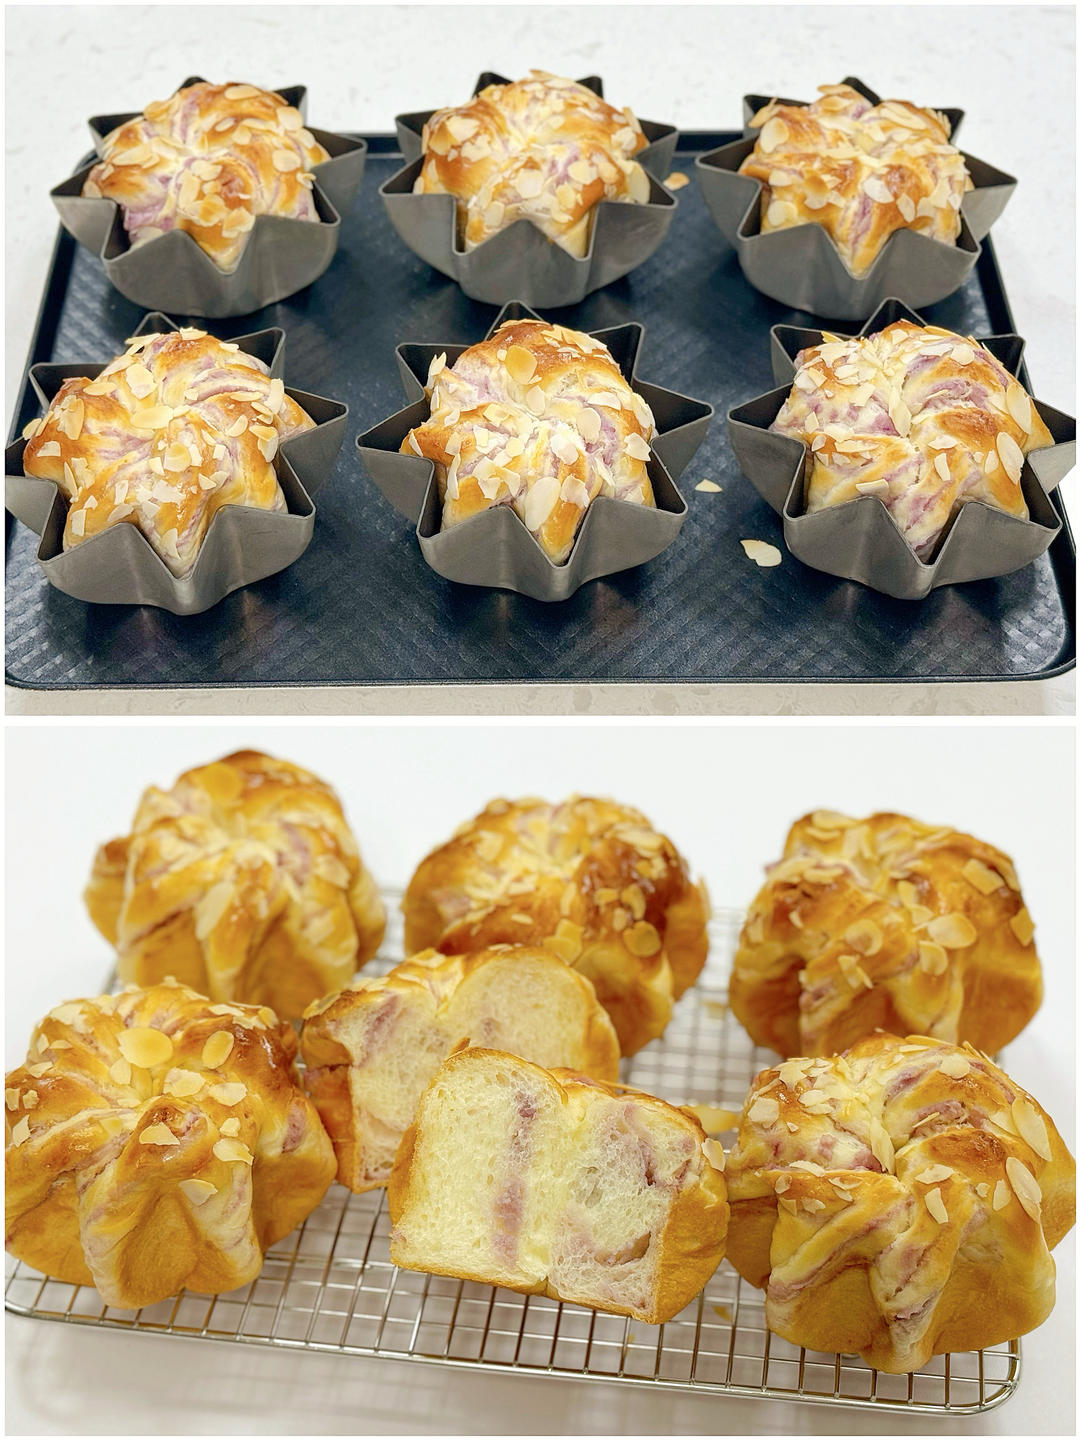
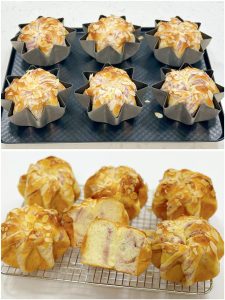
The shaped buns with their star-braid tops, ready for proofing.
Step 7 – Proofed and Puffed
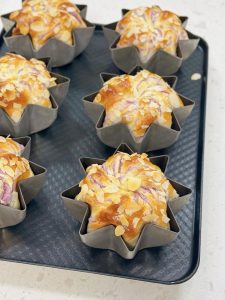
Proofed and puffed – nearly doubled in size.
Step 8 – The Egg Wash and Almonds
Brushed with egg wash and topped with almond slices before the oven.
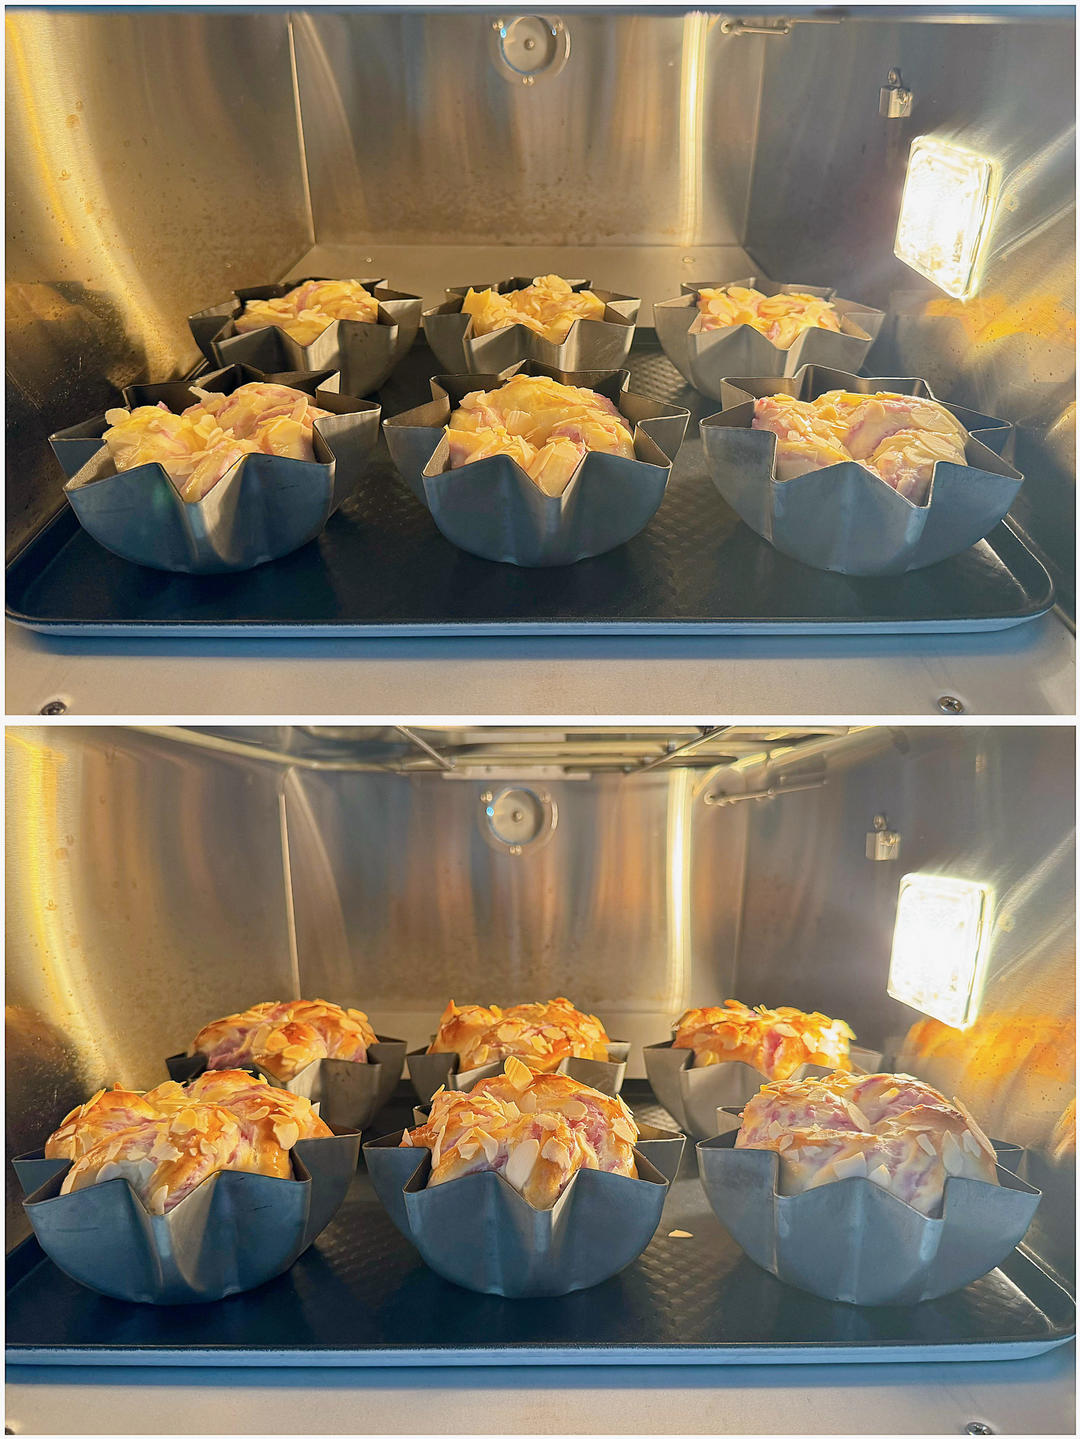
Step 9 – The Bake
Baking in the oven at the high top heat.
Step 10 – Out of the Oven
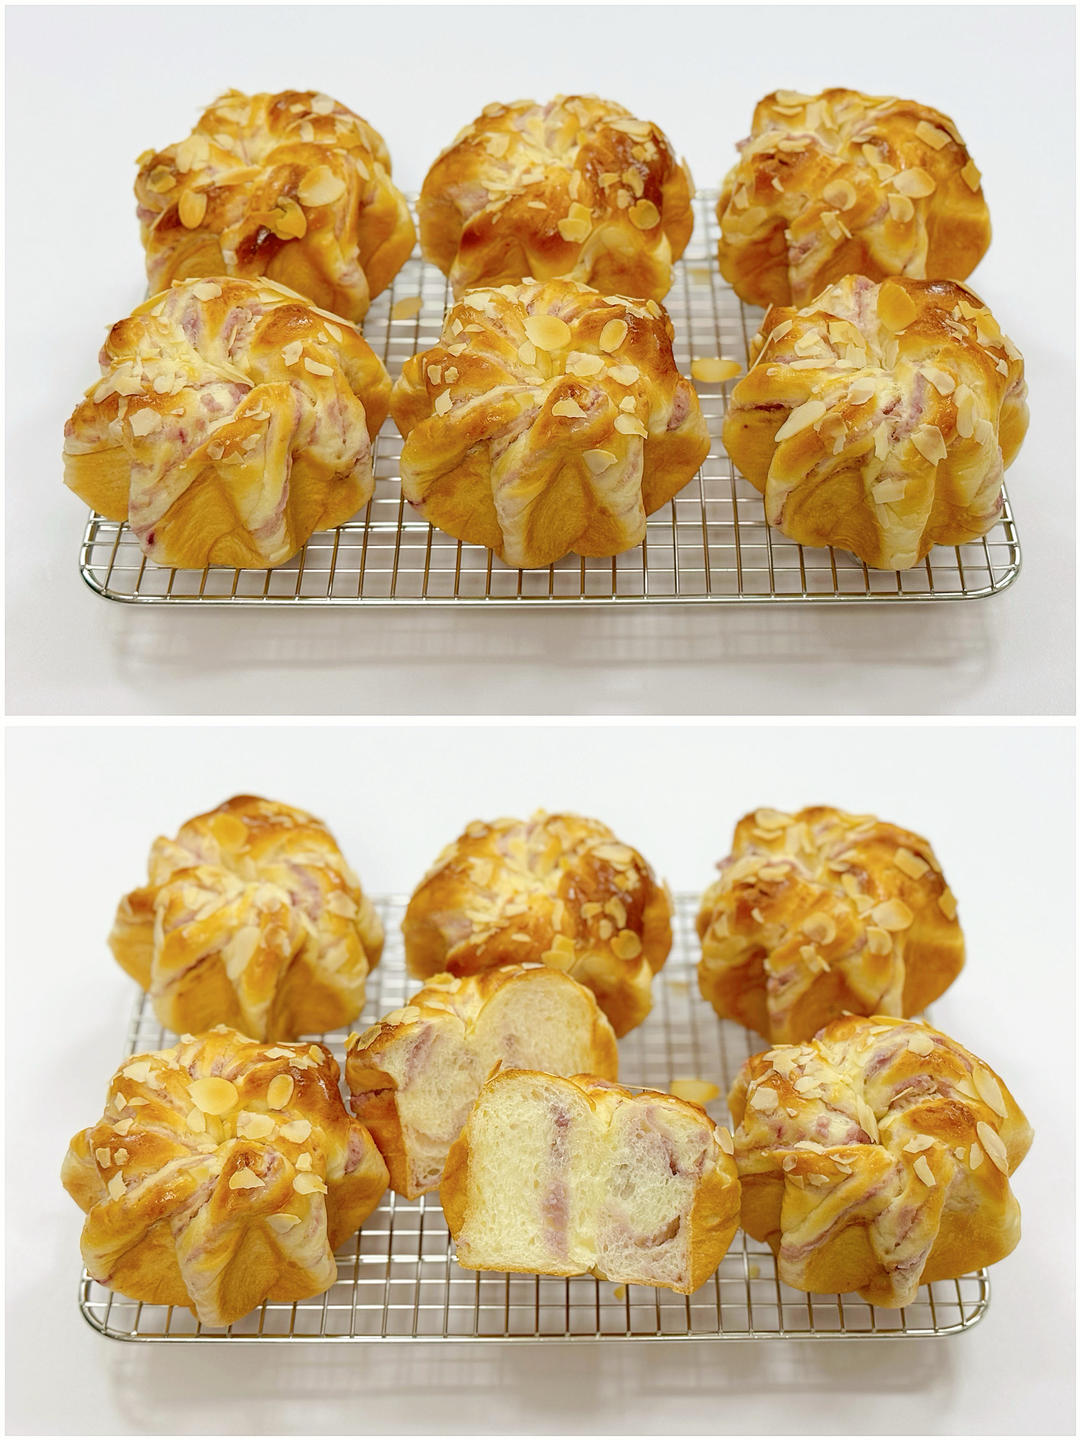
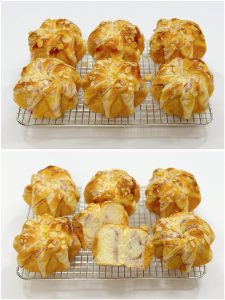
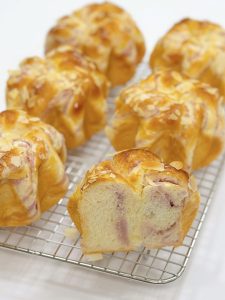
Fresh out of the oven, golden and fragrant.
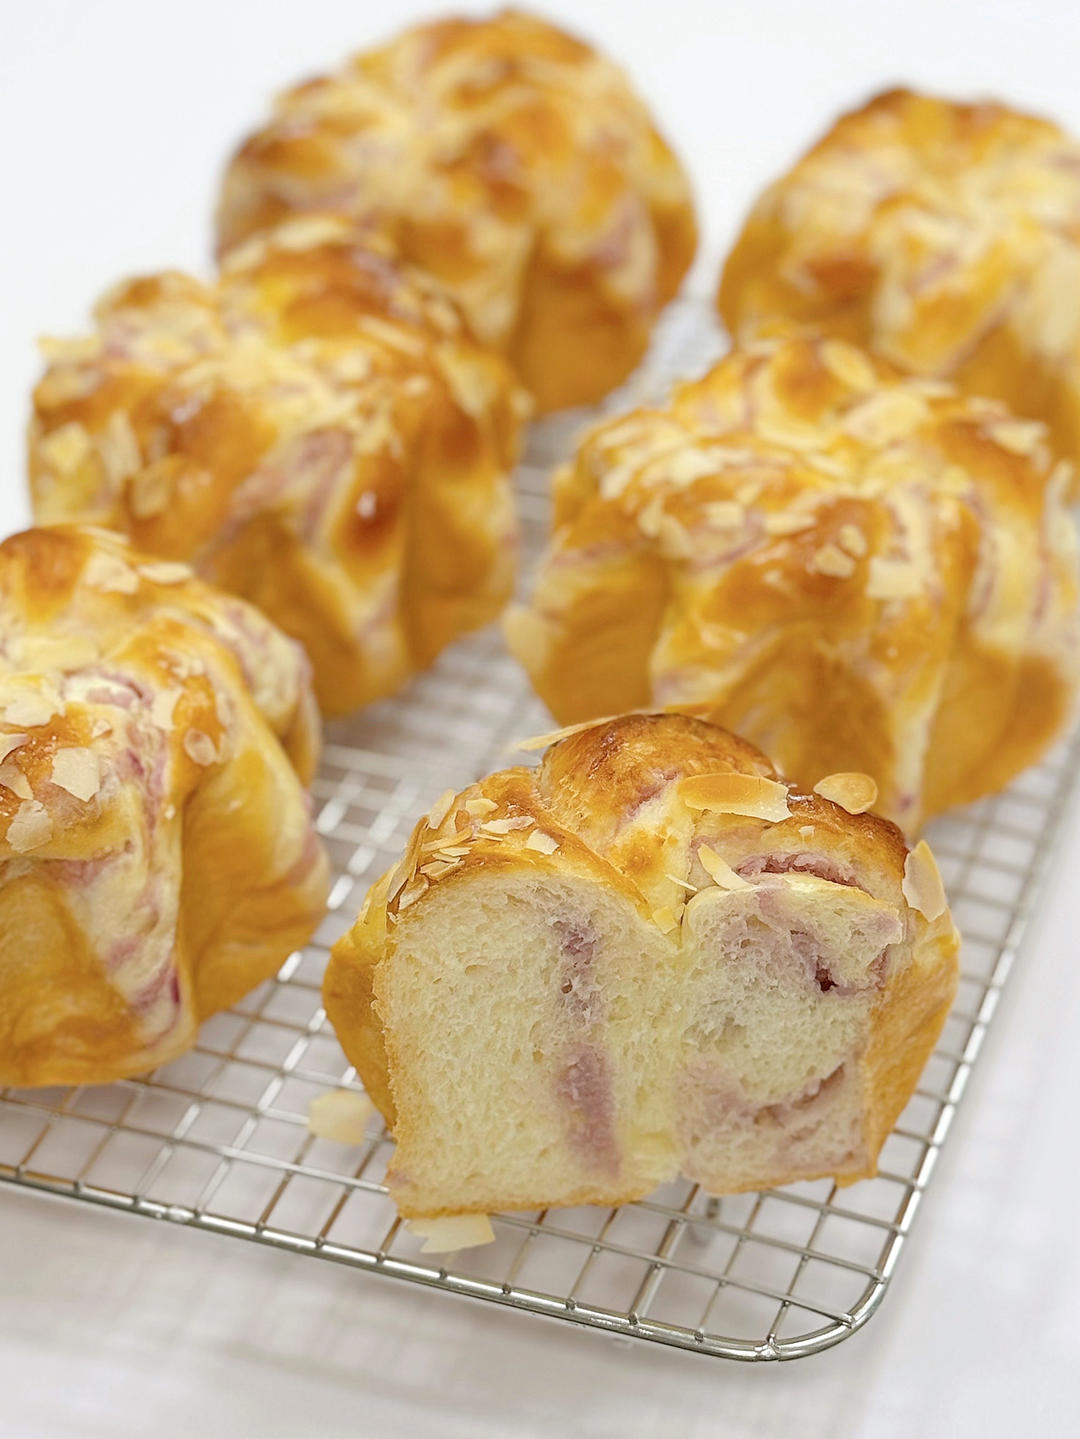
Step 11 – The Taro Core
Cooled and torn open to show the milky taro filling.
Common Mistakes When Making These Buns
1. Stars that puff into round buns. Cause: timid pinches. Fix: pinch the five points generously – the proof softens them.
2. A dense, heavy bun. Cause: under-kneading. Fix: the windowpane before the proof.
3. Leaking taro paste. Cause: overfilled or a weak seal. Fix: a modest filling and a firm seal.
4. A dry, tough crumb. Cause: too much flour. Fix: the recipe’s hydration and the enriched dough.
5. Pale, unrisen stars. Cause: not enough proof. Fix: proof until visibly puffed.
6. Burnt tops. Cause: the oven too hot. Fix: a moderate bake; tent with foil if needed.
Variations
Other pastes: Red bean or chestnut replace the taro – my steam-baked milk chiffon cake is the sponge alternative, and cloud-soft milk bread rolls and Chinese date cake the sweet shelf.
Matcha: A spoon of matcha in the paste for the green stars – my matcha chiffon cake is the matcha sweet, and cloud-soft milk bread rolls the unfilled dough.
More sesame: A scatter of black sesame on the egg wash – and with smiling sesame cookie balls and crispy pork floss and ham rolls the snack shelf is complete.
The sweet-bake shelf: With cloud-soft milk bread rolls, steam-baked milk chiffon cake, and matcha chiffon cake, the oven is never idle.
Frequently Asked Questions
How do I shape the star? Wrap the dough around the filling, seal, and pinch five points into the edge – the recipe’s shaping.
Can I use store-bought taro paste? Yes – the recipe’s homemade version is the flavor benchmark, and with steam-baked milk chiffon cake and matcha chiffon cake the sweet bake is covered.
How long do they bake? About 20-25 minutes at 180°C (356°F), until golden – and with yellow millet sticky rice cake and sticky rice apple cakes the sweet bake is covered.
Can I freeze them? Yes – bake, cool, freeze; warm 5 minutes before serving.
How long do they keep? Sealed, 2-3 days.
How to Serve
Serve warm, pulled apart – with cloud-soft milk bread rolls and steam-baked milk chiffon cake for a bakery table, or with matcha chiffon cake for a sweet spread.
Storage & Reheat
Store sealed 2-3 days or freeze a month; warm 5 minutes at 160°C (320°F). Do not microwave – the crumb turns rubbery.
Allergen Notice
This recipe contains gluten (flour), dairy (milk, butter), and egg. It is free of soy, nuts, fish, and shellfish.
Nutrition Disclaimer
Nutrition information is calculated using an ingredient database and should be considered an estimate. In cases where multiple ingredient alternatives are given, the first listed is calculated for nutrition. Garnishes and optional ingredients are not included.
About the Author & Recipe Development
I am Lin, a professional Chinese chef and food writer with a decade in restaurant kitchens before turning to recipes. This xiachufang baker’s taro star buns are my sister’s bakery order made at home, and the recipe’s pinch-before-proof shaping is exactly why the stars hold. I tested it as written. I have not tested the matcha or red-bean variations, so those are your experiments, not my claims.
Authoritative References
USDA Food Safety and Inspection Service – Safe Temperature Chart for egg and dairy handling in baking.
Taro Paste Star Buns (Nai Xiang Yu Ni Xing Xing Bao): Stars

Equipment
- Bowl or mixer
- Tray
- Brush
Ingredients
Dough
- 300 g bread flour 2 1/4 cups
- 3 g dry yeast 3/4 tsp
- 40 g sugar 3 tbsp
- 3 g salt 1/2 tsp
- 1 egg
- 150 g milk 2/3 cup
- 30 g butter 2 tbsp
Filling
- 200 g cooked taro, mashed with butter, sugar, and milk to taste
- egg wash, for the top
Instructions
- Milky taro filling: 1500 g cooked taro, 80 g fine sugar, 150 g condensed milk, 10 g purple potato powder, 180 g milk, cream…

- Mix all except butter and salt to the extension stage (thick membrane); add butter and salt, knead until a thin membrane forms.
- First proof until doubled. A flour-dipped finger poke that doesn’t spring back means done. Divide the proofed dough into 6 equal pieces.
- Roll each piece to about 30 cm, cut in half lengthwise, cross the two strands with cut sides up, join the ends, pinch the seam, and place…
- Second proof until doubled; brush the surface with egg wash and scatter almond slices. Bake: SP50, top 200°C / bottom 220°C.
- The shaped buns with their star-braid tops, ready for proofing.
- Proofed and puffed – nearly doubled in size.
- Brushed with egg wash and topped with almond slices before the oven.
- Baking in the oven at the high top heat.
- Fresh out of the oven, golden and fragrant.
- Cooled and torn open to show the milky taro filling.



Leave a Reply