If you have ever pulled a lid off a steamer and found flat, dense, slightly sour discs where fluffy baozi should be, you are not alone. For years my steamed buns came out like hockey pucks, and I blamed everything — the flour, the yeast, the humidity. The problem was almost never the ingredients. It was the proofing.
This is the method I use now, the one I learned watching home cooks in Chengdu who make three tiers of baozi before breakfast without a single thermometer. It is a one-rise dough — 10g yeast, 1kg all-purpose flour, 600g warm water — paired with a steam-box proofing trick that gives you a warm, humid environment without any special equipment. If you want the broader foundations first, my Chinese cooking techniques for absolute beginners guide covers the basics of dough hydration and heat control that everything else builds on.
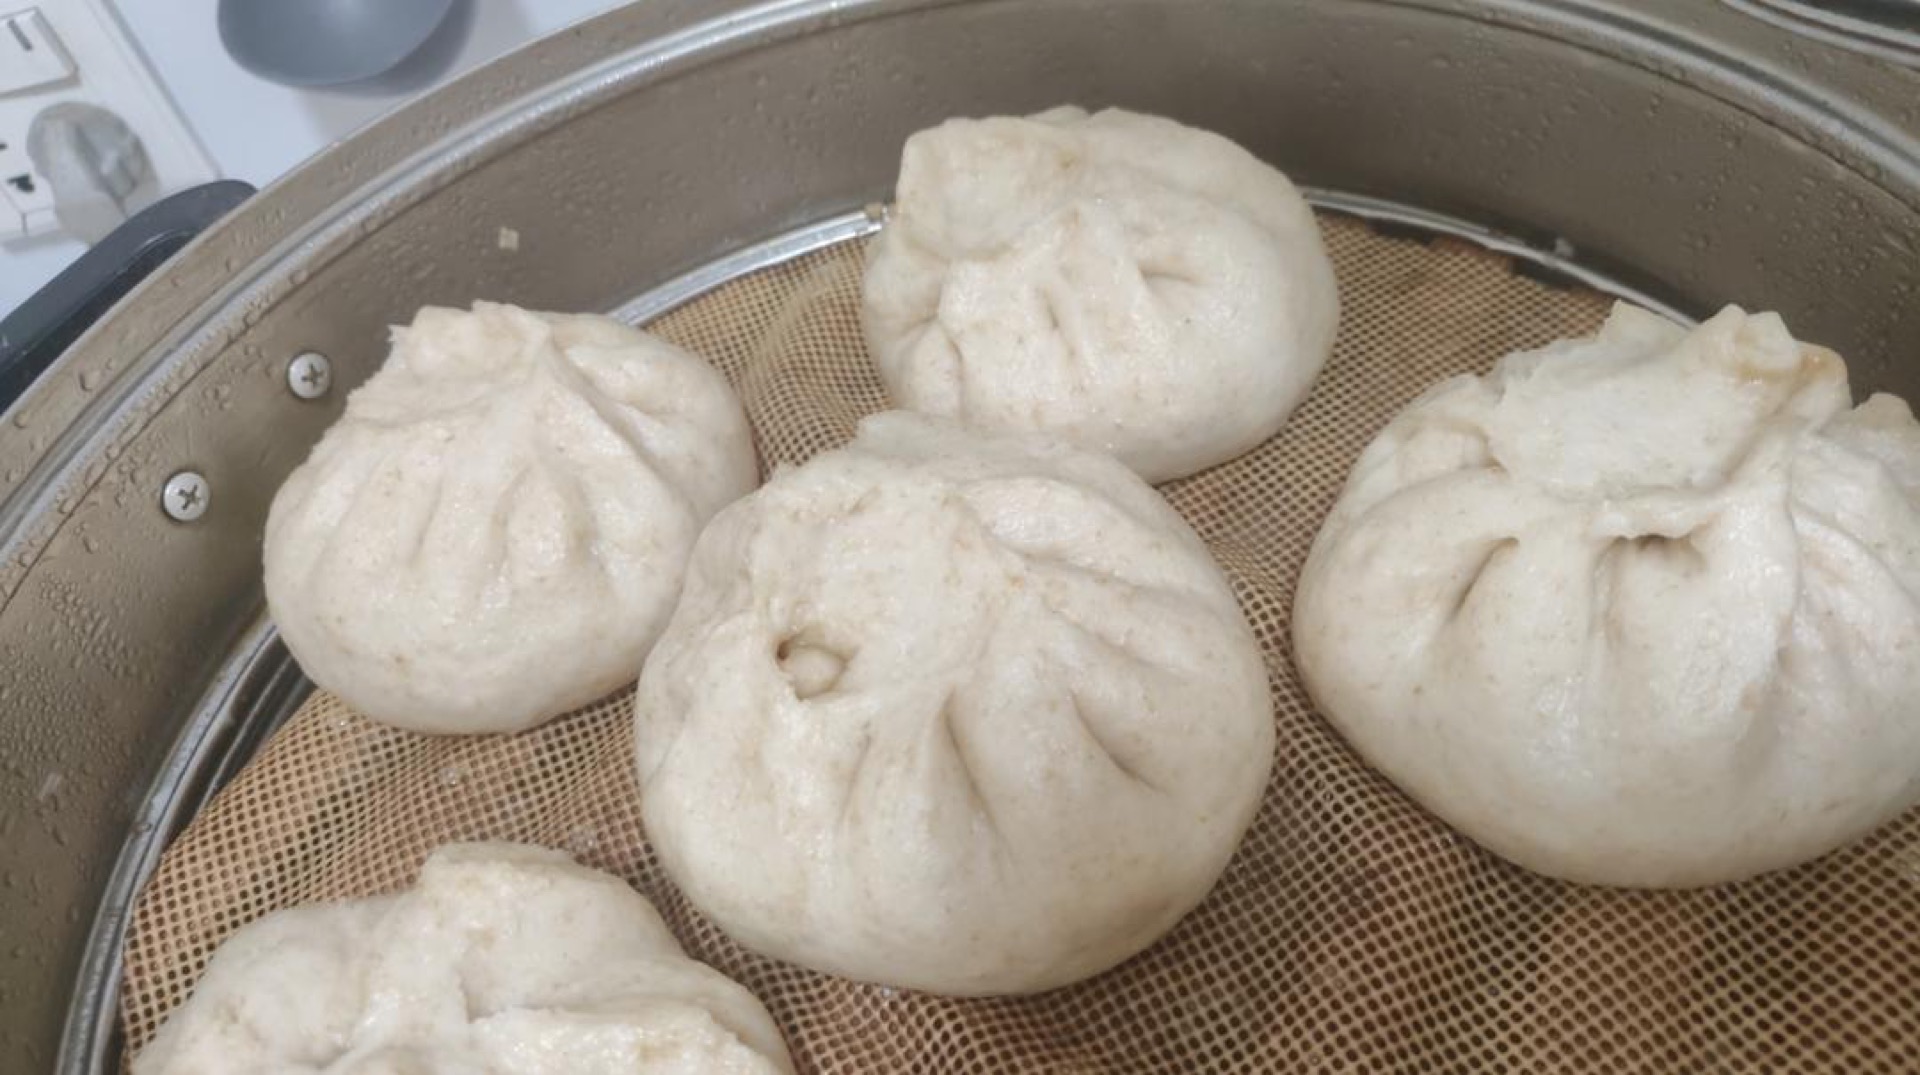
Honest caveat up front: this method relies on your eyes and hands, not a timer. The 15-minute proof is a starting point, not a law. In a cold kitchen in January you may need to repeat the steam step twice. That is normal, and I will show you exactly what to look for.
What Is 发面 (Fa Mian)?
发面 literally means “risen dough” — dough leavened with yeast or a starter so it traps gas and puffs up when steamed. It is the backbone of northern Chinese breakfast: baozi (filled buns), mantou (plain steamed bread), and huajuan (flower rolls). Unlike Western bread, which is baked and develops a crust, 发面 is steamed, which keeps the interior tender, moist, and snow-white.
The first time someone handed me a piece of dough and said “feel it — if it’s warmer than your wrist, the yeast is already dying,” I finally understood why my buns kept failing. Warm, not hot. That is the whole game.
There are two schools: two-rise (二次发酵) and one-rise (一次发酵). This recipe is the one-rise shortcut, which trades a little depth of flavor for speed and reliability. If you want to go deeper into dough science, my cloud-soft milk bread rolls using the sponge dough method explains how pre-ferments change texture, and the same principles apply here.
Why This Recipe Works
- The 10:1000:600 ratio is forgiving. 10g yeast, 1000g flour, 600g water gives roughly 60% hydration — soft enough to steam into a pillowy crumb, firm enough to shape without fighting sticky dough.
- Steam-box proofing beats a warm oven. Trapping steam inside stacked bamboo tiers creates the exact 35–38°C, high-humidity environment yeast loves, without drying out the surface.
- One rise, no punching down. You shape first, then proof. Fewer steps means fewer places to go wrong.
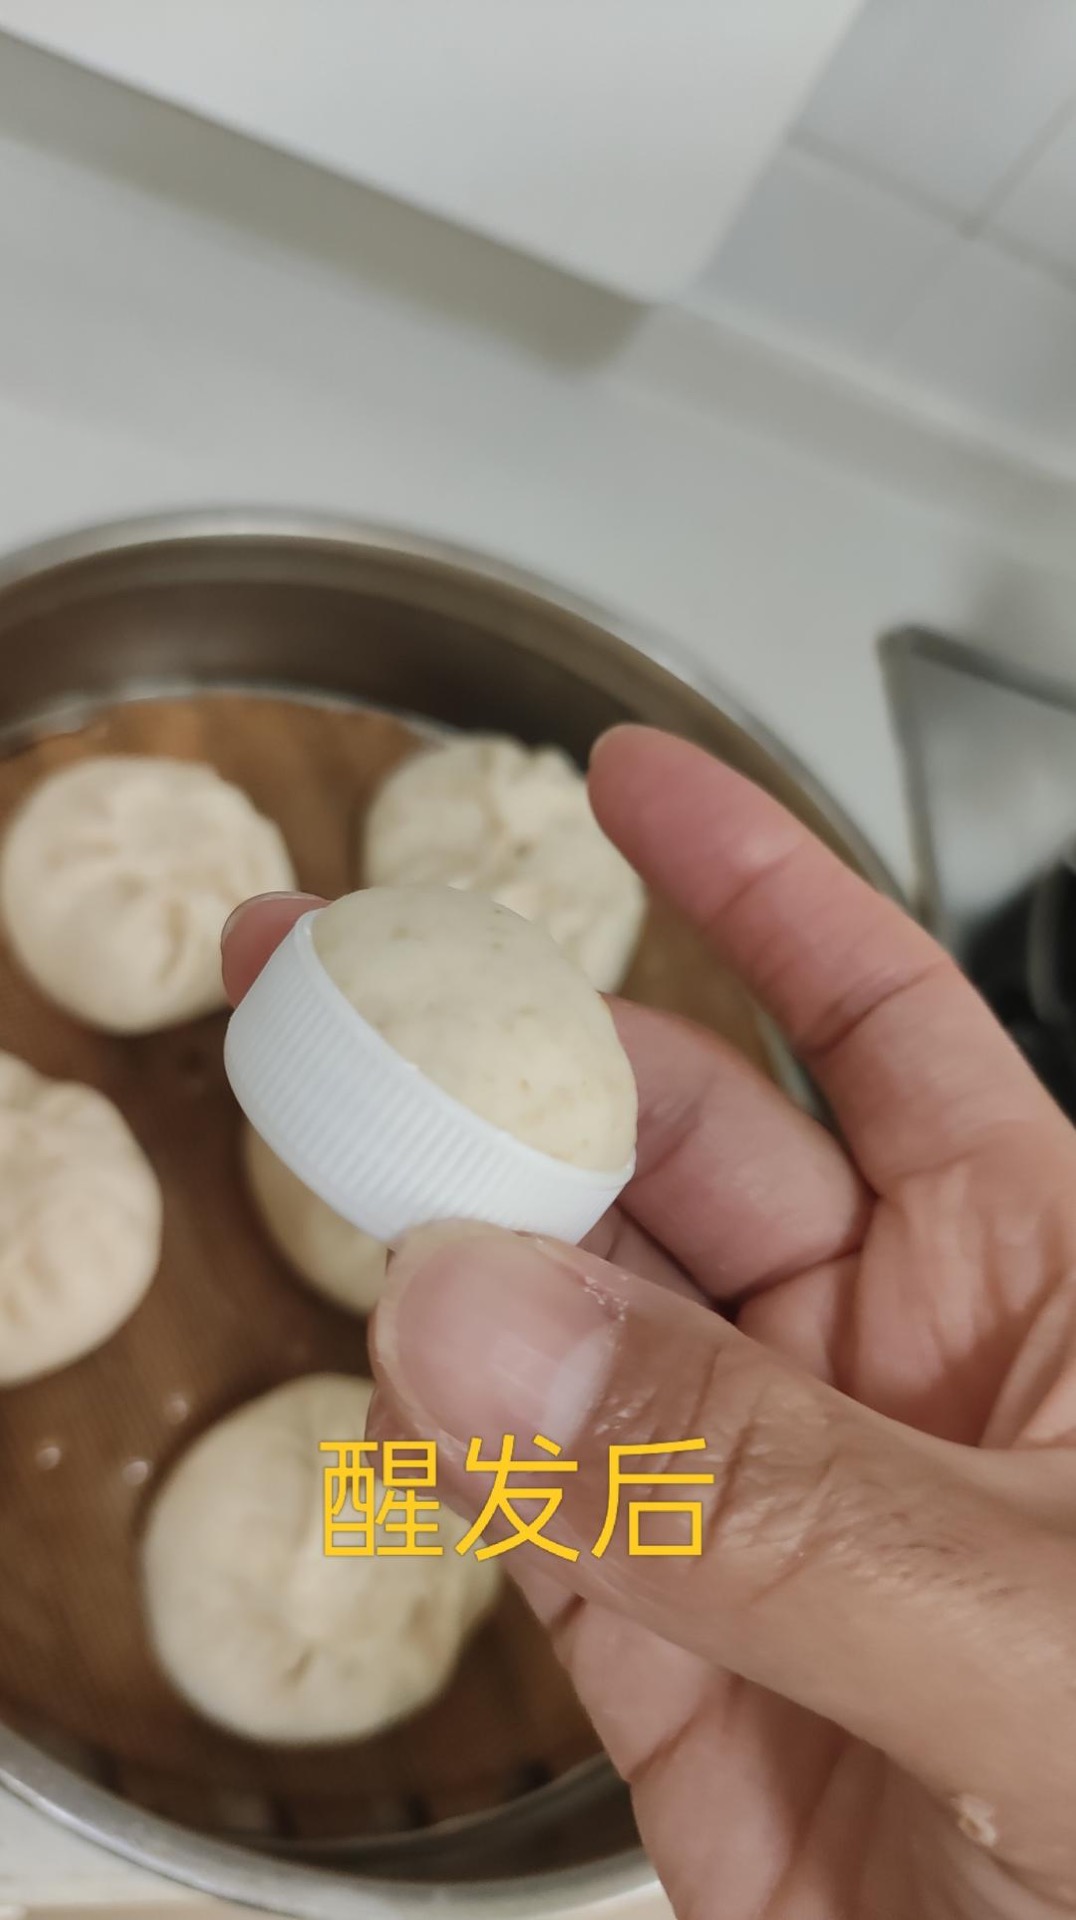
- Visual cues replace timers. A small “lid bun” (瓶盖馒头) lets you peek at the proof without opening the steamer and collapsing everything.
- It scales. The same dough makes baozi, mantou, and huajuan — just change the shaping.
Do not open the lid. I mean it. Every time you lift that lid mid-steam, you lose the heat that is doing the actual cooking, and the buns deflate like a sad soufflé. Wait for the timer.
Equipment Needed
- A large mixing bowl
- Bamboo steamer baskets (two or three tiers) with a lid — or a metal steamer with a tight lid
- A wide pot or wok that the steamer tiers sit on
- Parchment paper squares or cabbage leaves for lining
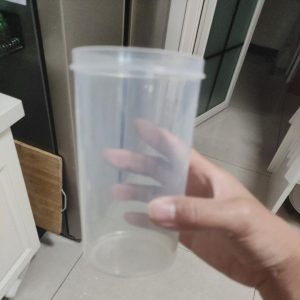
- A small heatproof cup or a bottle cap for the “lid bun” test
- Clean kitchen towel
- Kitchen scale (strongly recommended — volume measuring is unreliable for dough)
Ingredients
- 10g instant dry yeast (安琪 or any active dry yeast)
- 1000g all-purpose flour (中筋面粉)
- 600g warm water, roughly 35°C — comfortable to the touch, never hot
Ingredient Notes
Yeast. 10g is generous for 1kg of flour, and that is intentional — it powers the fast one-rise method. If your yeast is old or has been sitting open in the cupboard, proof it in the warm water with a pinch of sugar for 10 minutes first. If it does not foam, throw it out.
Flour. Chinese all-purpose flour (中筋面粉) sits around 10–11% protein, which is ideal. Bread flour makes the buns chewier; cake flour makes them collapse. If you only have Western all-purpose, it works fine.
Water. The temperature matters more than the amount. Test it on the inside of your wrist — it should feel barely warm, like bathwater for a baby. Water above 45°C kills yeast outright.
Prep & Mise en Place
Measure everything before you start. Set your steamer tiers on the counter and line them with parchment or cabbage leaves. Fill your pot with enough water to steam for 20 minutes without running dry — usually 5–7cm. Have a small heatproof cup ready for the lid-bun test, and a clean towel to wipe condensation off the lid.
Cooking Process
Step 1: Mix the dough
Pour a small amount of warm water into any container — warm, not hot, when you touch it with your hand. Add the 10g yeast and stir thoroughly until it dissolves completely. Pour this into the 1kg of flour and mix into a dough. Knead until it is a bit smoother, then divide it into the portions you plan to shape. This is the one-rise method, so shape your buns now rather than letting the dough bulk-ferment first.
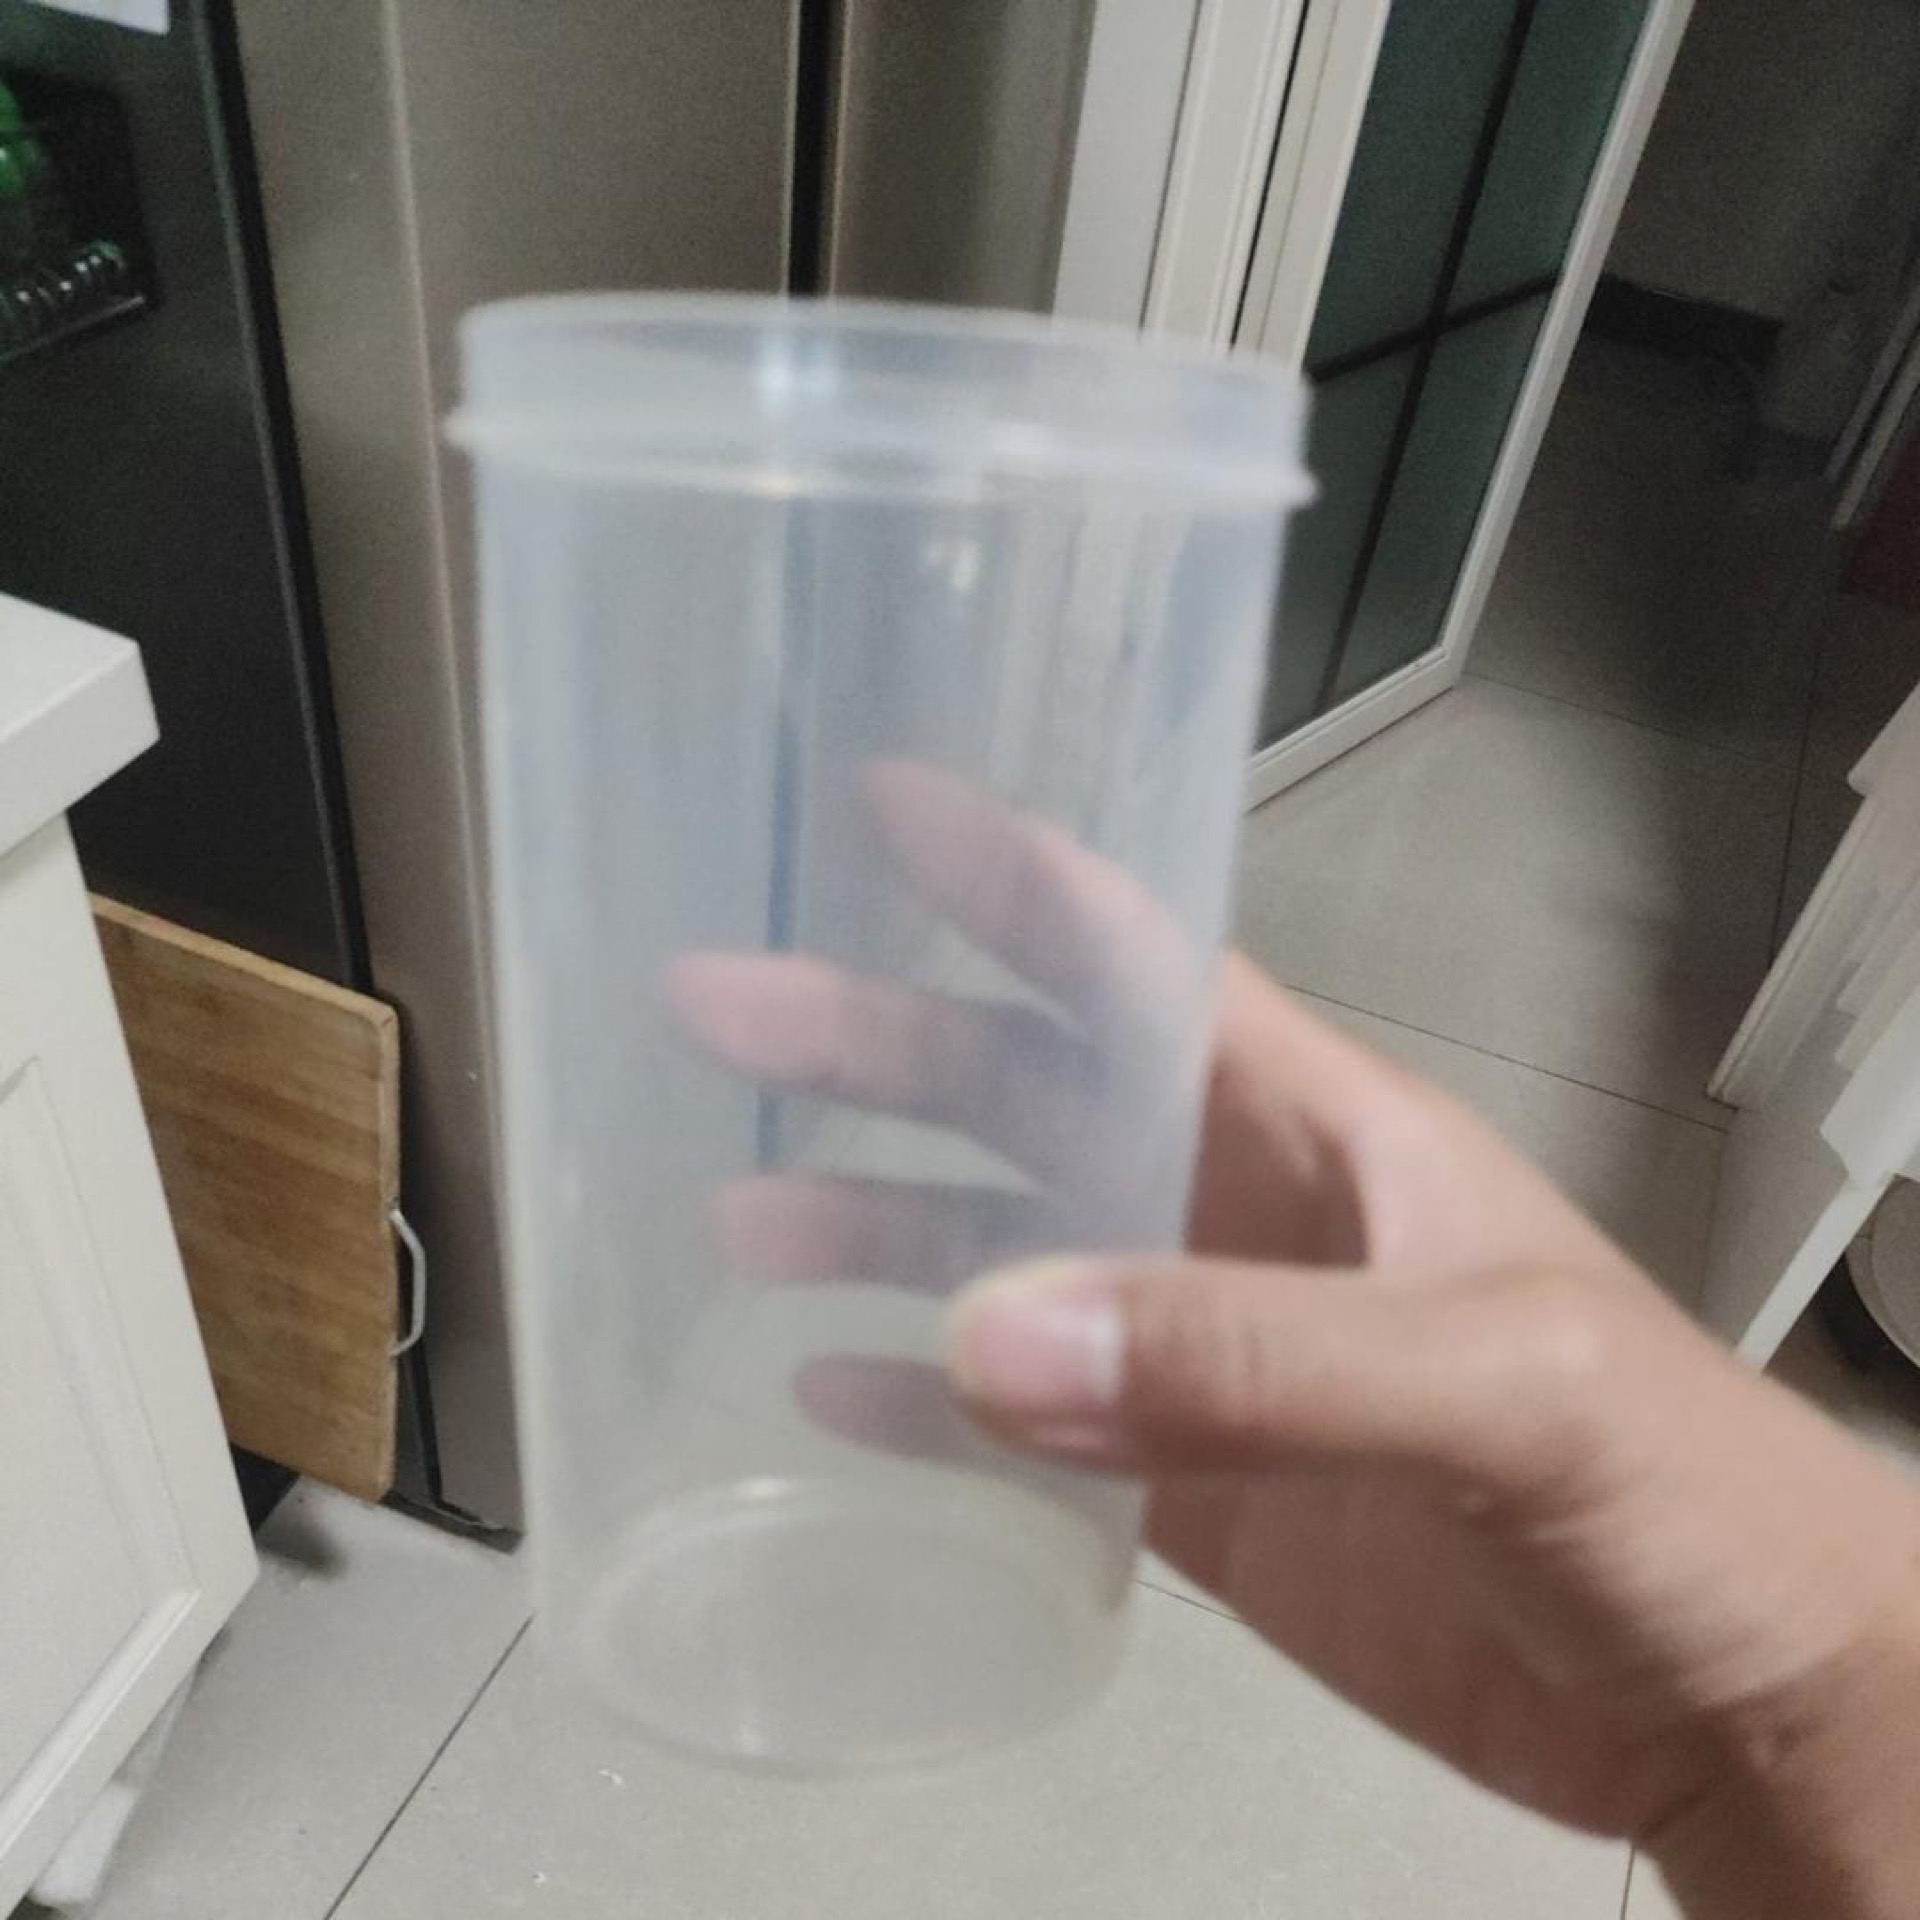
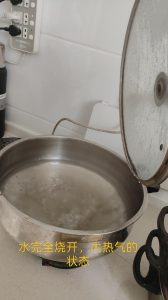
Step 2: Bring a pot of water to a rolling boil
Bring a pot of water to a full, rolling boil — you want big clouds of steam pouring off the top.
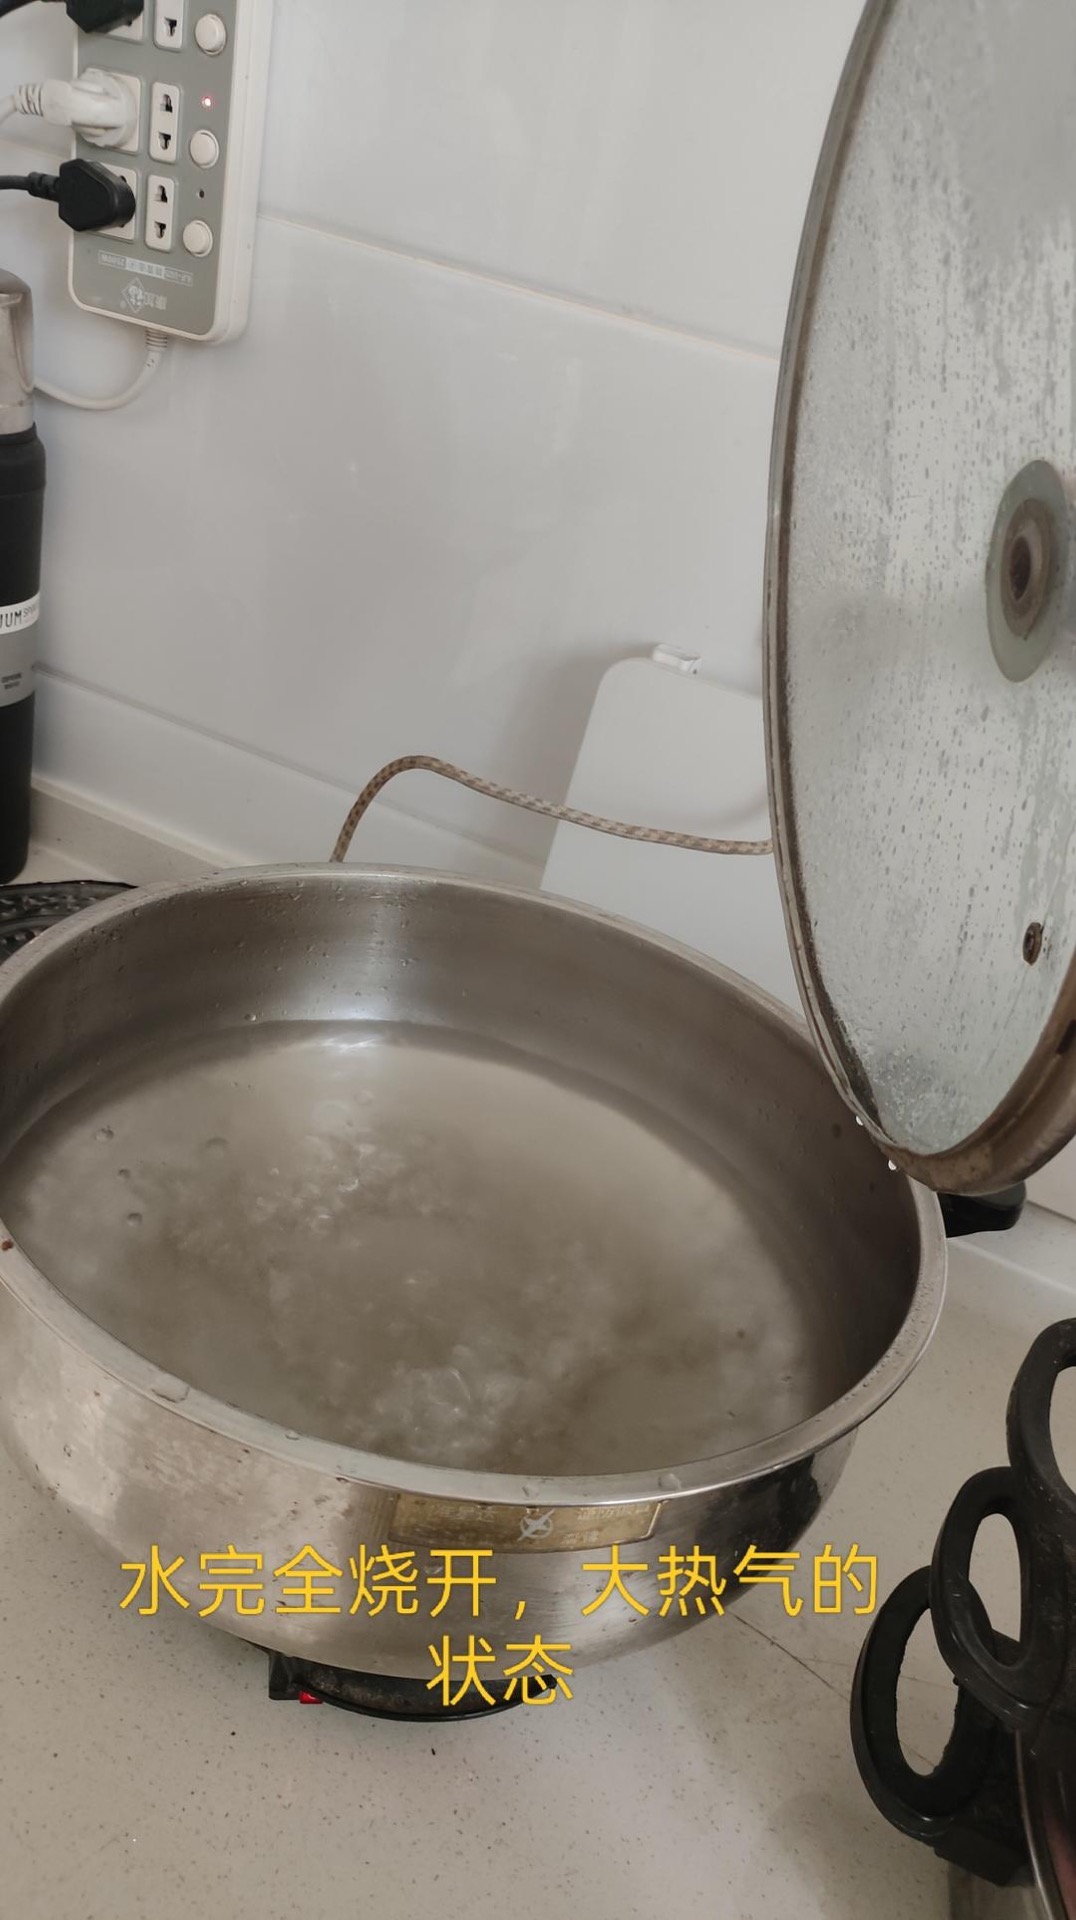
Step 3: Add the lid-bun test piece
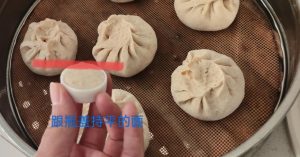
Take a small piece of dough, flatten it level, and place it in the pot alongside the buns so it proofs at the same rate. This is your window into the proof.
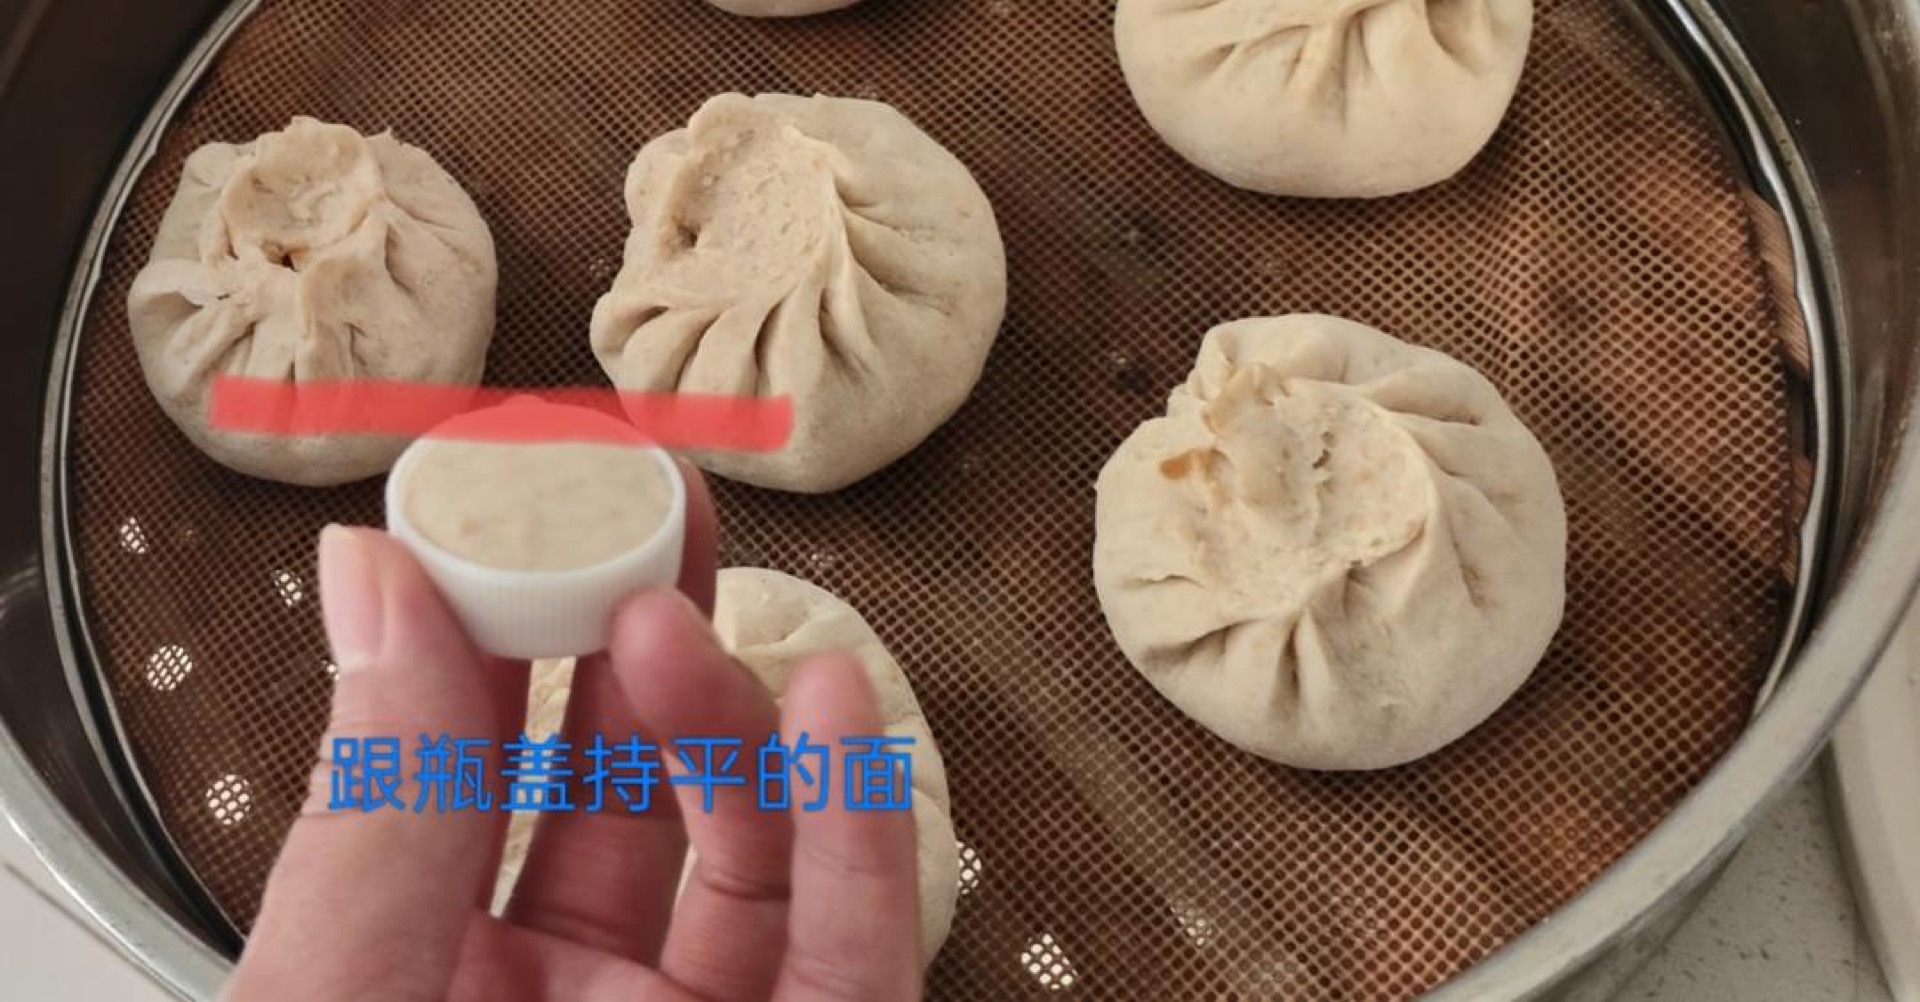
Step 4: Set up your tiers
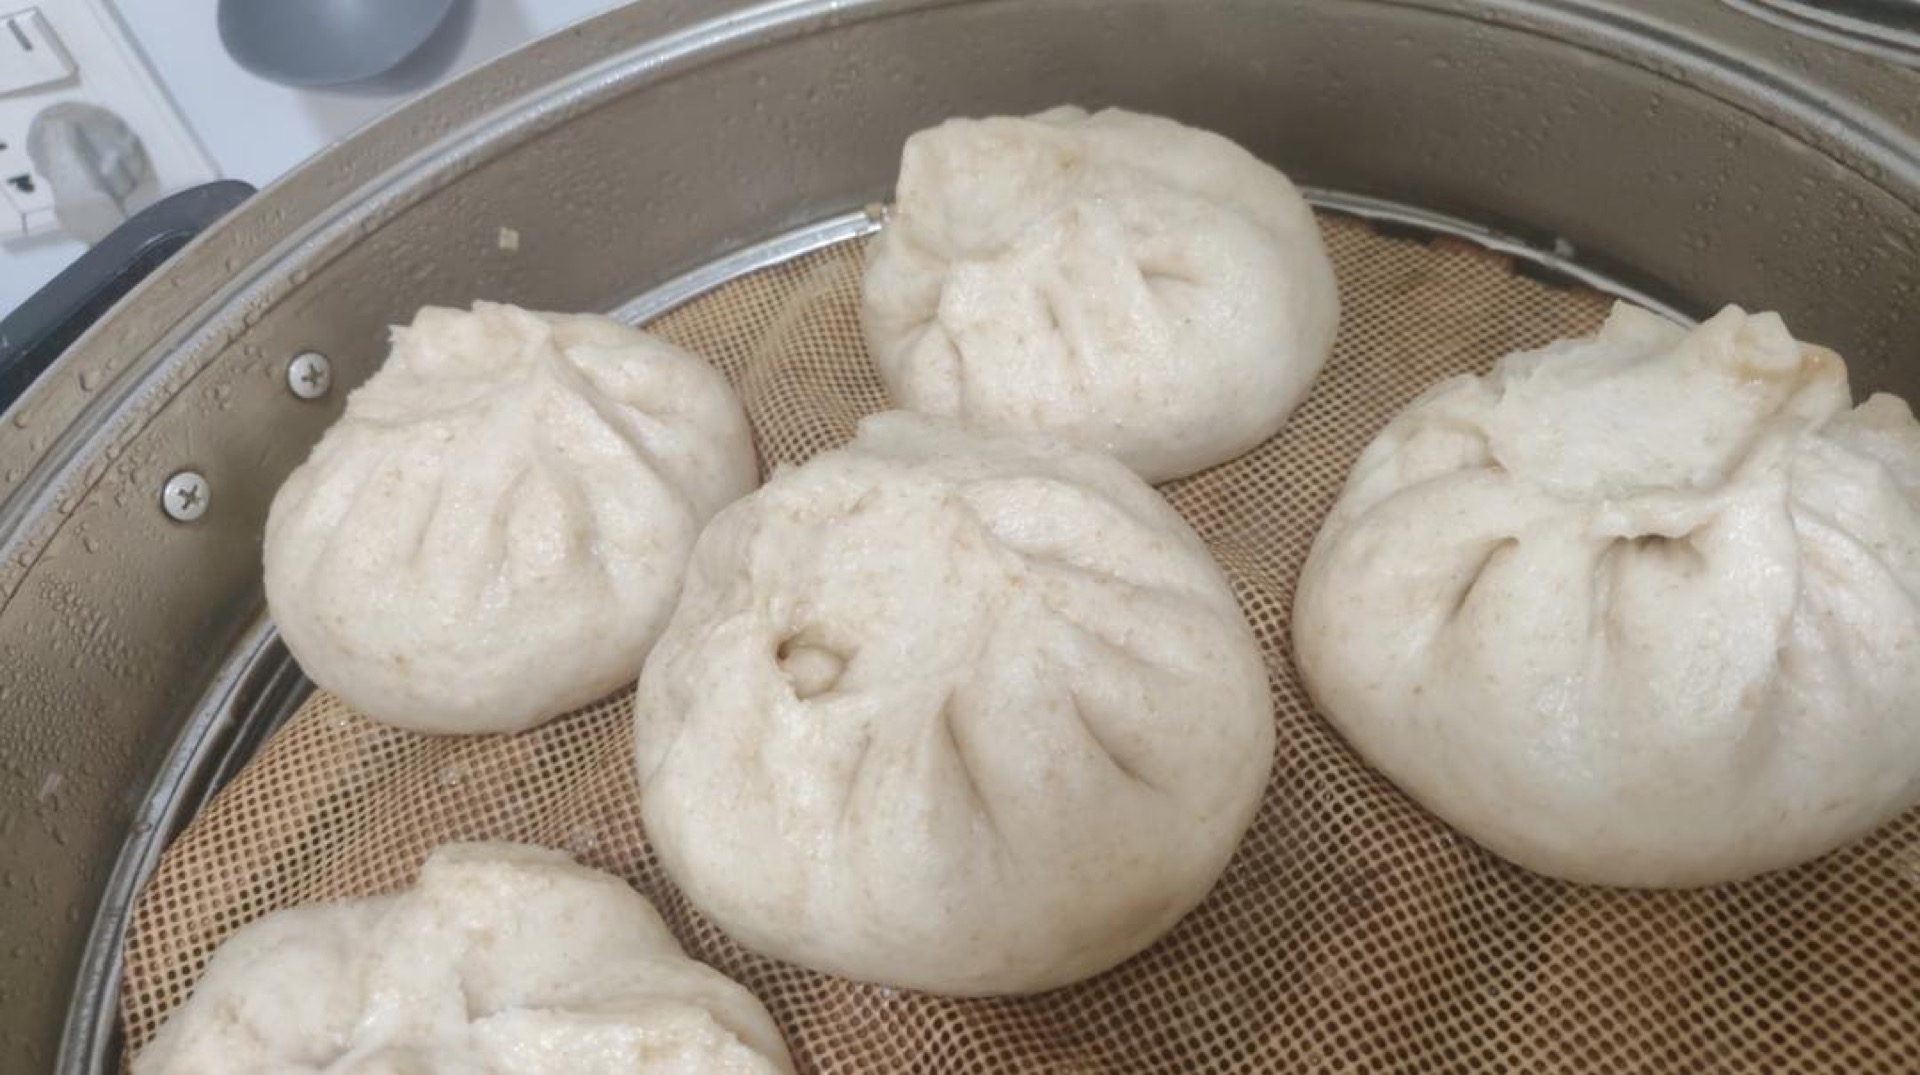
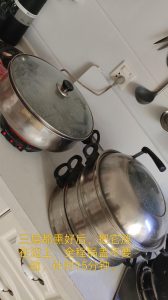
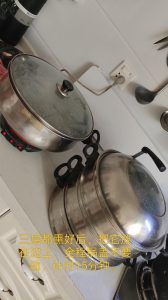
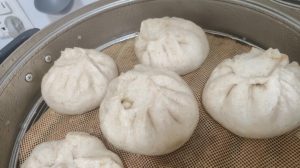
I steamed three tiers of buns. Stack the three tiers with the lid on, and set them aside on the table, leaving a clear spot for them.
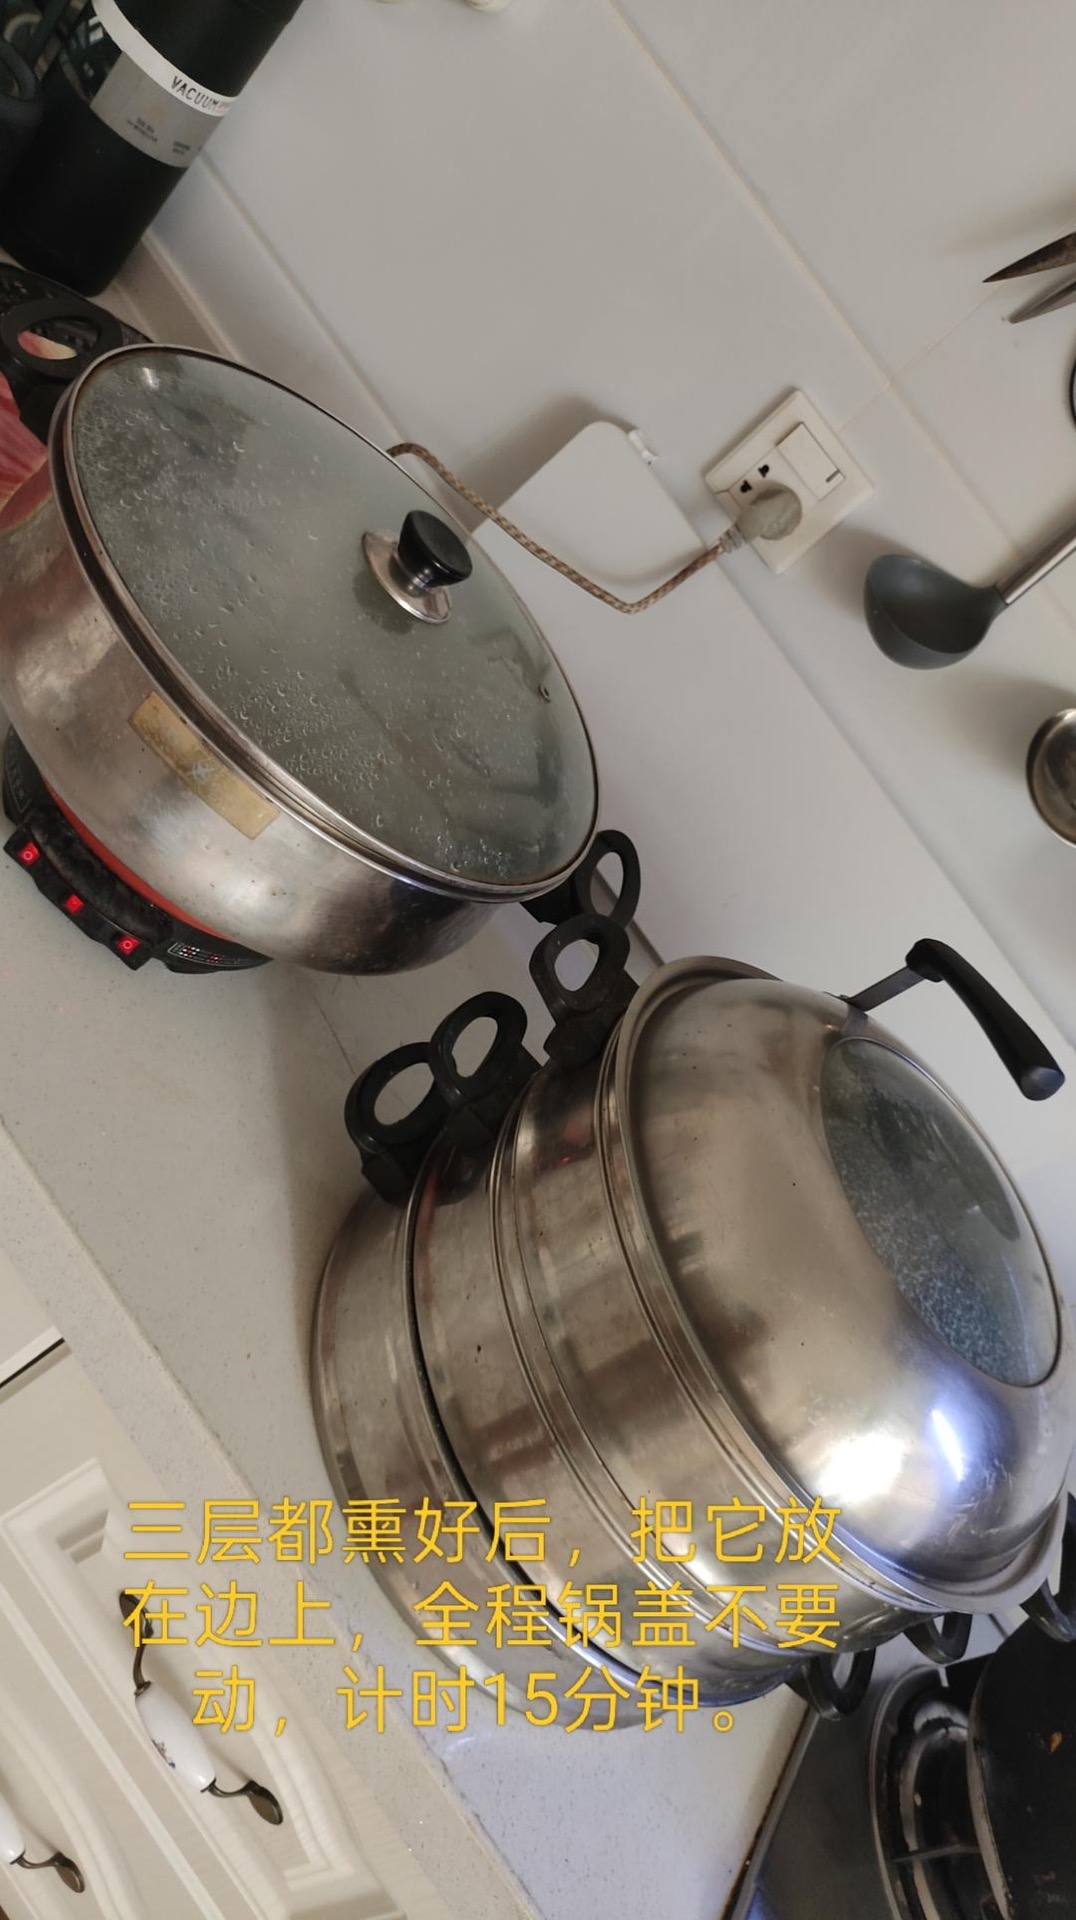
Step 5: Steam-warm the first tier
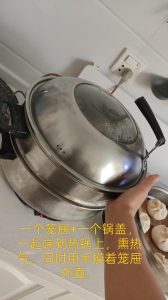
Take a single tier plus its lid and carry it to the pot to catch the steam — full heat, all burners on. Touch the edge of the tier with your hand; after about 10 seconds it should feel hot to the touch. If one side heats unevenly, rotate the tier.
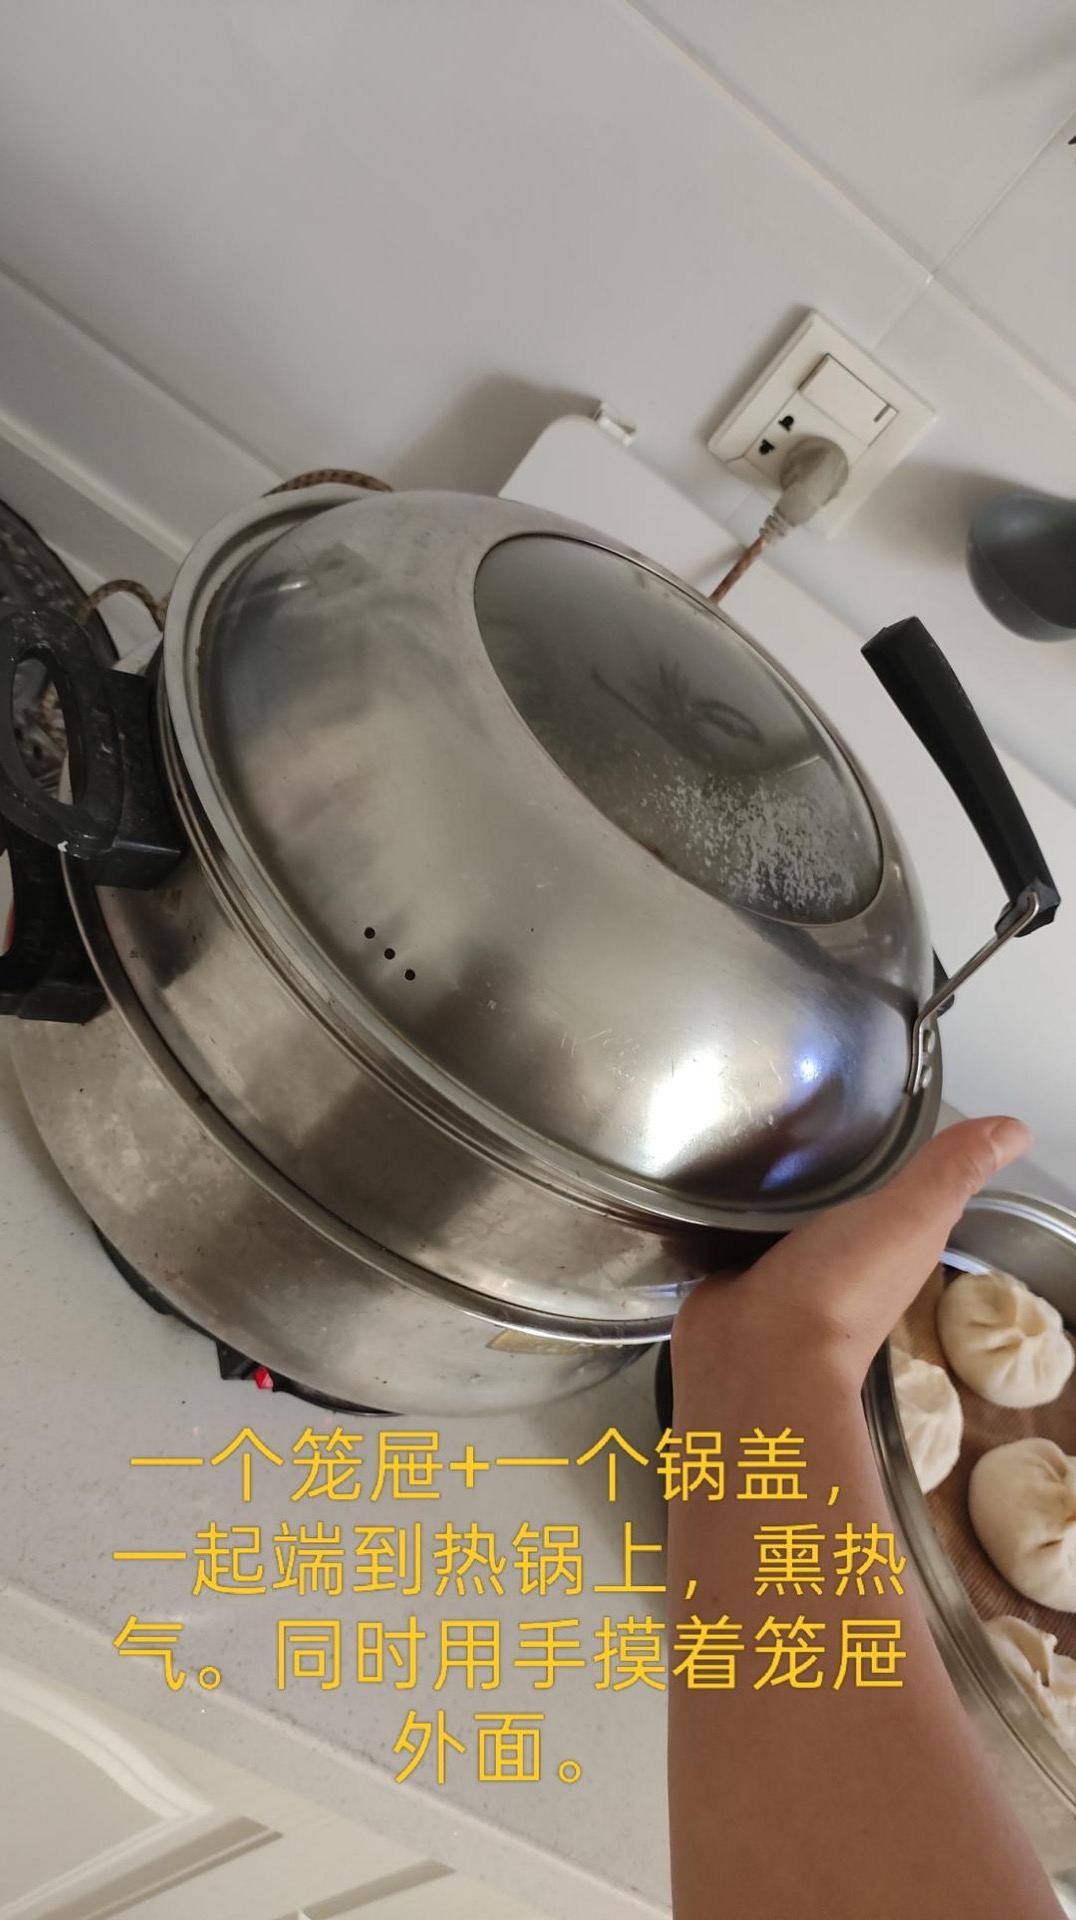
Step 6: Stack and warm the second tier
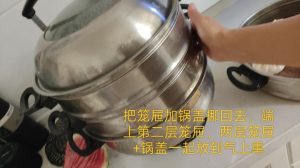
Carry the first tier plus lid over and set it on the second tier, then carry the combined first and second tiers plus lid to the pot and steam-warm the second tier the same way.
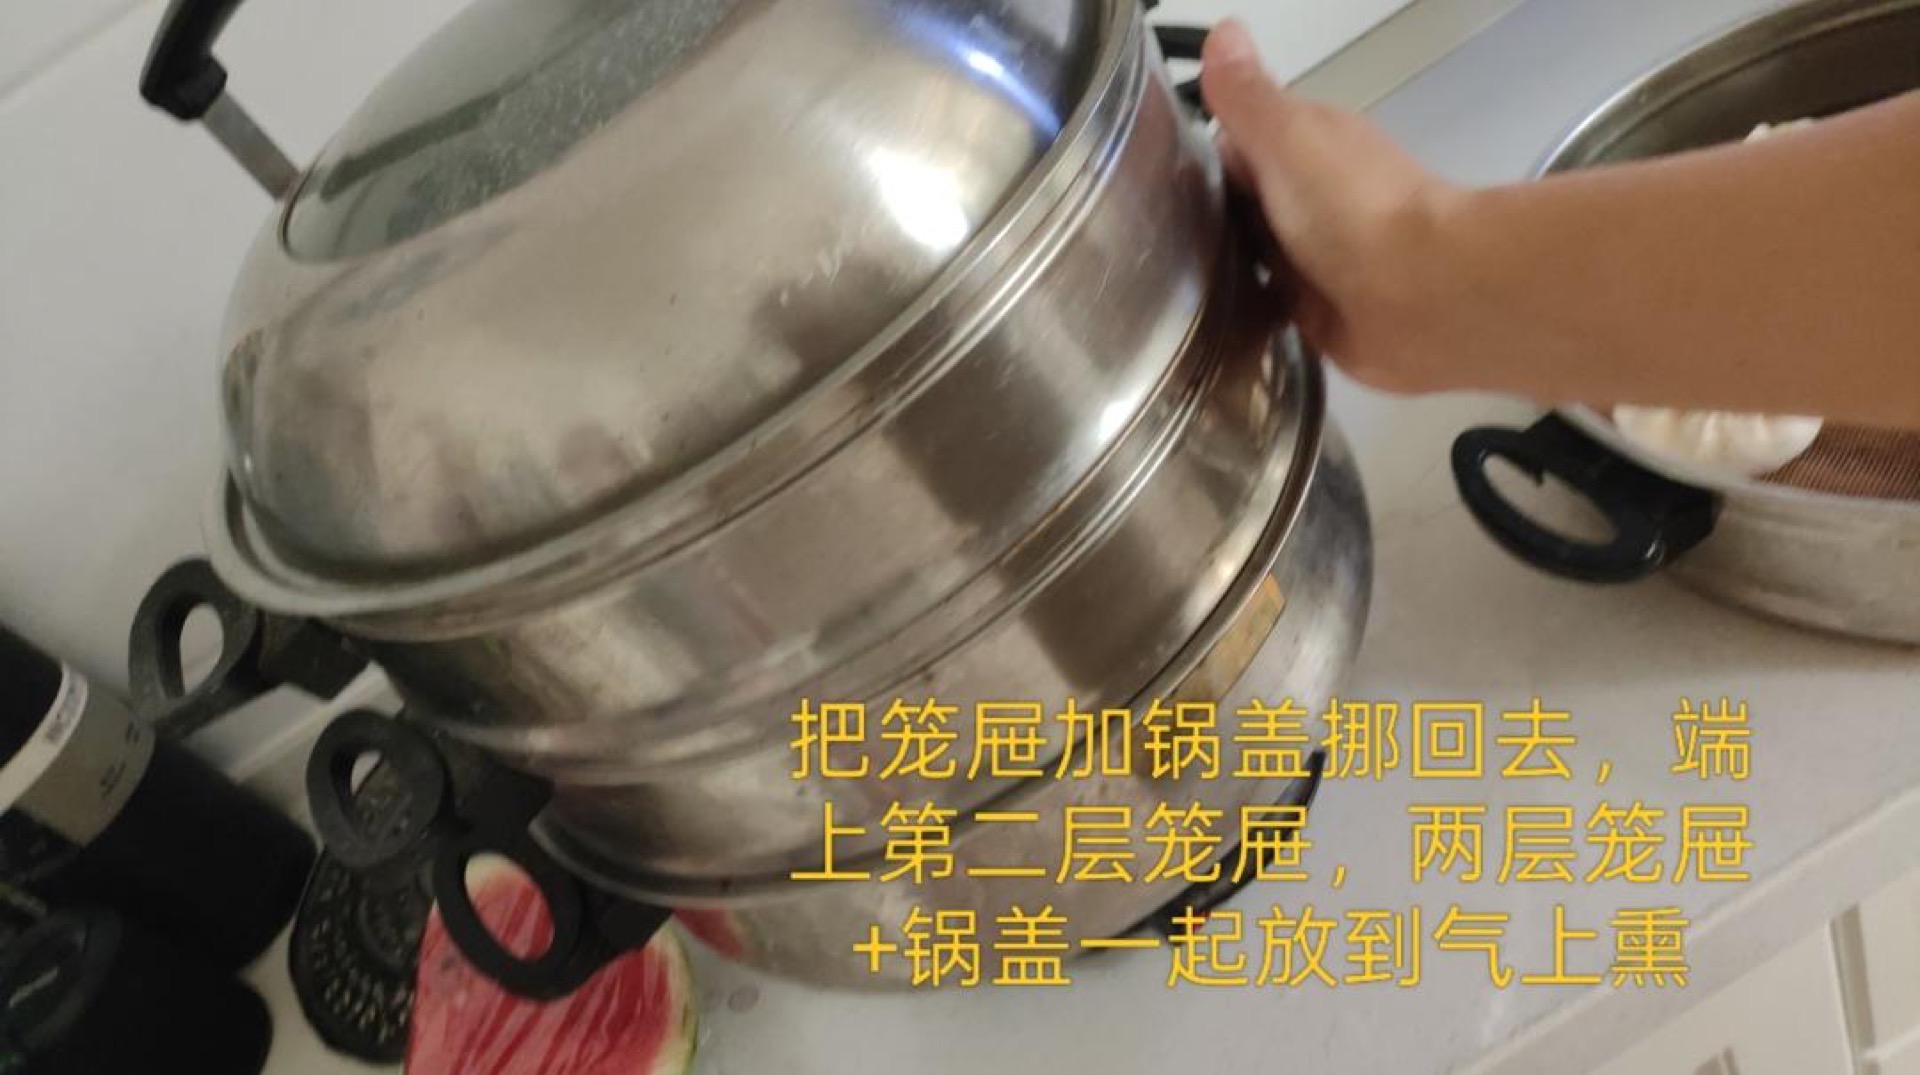
Step 7: Warm the third tier and proof
Do the same for the third tier: stack them together and carry the whole set to the pot to steam-warm. Do not open the lid at any point during this process. When the warming is done, set all three tiers plus lid back on the table, untouched, and time 15 minutes to let them ferment naturally. In summer 15 minutes is enough; in winter you may need two rounds of 15 minutes — watch the dough, not the clock. If the dough does not look ready after opening the lid, repeat the steam-warming step and then let it rest a few more minutes.
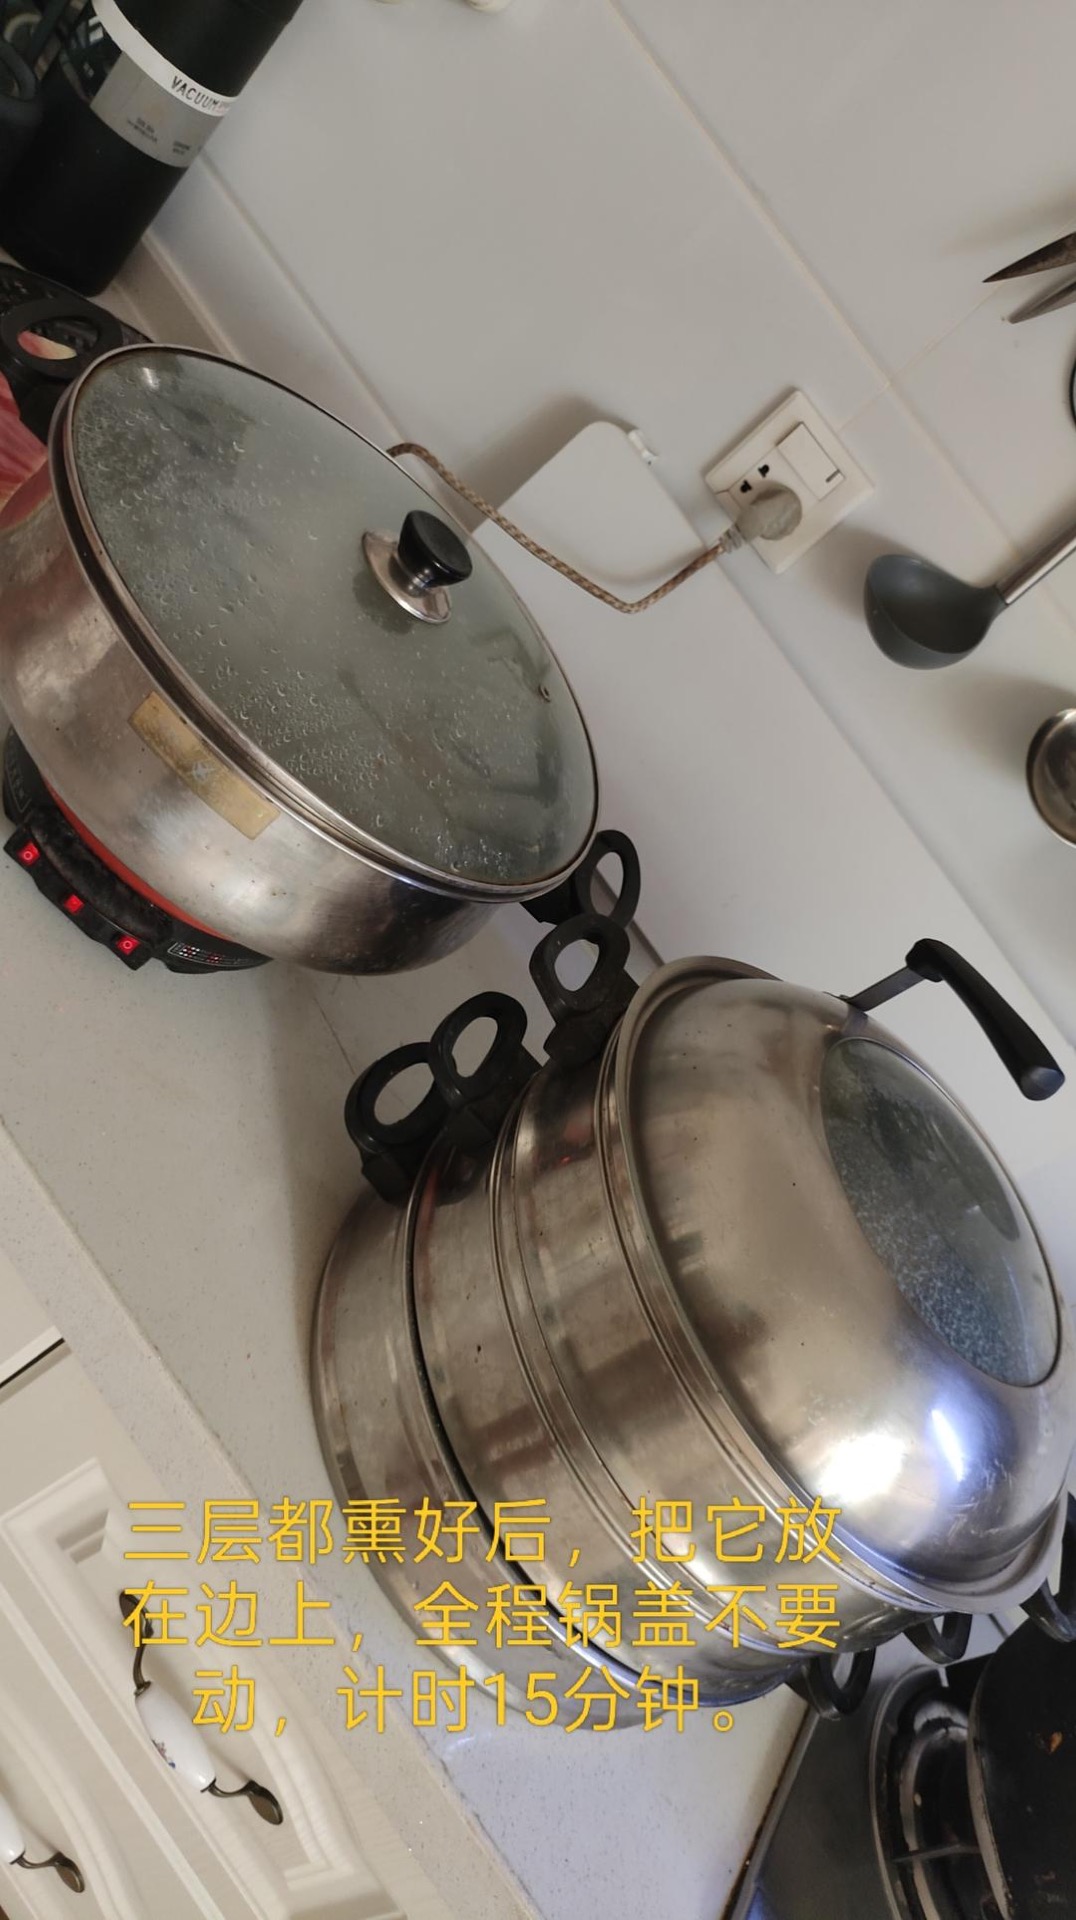
Step 8: Check the proof
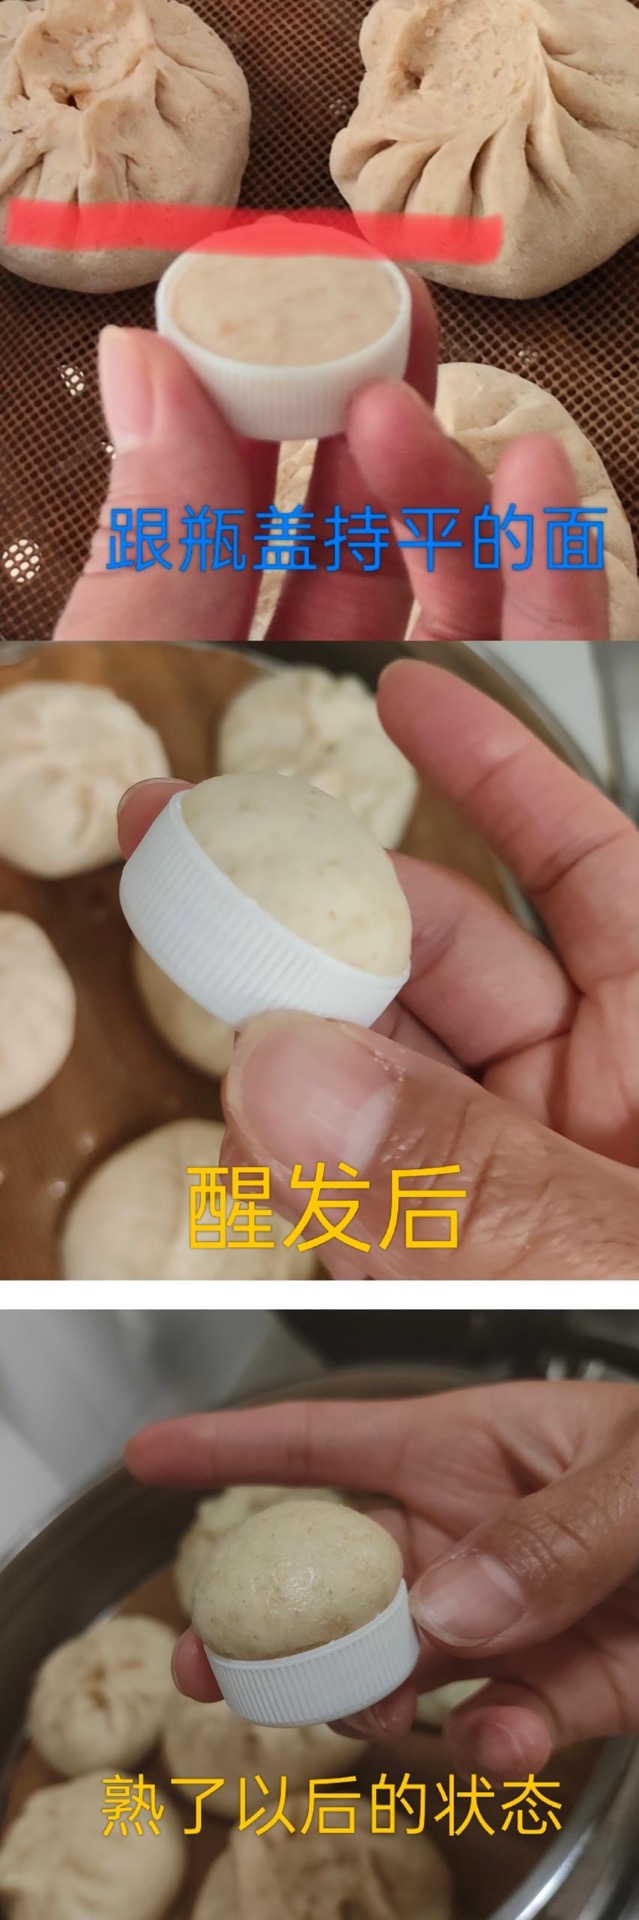
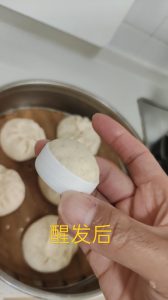
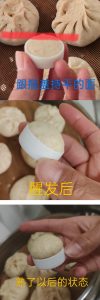
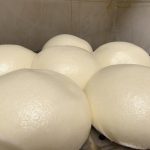
This is roughly doubled — the dough has risen a good bit above the cup rim. This is the point at which I usually start steaming.
Step 9: Steam
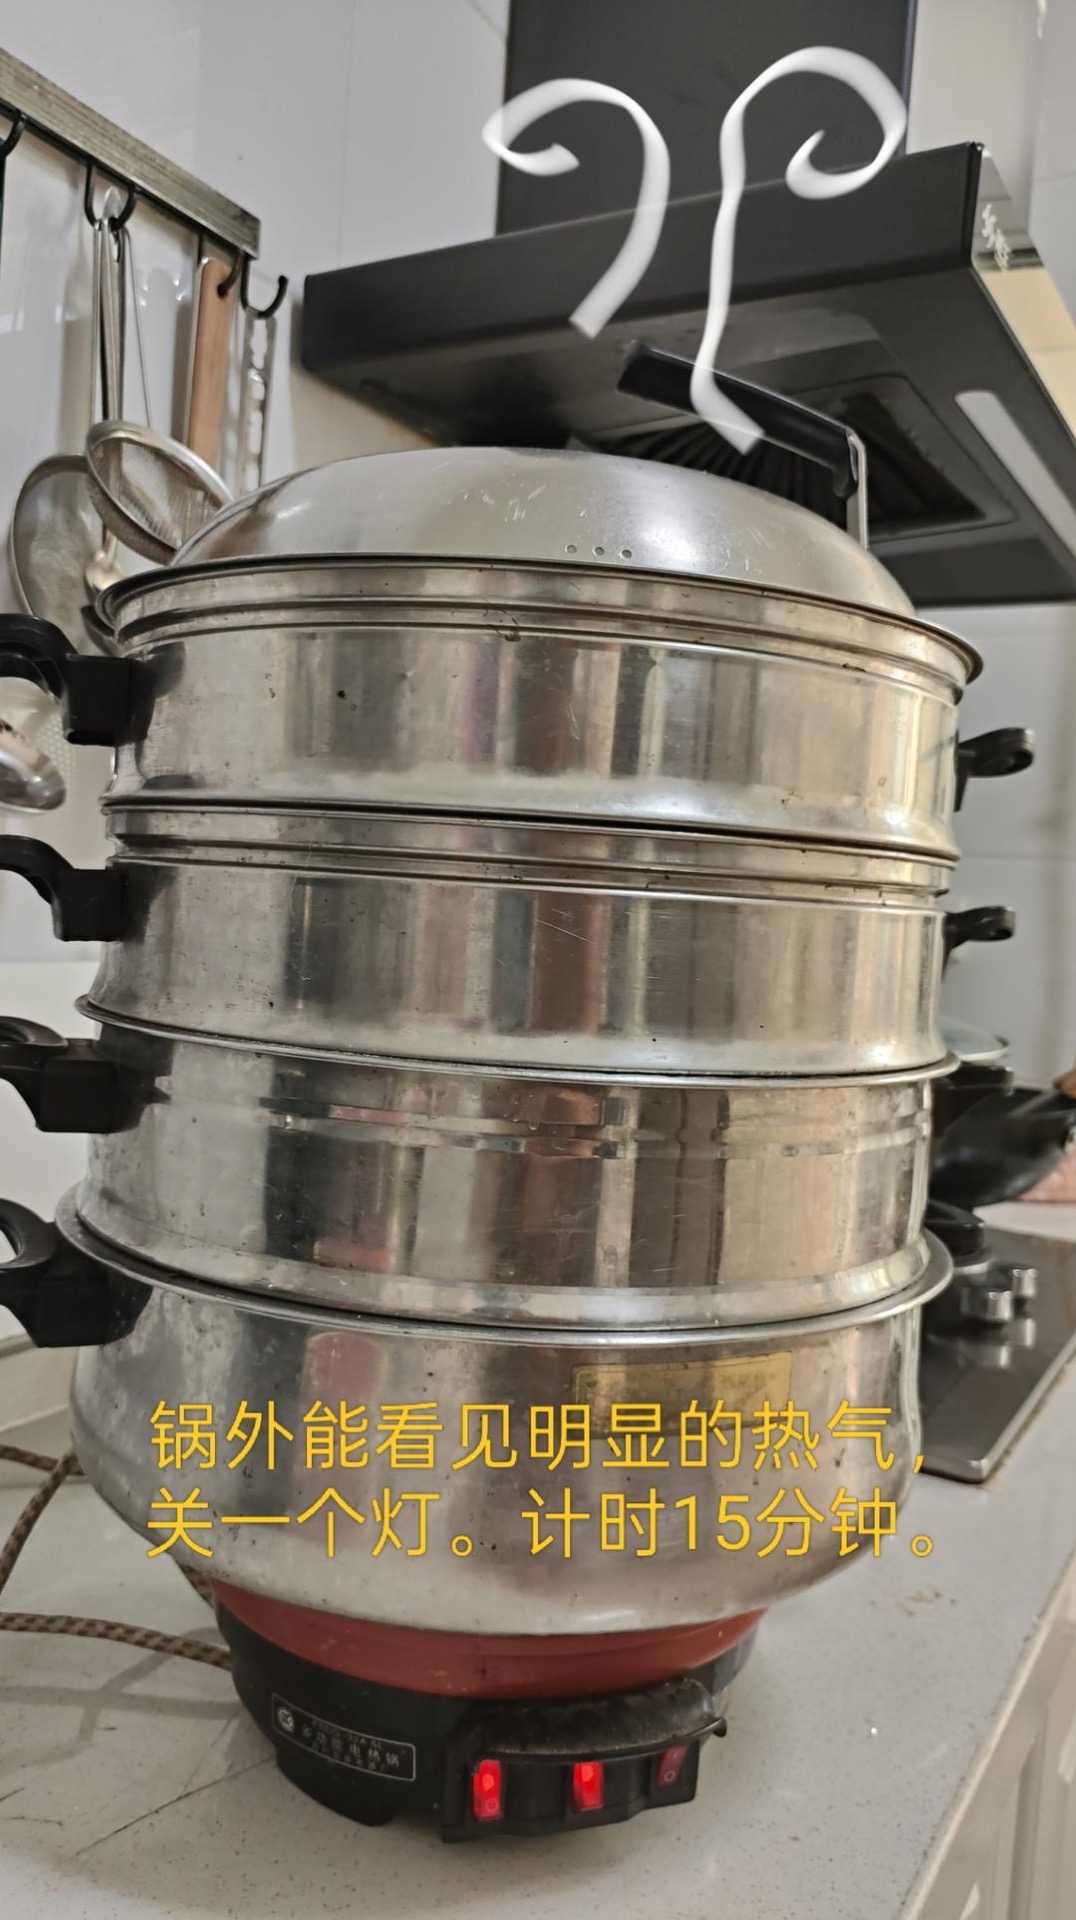
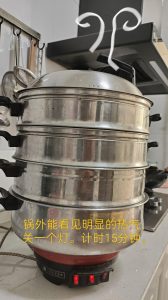
Set all the tiers directly onto the pot over high heat and wait until you see strong steam escaping around the outside. Then turn off one burner. Time 15 minutes. When the time is up, turn off the heat and let them sit, covered, for 3 to 5 minutes. Do not open the lid at any point during steaming — not once.
Step 10: See how it puffed up
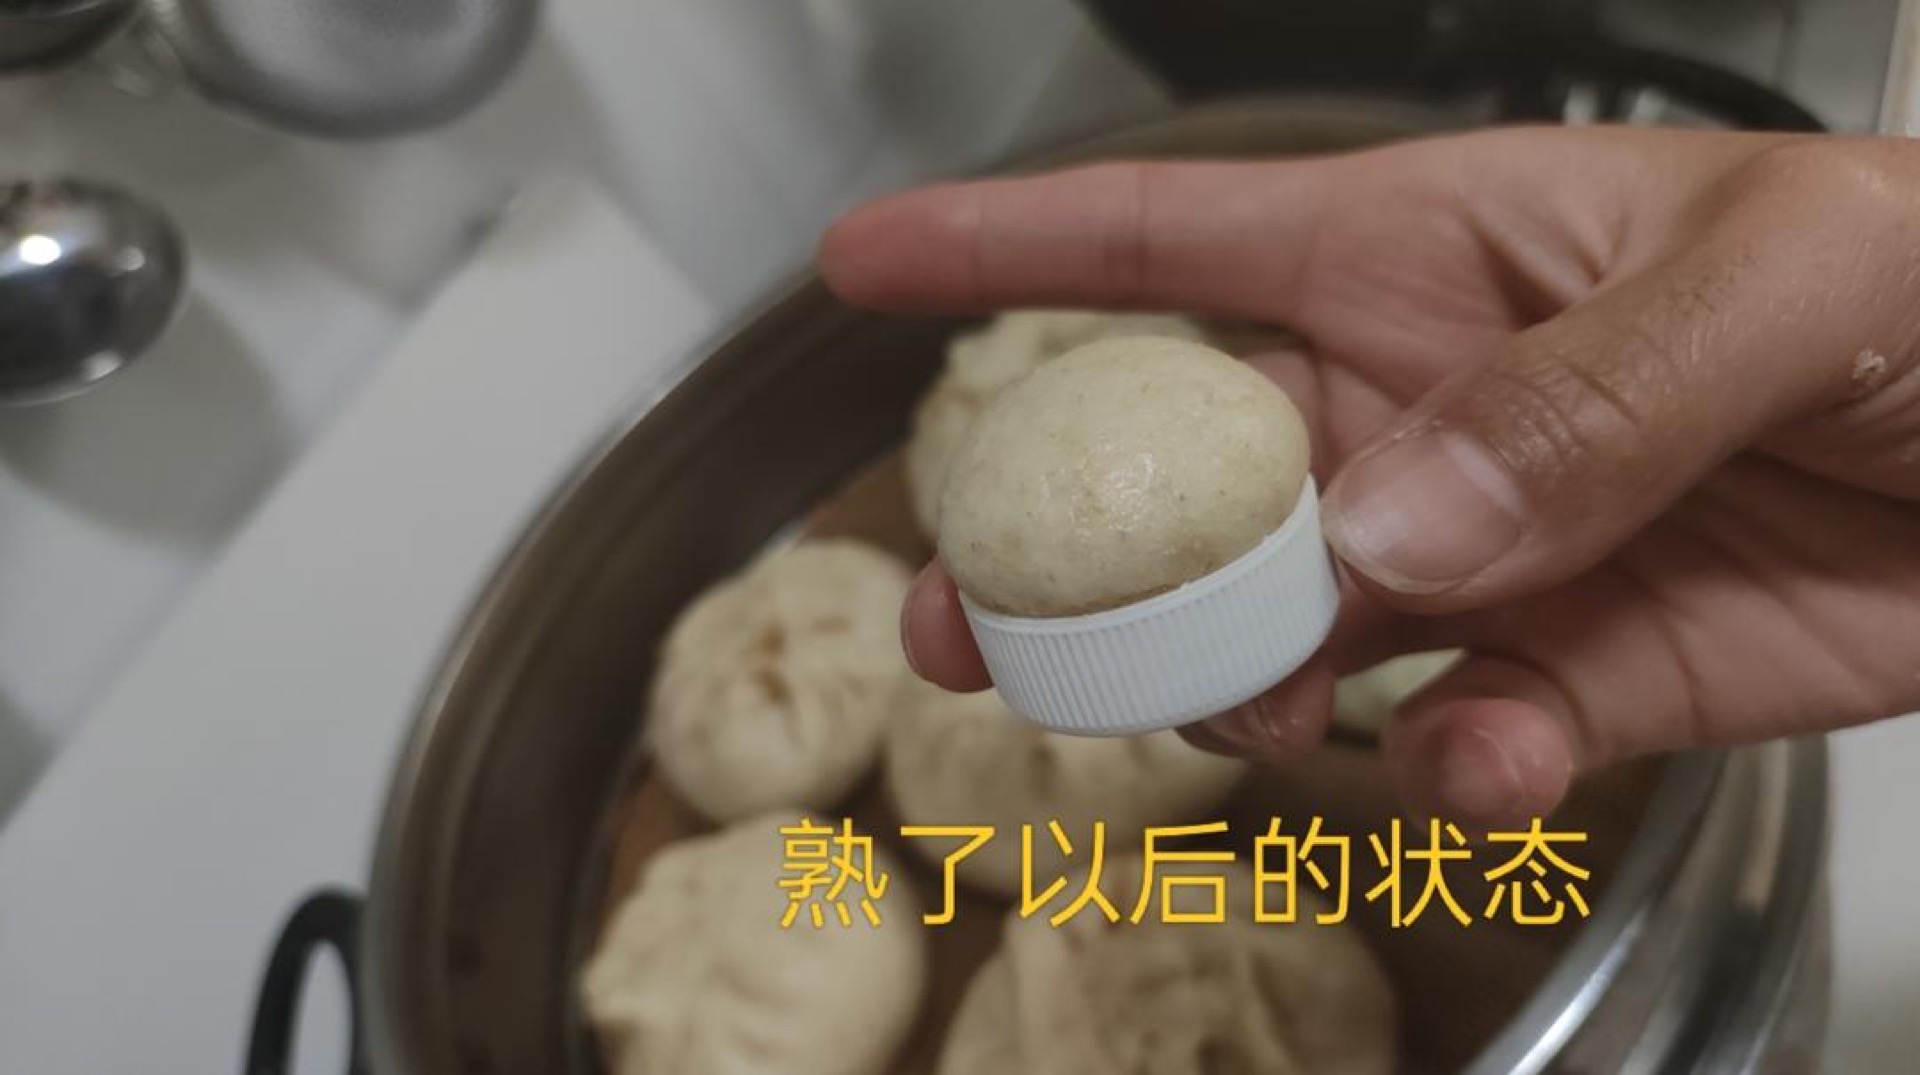
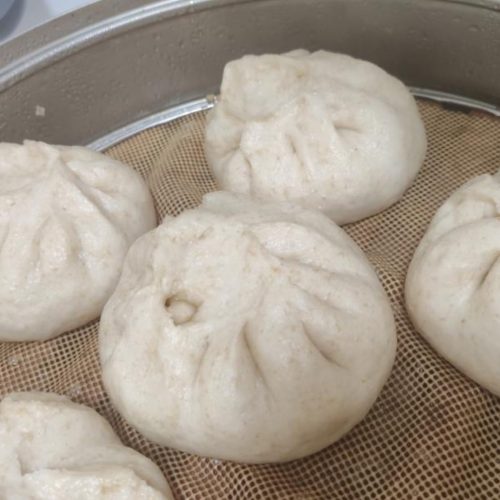
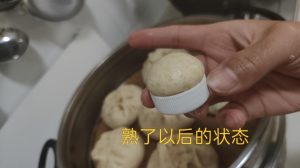
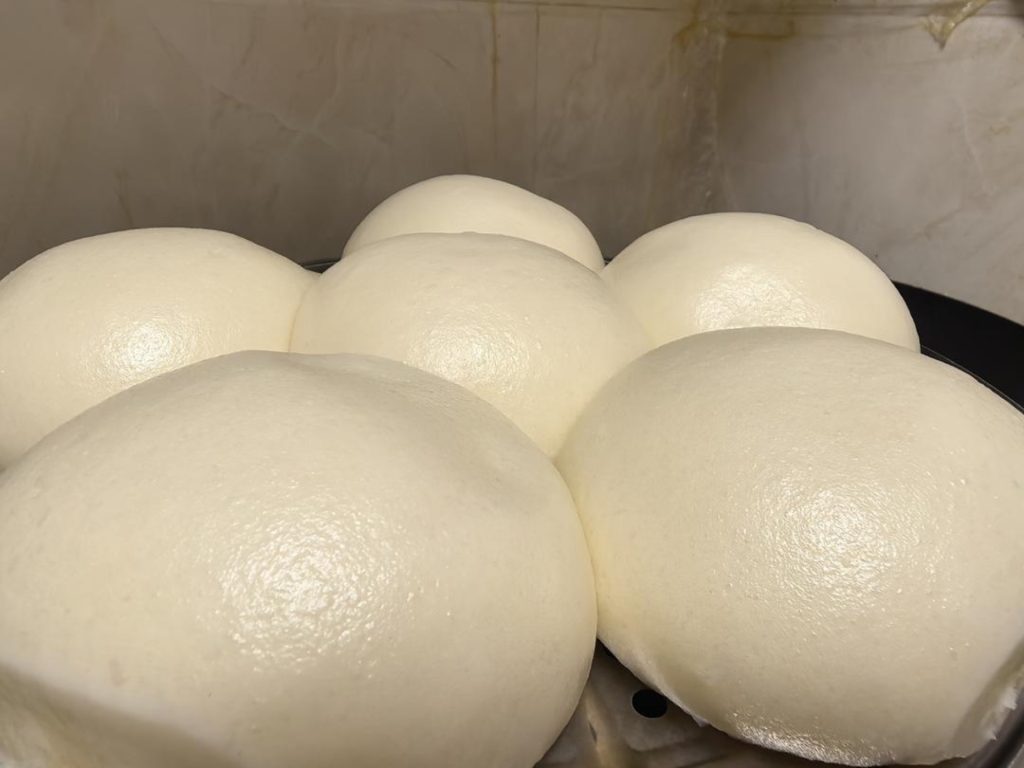
Take a look at the lid bun now that it is cooked — it has grown noticeably larger than when it was proofed.
Step 11: Compare the before and after
Here is a side-by-side comparison so you can see exactly how much the dough expands from raw to steamed.
Step 12: Serve
They are done — eat them straight away while they are hot. Read the whole process carefully and you will get it right the first time.
Common Mistakes When Making Steamed Buns Dough
1. Water that is too hot. If it steams or feels uncomfortably warm on your wrist, it will kill the yeast before it ever gets going. You will not notice at mixing time — you will notice 20 minutes later when nothing has risen.
2. Opening the lid during proofing or steaming. This is the single most common cause of collapsed buns. Every peek drops the temperature and lets the trapped steam escape, and the dough deflates. Trust the timer and the lid bun.
3. Skipping the steam-warming step in cold weather. In winter, a cold kitchen means the dough simply will not proof in 15 minutes. Repeat the steam-warm cycle rather than waiting an hour at room temperature.
4. Over-kneading after shaping. Once you have portioned and shaped the dough, stop handling it. Extra kneading develops gluten and makes the finished buns tough and chewy instead of fluffy.
5. Steaming too soon after shaping. If the dough has not visibly puffed and feels dense and heavy when you lift the tier, it needs more time. Steaming under-proofed dough gives you a tight, gummy crumb that no amount of extra steaming can fix.
Variations
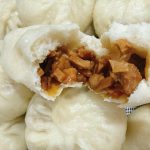
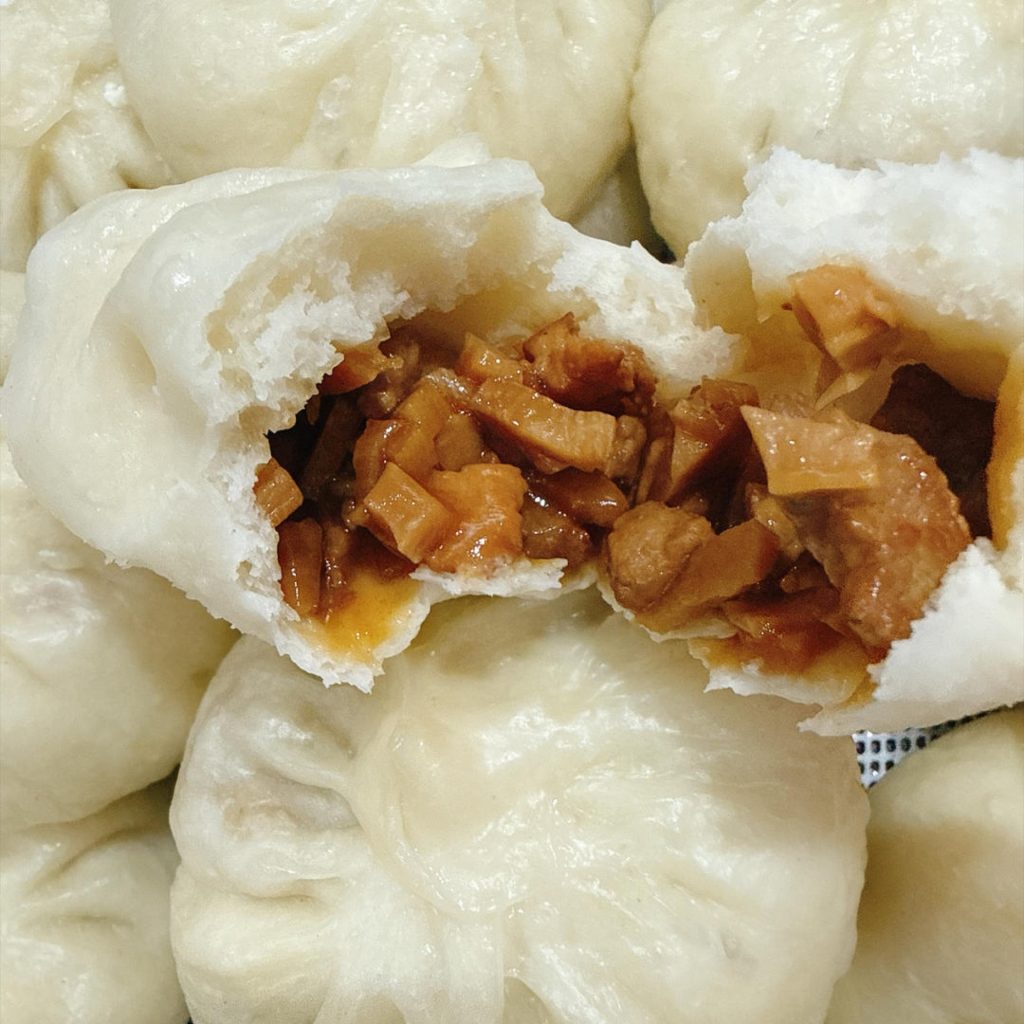
Baozi (包子). Roll the dough into rounds, fill with pork and cabbage or a vegetarian filling, and pleat closed. Add 2 minutes to the steaming time for filled buns.
Mantou (馒头). Shape the dough into smooth logs or rounds and steam as-is. Plain mantou is the purest test of your dough — if it is fluffy and slightly sweet, your technique is solid.
Huajuan (花卷). Roll the dough into a rectangle, brush with oil, scatter with scallions and a little salt, roll up, and twist into flower shapes. The same dough, a completely different breakfast.
Whole wheat or mixed grain. Replace up to 30% of the all-purpose flour with whole wheat or rye. Add an extra 20–30g of water, since whole grains absorb more.
Frequently Asked Questions
Can I use active dry yeast instead of instant? Yes. Proof it in the warm water with a pinch of sugar for 10 minutes first, then proceed. If it does not foam, the yeast is dead.
Why did my buns turn yellow or gray? Usually a reaction between the dough and the metal steamer, or over-proofing. Line your tiers with parchment or cabbage leaves, and do not let the dough proof past doubled.
Do I really need to steam-warm the tiers? In a warm, humid kitchen, you can sometimes get away with a plain 20-minute rest. In a dry or cold kitchen, the steam-warming step is what makes this method reliable.
Can I make the dough ahead of time? You can mix and refrigerate the dough overnight, but bring it back to room temperature before shaping. A cold dough proofs unevenly and steams up dense.
Why do my buns collapse after I take the lid off? You opened the lid too early, or you skipped the 3–5 minute rest after turning off the heat. Let them sit covered, off the heat, before you lift the lid.
How to Serve
Steamed buns are breakfast food in most Chinese households — serve them hot with congee, soy milk, or a bowl of tomato egg drop soup. They also work as a starchy side for dinner, mopping up sauces from braised dishes like soy-braised beef shank or Henan braised noodles. For a lighter meal, pair them with a quick cold dish like 15-minute chrysanthemum greens salad.
Leftover buns also slice and pan-fry beautifully, or get tossed into a stir-fry — see my egg and vegetable stir-fried udon for the general idea of how to fold leftovers into a wok dish.
Storage & Reheat
Steamed buns are best the day they are made, but they keep well. Cool completely, then store in an airtight bag in the fridge for up to 3 days, or freeze for up to 2 months. Reheat by steaming for 5–6 minutes from the fridge, or 10–12 minutes from frozen. A microwave works in a pinch — wrap in a damp paper towel and go 30 seconds at a time — but the texture will be slightly rubbery compared to re-steaming.
Allergen Notice
This recipe contains wheat (gluten). It is naturally dairy-free, egg-free, and nut-free as written. If you are cooking for someone with celiac disease or a serious wheat allergy, this dough is not suitable — gluten-free flour blends behave very differently in steamed dough and require a separate recipe.
Nutrition Disclaimer
Nutrition information is estimated and provided for general reference only. Actual values depend on your exact flour, the size you shape each bun, and whether the dough is filled. This is not medical or dietary advice — consult a qualified professional for your specific needs.
About the Author & Recipe Development
I am Lin, and I grew up in my parents’ restaurant kitchen in Chengdu, where every dish on the menu had to earn its place. Steamed buns were not on our menu — they were what we ate before service, at 6am, standing up, straight out of the steamer. This method is the one I watched my mother use for twenty years. It has no thermometer, no proofing box, and no patience for fancy equipment. It just works.
I tested this ratio repeatedly across humid summers and dry winters to make sure the steam-warming step holds up in a normal home kitchen. If you are new to Chinese cooking, start with my beginner techniques guide and my budget wok setup guide, then come back here. And if you want to try another dough-based project, my Chinese butterfly pastry is a fun next challenge.
Authoritative References
- Harold McGee, On Food and Cooking — yeast fermentation and gluten development fundamentals.
- Fuchsia Dunlop, The Food of Sichuan — regional context for northern-style steamed breads.
- King Arthur Baking Company — yeast temperature tolerances and hydration guidance.
Steamed Buns Dough (教你发面): Fluffy Baozi Mantou Huajuan Guide

Equipment
- Large Mixing Bowl
- Bamboo steamer tiers with lid
- Wide pot or wok
- Parchment paper or cabbage leaves
- Small heatproof cup
- Kitchen Scale
Ingredients
Dough
- 10 g instant dry yeast or active dry yeast, proofed first
- 1000 g all-purpose flour 中筋面粉
- 600 g warm water about 35°C, warm to the wrist
Instructions
- Pour a small amount of warm water into any container — warm, not hot, when you touch it with your hand. Add the 10g yeast and stir thoroughly until it dissolves completely. Pour this into the 1kg of flour and mix into a dough. Knead until it is a bit smoother, then divide it into the portions you plan to shape. This is the one-rise method, so shape your buns now rather than letting the dough bulk-ferment first.

- Bring a pot of water to a full, rolling boil — you want big clouds of steam pouring off the top.

- Take a small piece of dough, flatten it level, and place it in the pot alongside the buns so it proofs at the same rate. This is your window into the proof.

- I steamed three tiers of buns. Stack the three tiers with the lid on, and set them aside on the table, leaving a clear spot for them.
- Take a single tier plus its lid and carry it to the pot to catch the steam — full heat, all burners on. Touch the edge of the tier with your hand; after about 10 seconds it should feel hot to the touch. If one side heats unevenly, rotate the tier.
- Carry the first tier plus lid over and set it on the second tier, then carry the combined first and second tiers plus lid to the pot and steam-warm the second tier the same way.

- Do the same for the third tier: stack them together and carry the whole set to the pot to steam-warm. Do not open the lid at any point during this process. When the warming is done, set all three tiers plus lid back on the table, untouched, and time 15 minutes to let them ferment naturally. In summer 15 minutes is enough; in winter you may need two rounds of 15 minutes — watch the dough, not the clock. If the dough does not look ready after opening the lid, repeat the steam-warming step and then let it rest a few more minutes.
- This is roughly doubled — the dough has risen a good bit above the cup rim. This is the point at which I usually start steaming.
- Set all the tiers directly onto the pot over high heat and wait until you see strong steam escaping around the outside. Then turn off one burner. Time 15 minutes. When the time is up, turn off the heat and let them sit, covered, for 3 to 5 minutes. Do not open the lid at any point during steaming — not once.
- Take a look at the lid bun now that it is cooked — it has grown noticeably larger than when it was proofed.
- Here is a side-by-side comparison so you can see exactly how much the dough expands from raw to steamed.

- They are done — eat them straight away while they are hot. Read the whole process carefully and you will get it right the first time.




Leave a Reply