Growing up in Sichuan, my family’s restaurant kitchen was a symphony of aromas, but few things triggered my hunger quite like the smell of spiced pork belly slowly braising in the pressure cooker. Today, I’m sharing a recipe that is near and dear to my heart: Rou Jia Mo (腊汁白吉馍), often called the “Chinese Hamburger.”
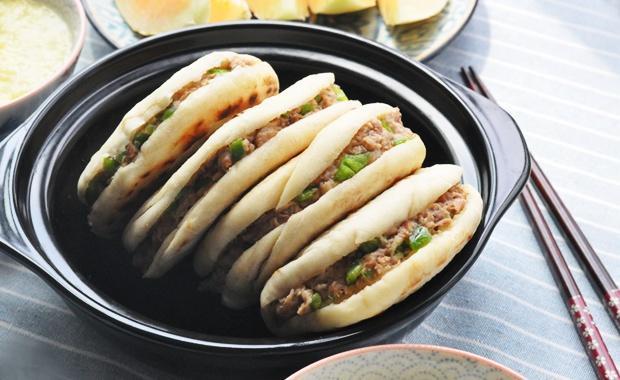
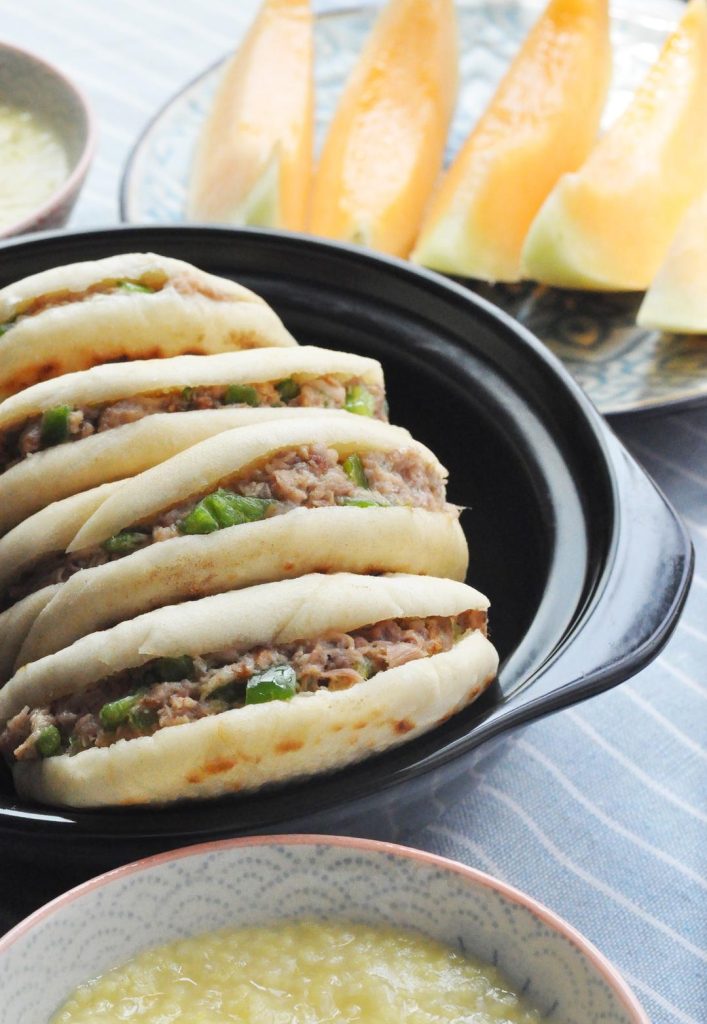
While I spent years training in a culinary institute perfecting complex banquet dishes, this street food staple remains one of my ultimate comfort foods. It consists of two main parts: the Bai Ji Mo (a crispy, chewy, semi-leavened flatbread) and the La Zhi Rou (succulent, spice-braised pork belly). Unlike the American hamburger, the flavor here comes not from searing, but from a long, slow braise in a master stock rich with aromatics.
Why make this at home? Because the texture of a freshly baked Mo—crispy on the outside, soft inside—stuffed with hot, chopped pork belly and fresh peppers is an experience you simply cannot get from takeout.
What is Rou Jia Mo?
Originating from Shaanxi Province, Rou Jia Mo is one of the world’s oldest sandwiches. “Rou” means meat, “Jia” means sandwiched, and “Mo” refers to the bread. Authentic versions rely on a “master stock” (La Zhi) that restaurants might keep alive for years.
In this recipe, we are simulating that rich depth of flavor using a pressure cooker to tenderize the meat quickly, followed by an overnight soak—a technique I learned from professional kitchens to ensure the flavor penetrates the meat fibers deeply.
Similar Recipes You Might Love
If you enjoy the concept of meat-filled buns or savory braised pork, you should also explore our recipe for Sheng Jian Bao (Pan-Fried Pork Buns). While Rou Jia Mo uses a baked bun, Sheng Jian Bao features a fluffy leavened dough that is steamed and fried simultaneously. Additionally, the flavor profile of the meat in this recipe is quite similar to Red Braised Pork Belly, which is another must-try classic if you love rich, savory pork dishes.
Why This Recipe Works
- Double-Cooked Bread: By dry-frying the dough in a pan first and then finishing it in the oven, we achieve the traditional “iron ring” pattern and a crispy crust without drying out the interior.
- Pressure Cooker Method: Braising pork belly on the stove can take hours. Using a pressure cooker significantly reduces active cooking time while breaking down the connective tissues in the pork belly for that melt-in-your-mouth texture.
- The Soak: We don’t just cook the meat; we let it sit in the juices. This scientific process (osmosis) allows the savory broth to replace the moisture lost during cooking.
About the Author & Recipe Development
I’m Lin, a culinary instructor and writer for Woks of Love. With over a decade of experience in professional kitchens—from my family’s humble spot in Sichuan to culinary school training—I specialize in bridging the gap between traditional Chinese techniques and Western home kitchens.
For this recipe, I tested the dough hydration specifically for all-purpose flour commonly found in US/European supermarkets (like King Arthur or Gold Medal) to ensure the Mo achieves the correct stiffness. I also adjusted the spice measurements to ensure the flavor profile remains authentic without requiring a trip to a specialty herbalist.
Key Ingredients & Substitutions
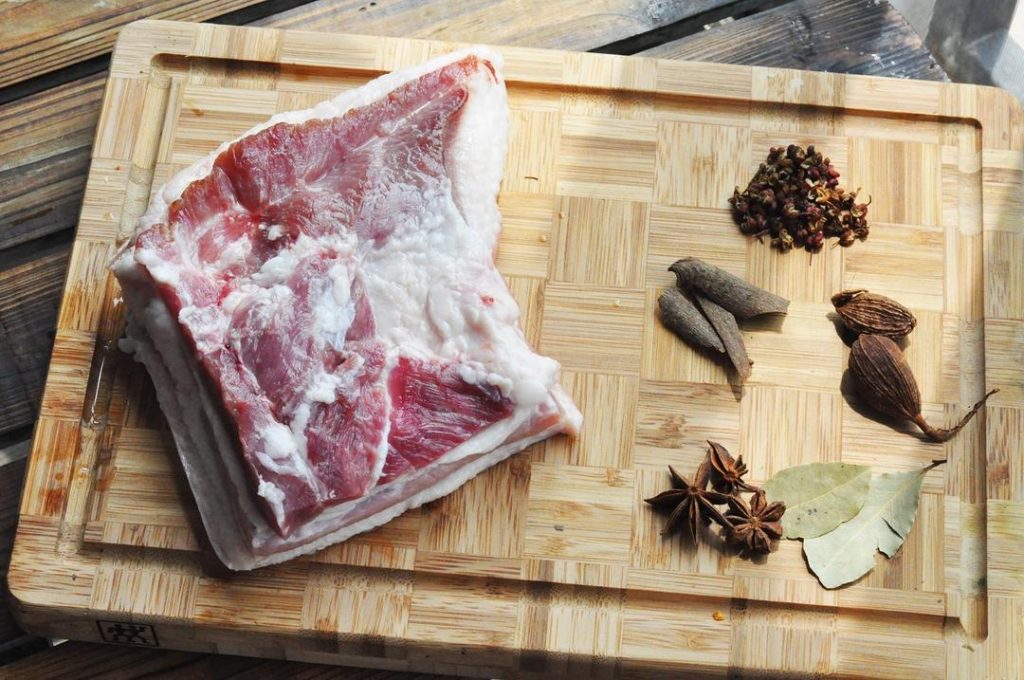
- Pork Belly: You need skin-on Pork Belly. The skin provides gelatin, which thickens the sauce and adds a crucial rich mouthfeel. If you cannot find skin-on, regular pork belly works, but the texture will be less silky.
- The Spices: The recipe calls for a classic mix of Sichuan peppercorns, Star Anise, bay leaves, and cinnamon. You can also use pre-made Chinese Spice Braising Packets for convenience.
- Dark Soy Sauce: This is primarily for color. Dark Soy Sauce gives the meat that appetizing amber-red hue. If you only have light soy sauce, the taste will be similar, but the meat will look pale.
- The Dough: We use All-Purpose flour. Traditional Bai Ji Mo dough is quite stiff (low hydration), so don’t be tempted to add too much water.
Ingredients
For the Dough (The Mo):
- 300g (approx. 2 ½ cups) All-Purpose Flour
- 5g (1 ½ tsp) Instant Yeast
- 2g (½ tsp) Baking Powder
- 150g (approx. ⅔ cup) Warm Water
- 2g (¼ tsp) Salt
- Oil (for brushing)
For the Meat (The La Zhi Rou):
- 1.1 lbs (500g) Pork Belly, skin-on
- 10g (2 tsp) Light Soy Sauce (can substitute with Kikkoman)
- 8g (1 ½ tsp) Dark Soy Sauce
- 2g (½ tsp) Salt (plus more to taste)
- Rock Sugar (approx. 1 tbsp, or substitute brown sugar)
- Aromatics: 1 spice bag containing Sichuan peppercorns, 1 star anise, 2 bay leaves, and a small cinnamon stick.
- 1 Green Pepper (Jalapeño or Anaheim), chopped (for serving)
Recipe Notes Before We Begin
- Plan Ahead: This recipe tastes significantly better if you let the meat soak in the braising liquid overnight. If you want to eat it the same day, let it soak for at least 2 hours after cooking.
- Equipment: You will need a pressure cooker (Instant Pot works great) for the meat, a heavy-bottomed skillet (cast iron is ideal) for the buns, and an oven.
- Dough Texture: This dough will feel drier and stiffer than bread or pizza dough. This is intentional to create the dense, chewy texture of a proper Mo.
Mise en Place (Prep Work)
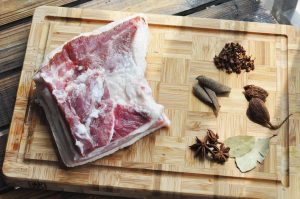
- Soak the Meat: Cut the pork belly into large chunks. Soak them in a bowl of clean water for 2 hours to draw out blood and impurities. Change the water 2-3 times during this process. This ensures a clean-tasting broth.
- Prep Spices: Gather your Sichuan peppercorns, star anise, bay leaf, and cinnamon. Wrap them in a cheesecloth or a spice ball.
- Weigh Flour: If possible, use a digital scale for the flour and water to ensure the dough consistency is correct.
How to Make Rou Jia Mo
Part 1: The Meat (La Zhi Rou)
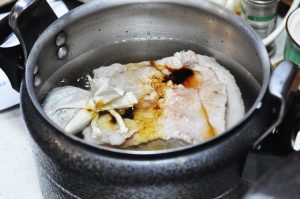
- Combine Ingredients: Place the soaked pork belly chunks into your pressure cooker. Add the spice bag, salt, Dark Soy Sauce, Light Soy Sauce, and rock sugar.
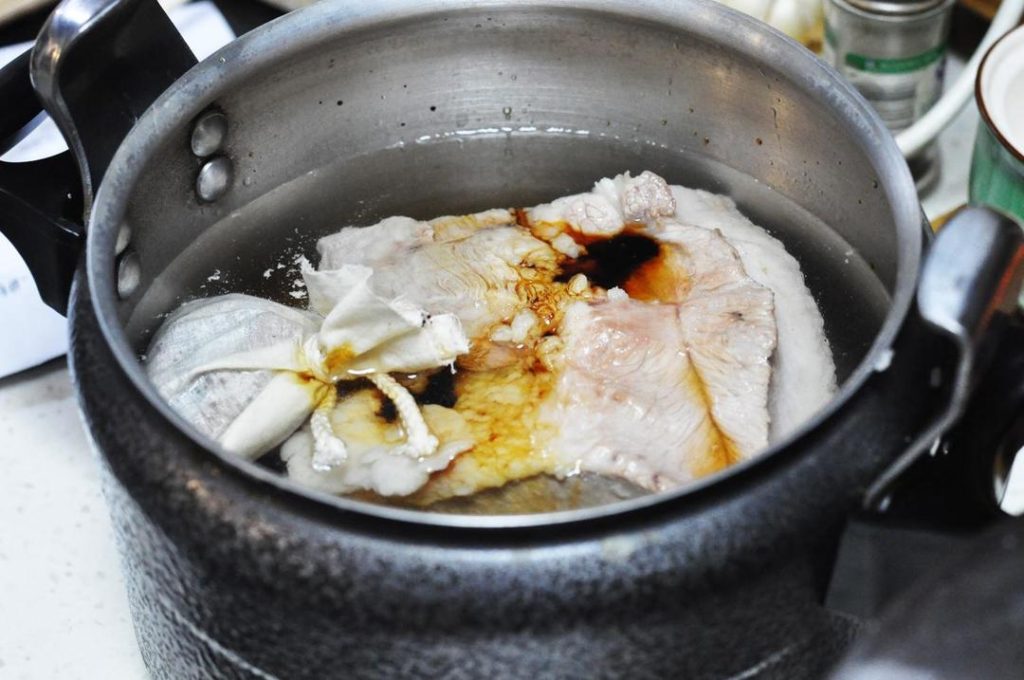
- Cook: Add enough water to just barely cover the meat. Seal the pressure cooker and cook on High Pressure for 30 minutes (or stew on the stove for 2 hours if you don’t have a pressure cooker).
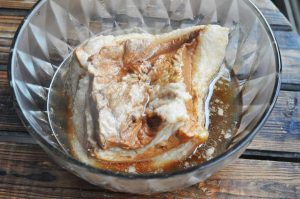
- The Soak: Once the meat is soft and tender, do not remove it immediately. Let it soak in the liquid. As mentioned, leaving it overnight in the fridge (in the liquid) produces the best flavor. If rushing, soak for at least 30 minutes to an hour.

Part 2: The Bun (Bai Ji Mo)
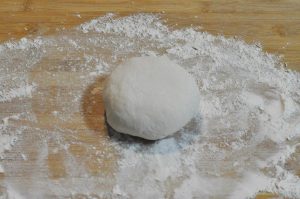
- Make the Dough: In a mixing bowl, combine the flour, yeast, baking powder, and salt. Pour in the warm water. Mix until a shaggy dough forms, then knead for about 8-10 minutes until smooth.
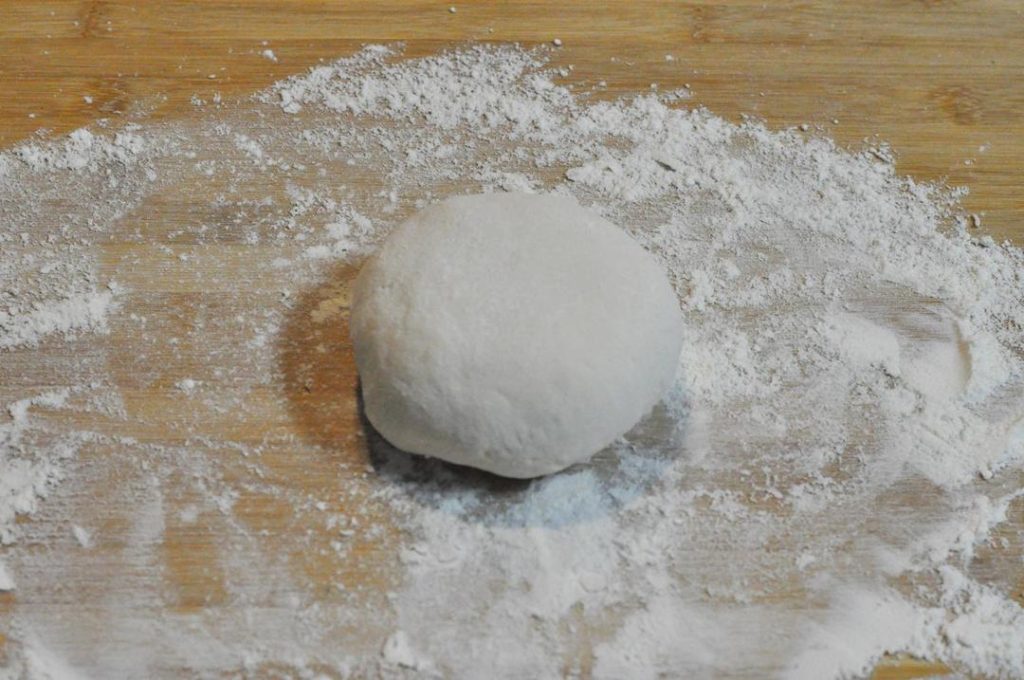
- First Rise: Cover the dough and let it ferment in a warm place for 1 hour, or until it has slightly expanded (it won’t double like soft bread dough).
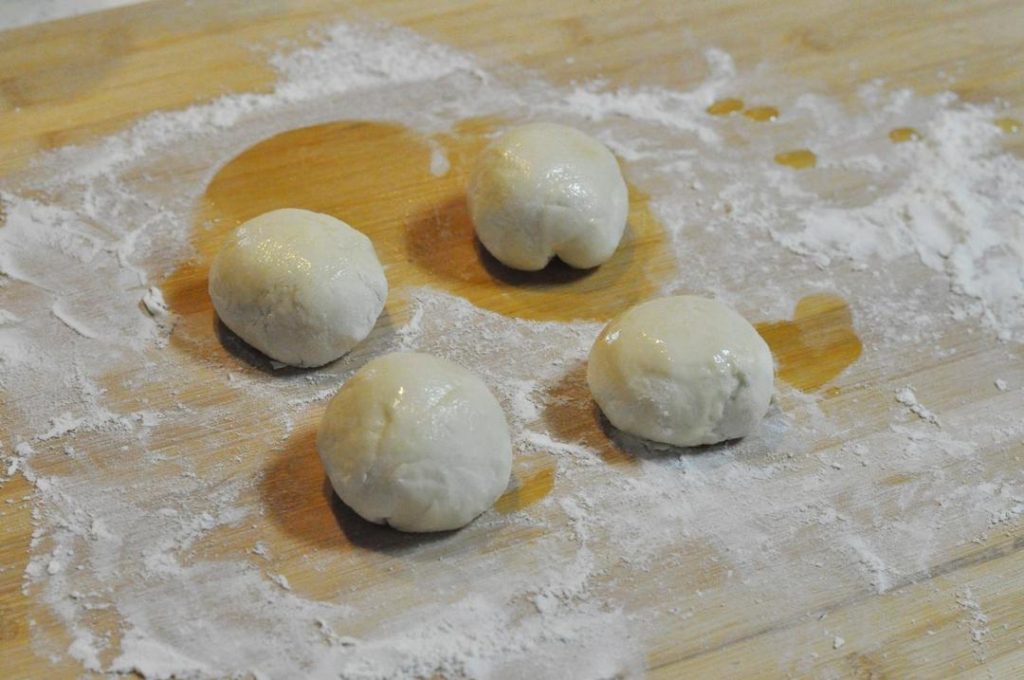
- Shape: Divide the dough into equal portions (about 60g each). Brush a little oil on the surface of each ball and let them rest (relax the gluten) for 15 minutes.
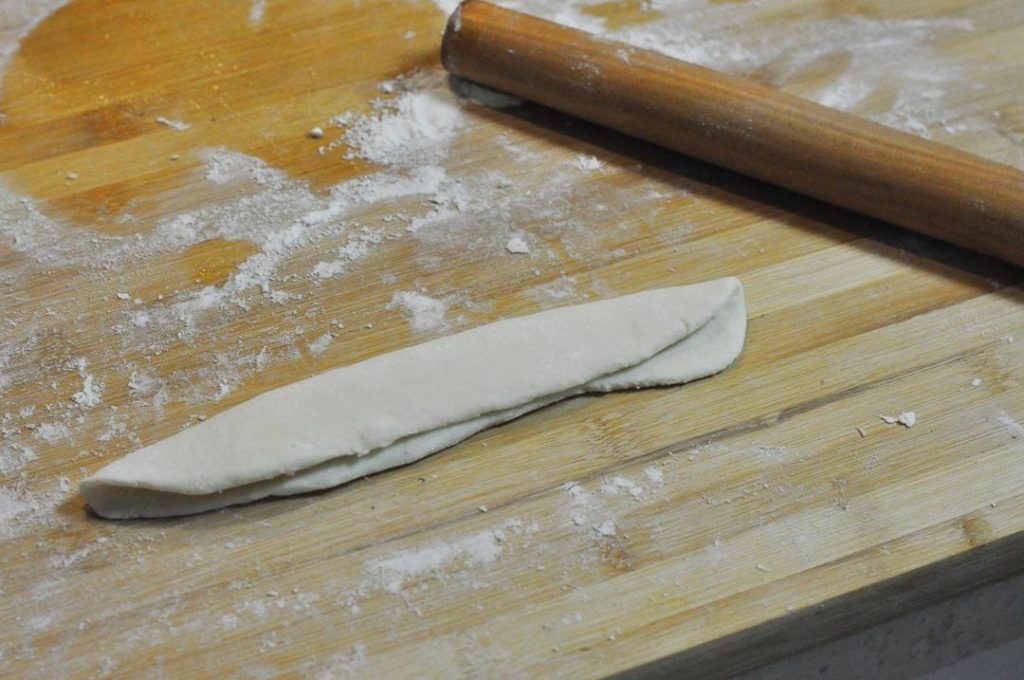
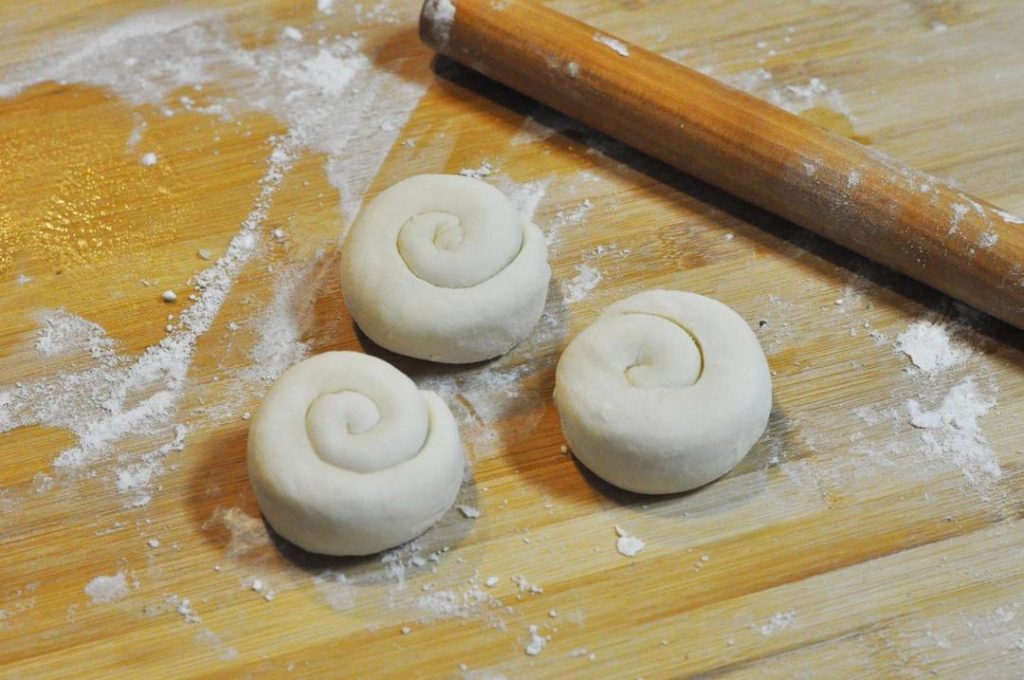
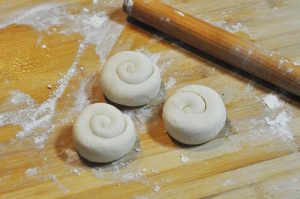
- Form the “Snail”: Take a portion of dough and roll it into a long, thin rope or strip. Flatten this strip with a rolling pin. Fold the strip in half lengthwise, then roll it up from one end like a snail shell or cinnamon roll. Tuck the tail end underneath.
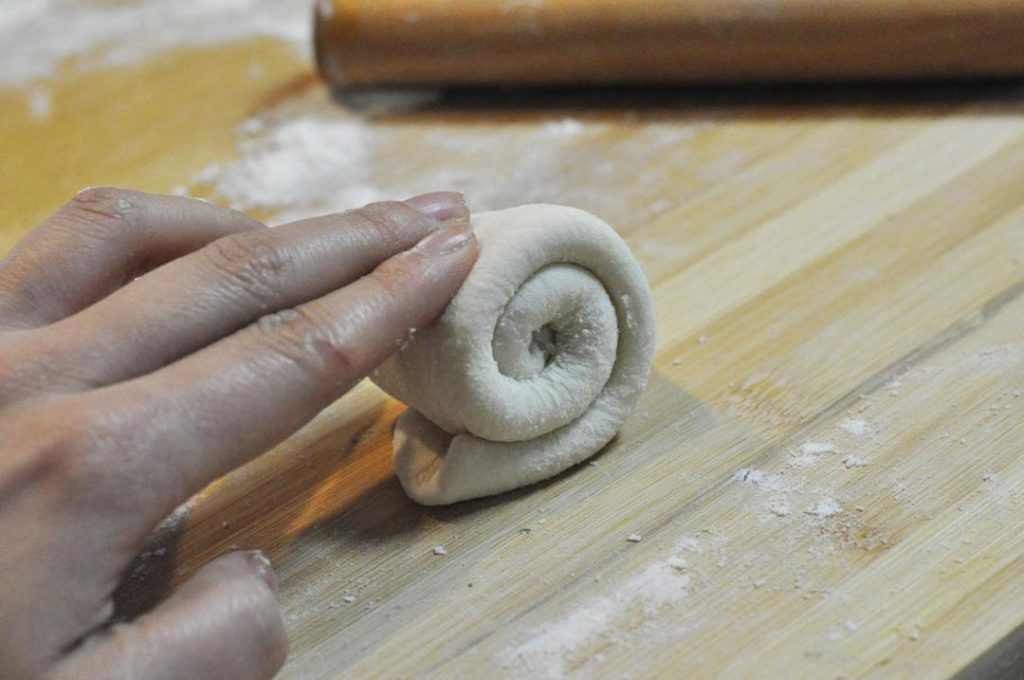
- Press and Rest: Stand the “snail” on its end and flatten it with your palm to form a disc. This technique creates the flaky internal layers. Let these discs rest for another 10 minutes.
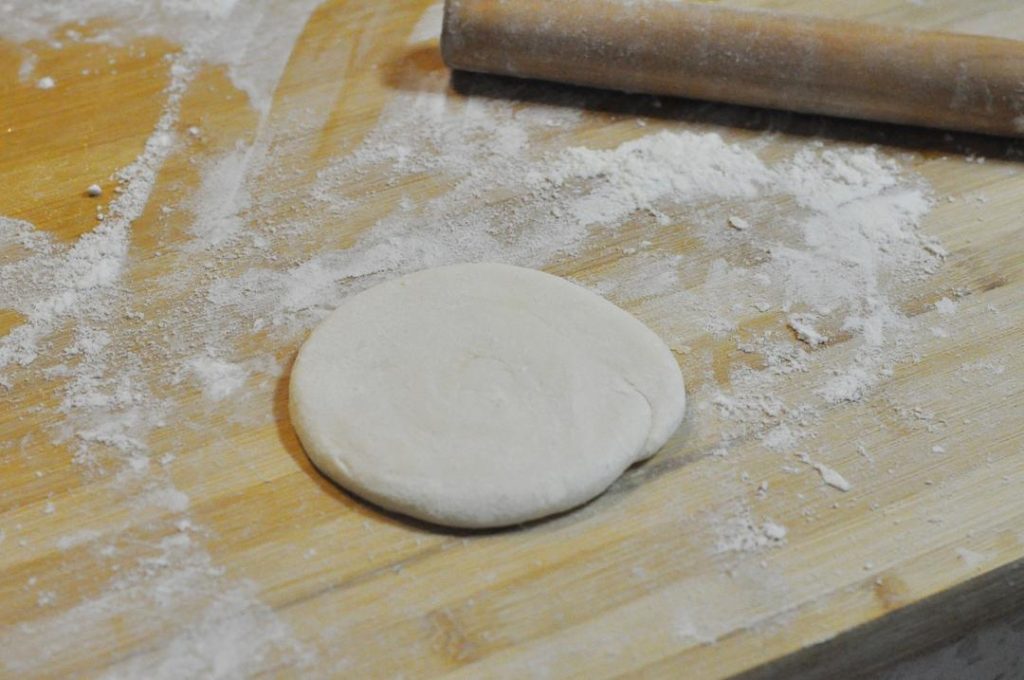
- Roll Flat: Roll the discs out into flat circles (about 1/2 inch thick).
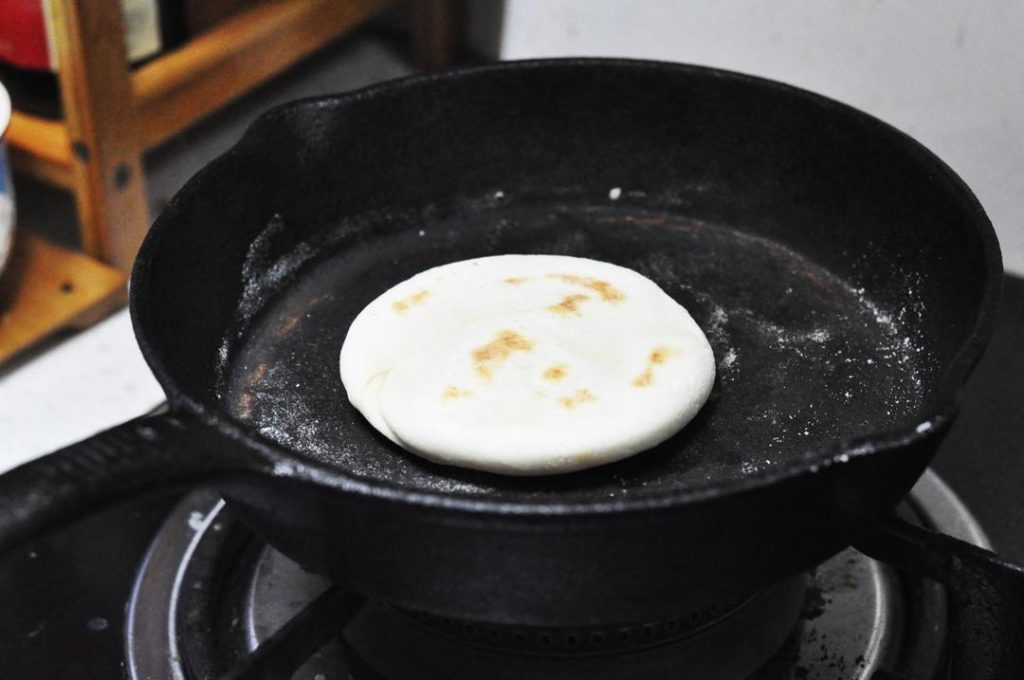
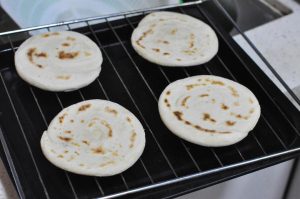
- Dry Fry: Heat a skillet over medium-low heat. Do not add oil. Place the buns in the pan. Cook for about 2 minutes on each side until you see a nice golden “tiger skin” pattern.
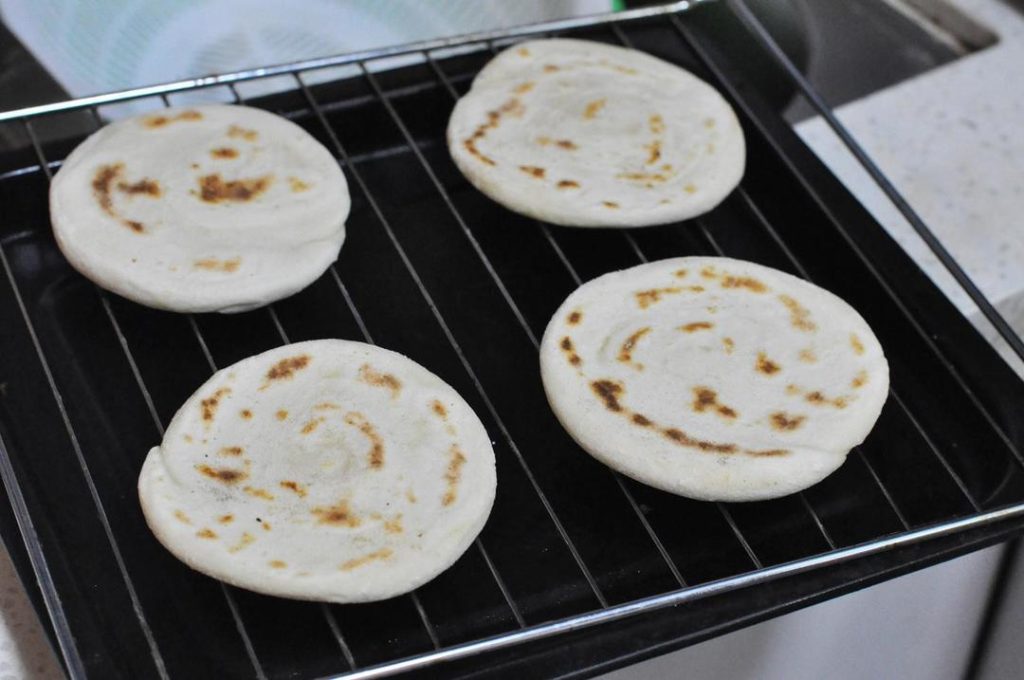
- Bake: Transfer the buns to an oven preheated to 350°F (180°C). Bake for 10 minutes to ensure the inside is fully cooked through.
Part 3: Assembly
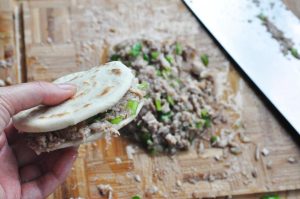
- Chop: Take the braised pork belly out of the sauce. Finely chop the meat on a cutting board. Chop the green pepper and mix it into the meat. (Optional: Spoon a tablespoon of the braising liquid over the chopped meat for extra juiciness).

- Stuff: Slice the warm buns horizontally (like a burger bun), but not all the way through—leave a “hinge” at the back. Stuff generously with the meat mixture.
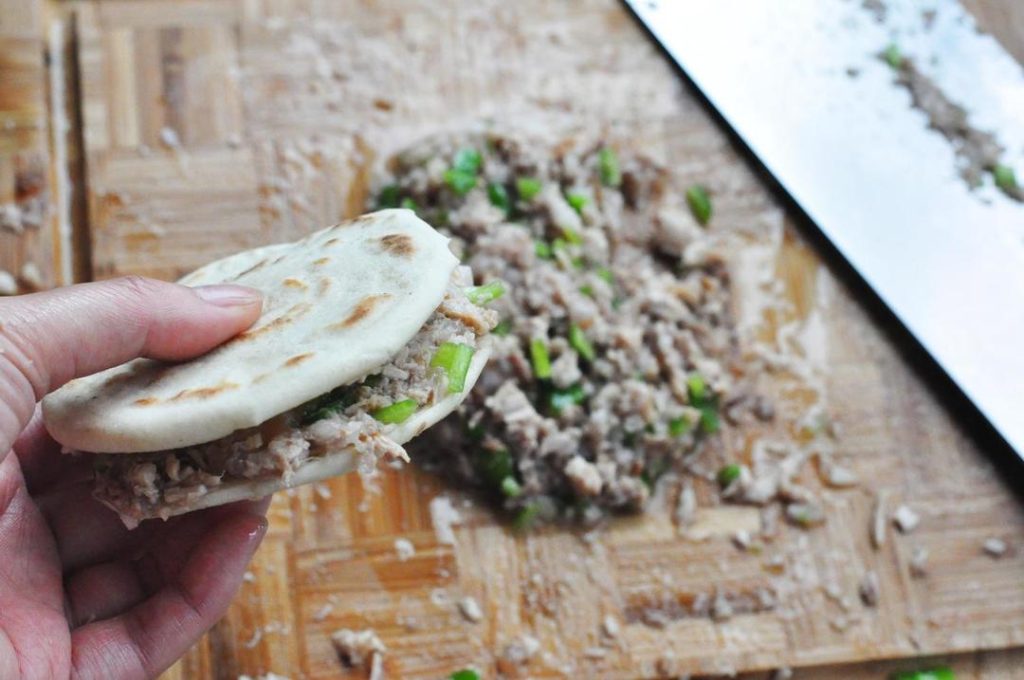
- Enjoy: Serve immediately while the bun is crispy and the meat is hot!
Common Mistakes When Making Rou Jia Mo
- Skipping the Meat Soak: If you eat the meat immediately after pressure cooking, the flavor will be on the surface only. The soaking process is where the magic happens.
- Dough too Wet: If the dough is sticky, the bun will be too soft and bread-like. It should be a stiff dough to get that chewy Bai Ji Mo texture.
- Cooking the Buns too Fast: If your pan is too hot, the outside will burn before the inside is cooked. Use medium-low heat for the pan-frying stage, and rely on the oven to finish the cooking.
Serving Suggestions & Pairings
Rou Jia Mo is rich and savory, so it pairs beautifully with acidic or light sides to cut through the fat.
- Soup: A bowl of Hot and Sour Soup or Tomato Egg Drop Soup is a classic accompaniment.
- Vegetables: Try serving this with a refreshing Smashed Cucumber Salad.
- Sauce: While traditional Rou Jia Mo relies on the braising liquid for flavor, some people like a kick of heat. You can add a spoonful of Chili Garlic Sauce inside the bun.
Authoritative References
To better understand the food safety and science behind this recipe:
- Pork Safety: We ensure the pork is braised until “fork tender.” According to the USDA Food Safety and Inspection Service, pork is safe at 145°F, but for braising cuts like belly, we cook it much longer (to approx 190°F-200°F internal) to break down collagen.
- Fermentation: For more on yeast activity in dense doughs, refer to Baker’s Journal resources on low-hydration breads.
Nutrition Information (Estimate)
(Disclaimer: Nutrition information is calculated using an ingredient database and should be considered an estimate. Garnishes and optional ingredients are not included.)
- Serving Size: 1 Bun with Meat
- Calories: ~350-400 kcal
- Protein: 12g
- Carbohydrates: 35g
- Fat: 18g
- Sodium: 450mg
- Contains: Wheat, Soy.
How to Store and Reheat
- Storage: Store the baked buns and the cooked meat separately. The buns can be kept in an airtight container at room temperature for 2 days. The meat should be refrigerated in its sauce for up to 3 days.
- Reheating: Reheat the meat in a small pot or microwave. Reheat the buns in a toaster oven or air fryer (350°F for 3-4 minutes) to restore crispiness. Do not microwave the buns or they will become tough and chewy.
Rou Jia Mo (Chinese Hamburger)

Equipment
- Pressure Cooker (or heavy pot)
- Cast Iron Skillet or Heavy Pan
- Rolling Pin
Ingredients
The Dough (Bai Ji Mo)
- 300 g all-purpose flour (approx. 2 1/2 cups)
- 5 g instant yeast (approx. 1 1/2 tsp)
- 2 g baking powder (approx. 1/2 tsp)
- 150 g warm water (approx. 2/3 cup)
- 2 g salt (approx. 1/4 tsp)
- Oil for brushing dough
The Meat (La Zhi Rou)
- 500 g pork belly skin-on (approx. 1.1 lbs)
- 10 g light soy sauce (approx. 2 tsp)
- 8 g dark soy sauce (approx. 1 1/2 tsp)
- 2 g salt (plus more to taste)
- 1 tbsp rock sugar (or brown sugar)
- 1 bag spices (Sichuan peppercorns, 1 star anise, 2 bay leaves, cinnamon stick)
- 1 green pepper (Jalapeño or Anaheim), chopped
Instructions
- Prep the Meat: Cut pork belly into chunks. Soak in clean water for 2 hours, changing water occasionally to remove blood. Wrap spices in a cloth bag or spice ball.

- Cook Meat: Place pork, spice bag, salt, dark soy sauce, light soy sauce, and rock sugar in a pressure cooker. Add water to just cover. Cook on High Pressure for 30 minutes (or stew 2 hours on stovetop).
- Soak: Let the meat soak in the liquid for at least 2 hours (overnight in the fridge is best for flavor).
- Make Dough: Mix flour, yeast, baking powder, and salt. Add warm water. Knead into a smooth dough. Cover and ferment for 1 hour.
- Shape Buns: Divide dough into 60g portions. Brush with oil and rest 15 mins. Roll each into a long strip, fold in half lengthwise, roll up into a snail shape, and tuck the end under. Press flat into a disc. Rest 10 mins.
- Cook Buns: Roll discs flat. Dry fry (no oil) in a skillet over medium-low heat for 2 mins per side until patterned. Transfer to a 350°F (180°C) oven and bake for 10 minutes.
- Serve: Chop the braised meat and green pepper together. Slice the buns open and stuff generously.


Leave a Reply