This recipe is entirely orchestrated by my mother. I am simply the happy recorder, organizing her movements into a detailed guide to share with you. Growing up in our family kitchen, watching her hands work the dough was mesmerizing. I hope that through this recipe, you can feel the fullness of that love, too.

About the Author & Recipe Development
I’m Lin, a culinary professional born in Sichuan with over a decade of experience in professional kitchens. My foundation in cooking began not in a culinary school, but at the elbow of my chef father and my incredibly practical mother. Later, I formalized my training at the Sichuan Culinary Institute, but my heart remains with the homestyle techniques that define Chinese comfort food.
This specific recipe for Pan-Fried Buns (Shui Jian Bao) has been tested extensively in my family’s kitchen and adapted for the U.S. home cook. We’ve tested this dough method in various climates to ensure the yeast activates correctly, and I’ve standardized the water-to-oil ratios for a 12-inch cast iron skillet or non-stick pan to guarantee that signature golden crust without burning.
What Are Pan-Fried Buns (Shui Jian Bao)?
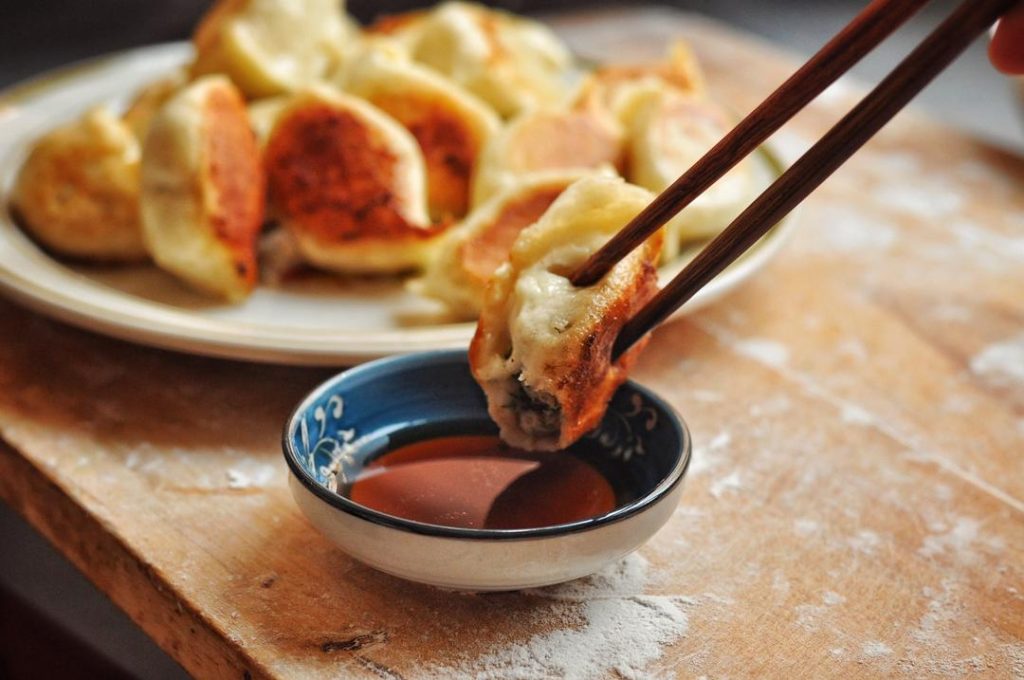
Shui Jian Bao (水煎包), literally “water-fried buns,” are a staple of Northern and Central Chinese cuisine. Unlike Crispy Pork and Chive Potstickers (Guo Tie), which usually use an unleavened dough wrapper, Shui Jian Bao utilizes a yeast-leavened dough. This creates a texture that is fluffy and soft on top—similar to a steamed bun—but with a fiercely crispy, golden bottom.
While they share similarities with the famous Shanghai-style Sheng Jian Bao, this version represents a more rustic, homestyle approach common in Northern households. The wrapping technique is also different; we use a “squeeze” method rather than elaborate pleating, sealing the juices inside efficiently.
Why This Recipe Works
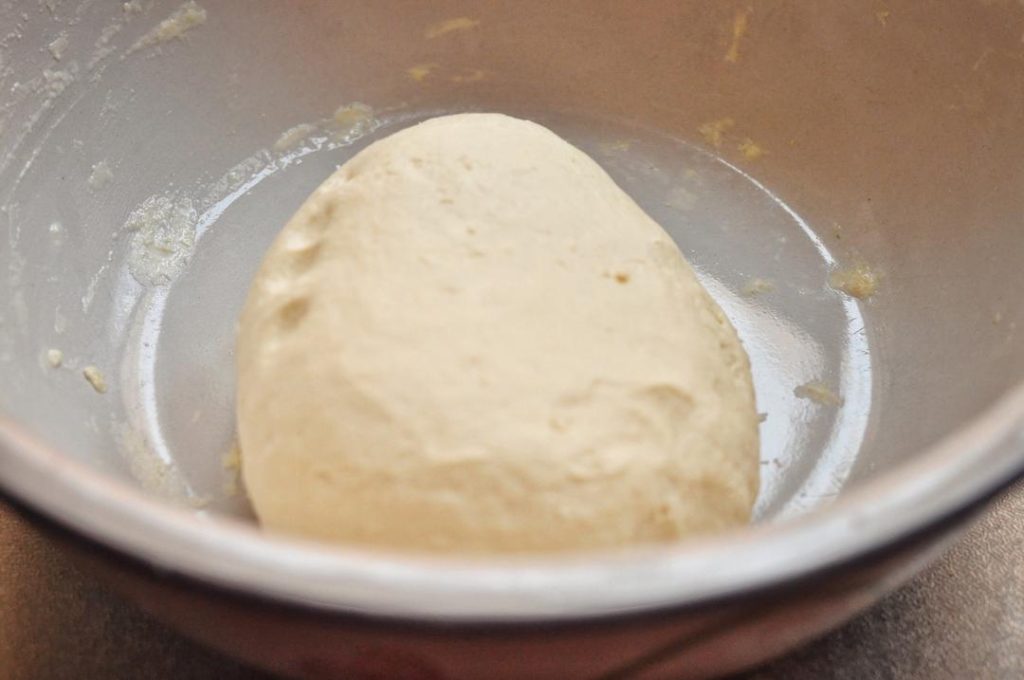
- The “Three Cleans” Principle: My mother taught me the standard for a perfect dough is San Guang (Three Cleans): clean hand, clean bowl, clean dough. This indicates the hydration is perfectly balanced.
- The Squeeze Method: Unlike the delicate pleats of Crystal Shrimp Dumplings, this recipe uses a two-handed squeeze technique. It’s faster and creates a tight seal that prevents the “filling” from leaking during the vigorous boiling phase.
- The Oil-Water-Oil Technique: We start with oil to set the bottom, add water to steam the buns through, and finish with oil to fry the bottom to a golden crisp. This ensures the meat is safe to eat while the crust is shattering.
Key Ingredients & Substitutions
- All-Purpose Flour: A standard medium-protein flour (about 10-11%) works best here. You don’t need specialty flour.
- Yeast: We use instant yeast for efficiency. If using active dry yeast, activate it in warm water first.
- The Filling: My mom usually uses a savory pork mixture. For this recipe, you can use our versatile Pork Filling recipe. Ensure it is well-seasoned and has a bit of fat for juiciness.
- Cooking Oil: Use a neutral oil with a high smoke point, such as vegetable, canola, or grapeseed oil.
Recipe Notes Before You Start
- Equipment: You will need a large skillet with a tight-fitting lid. A 12-inch non-stick pan or a well-seasoned cast-iron skillet is ideal.
- Dough Texture: The dough should be soft but not sticky. Humidity affects flour; if it’s dry, add water 1 tablespoon at a time.
- Timings: Yeast activity depends on temperature. In a warm kitchen (75°F/24°C), the dough might double in 30 minutes. In a cooler kitchen, it may take 60 minutes.
How to Make Mom’s Pan-Fried Buns
Step 1: Make the Dough
I didn’t capture the initial mixing photo in time, but the process is straightforward. In a large bowl, mix 3 cups (approx. 400g) of all-purpose flour with 1 tsp of instant yeast. Slowly pour in warm water (about 1 cup / 240ml) while stirring with chopsticks.
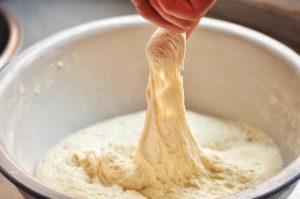
Stop adding water when the flour looks like wet, shaggy flakes. Then, go in with your hands. Knead until you achieve a smooth dough. Remember the “Three Cleans”: your hands, the bowl, and the dough should all be clean of sticky residue.
Step 2: Proof the Dough
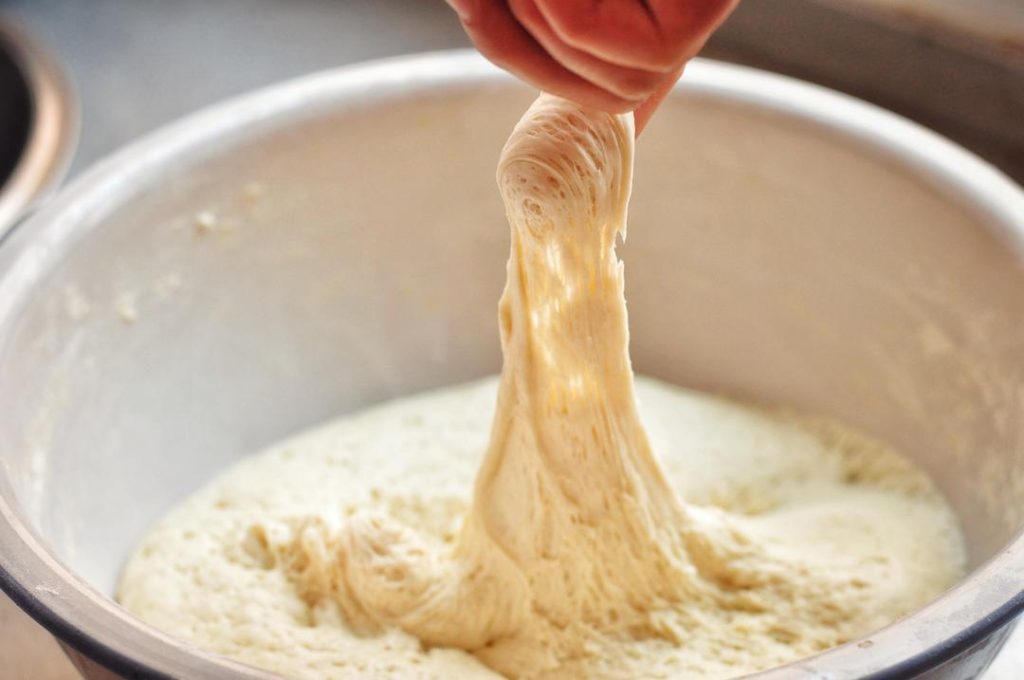
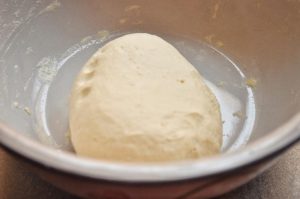
Cover the dough with a lid or plastic wrap. Place it in a warm spot for about 30 minutes. You know it is ready when it has doubled in size.
- Check: Poke inside the dough; it should look like a honeycomb with many air bubbles.
Step 3: Degas and Knead
Transfer the proofed dough to a floured surface. Dust with a little more flour and knead repeatedly for about 3 to 5 minutes. You want to remove those air bubbles so the texture becomes fine and chewy. The dough should feel elastic and the surface should be very smooth.

Step 4: Shape the Ring
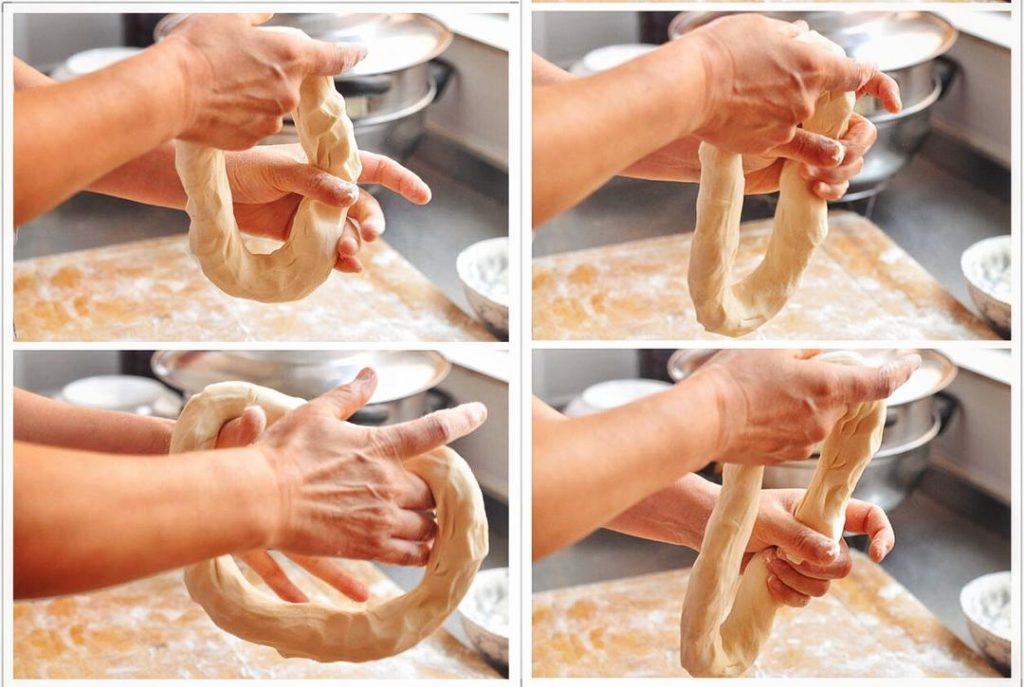
Poke a hole in the center of the dough ball. Using your hands, gently expand the hole, rotating the dough to form a large, even ring. My mom does this in seconds—it’s muscle memory!
Step 5: Portion the Dough
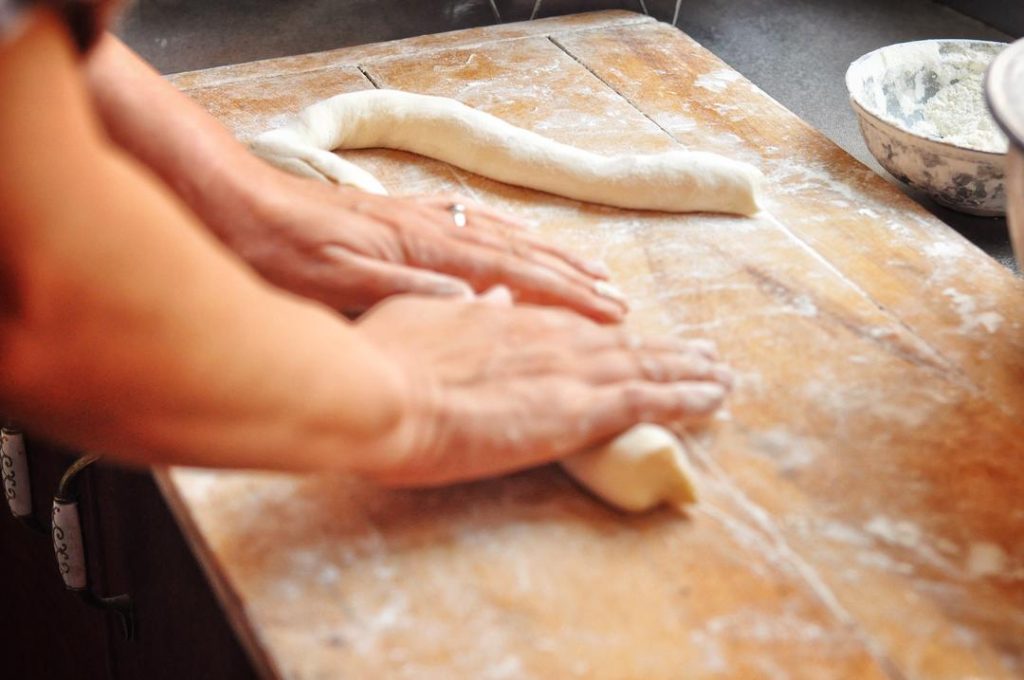
Break the ring to form a long log (snake). Roll it back and forth to ensure it is an even thickness.
Step 6: The “Jiu” (Pulling) Technique
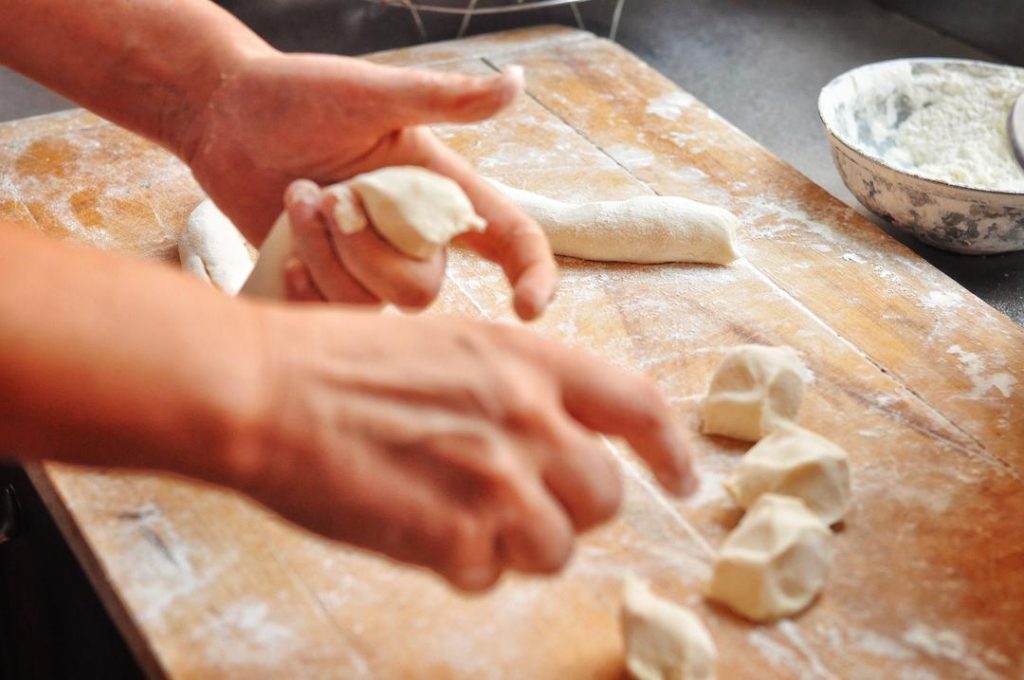
While many use a knife to cut dough, the older generation in Northern China prefers to “Jiu” (pull/tear) the dough. Hold the dough in your left hand and use your right hand to quickly snap off small pieces (agents).
- Why do this? It seals the edges of the cut slightly and is much faster once mastered.
Step 7: Roll the Wrappers
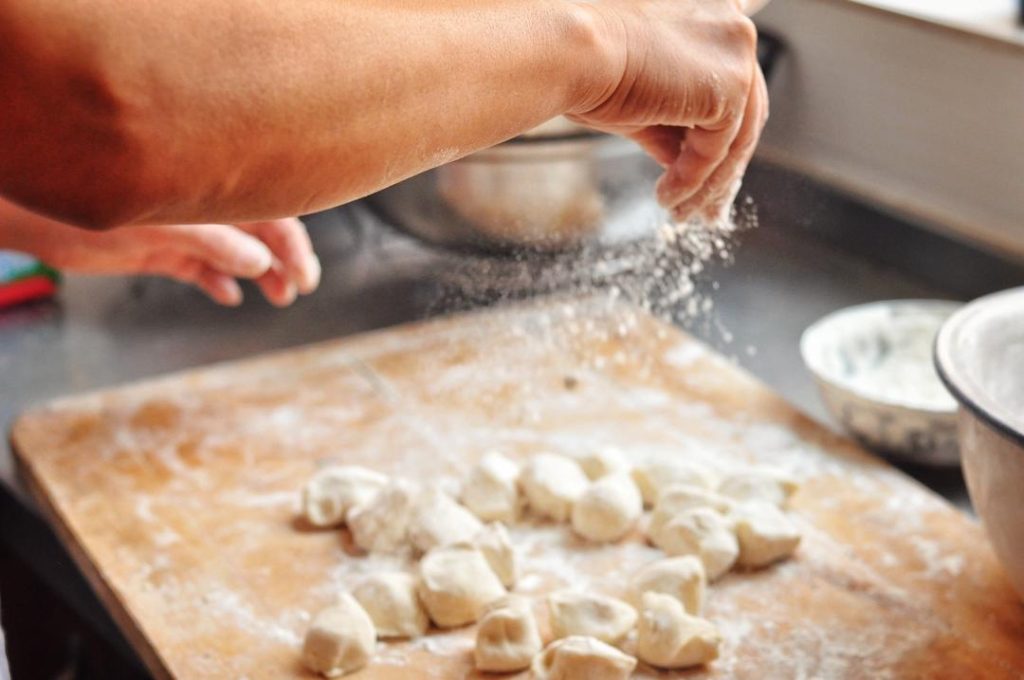
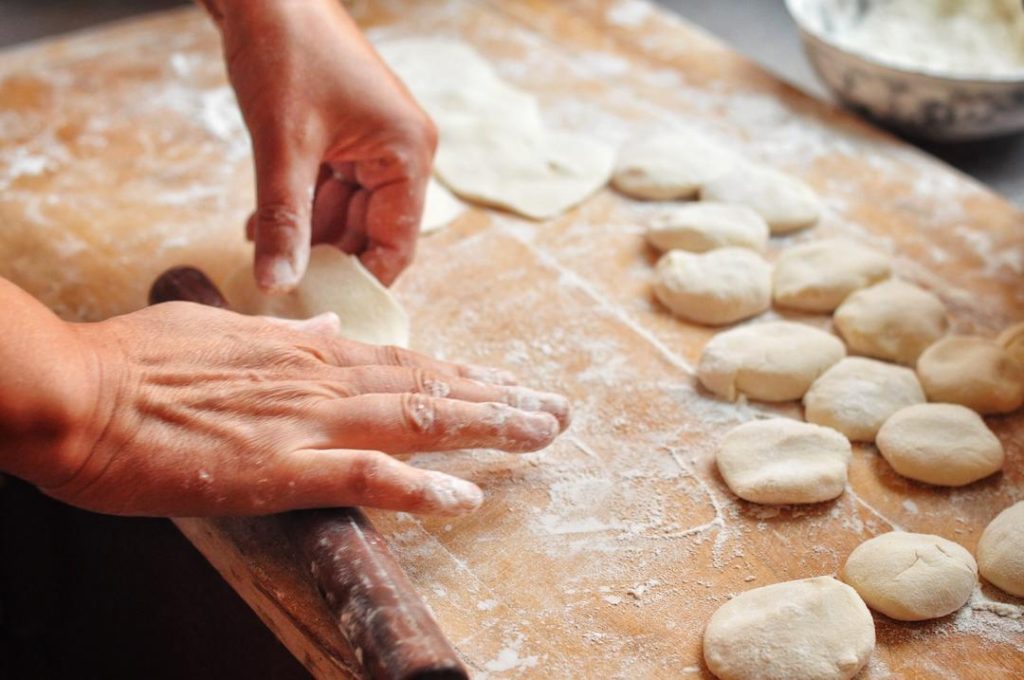
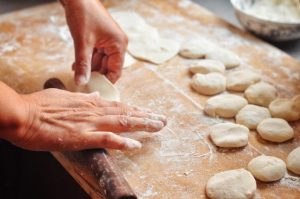
Dust the small dough pieces with flour so they don’t stick. Flatten each piece into a disc with your palm. Using a rolling pin, roll them into circles.
- Pro Tip: The center should be slightly thicker than the edges (like a flying saucer). This supports the Pork Dumpling Filling without breaking.
Step 8: The Squeeze Wrap
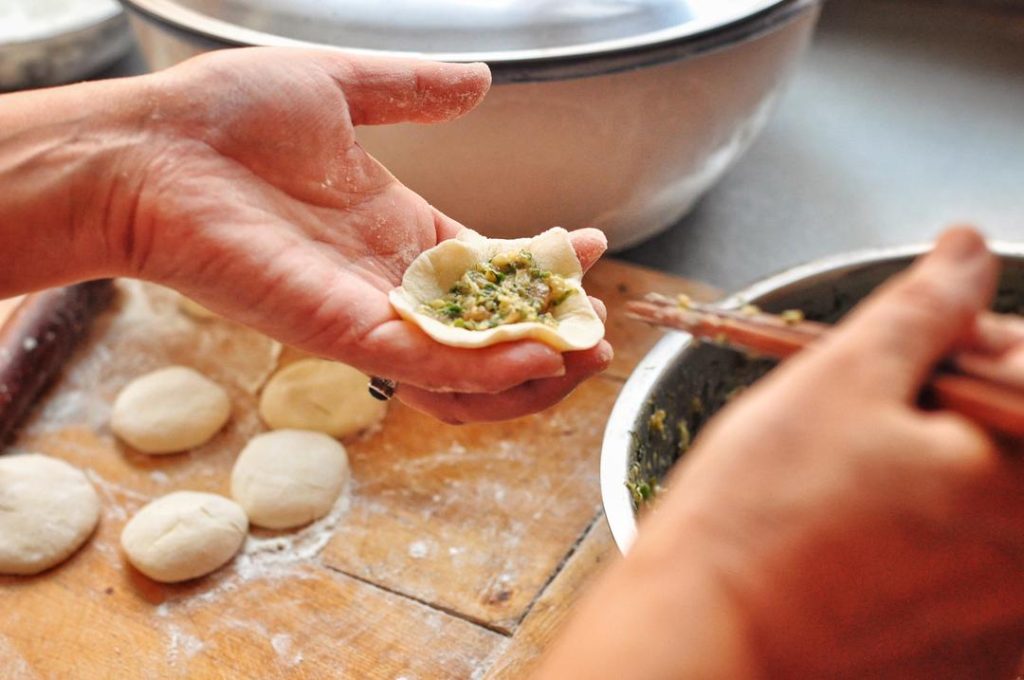
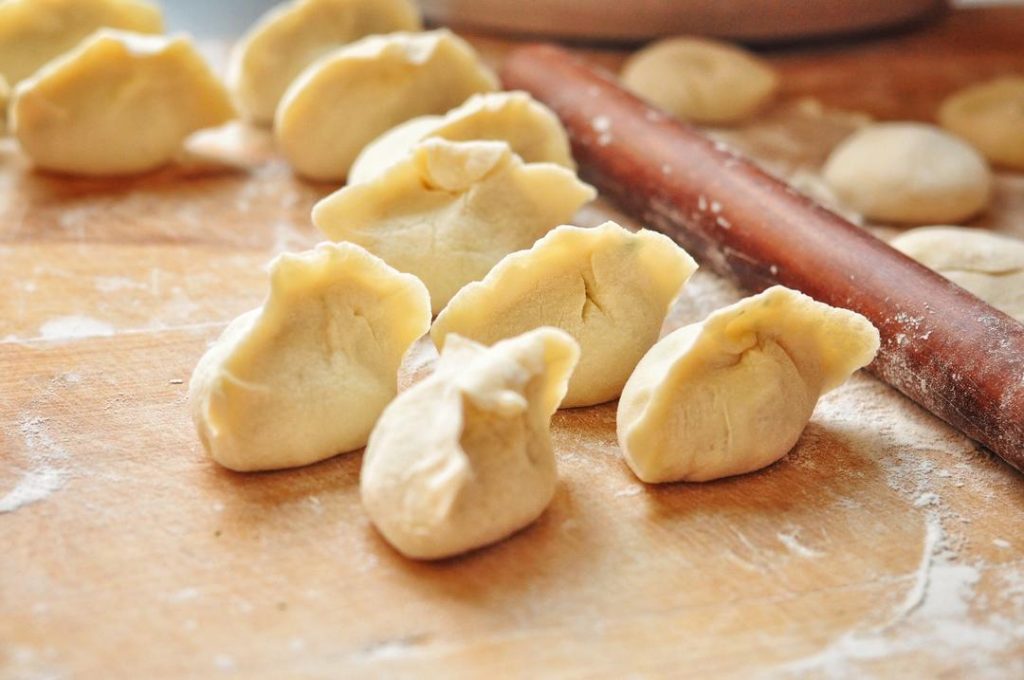
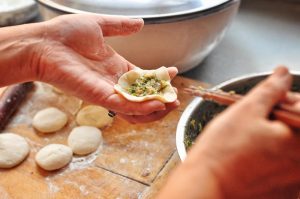
This is the “fast hand” method. Place a wrapper in the crook of your hand (your fingers form a natural cradle). Place the filling in the center. Pinch the top center together. Then, using the thumbs and index fingers of both hands, squeeze the edges toward the center.
- Result: This creates a crescent-moon shape with a “belly” and a tight seal that won’t burst in the pan.

Step 9: The First Fry (Setting the Bottom)
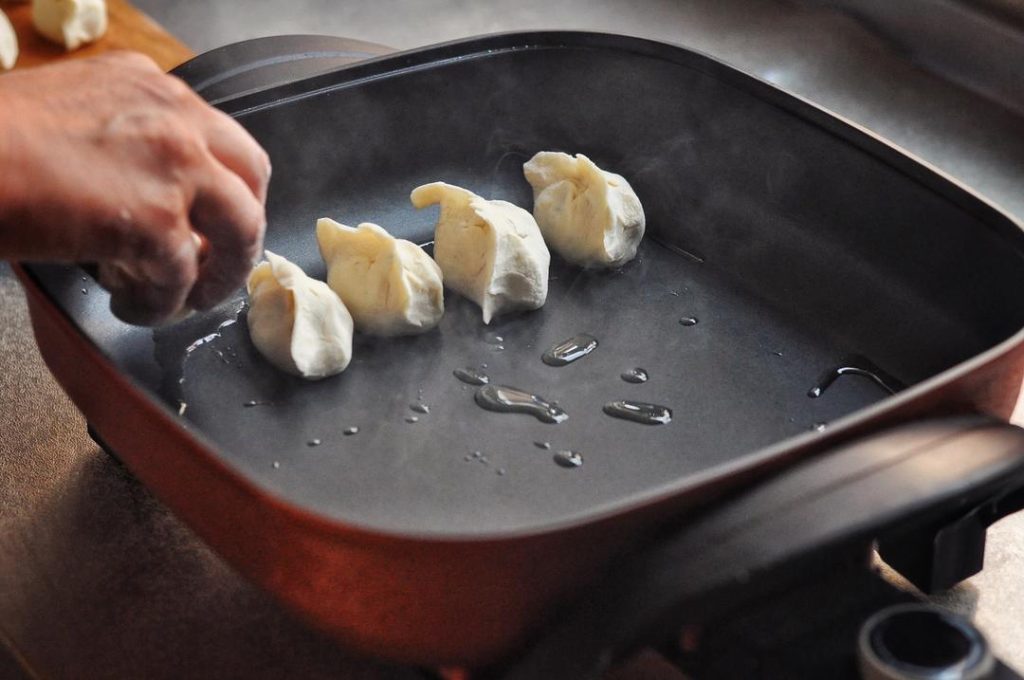
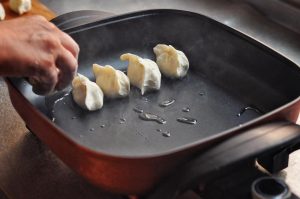
We used an electric skillet, but a stove-top pan works perfectly. Preheat your pan over medium heat. Add a small amount of vegetable oil to coat the bottom. Arrange the buns neatly in the pan.
- Tip: Make sure every bun gets a little “kiss” of oil on the bottom.
Step 10: The Steam
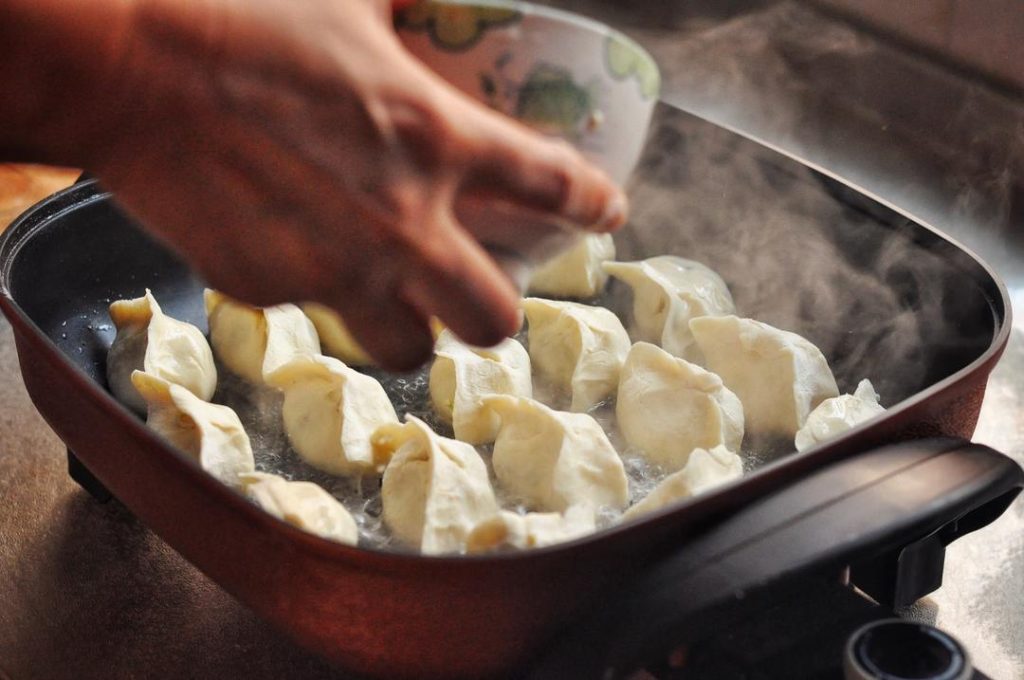
Once the bottoms are slightly set (about 1 minute), pour in water. You need enough water to cover the bottom third of the buns.
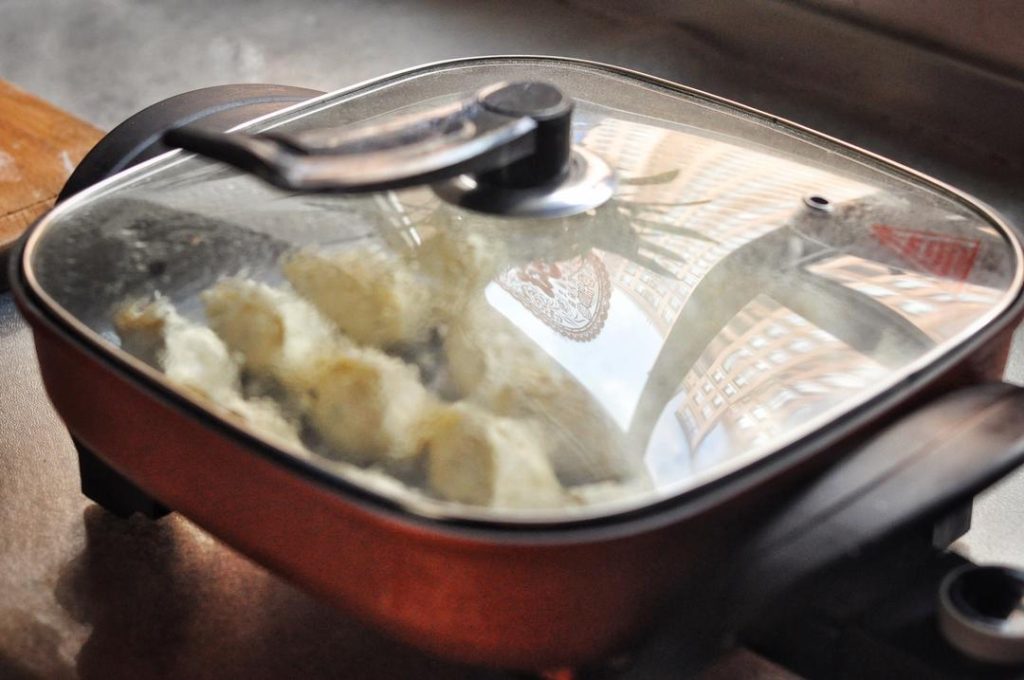
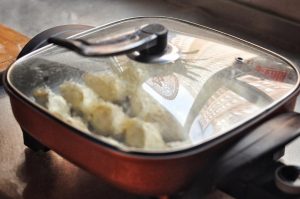
Step 11: Covered Cooking
Immediately cover with a lid. The water will boil and create steam, cooking the dough and the raw meat filling. Keep the heat on medium-high. Listen to the sound; vigorous bubbling means it is cooking.
Step 12: The Second Fry (Crisping)
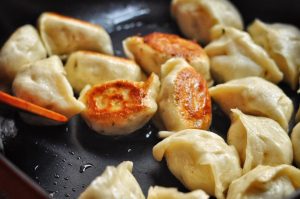
When the water has evaporated (the sound will change from a bubbling hiss to a crackle), open the lid. Move the buns slightly with a spatula to ensure they aren’t stuck.
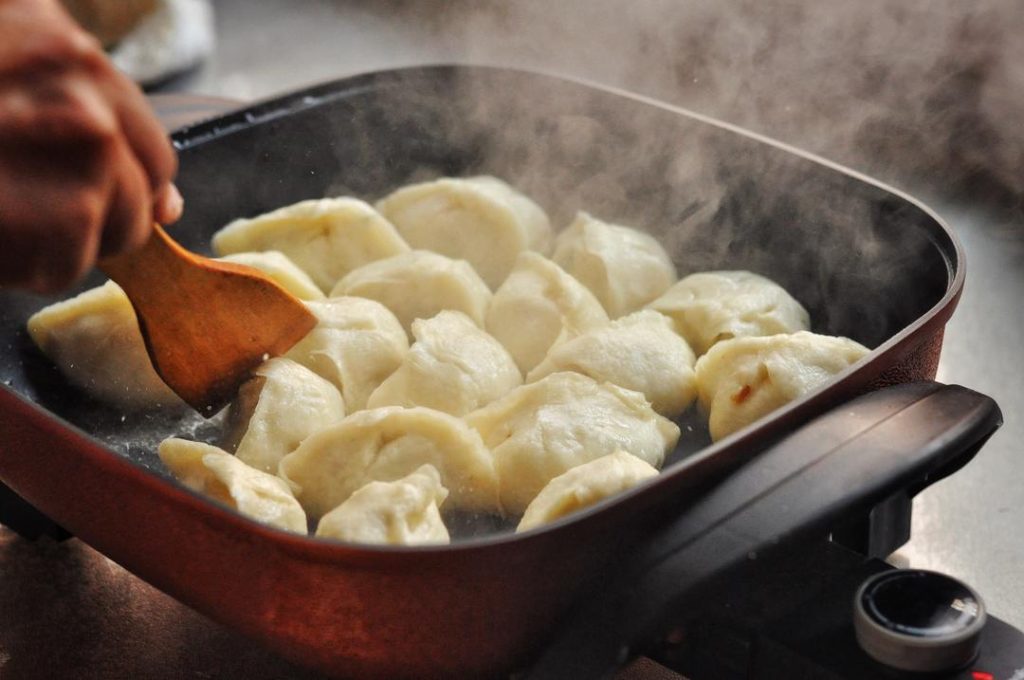
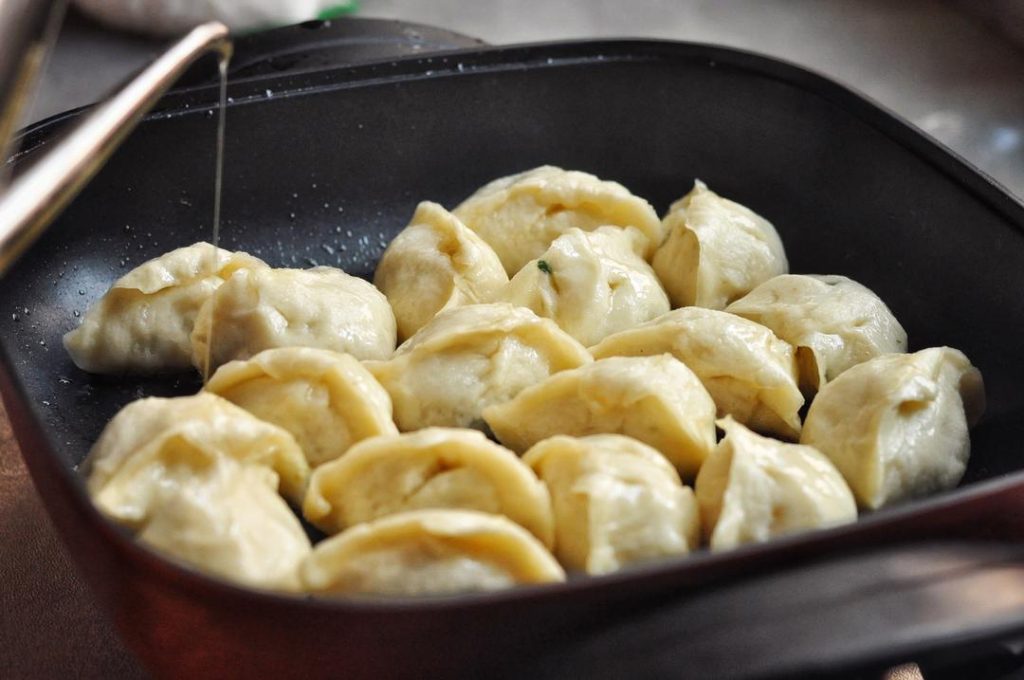
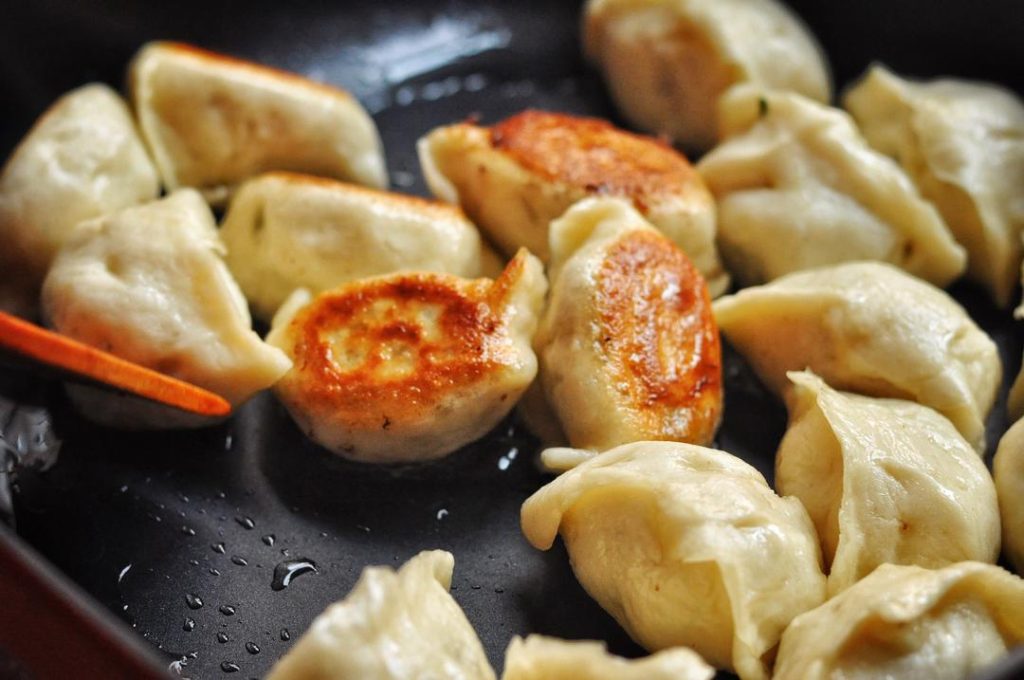
Drizzle a little more oil around the edges of the pan and between the buns. This “refrying” stage creates the signature golden, crunchy bottom. Fry until they reach your desired color (usually deep golden brown).
Common Mistakes When Making Pan-Fried Buns
- Water Evaporating Too Fast: If the water dries up before the meat inside reaches a safe internal temperature (160°F/71°C), the buns will burn but remain raw inside. If you hear crackling too early, turn the heat down and add a splash more water.
- Crowding the Pan: While they can touch, jamming them in too tight prevents the steam from circulating properly, leading to gummy dough sides.
- Cold Pan: If you put the dough into a cold pan with cold oil, they may soak up grease before they start cooking. Always preheat.
Serving Suggestions
These are best eaten piping hot (be careful of the steam inside!).
- Classic Dip: Vinegar and chili oil.
- Mom’s Recommendation: Try Japanese soy sauce plus a little wasabi—it opens a door to a whole new world of flavor!
- Pairings: These are rich, so pair them with something light like Smashed Cucumber Salad or a warming bowl of Seaweed Egg Drop Soup.
Authoritative References
- For information on safe cooking temperatures for ground pork, refer to the USDA Food Safety and Inspection Service.
- To understand the science of yeast fermentation in dough, Bakerpedia offers excellent technical resources.
Food Safety and Preparation
- Pork Safety: Ensure your ground pork filling reaches an internal temperature of at least 160°F (71°C).
- Cross Contamination: Wash hands thoroughly after handling raw dough and meat filling before touching cooked food or surfaces.

Mom’s Pan-Fried Buns (Shui Jian Bao)

Equipment
- Large Skillet with Lid Non-stick or Cast Iron
- Rolling Pin
Ingredients
The Dough
- 3 cups all-purpose flour approx. 400g
- 1 cup warm water adjust as needed for humidity
- 1 tsp instant yeast
The Filling & Cooking
- 2 cups Pork Dumpling Filling See notes for recipe link
- 2 tbsp vegetable oil divided for frying
- 0.5 cup water for steaming
Instructions
- Make the Dough: Combine flour and yeast. Slowly add warm water while stirring until shaggy flakes form. Knead by hand until the dough is smooth and your hands/bowl are clean.

- Proof: Cover and let rest in a warm place for about 30 minutes, or until doubled in size with a honeycomb interior structure.
- Shape: Knead the dough on a floured surface to degas it (3-5 mins). Form a ring, break it into a log, and pull/cut into small even pieces (agents).
- Roll & Fill: Roll each piece into a circle with a thicker center. Place filling in the center and seal using the squeeze method or by pinching tightly.
- First Fry: Heat oil in a skillet. Arrange buns in the pan and fry for 1-2 minutes until bottoms are slightly set.
- Steam: Add water (enough to cover bottom 1/3 of buns) and immediately cover with a lid. Steam on medium-high until water evaporates (listen for the crackling sound).
- Crisp: Uncover, add a little more oil around the edges, and fry until the bottoms are golden brown and crispy. Serve hot.



Leave a Reply