Hey everyone, it’s Lin! Welcome back to my kitchen.
If you’ve been following Woks of Love for a while, you know that Kung Pao Chicken is one of the most iconic dishes in Sichuan cuisine. But today, I want to share its slightly more “luxurious” cousin: Kung Pao Shrimp (Gong Bao Xia Qiu).

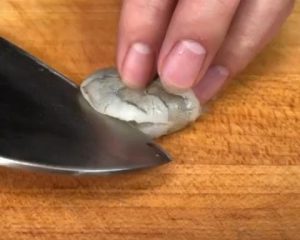
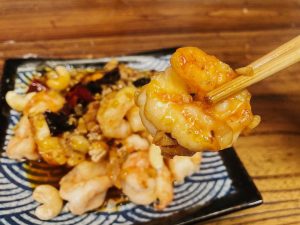
In Chinese restaurants, this dish often comes with a hefty price tag compared to the chicken version. But here is a secret from my years working in kitchens: it is incredibly fast, simple, and affordable to make at home. The “Xia Qiu” in the Chinese name translates literally to “Shrimp Ball.” We aren’t actually making meatballs here; rather, we use a specific knife technique to butterfly the shrimp deeply so they curl up into beautiful, bouncy spheres when cooked.
I’m also sharing a “Golden Ratio” for the Kung Pao sauce in this recipe. This is a versatile sauce ratio you can memorize and use for chicken, tofu, or even Garlic Fried Shrimp if you want to switch up the flavor profile.
Let’s get our woks ready!
About the Author & Recipe Development
I’m Lin, a Sichuan-born chef with over a decade of experience cooking in both traditional Chinese restaurants and home kitchens in the US. My culinary philosophy bridges the gap between authentic Sichuan flavors and the practicalities of a Western home kitchen. This recipe was developed to replicate the texture of restaurant-style deep-fried shrimp without requiring a commercial deep fryer, while maintaining the ma-la (numbing and spicy) balance that defines my hometown’s cuisine.
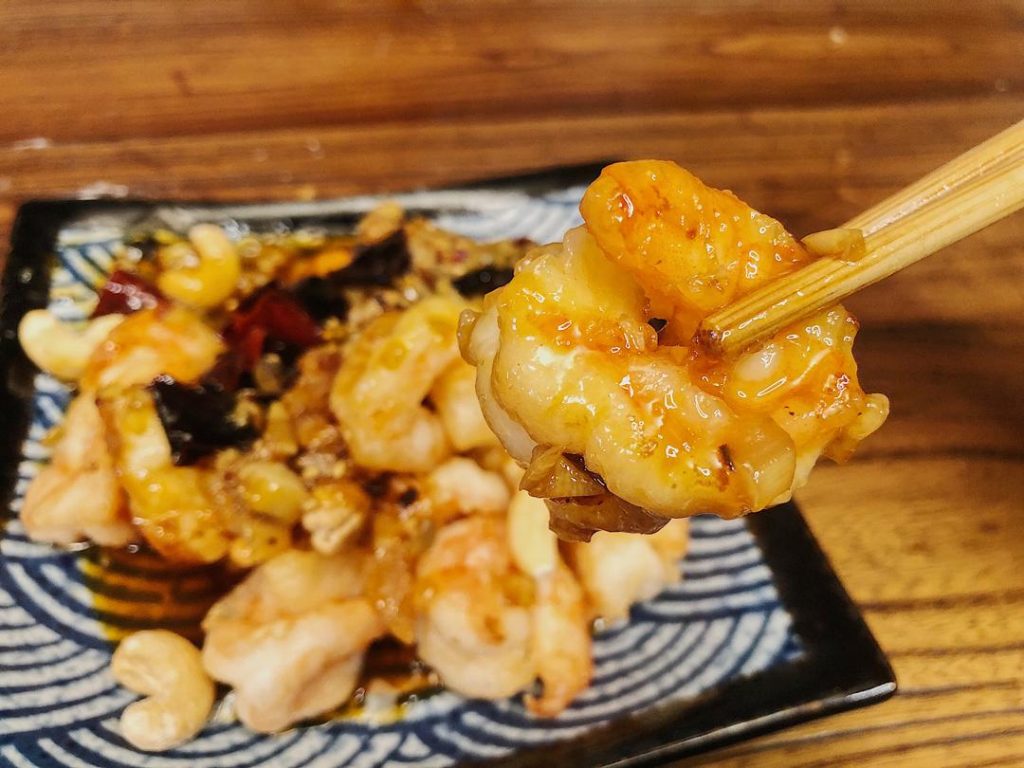
Why This Recipe Works
- Textural Contrast: By coating the shrimp in a wet starch batter and frying them, we create a crispy shell that protects the juicy, tender meat inside.
- The “Butterfly” Effect: Deeply scoring the back of the shrimp allows them to curl into “balls,” which not only looks beautiful but increases the surface area for the sauce to cling to.
- The Sauce Application: Unlike some stir-fries where ingredients swim in liquid, we pour the thickened sauce over the fried shrimp at the very end. This ensures the crust stays crispy rather than turning soggy immediately.
Key Ingredients & Substitutions
The Shrimp
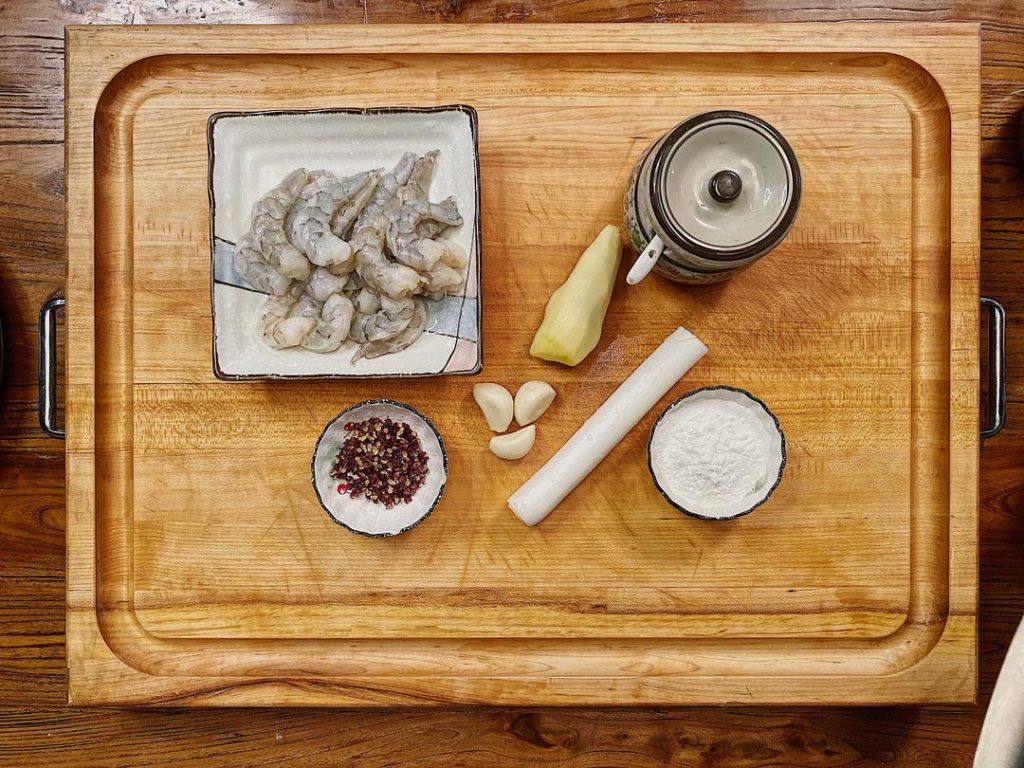
The recipe calls for about 1/2 lb (250g) of shrimp.
- Size: I recommend large shrimp (21/25 count or larger). The larger the shrimp, the better the “ball” effect when they curl up.
- Preparation: Fresh is best, but frozen works perfectly fine. Just make sure they are fully thawed and patted dry.
The Aromatics (The Soul of Sichuan)
- Sichuan Peppercorns: You’ll need about 5-10 peppercorns. These provide the signature numbing citrusy aroma. If you can’t find them, you can skip them, but you’ll miss that authentic kick.
- Dried Chili Peppers: 2 whole dried chilies (like Arbol or Tien Tsin peppers), cut into segments. Adjust this based on your spice tolerance.
- Fresh Aromatics: Ginger, garlic, and the white part of the scallion (green onion).
The “Golden Ratio” Kung Pao Sauce
We are mixing this in a bowl beforehand. Here is what you need:
- Soy Sauce: Use a high-quality Light Soy Sauce (like Pearl River Bridge or Kikkoman).
- Vinegar: Ideally, use Chinkiang Vinegar (Chinese Black Vinegar). If you can’t find it, the original recipe suggests Rice Vinegar, which works well too for a lighter taste.
- Sugar: Kung Pao flavor is a balance of savory, sweet, and sour (Lychee flavor profile). Do not skimp on the sugar!
- Red Oil or Ketchup: The original recipe offers a choice here.
- Option A (Traditional): Use Homemade Chinese Chili Oil for authentic heat.
- Option B (Restaurant Style): Use Ketchup. Yes, ketchup! In many Chinese kitchens, a spoon of ketchup creates that glossy, appetizing red color and adds a tangy sweetness that Americans love.
NOTE: If you are gluten-free, ensure your soy sauce and vinegar are certified gluten-free. Tamari is a great substitute for soy sauce.
Common Mistakes When Making Kung Pao Shrimp
- Not Drying the Shrimp: If the shrimp are wet before adding the marinade and starch, the batter will slide right off. Pat them dry with paper towels!
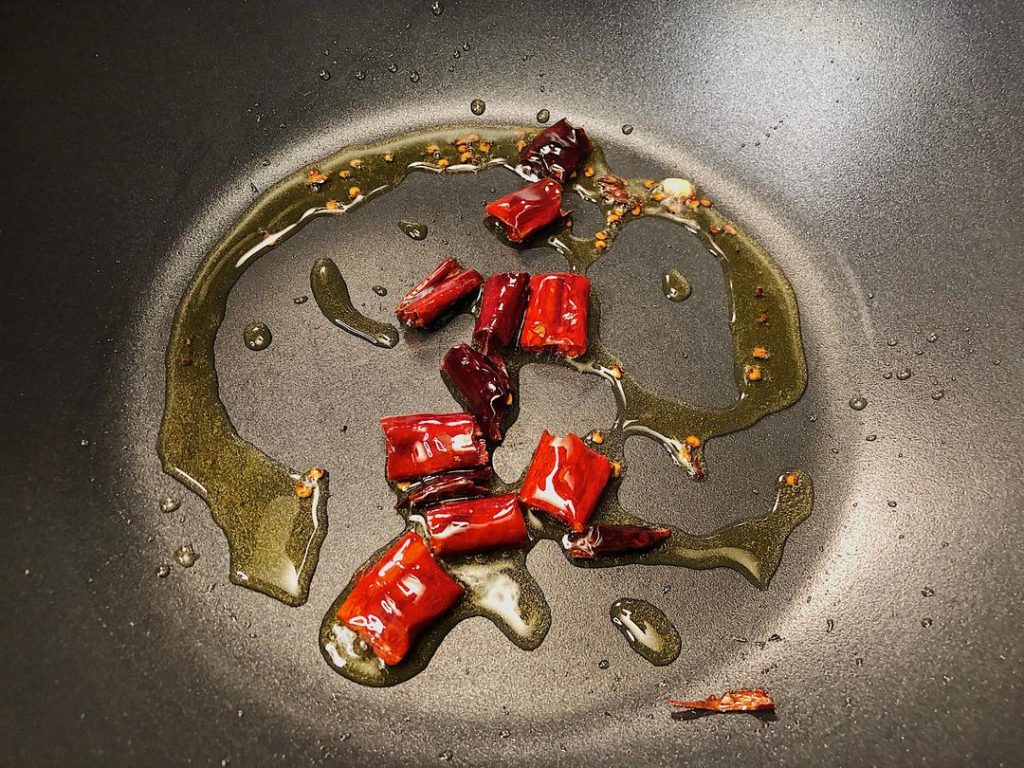
- Burning the Chilies: We want to fry the dried chilies until they are just turning dark red/brown (this is called “huxiang” or burnt pepper fragrance). If they turn black and smoke heavily, they will taste bitter.
- Overcooking the Shrimp: Shrimp cook fast! They only need a couple of minutes. As soon as they curl tightly and the crust is hard, get them out.
Recipe Notes Before You Start
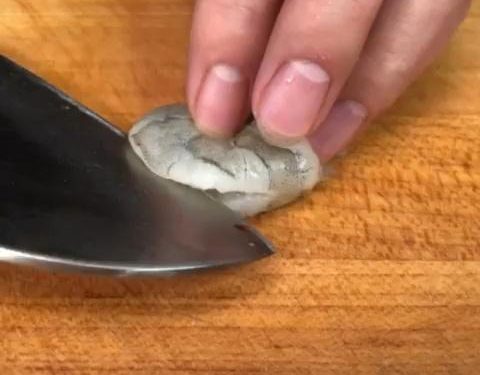
- The Knife Work: When butterflying the shrimp, cut deeply along the back—deeper than you think—but do not cut all the way through. This is the secret to the shape.
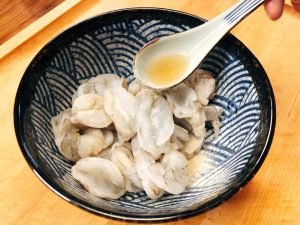
- The Massage: The recipe calls for “massaging” the shrimp with salt and pepper for 3 minutes. This breaks down proteins and gives the shrimp a “bouncy” texture (what we call ‘Q’ texture). Don’t skip this!
- Nuts: The original recipe mentions adding cashews or peanuts at the end. This is optional but adds a wonderful crunch.
Instructions
Step 1: Prep the Shrimp
Peel and devein your shrimp. Using a sharp knife, slice along the back of the shrimp deeply, almost cutting it in half, but keeping the belly connected. This is deep butterflying.
Step 2: Aromatics
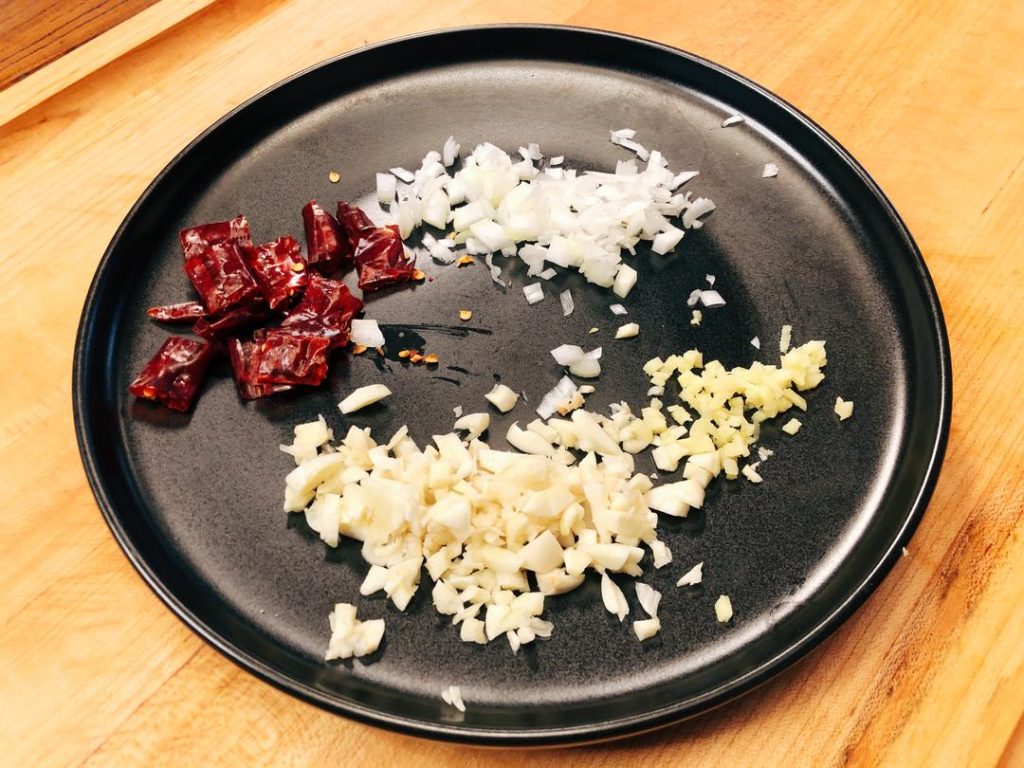
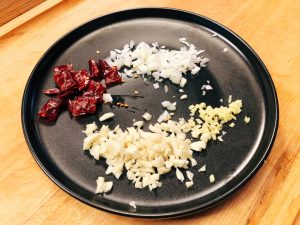
Finely chop the garlic and ginger. Cut the white part of the scallion into small segments. Snip the 2 dried chili peppers into small sections (shake out seeds if you want less heat).
Step 3: Marinate (The Massage)
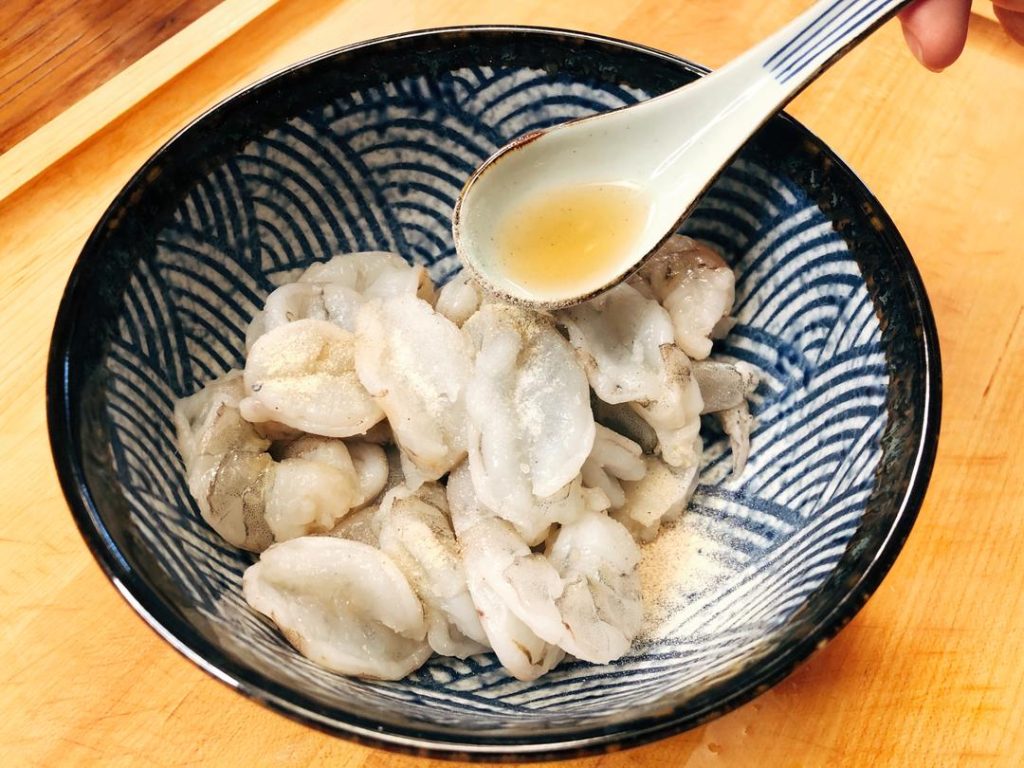
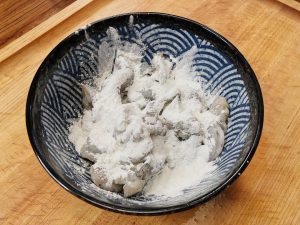
Place the shrimp in a large bowl. Add 1/4 tsp salt and 1/3 tsp white pepper (or black pepper). Mix and massage the shrimp vigorously with your hand for about 3 minutes. You will feel the shrimp become sticky; this creates that classic snappy texture.
Step 4: The Batter
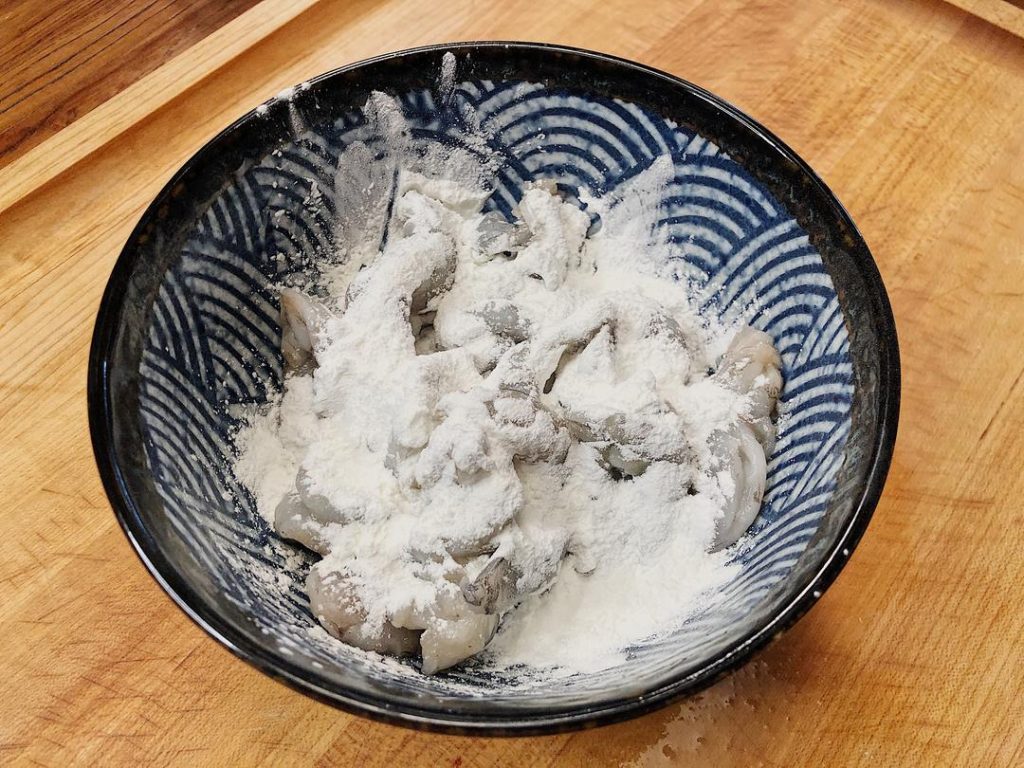
Add 3 tbsp cornstarch (or potato starch) to the shrimp. Mix well.
- Tip: If your shrimp were very dry, the starch might be powdery. Add 2-3 tsp of water to help create a thick, sticky batter that coats the shrimp completely. It should feel like a paste.
Step 5: The Universal Sauce
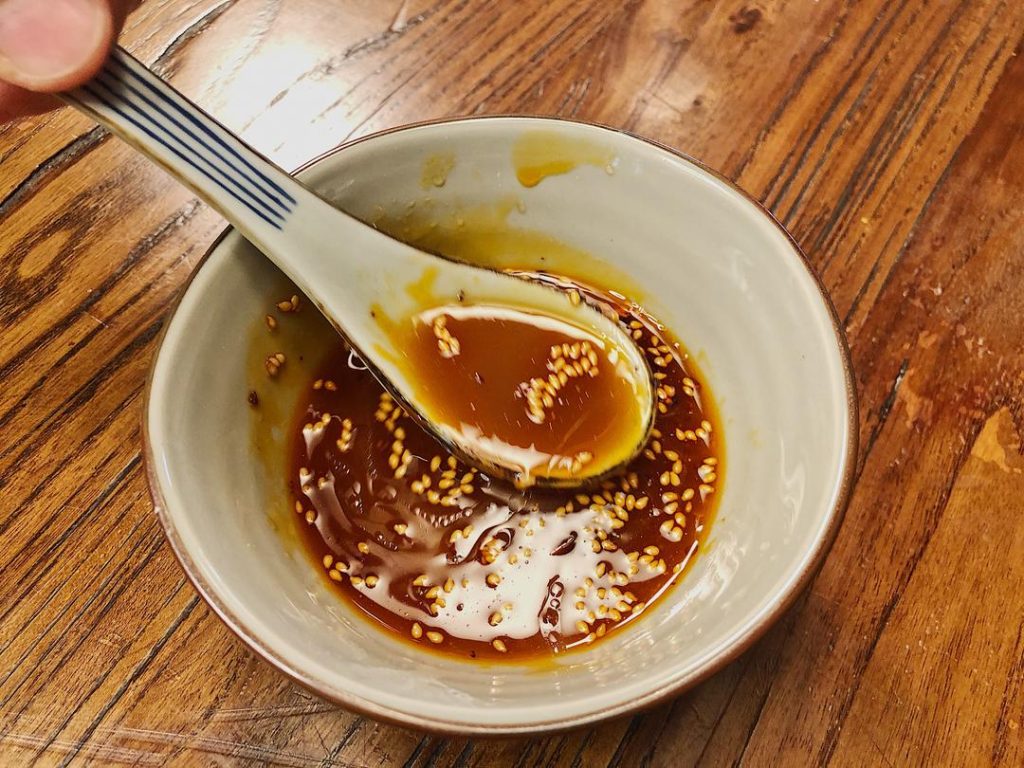
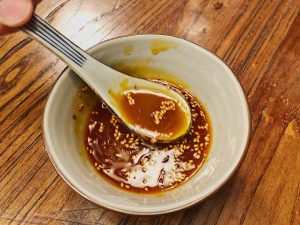
In a small bowl, mix the following:
- 1 tbsp Cornstarch + 4 tbsp Water (mix this first to make starch water)
- 1 tbsp Light Soy Sauce
- 2 tbsp Sugar
- 1.5 tbsp Vinegar (Chinkiang or Rice Vinegar)
- 1 tbsp Red Chili Oil OR Ketchup (for color) Stir until the sugar is dissolved. Set aside.
Step 6: Frying the Shrimp
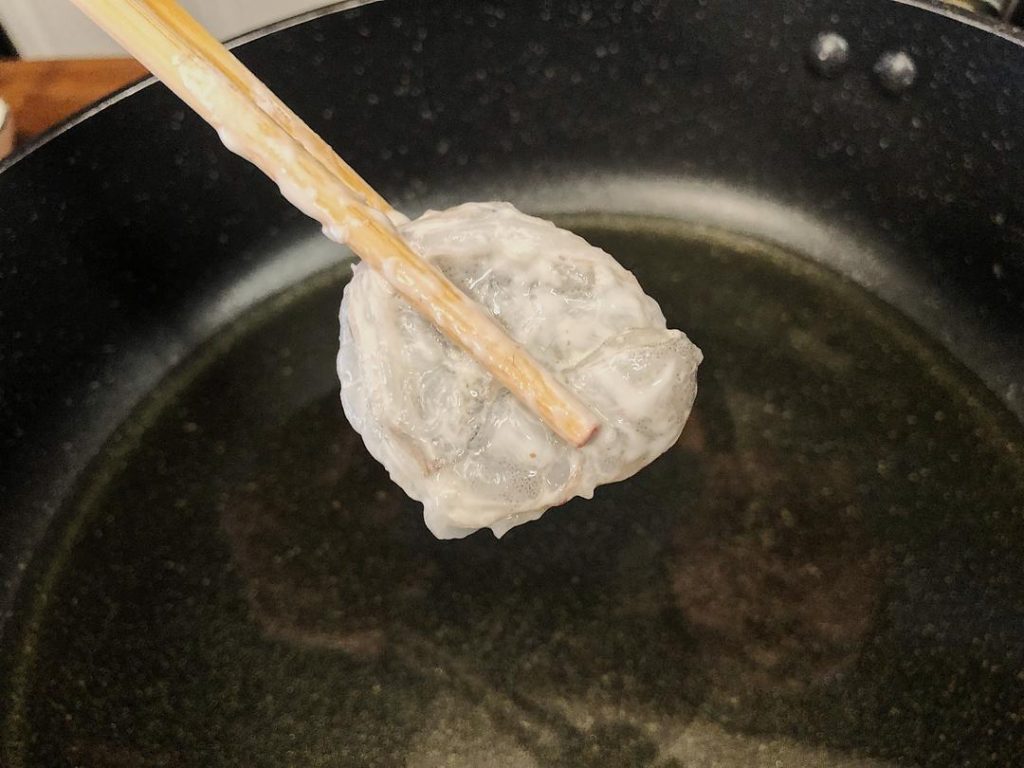
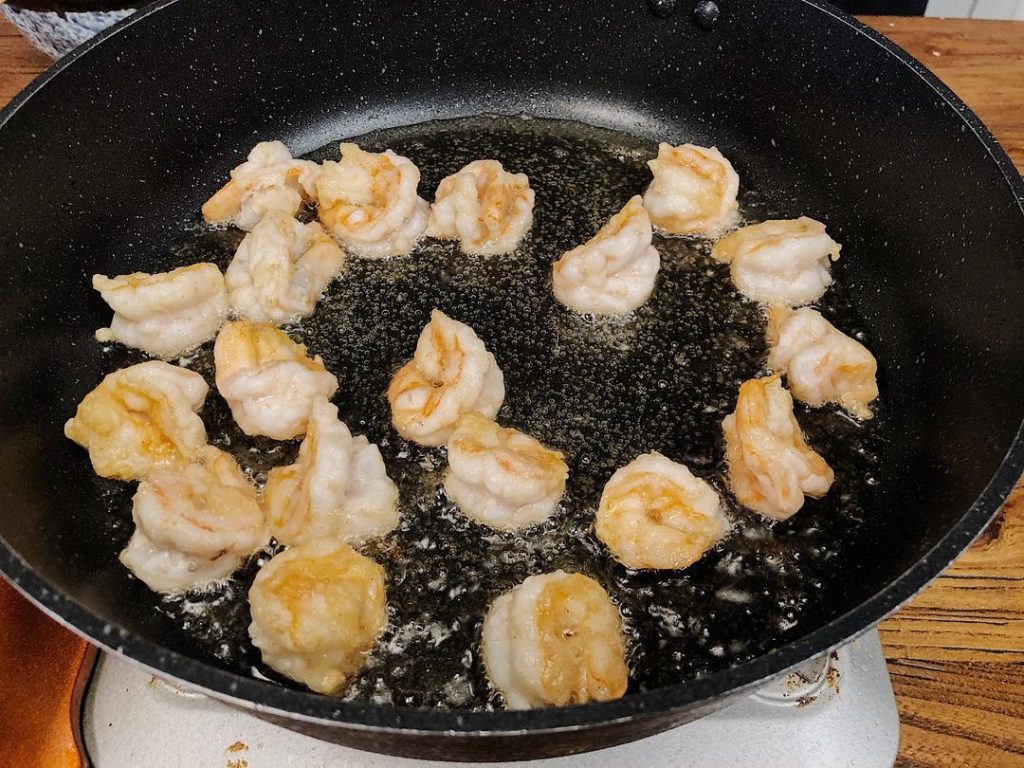
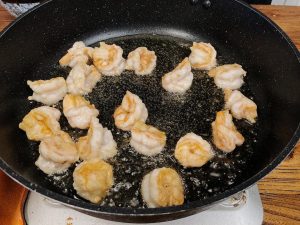
You don’t need a huge wok full of oil. Use a small pot and add enough oil to just cover the shrimp when they lay flat (shallow fry). Heat the oil over medium heat.
- Test: Place your hand (carefully!) above the oil. If you feel significant heat radiating, it’s ready.
- Place the shrimp in one by one. Try to let the head and tail touch to form a circle/ball as you drop them in.
- Fry until the bottom is red and a crispy shell forms. Flip and fry the other side.
- Once crispy and golden-red, remove and drain on a wire rack or paper towel.
Step 7: Stir-Fry the Aromatics
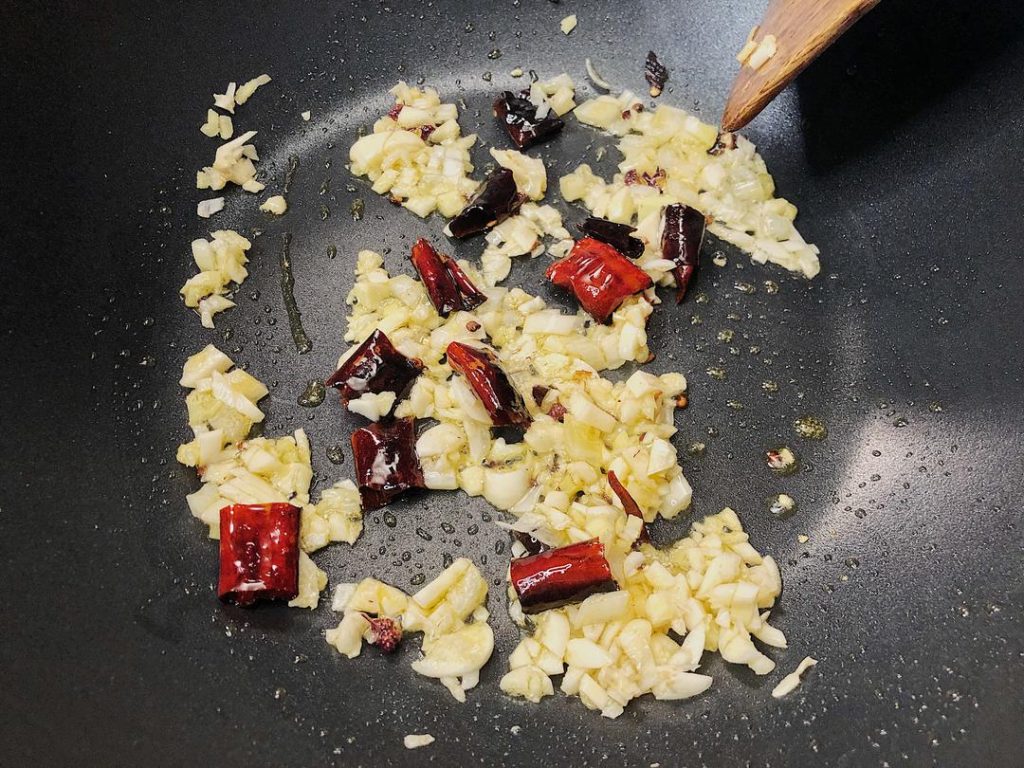
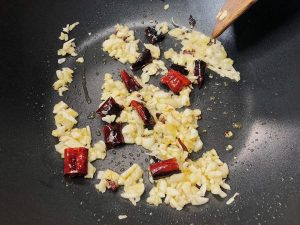
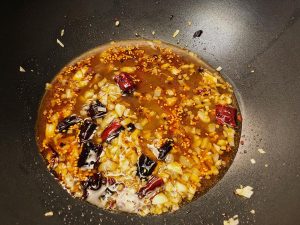
In a non-stick pan or wok, add 1 tbsp of oil. Add the dried chili segments. Fry over low heat until they just start to turn slightly dark/chocolate color. Immediately add the scallion, ginger, garlic, and Sichuan peppercorns. Stir-fry briefly until fragrant (about 30 seconds).
Step 8: Final Assembly
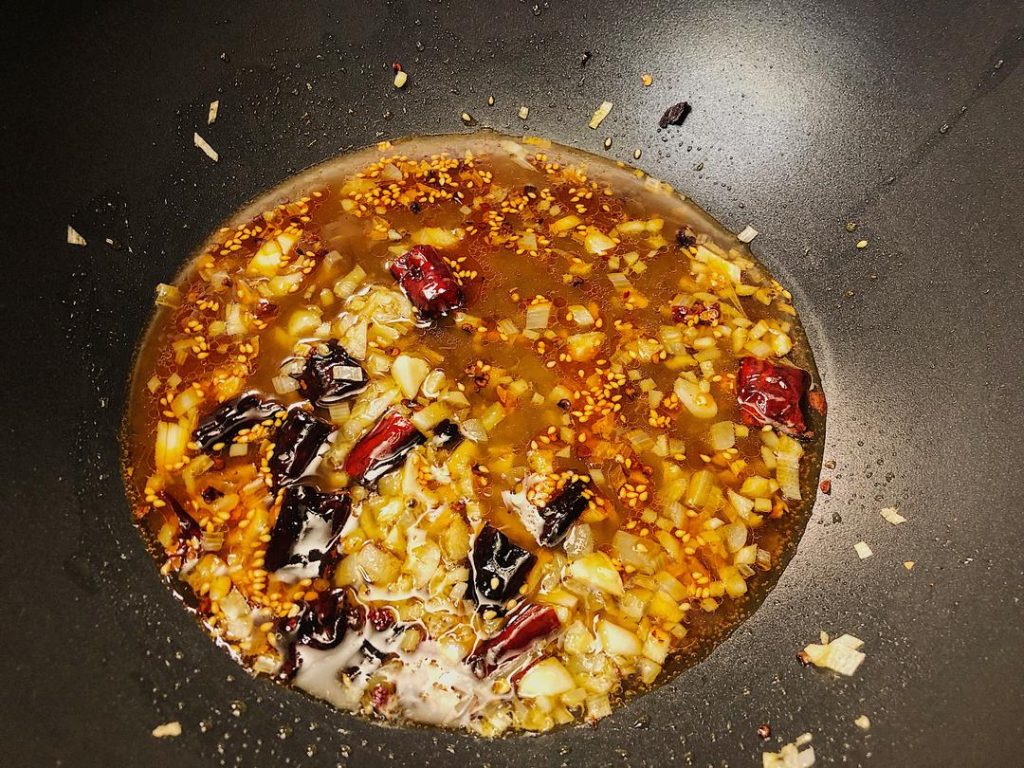
Give your sauce a quick stir (starch settles at the bottom) and pour it into the pan. Keep the heat low. Stir until the sauce bubbles and thickens into a glossy glaze.
- Reference: If you want to see how thick a glaze should be, check out my guide on Essential Chinese Sauces.
Step 9: Serve
You have two options here. You can toss the shrimp in the pan quickly, OR simply arrange the crispy shrimp on a plate and pour the hot glaze over them. The original recipe suggests pouring it over to maintain maximum crispiness. Sprinkle with toasted peanuts or cashews if desired. Serve immediately with steamed rice or maybe some Yangzhou Fried Rice if you are feeling fancy!
Food Safety & Preparation
- Shellfish Safety: Ensure shrimp are cooked to an internal temperature of 145°F (63°C). The flesh should be pearly and opaque. For more on safe seafood handling, refer to the FDA Seafood Guidelines.
- Oil Safety: When frying, never leave hot oil unattended. Keep the handle of the pot turned inward to prevent accidents.
- Allergens: This recipe contains Shellfish, Soy, and Gluten (in the soy sauce/vinegar). It may contain Peanuts/Tree Nuts if you add the garnish.
Serving Suggestions
This dish has a bold, sweet, and spicy flavor profile. It pairs best with neutral sides to balance the palate.
- Rice: Steamed Jasmine rice is the classic choice.
- Vegetables: A simple Stir-fried Lettuce with Garlic or a refreshing Smashed Cucumber Salad works perfectly to cool down the heat.
- Soup: Start the meal with a warm bowl of Tomato Egg Drop Soup.
Frequently Asked Questions
Q: Can I use chicken instead? A: Absolutely! This sauce is known as “universal Kung Pao sauce.” Cut chicken thigh into cubes and follow the same marinade and frying steps.
Q: My sauce is too thick/gooey. A: The starch in the sauce thickens rapidly. If it’s too gloopy, add a splash of water or unsalted stock to thin it out to your desired consistency.
Q: Can I air fry the shrimp? A: Yes. Coat the shrimp as directed, spray generously with oil, and air fry at 375°F (190°C) for 6-8 minutes, shaking halfway. Simmer the sauce separately on the stove and toss to coat.
Q: Is this spicy? A: It has a kick, but it’s customizable. The “Red Oil” adds heat, while “Ketchup” makes it mild and kid-friendly.
Authoritative References
- FDA: Selecting and Serving Fresh and Frozen Seafood Safely
- USDA: Cooking Meat? Check the New Recommended Temperatures
Serves: 2-3 | Prep Time: 15 mins | Cook Time: 15 mins | Total Time: 30 mins
Nutrition information is calculated using an ingredient database and should be considered an estimate. Garnishes and optional ingredients are not included.
Calories: ~280 kcal per serving | Protein: 18g | Carbs: 22g | Fat: 12g
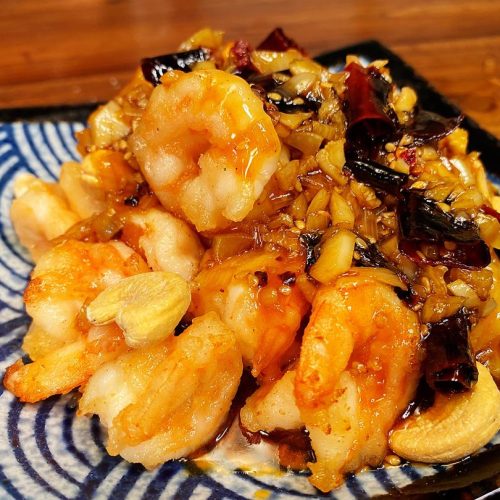
Kung Pao Shrimp (Gong Bao Xia Qiu)

Equipment
- Wok or Frying Pan
- Small pot for frying
Ingredients
- 0.5 lb shrimp large, peeled and deveined (approx 250g)
- 5 Sichuan peppercorns optional but recommended for authentic flavor
- 1 stalk scallion white part only, cut into segments
- 1 chunk ginger small piece, minced
- 2 dried chili peppers cut into segments
- 4 cloves garlic minced
Marinade
- 0.25 tsp salt
- 0.33 tsp white pepper or black pepper
- 3 tbsp cornstarch plus 2-3 tsp water if mixture is too dry
Kung Pao Sauce
- 1 tbsp cornstarch mixed with 4 tbsp water (slurry)
- 1 tbsp light soy sauce
- 2 tbsp sugar
- 1.5 tbsp vinegar Chinkiang vinegar or Rice vinegar
- 1 tbsp chili oil or ketchup for a milder, redder sauce
Instructions
- Prep the Shrimp: Peel and devein the shrimp. Use a knife to slice deeply along the back (butterfly) without cutting all the way through. This helps them curl into balls.

- Prep Aromatics: Mince the garlic and ginger. Cut the white part of the scallions into small segments. Cut dried chilies into small sections.

- Marinate: In a bowl, combine shrimp, salt, and white pepper. Massage vigorously with your hand for 3 minutes until the shrimp feel sticky. This creates a bouncy texture.
- Batter: Add 3 tbsp cornstarch to the shrimp. If too dry, add 2-3 tsp of water. Mix until shrimp are coated in a thick, sticky paste.
- Make Sauce: In a separate bowl, mix 1 tbsp cornstarch with 4 tbsp water. Add soy sauce, sugar, vinegar, and chili oil (or ketchup). Stir well to dissolve sugar.
- Fry Shrimp: Heat oil in a small pot over medium heat. When you feel heat radiating from the oil surface, add shrimp one by one (try to form them into circles). Fry until the bottom is red and crispy, then flip. Remove when both sides are crispy and red. Drain oil.
- Stir-Fry Aromatics: In a pan with 1 tbsp oil, fry dried chilies over low heat until slightly darkened. Immediately add scallions, ginger, garlic, and Sichuan peppercorns. Stir-fry until fragrant.
- Thicken Sauce: Pour the sauce mixture into the pan. Simmer over low heat until it bubbles and thickens into a glossy glaze.
- Serve: Pour the hot glaze directly over the crispy shrimp (or toss quickly). Garnish with peanuts or cashews if desired.


Leave a Reply