I haven’t wanted to go out much lately, but the craving for crispy, golden spring rolls hit me hard. The only solution? Make them from scratch. While buying frozen wrappers is easy, there is a distinct satisfaction and texture to the homemade version—specifically the kind made using the traditional “smearing” or “daubing” method.

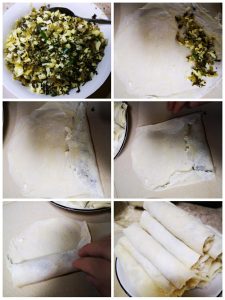
I actually learned this specific hydration technique from my husband’s family. He is from Taizhou, where they have a famous local delicacy called Shibingtong (食饼筒). It involves making a large, thin, crepe-like wrapper, stuffing it with various stir-fries, rolling it up, and pan-frying it until savory and crisp.
Today, I’m sharing how to make these pliable, chewy, and paper-thin wrappers at home. Whether you want to make classic Crispy Pork and Chive Spring Rolls or a hearty Taizhou Shibingtong, this dough is the foundation you need.
What Are “Smeared” Spring Roll Wrappers?
Unlike the wonton or dumpling wrappers you might roll out with a pin, this batter is wet and elastic. You don’t roll it; you “smear” it.

In China, if you visit a wet market, you will see masters with a ball of wet dough in one hand. They quickly dab the dough onto a hot, flat iron griddle, leaving a perfect circle of batter behind, and peel it off seconds later. It requires a specific hydration ratio—usually around 350g of flour to 300g of water —to get that sticky yet manageable consistency.
Why This Recipe Works
- The Autolyse Method: We use a high-hydration resting method (autolyse). By letting the flour and water sit, gluten forms passively. This saves you from exhausting arm workouts or needing a heavy-duty mixer.
- Versatility: You can make small wrappers for deep-frying or larger ones for soft rolls (popiah or Shibingtong).
- No Waste: The recipe is designed for a standard 10-inch (26cm) non-stick pan and produces about 20 wrappers with zero waste.
Key Ingredients & Substitutions
- All-Purpose Flour: Standard AP flour works best here. You need enough protein for elasticity (so it doesn’t break when peeling) but not so much that it becomes tough.
- Salt: Essential for tightening the gluten structure and adding flavor.
- Water: The quantity is crucial. We aim for a thick batter, not a runny liquid.
Comparison: Non-Stick Pan vs. Cast Iron
For this specific technique, the choice of pan is critical.
- Non-Stick Pan (Recommended): You must use a good quality non-stick pan. The batter needs to grip the pan momentarily to set, but it must release effortlessly without oil.
- Cast Iron/Carbon Steel: Unless your seasoning is absolutely perfect and glass-like, the batter will likely stick and tear. I strongly recommend beginners stick to Teflon or ceramic non-stick pans for this.
The Secret to Success: The “Batter” Consistency
There are two ways to achieve the right gluten structure.
Method 1: The Machine Method (Fast) If you are in a rush, mix the flour, salt, and water in a stand mixer on low speed to combine, then increase to medium speed for about 10 minutes. This mechanically forces the gluten to align. Let it rest for 20 minutes before using.
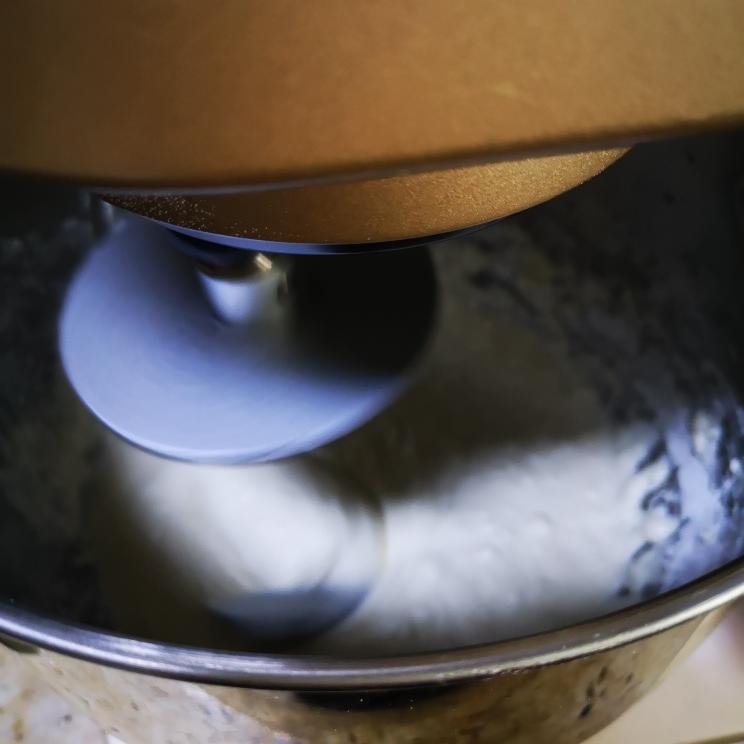
Method 2: The Autolyse Method (Recommended/Easiest) This is my preferred method. Mix the ingredients with a pair of chopsticks for just 1-2 minutes until no dry flour remains. Let it sit for 20 minutes, stir again, and then place it in the fridge for at least 4 hours (or overnight). Time does the work for you, creating a super stretchy (“Q”) dough without the effort.
Homemade Spring Roll Wrappers Recipe Instructions
Prepare the Batter
Mix 350g of all-purpose flour, 2g of salt, and about 300g of water.
If using the overnight method (which I recommend for better elasticity), mix roughly, cover, and refrigerate. The next day, the dough will be smooth, shiny, and extremely elastic.
Set Up Your Station
Prepare a bowl of cool water next to your stove. You need this to wet your hand so the dough doesn’t stick to your fingers.
Heat your non-stick pan over low heat. This is vital. If the pan is too hot, the batter cooks instantly before you can spread it, leaving holes.
The “Smearing” Technique

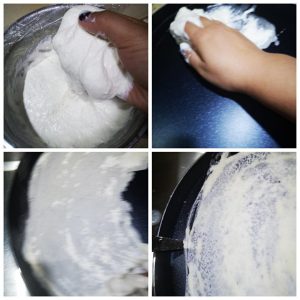
- Wet your hand: Dip your hand in the cool water, shake off excess, and grab a handful of the wet dough.
- The Swirl: Quickly smear the dough ball onto the center of the pan and swirl it outward in a circular motion to coat the pan.
- Lift: Lift the dough ball up briskly. The batter that adhered to the pan will stay, and the excess comes up with your hand.
- Patch: If there are small holes, quickly dab a little fresh dough over them.
Cook and Peel
Cook over low heat. Do not add oil to the pan. Oil causes the batter to slide rather than grip and spread.
When the wrapper changes color (turns translucent and white) and the edges start to lift slightly, it is done. This takes about 30-45 seconds.
Gently peel the wrapper off by the edge. Be careful—it’s hot! Transfer to a plate. You can stack them directly on top of each other; they won’t stick once cooked.
Troubleshooting & FAQ
Why is my batter sticking to my hand?
You didn’t wet your hand enough. Always dip your hand in water before grabbing the dough. The water creates a barrier.
Why is the wrapper tearing when I peel it?
The batter might be too dry (add a teaspoon of water) or it hasn’t rested long enough. The gluten needs to be fully developed to provide elasticity. Also, ensure the wrapper is fully cooked; if it’s still raw in the middle, it will tear.
Why does the batter cook instantly and clump up?
Your pan is too hot. Remove the pan from the heat for 30 seconds between wrappers to cool it down slightly. The pan should be warm enough to grip the batter, but not hot enough to sear it immediately.
Serving Suggestions
Once you have your stack of wrappers, the possibilities are endless.
- Classic Spring Rolls: Fill with a mixture of pork, cabbage, and carrots, roll them up, and deep fry until golden.
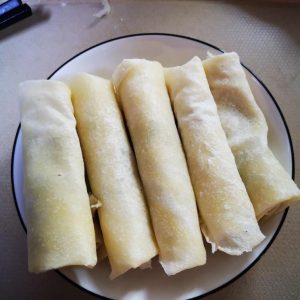
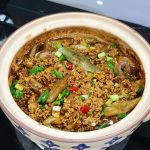
- Taizhou Shibingtong: Use these large wrappers like a burrito. Fill them with Easy Pan-Fried Pork Belly, stir-fried noodles, or Easy Stir-Fried Pork with Peppers. Roll them up and pan-fry the cylinder in a little oil until crispy.
Storage and Reheating
- Refrigerator: Wrapped tightly in plastic wrap, these stay fresh for 2-3 days.
- Freezer: These freeze surprisingly well. Stack them, wrap the entire stack in plastic wrap, then place in a freezer bag. To use, thaw completely at room temperature. They will retain their pliability.
Nutrition Information & Safety Notes
Nutrition Information (Per Wrapper)
- Calories: 65 kcal
- Carbohydrates: 13g
- Protein: 2g
- Fat: 0g
- Saturated Fat: 0g
- Sodium: 40mg
- Potassium: 19mg
- Fiber: 0.5g
- Sugar: 0g
- Calcium: 3mg
- Iron: 0.8mg
Disclaimer: Nutrition information is calculated using an ingredient database and should be considered an estimate. Garnishes and optional items are not included. Actual values vary based on the specific brand of flour used.
Food Safety & Preparation Notes
- Burn Hazard: This recipe involves the “smearing” technique, which requires your hand to be in very close proximity to a hot pan. Please exercise extreme caution. Keep the heat on LOW to prevent burns and give yourself enough time to spread the dough without rushing.
- Cook Thoroughly: Ensure each wrapper turns completely translucent and the edges lift before peeling. This indicates the raw flour batter is fully cooked.
- Allergen Warning: This recipe contains Wheat (Gluten). It is not suitable for those with celiac disease or gluten intolerance.
- Equipment Safety: If using a non-stick pan (which is recommended), avoid overheating it while empty for long periods, as high heat can damage the coating. Since this recipe uses low heat, it is generally safe, but monitor the temperature carefully.
Homemade Spring Roll Wrappers (The Smearing Method)

Equipment
- Non-stick Pan (10-inch)
- Stand Mixer (Optional)
Ingredients
The Batter
- 350 g all-purpose flour (approx. 2 3/4 cups)
- 2 g salt (approx. 1/2 tsp)
- 300 g water (approx. 1 1/4 cups, plus more for dipping hands)
Instructions
- Mix the Batter (Method 1 – Fast/Machine): Combine flour, salt, and water in a stand mixer. Mix on low to combine, then increase to medium speed for 10 minutes until elastic. Cover and rest for 20 minutes.

- Mix the Batter (Method 2 – Slow/Autolyse – Recommended): Mix flour, salt, and water with chopsticks until no dry flour remains (about 2 minutes). Rest for 20 minutes. Stir again, then cover and refrigerate for 4 hours or overnight to let gluten develop naturally.
- Prepare the Station: Place a bowl of cool water next to the stove. Heat a non-stick pan over LOW heat. Do not add oil to the pan.
- The Smear: Wet your hand in the cool water to prevent sticking. Grab a handful of the wet dough. Quickly smear/swirl the dough in a circular motion onto the warm pan, then briskly lift the dough ball up. A thin layer of batter should stick to the pan. Patch any small holes with a dab of dough.
- Cook: Cook over low heat until the wrapper turns white/translucent and the edges lift slightly (about 30-45 seconds).
- Peel and Repeat: Gently peel the wrapper off the pan and set aside on a plate. You can stack them immediately; they will not stick. Repeat until all batter is used.
- Use or Store: Use immediately for fresh spring rolls or Shibingtong. To store, wrap tightly in plastic wrap and freeze.



Leave a Reply