Most beginners look at a restaurant kitchen—with its roaring jet-engine burners and 20-ingredient sauce bottles—and think, “I can’t do that on my electric stove.” You end up with soggy vegetables, grey meat, or a sauce that tastes like pure salt. It’s frustrating when you want that vibrant, smoky takeout flavor but settle for a lukewarm pile of mush because the recipe felt too “professional.”
The secret to great weeknight Chinese food isn’t high-BTU burners; it’s preparation and heat management. By mastering three core techniques—pre-mixing your sauce, slicing ingredients for maximum surface area, and not overcrowding your pan—you can achieve restaurant-quality results on a standard home stove in under 20 minutes.
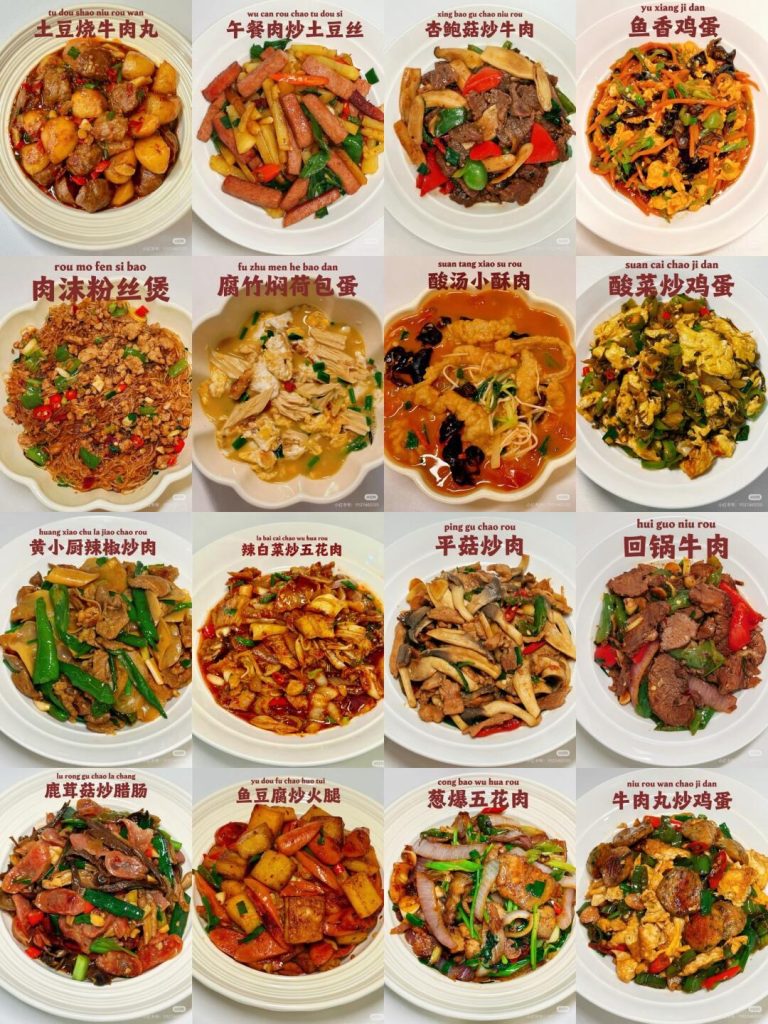
Why the “Pre-Prep” Method Works
The science of a successful quick stir-fry relies on the Maillard reaction and moisture control. On a home stove (typically 10,000–18,000 BTU compared to a restaurant’s 80,000+ BTU), your pan loses heat the moment food hits it.
- Heat Retention: Slicing meat thinly allows it to cook at the 375–450°F (190–230°C) range required for browning before the pan temperature drops.
- Moisture Management: If you wash your vegetables right before throwing them in, the water creates steam. Steam tops out at 212°F (100°C), which is too low for browning, leading to that “boiled” texture.
- Emulsification: Pre-mixing your sauce with a starch ensures that as soon as the liquid hits the hot pan, the starch granules swell and thicken the sauce into a glossy coating rather than a watery puddle.
The Real Kitchen Insight
In my experience working in professional kitchens, we never “cook and look.” Every sauce is measured, and every vegetable is dried before the first flame is lit. What most beginners don’t realize is that stir-frying is 80% prep and 20% cooking.
In a restaurant, we use a technique called “velveting” to keep meat tender. While it sounds fancy, at home, it just means a quick 15-minute marinade with a bit of cornstarch and oil. This creates a protective barrier that keeps the juices in. If you’ve ever wondered why your chicken is tough, it’s usually because you skipped this step. For a deep dive, check out my guide on how to velvet chicken for stir fry to see the difference it makes.
Essential Weeknight Pantry
You don’t need a specialty market to start. Here are the “Big Four” and their Western-friendly substitutes:
- Light Soy Sauce: Provides salt and umami. (Substitute: All-purpose soy sauce).
- Shaoxing Wine: Adds depth and removes “meatiness.” If you can’t find it, the best substitute for Shaoxing wine is usually dry sherry or even a splash of broth with a drop of vinegar.
- Cornstarch: The “glue” for your sauce and the “shield” for your meat.
- Aromatics: Fresh garlic, ginger, and scallions. Never use the jarred stuff; it lacks the volatile oils needed for that “breath of the wok” (wok hei) aroma.
Prep Strategy: The “Bowl System”
- The Protein Bowl: Slice meat across the grain. Marinate with 1 tsp soy sauce, 1 tsp oil, and ½ tsp cornstarch.
- The Vegetable Bowl: Cut all veggies to a uniform size so they cook evenly. Make sure they are bone-dry.
- The Sauce Bowl: Whisk your liquid ingredients (soy sauce, sugar, starch, broth) together. This prevents you from fumbling with bottles while your garlic is burning.
Step-by-Step Execution
- Heat the Pan: Add 2 tbsp of a high smoke point oil to your skillet. Wait until you see the first wisps of smoke.
- Sear the Protein: Spread the meat in a single layer. Do not touch it for 60 seconds. You should hear a vigorous sizzling sound. Flip and cook for another 30 seconds, then remove it from the pan (it should be 80% done).
- Aromatics: Add a touch more oil if needed. Toss in garlic and ginger. You will smell them instantly—usually 10–15 seconds is enough.
- Vegetables: Toss them in. If the pan looks dry, add a teaspoon of water to create a “steam-fry” effect, but keep the heat on high.
- Recombine and Glaze: Add the meat back in. Give the sauce bowl a quick stir (starch settles!) and pour it in. Toss everything until the sauce turns from opaque to a translucent, glossy glaze.
Common Mistakes When Making Quick Stir-Fries
| Mistake | Why It Happens | The Fix |
|---|---|---|
| Watery Sauce | Veggies released too much water or the pan wasn’t hot enough. | Sear in smaller batches; ensure veggies are dry. |
| Burnt Garlic | Added too early or heat was uncontrolled. | Add aromatics after the meat is removed or with the veggies. |
| Tough Meat | Cut with the grain or overcooked. | Slice across the grain and use the “velveting” technique. |
| Sticky Rice | Using freshly cooked, warm rice. | Use day-old, refrigerated rice to ensure grains stay separate. |
Pro Tips for Home Stoves
- Wok vs. Skillet: If you are on an electric or induction stove, a heavy-bottomed stainless steel or cast iron skillet often performs better than a round-bottomed wok because it has more surface contact with the heat source.
- The “Half-Batch” Rule: If a recipe calls for 1 lb of meat, sear it in two ½ lb batches. This prevents the temperature from dropping and the meat from “stewing” in its own juices.
- Flavor Layering: Add a few drops of toasted sesame oil or a spoonful of homemade chili oil at the very end. Heat destroys the delicate aroma of these oils, so they are best used as finishing touches.
Featured Recipe: 15-Minute Tomato and Egg Stir-fry (Fan Qie Chao Dan)
This is the ultimate Chinese comfort food. It requires no special trips to the store and is the perfect beginner-friendly weeknight dinner.
Ingredients
- 4 large eggs, beaten with a pinch of salt
- 3 medium tomatoes, cut into wedges
- 2 scallions, chopped (whites and greens separated)
- 1 tbsp ketchup (the “secret” restaurant ingredient for acidity)
- 1 tsp sugar
- 2 tbsp neutral oil
Instructions
- Heat 1 tbsp oil in a skillet over medium-high heat. Pour in eggs. Once they set slightly, scramble into large curds and remove immediately. They should be soft, not brown.
- Add the remaining 1 tbsp oil. Sauté scallion whites for 15 seconds.
- Add tomatoes. Stir-fry for 2–3 minutes until they soften and release their juices.
- Stir in ketchup and sugar. If it looks dry, add 1 tbsp of water.
- Fold the eggs back in. Garnish with scallion greens and serve over steamed jasmine rice.
About the Author & Recipe Development
I’m Lin, and I’ve spent over a decade in professional Chinese kitchens, from high-volume stir-fry stations to delicate dim sum prep. This guide was developed by testing traditional techniques on standard “apartment-style” electric stoves. My goal is to bridge the gap between professional “wok hei” and the reality of a busy home kitchen. Every tip here has been tested to ensure that even with limited equipment, you can achieve that addictive balance of salt, sweet, and umami.
Sources & Standards Referenced
- USDA Food Safety and Inspection Service – Safe Minimum Internal Temperature Chart
- Harvard T.H. Chan School of Public Health – Cooking Oils and Smoke Points
Frequently Asked Questions
1. Can I make these recipes ahead of time?
Stir-fries are best eaten fresh. However, you can prep all the components (cut veggies, marinate meat, mix sauce) 24 hours in advance and store them separately in the fridge.
2. What if I don’t have a wok?
A large, flat-bottomed skillet is actually better for most Western electric stoves as it maintains better heat contact.
3. Is this recipe authentic?
“Authentic” in a Chinese home means using what you have. These techniques are used by millions of families every night, adapted for modern kitchens.
4. Can I make this vegetarian?
Absolutely. Replace meat with firm tofu or extra mushrooms. If a recipe calls for oyster sauce, use a vegetarian stir-fry sauce (usually made from mushrooms).
5. Why is my ginger/garlic bitter?
You likely burnt them. Aromatics only need 10–20 seconds in hot oil. If they turn dark brown or black, wipe out the pan and start over.
How to Serve
Pair your stir-fry with a simple bowl of steamed rice or Vegetable Chow Fun for a complete meal. If you want a cold side, a smashed cucumber salad provides a refreshing crunch that cuts through the savory sauce.
Nutrition Disclaimer: Nutrition information is an estimate and provided for informational purposes only. Factors such as specific brands of sauces and oil absorption can vary results.
Allergen Notice: This guide contains references to Soy, Eggs, and Gluten (in soy sauce). For a gluten-free version, substitute soy sauce with Tamari or coconut aminos.








Leave a Reply