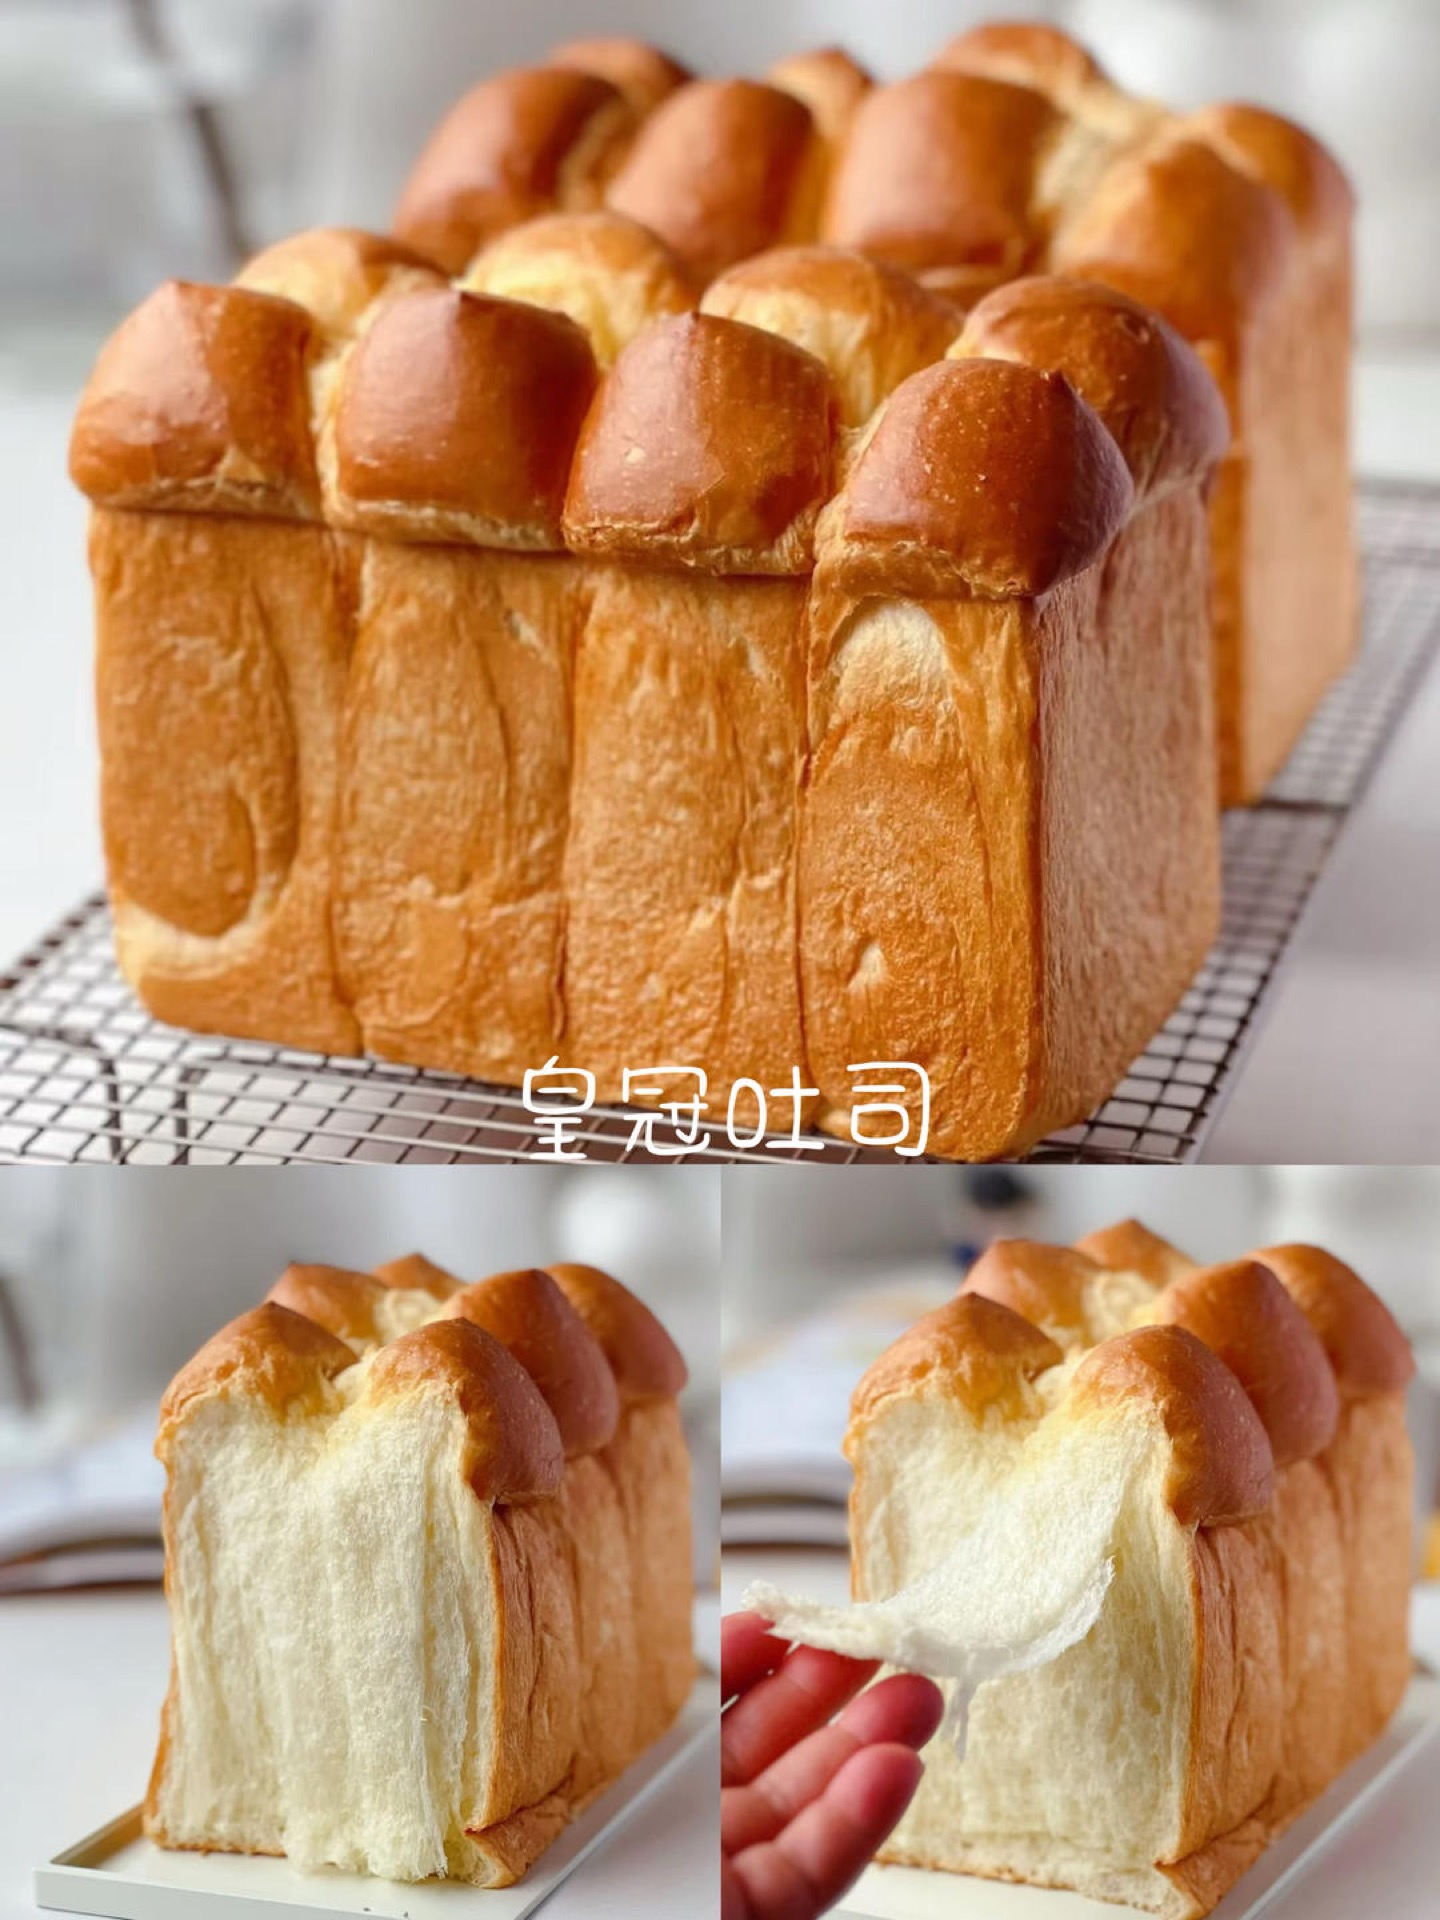
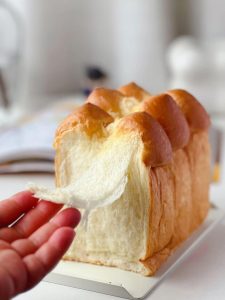
There is a specific sound a good crown toast makes when you pull it apart: a soft, feathery give, then a whisper of steam, then the smell of butter and milk hitting the air all at once. I first ate it from a paper bag on a Chengdu street corner, still warm enough to fog the plastic window, and I have been chasing that texture in my own oven ever since.
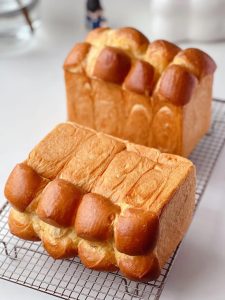
The Chinese name, 皇冠吐司, literally means “crown toast” — the snipped top of the loaf opens into eight little peaks as it bakes, like a crown of petals. It is essentially a rich milk bread, but the dough is deliberately slack and the bake is deliberately gentle, which is what gives you a crumb so fine you can almost read through a slice.
If you have made my crispy youtiao or the shiitake sausage sticky rice shumai, you already know how much I care about dough hydration. This loaf is the sweet, buttery sibling of those recipes: same patience, different payoff.
What Is Crown Toast?
Crown toast (皇冠吐司) is a Chinese bakery-style enriched milk bread baked in a pullman or lidded loaf pan. Before baking, the proofed top of the dough is snipped with scissors into a grid, and cold butter is tucked into each cut. As the loaf rises, those cuts bloom open into a crown of buttery petals — hence the name.
The dough is almost too soft to handle at first. Resist the urge to add flour. That wet, slightly tacky feel is exactly what gives you the tear-apart strands later.
Unlike Japanese shokupan, crown toast leans a little sweeter and a little more buttery, and the snip-and-butter step means the top gets a lacquered, salty-sweet crust while the interior stays cloud-soft. It is the kind of bread that disappears standing at the counter, no plate required.
Honest caveat: this is not a beginner’s first loaf. The dough is 60%+ hydration with a lot of fat and sugar, so it stays sticky through the first several minutes of kneading. If you have never made enriched bread before, start with my foolproof Japanese curry chicken rice or another simpler bake first, then come back.
Why This Recipe Works
- Overnight cold rest. Mixing everything except the yeast, salt, and butter the night before hydrates the flour and develops gluten with zero effort. It also deepens the milky flavor.
- Yeast added late. Because the flour has already hydrated, the yeast can go straight into the rested dough without a separate proof — one less bowl, one less wait.
- Butter and salt at the windowpane stage. Adding fat too early coats the gluten and slows development. We wait until the dough pulls a jagged “sawtooth” membrane, then add butter and salt.
- Two rounds of rolling and resting. This is what builds the fine, layered crumb that tears into strands instead of crumbling.
- Low, slow bake at 150°C. A convection oven at 150°C for 30 minutes sets the crust without drying the interior. Higher heat browns the top before the center is cooked.
Equipment Needed
- A 450g (1 lb) pullman loaf pan with a lid, or a standard 9×5-inch loaf pan
- Stand mixer with dough hook (or a large bowl and strong arms)
- Kitchen scale — non-negotiable for enriched dough
- Bench scraper
- Plastic wrap or a large food-safe bag for proofing
- Kitchen scissors, cleaned, for snipping the crown
- Instant-read thermometer (optional but helpful)
- Cooling rack
Ingredients
- 495 g bread flour (吐司粉 / high-gluten)
- 25 g milk powder
- 92 g granulated sugar
- 106 g egg (about 2 large eggs, beaten)
- 283 g whole milk, cold
- 16 g instant yeast (yes, that much — see notes)
- 7 g fine sea salt
- 80 g unsalted butter, softened, plus extra cold butter for snipping
Ingredient Notes
Bread flour. You want 12.5–13.5% protein. All-purpose will work but the loaf will be shorter and less springy. Chinese 吐司粉 is usually labeled “toast flour” and sits right in that range.
Milk powder. This is not optional for that bakery flavor. It contributes lactose (which browns) and a distinct creamy note. If you only have liquid milk, replace 25 g of the milk with 25 g more milk and accept a slightly less aromatic loaf.
Yeast quantity. 16 g sounds aggressive, but because we are skipping a separate proof and the dough is very cold from overnight rest, the extra yeast brings it back to life. If your kitchen is above 26°C, reduce to 12 g.
Butter. Softened, not melted. If you can press a thumbprint into it easily but it still holds its shape, it is right. Cold butter for the snip step should be straight from the fridge.
Salt. Fine sea salt, not flaky. 7 g is about 1.4% of flour weight — enough to season without slowing fermentation too much.
Prep & Mise en Place
Weigh everything before you start. Enriched doughs punish improvisation. Have your stand mixer fitted with the dough hook, your loaf pan lined with a parchment sling (or lightly greased), and your cold butter for snipping cut into eight small batons and returned to the fridge.
If you are using a standard loaf pan rather than a pullman, you will get a taller, more domed crown — that is fine, just watch the top in the last 5 minutes. See my notes on substituting equipment if you are missing a pan entirely.
Cooking Process
Step 1: Overnight rest, knead, divide, and shape
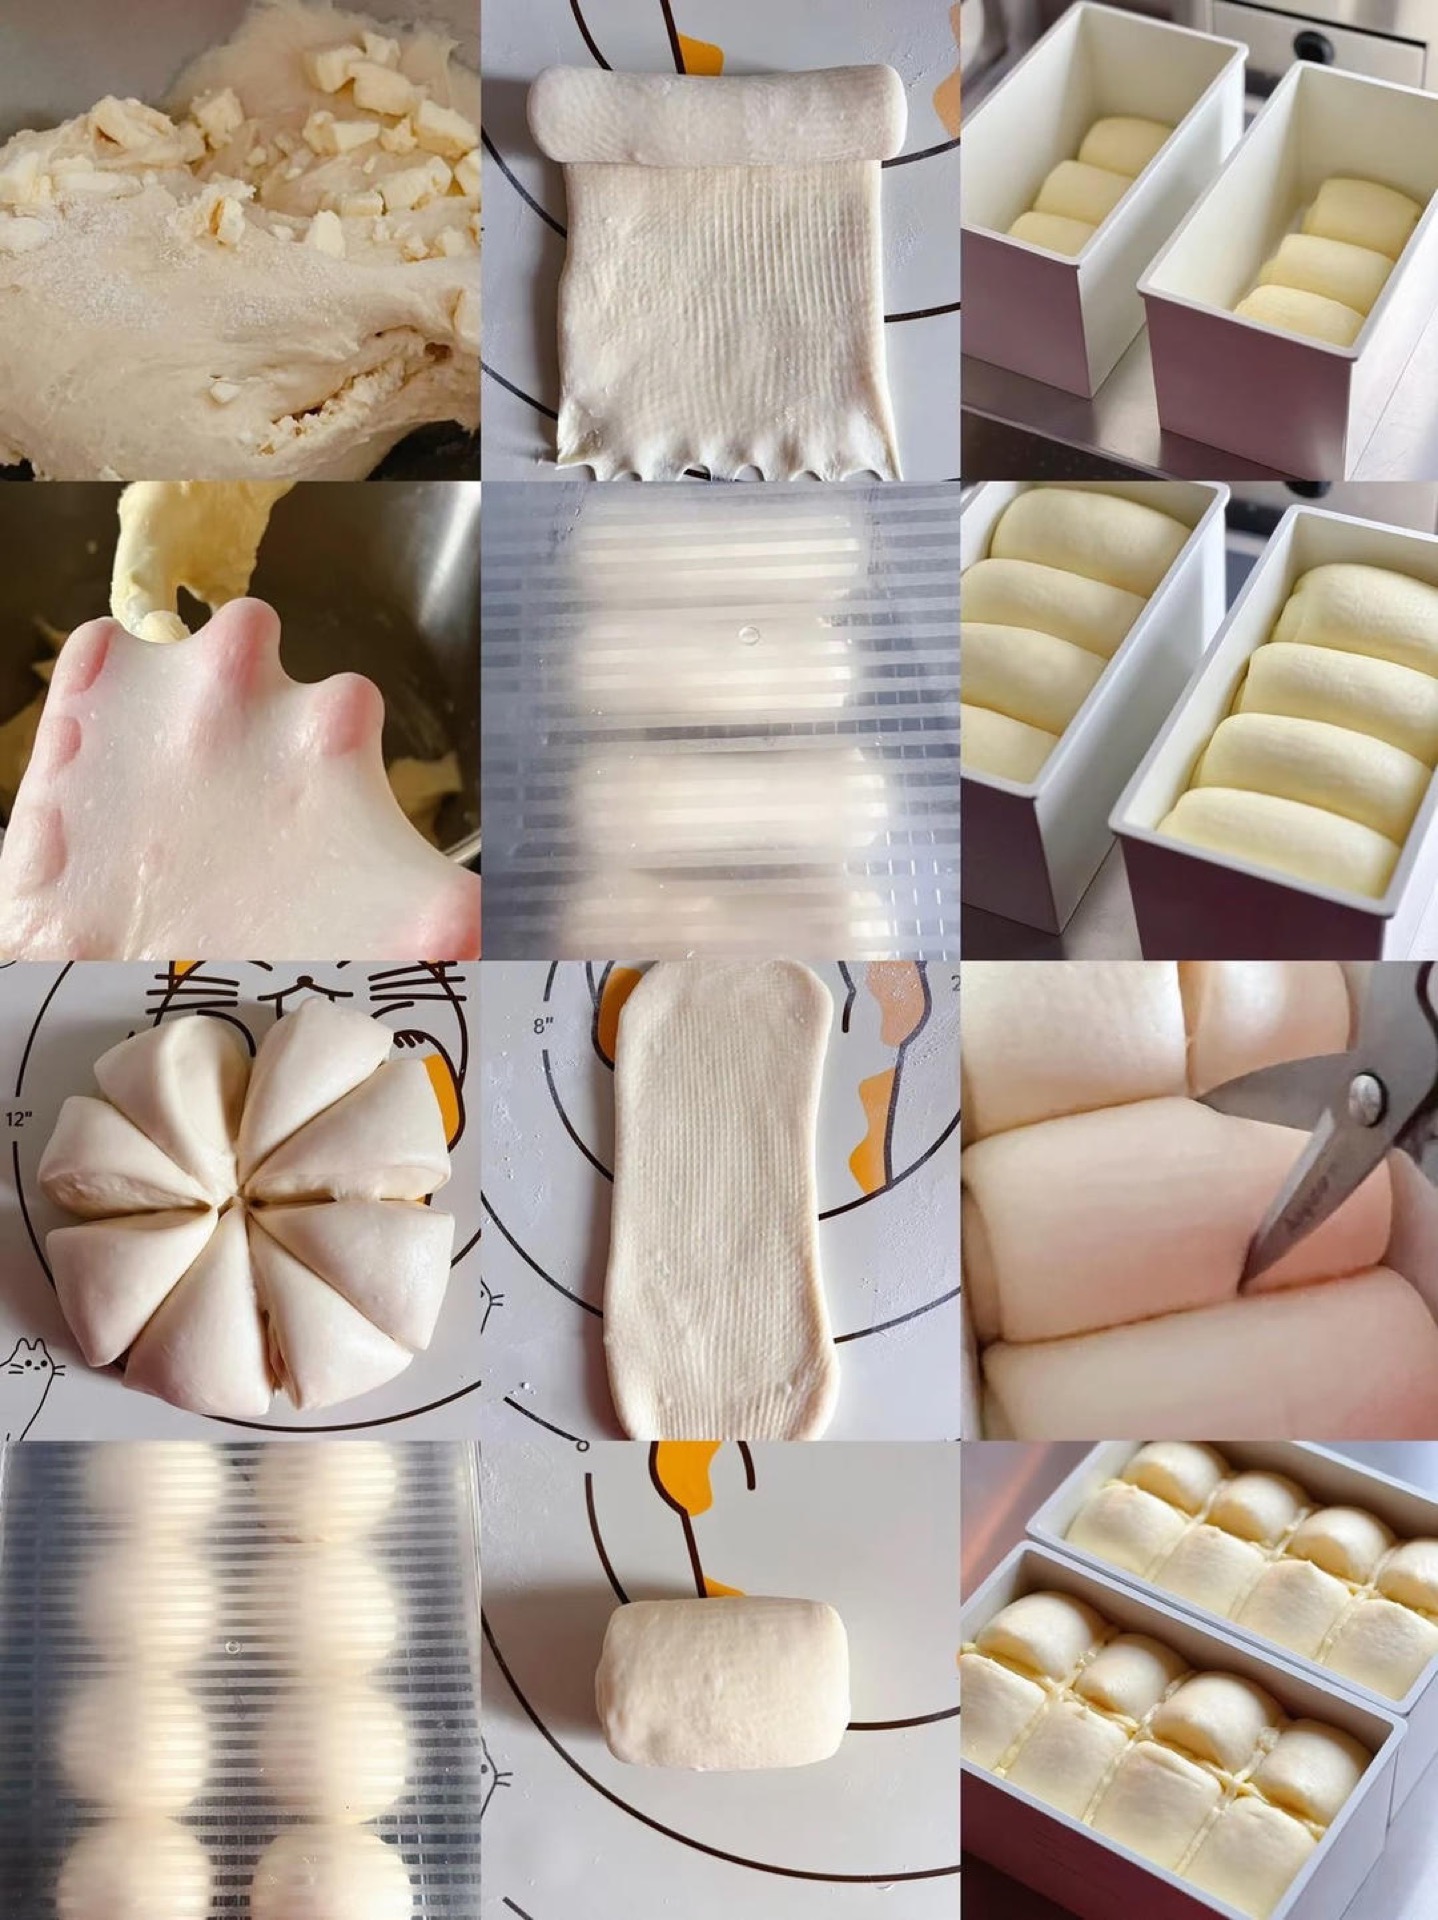
The night before, whisk together the bread flour, milk powder, sugar, egg, and cold milk in the bowl of your stand mixer until no dry flour remains. It will look shaggy and rough. Cover and refrigerate 12–16 hours.
The next day, the dough will be cold, smooth, and slightly puffed. Add the yeast and knead on medium-low for 3 minutes. Increase to medium and knead until the dough pulls a ragged, sawtooth membrane when stretched — about 6–8 minutes. Now add the softened butter and salt and knead another 6–8 minutes, scraping down the bowl once, until the dough is glossy, elastic, and passes the windowpane test: you can stretch a small piece thin enough to see your hand through it without tearing.
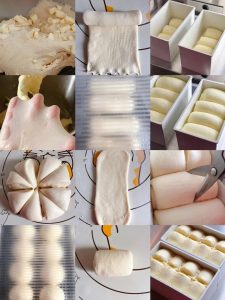
Turn the dough onto a lightly floured bench and divide into 8 equal pieces (about 145 g each). Roll each into a tight ball, cover, and rest 20 minutes. Working one at a time, roll each ball into an oval, roll it up like a cigar, and place seam-side down in a container. Cover and rest another 20 minutes. Roll each piece long again and roll it up tightly, then place four rolls side by side in the loaf pan, seam-side down, and repeat with the remaining four in a second pan (or all eight in one large pan).
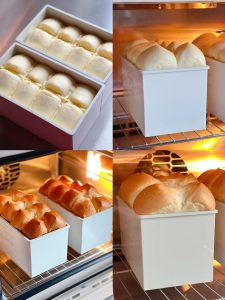
Cover and proof at room temperature (24–26°C) until the dough reaches 8/9 of the way up the pan — roughly 60–90 minutes depending on kitchen temperature. It should feel like a soft marshmallow when you press it lightly.
Step 2: Snip, butter, and bake
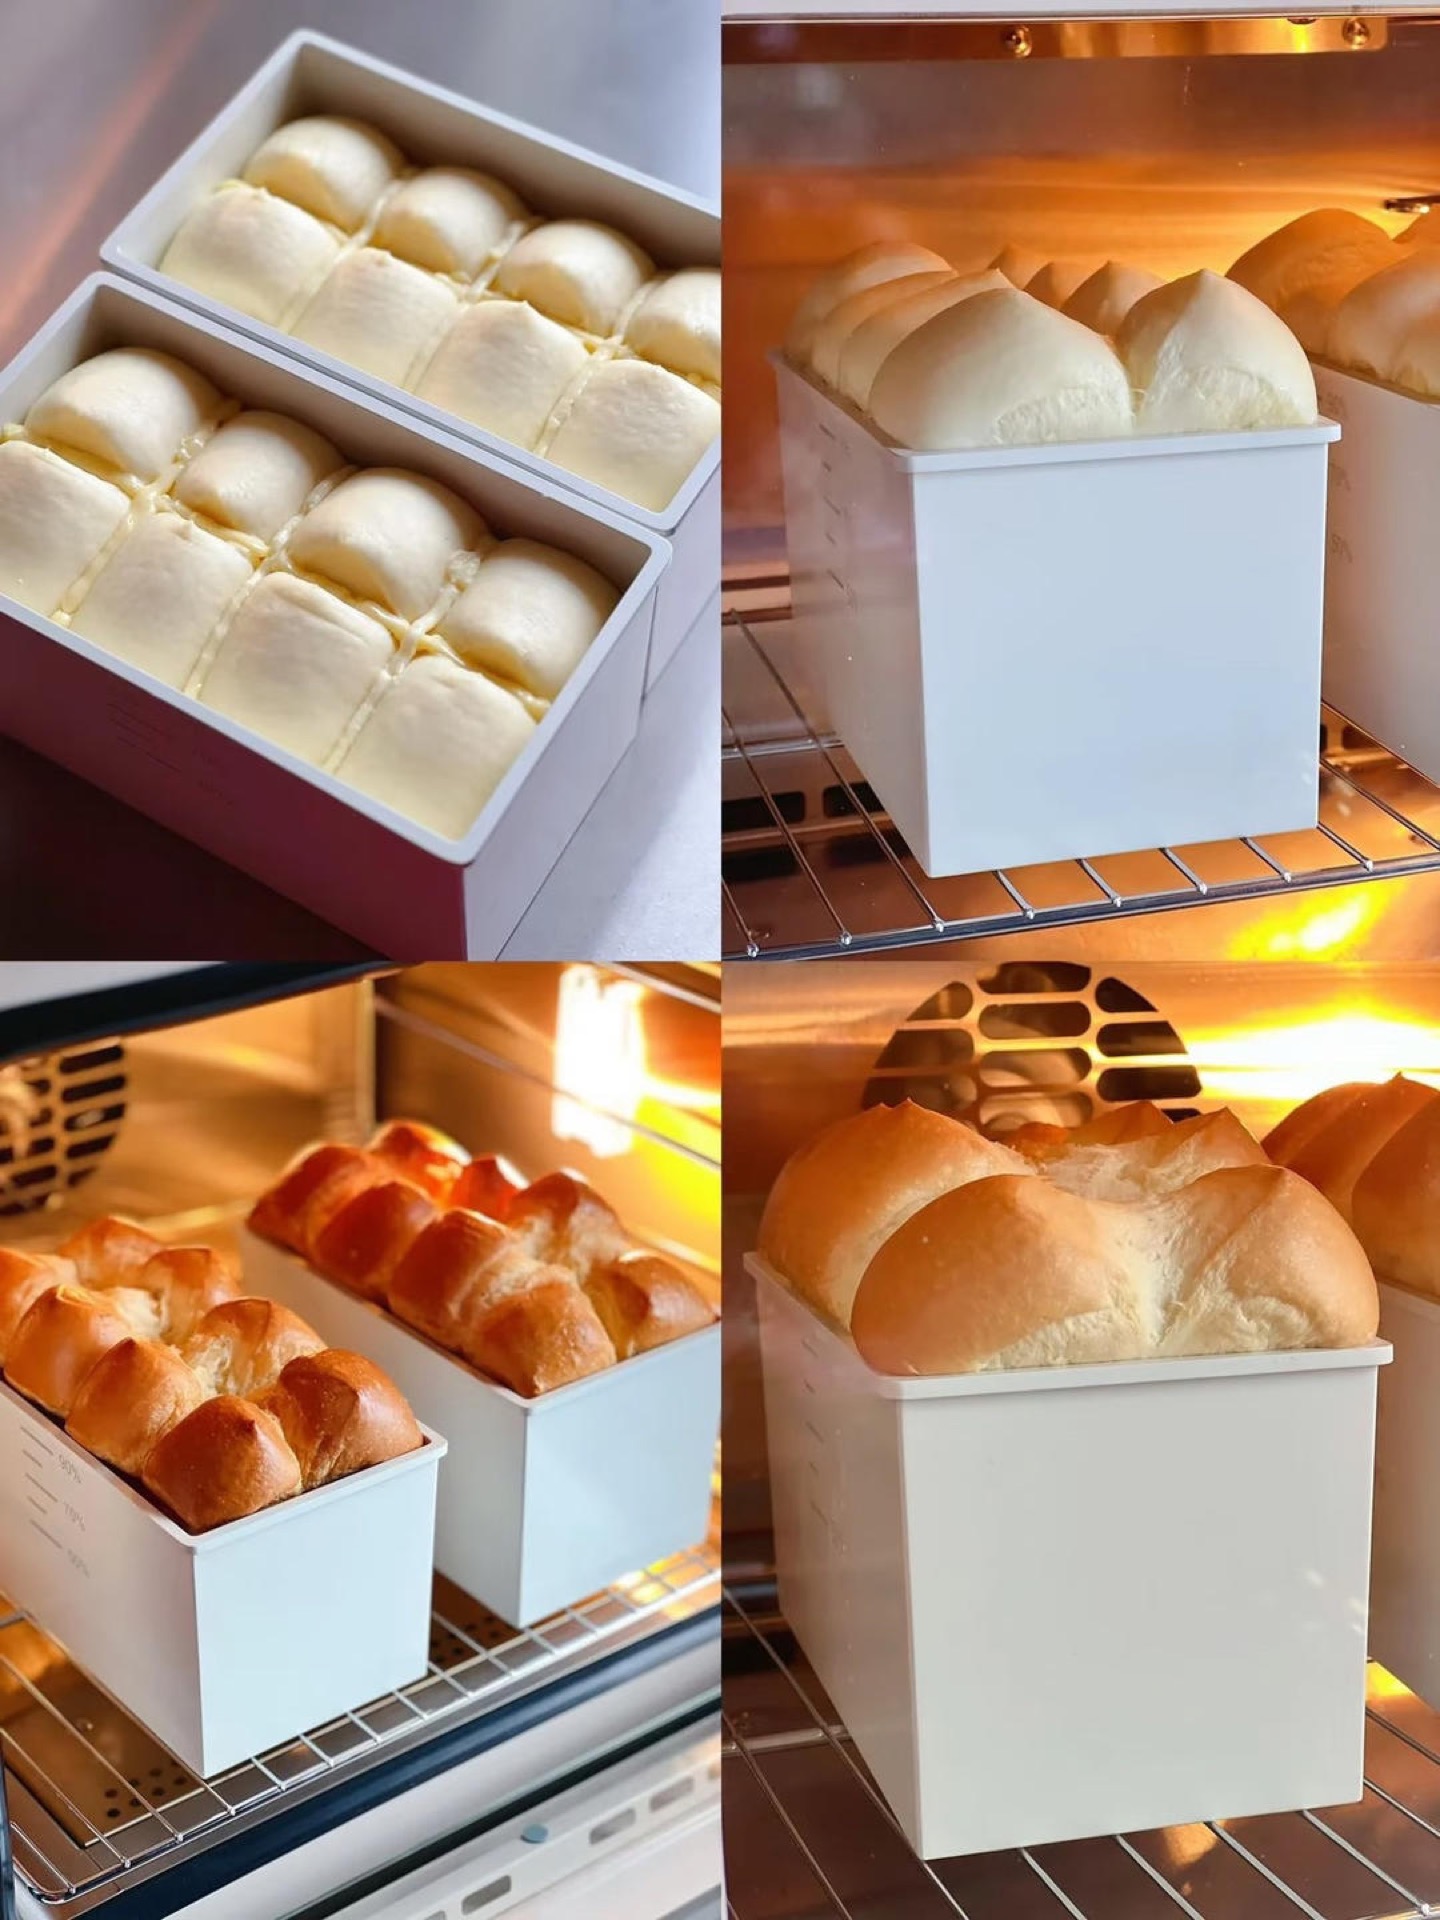
Using clean kitchen scissors, snip the top of the proofed dough in a grid pattern — about 8–10 cuts, roughly 2 cm deep. Tuck a small baton of cold butter into each cut. This is what creates the crown petals.
Bake in a preheated convection oven at 150°C (300°F) for 30 minutes. If you are using a conventional oven, go 160°C (320°F) and check at 28 minutes. The top should be a deep golden brown and the internal temperature should read 93–96°C (200–205°F).
Step 3: Cool and unmold
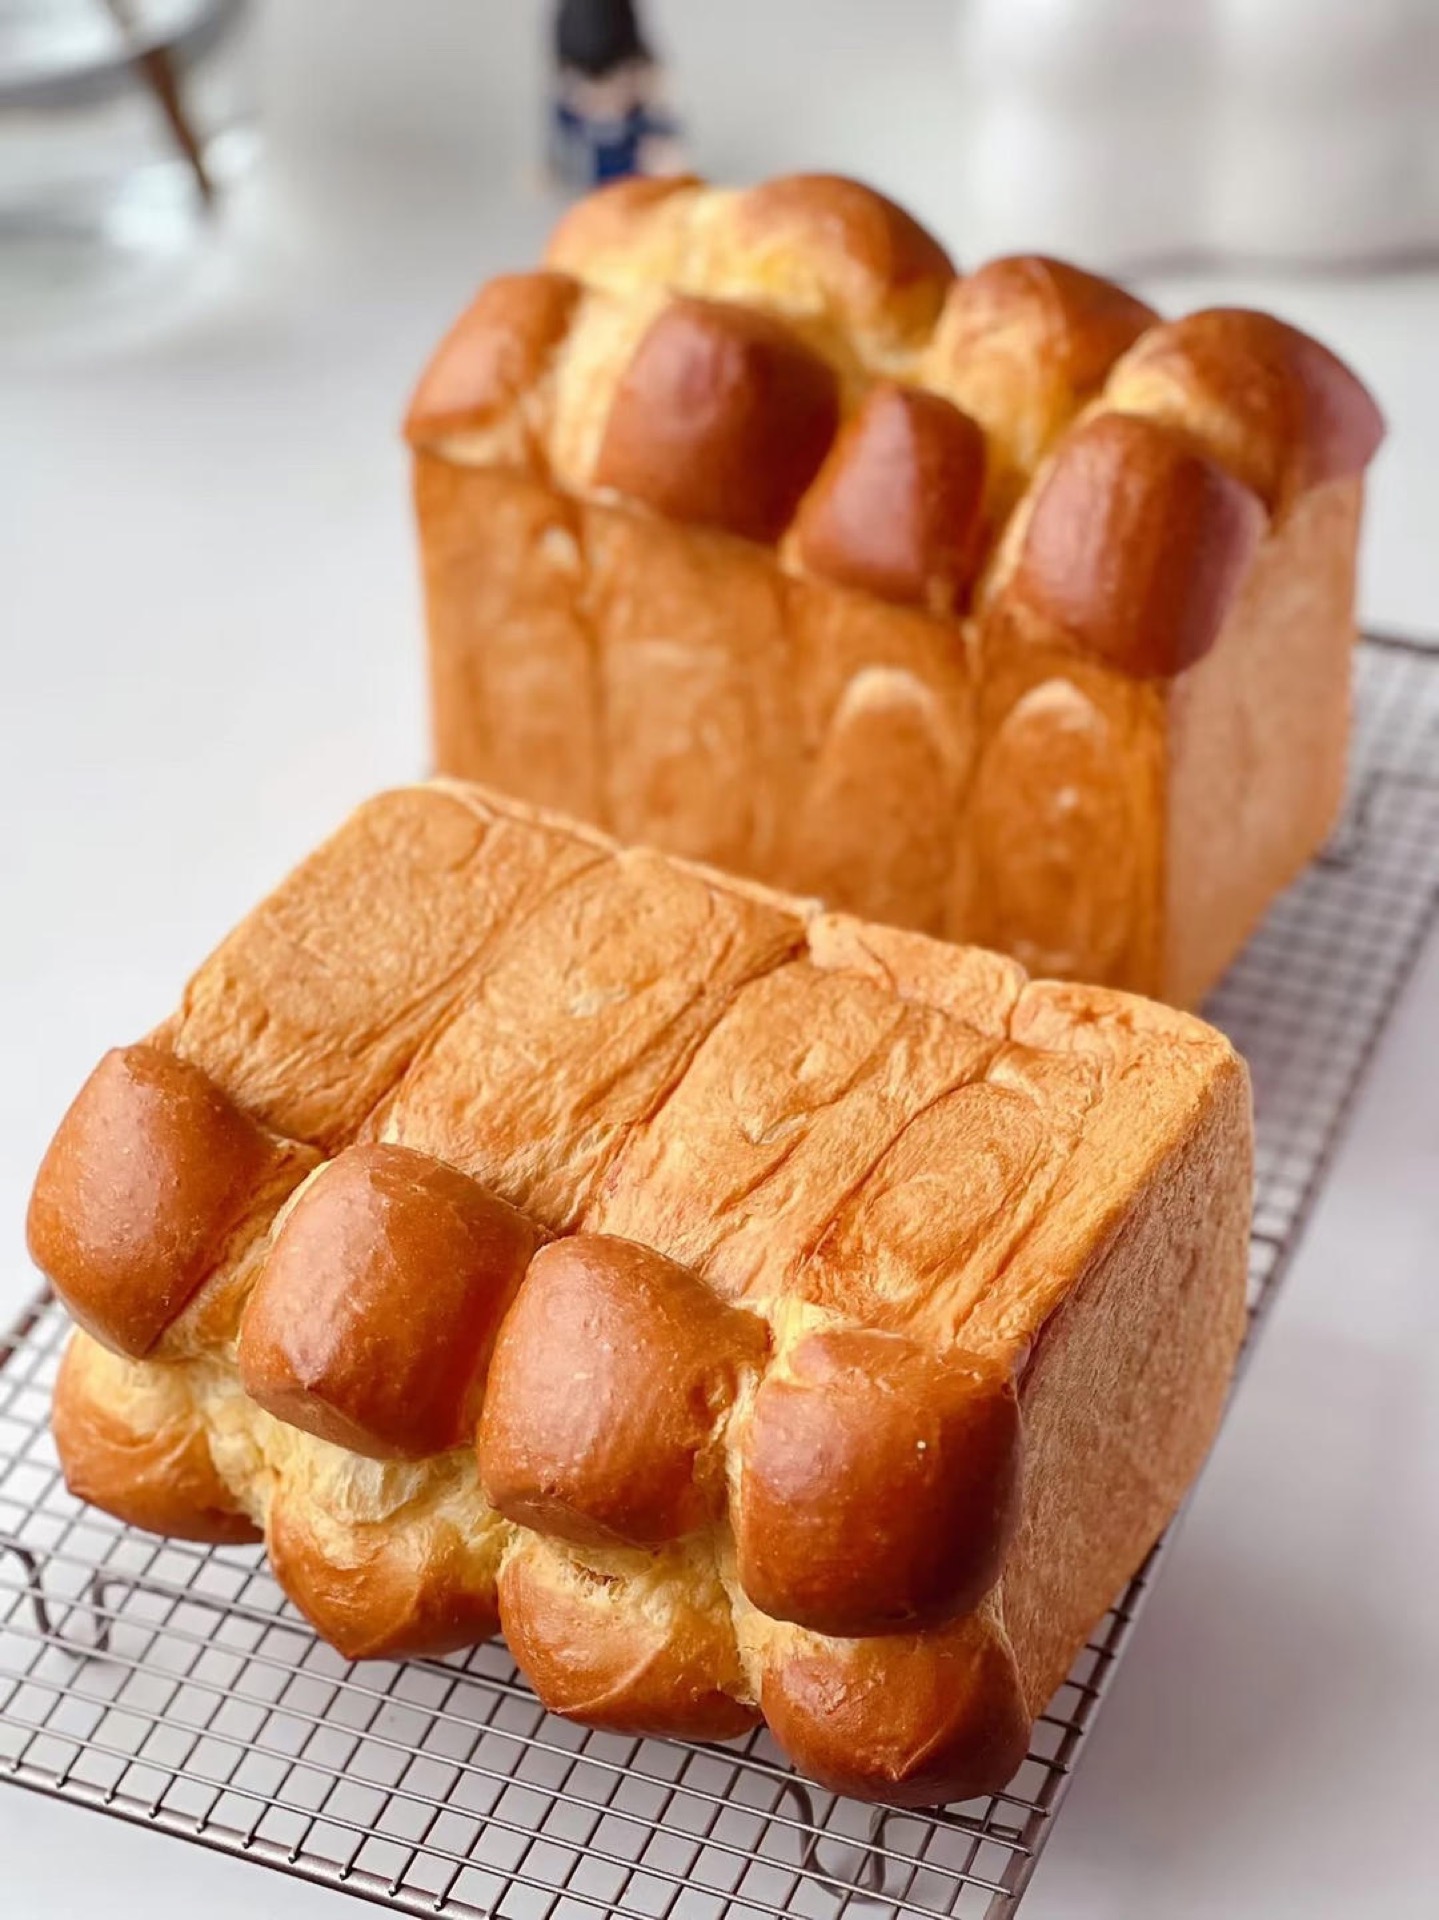
Remove from the oven and immediately drop the pan onto a folded towel from about 10 cm height — this “shocks” the hot air out and prevents the loaf from collapsing. Let it sit in the pan 5 minutes, then tilt it out onto a wire rack. Cool completely, at least 1 hour, before slicing. Cutting warm bread smears the crumb.
Step 4: Admire the crumb
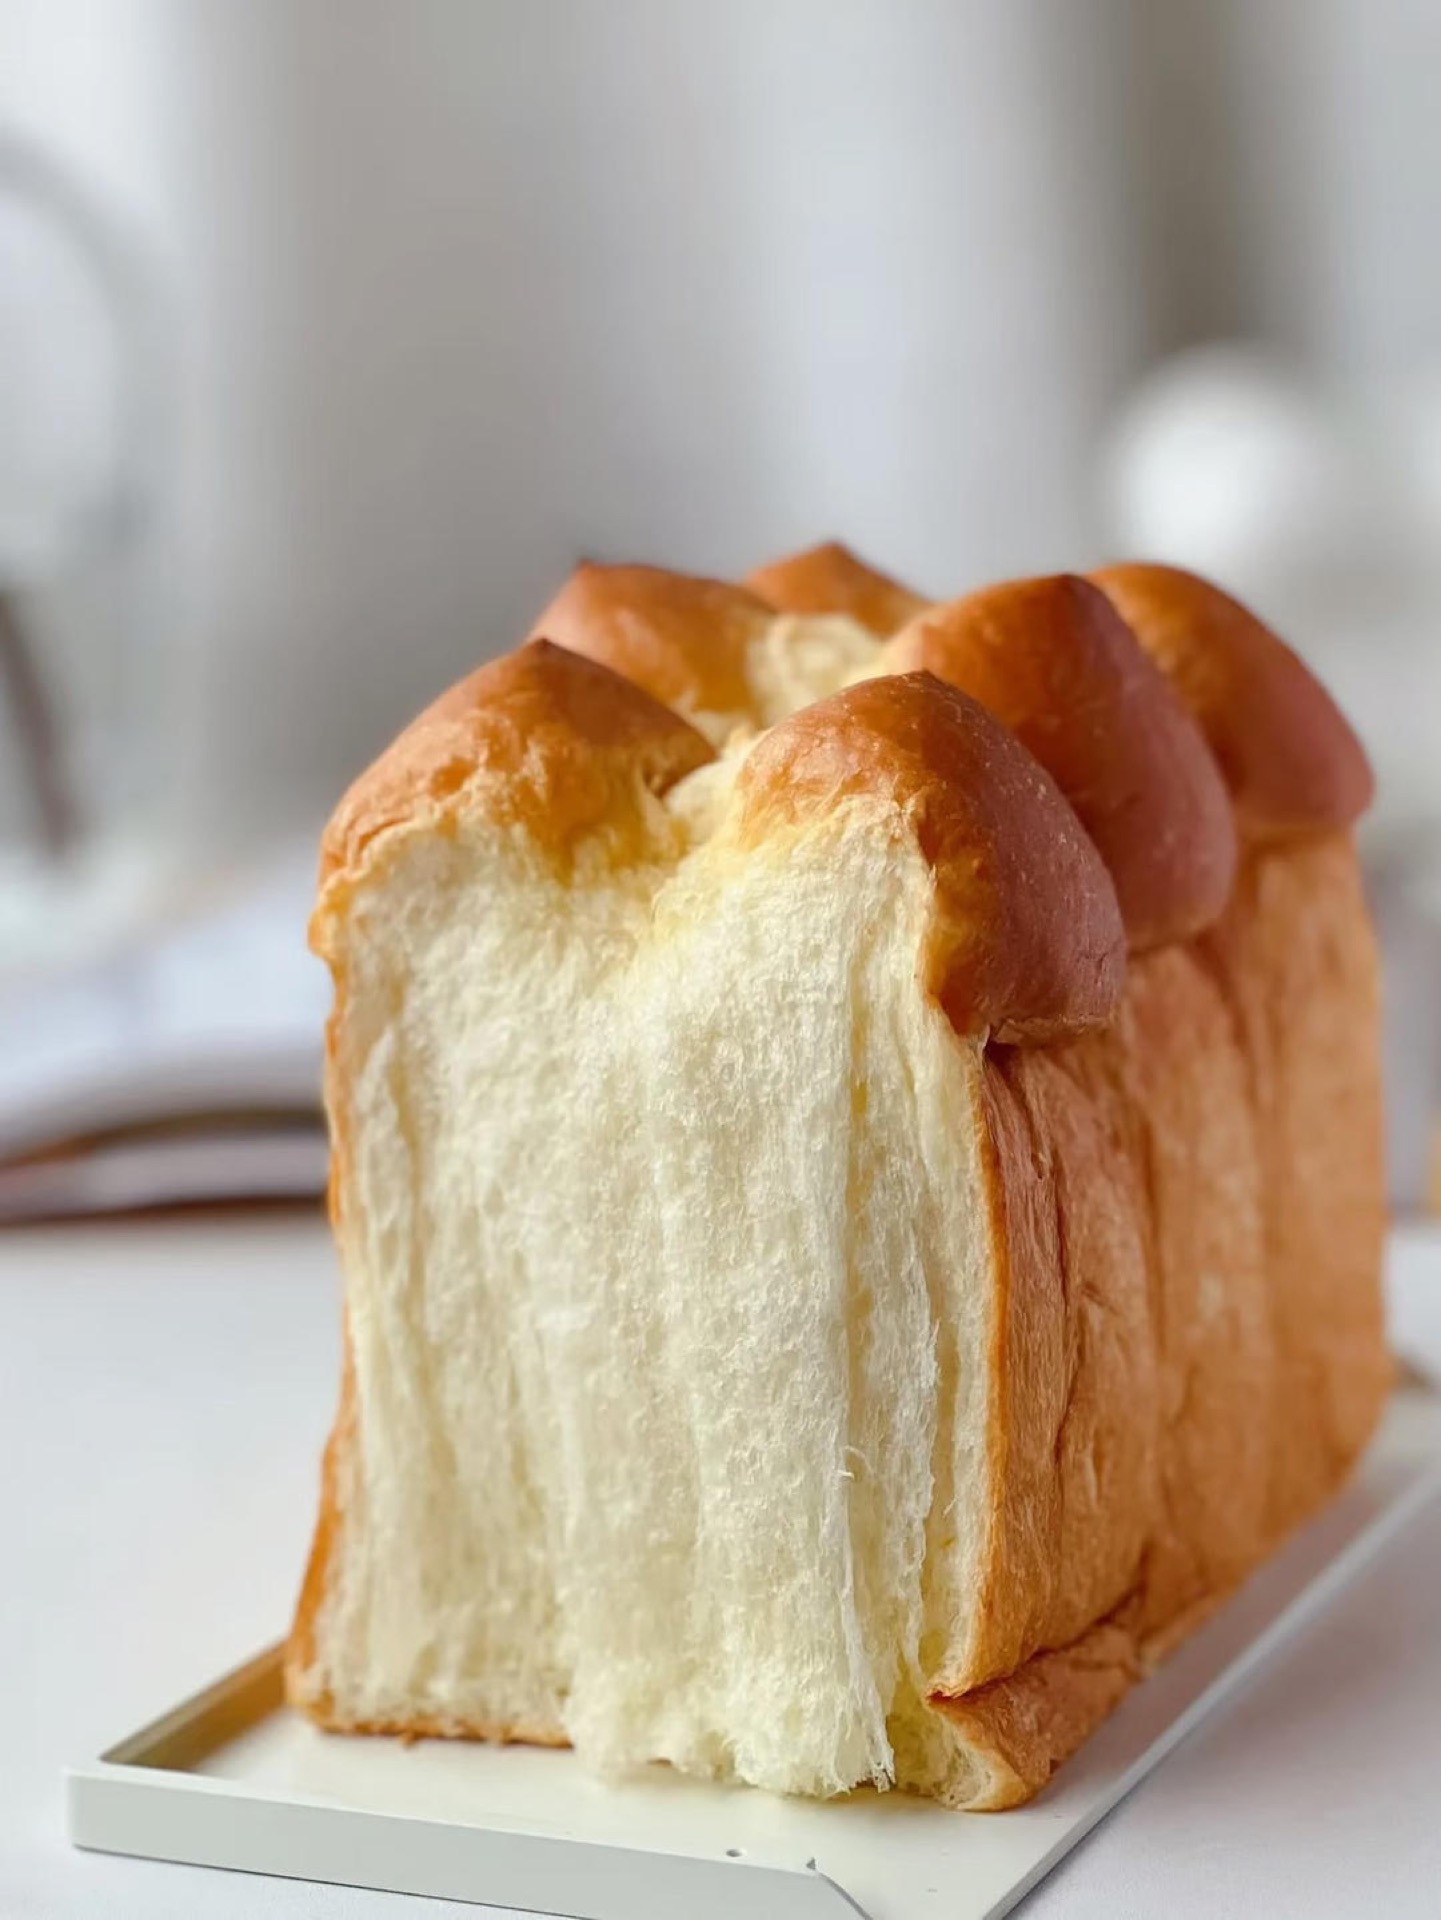
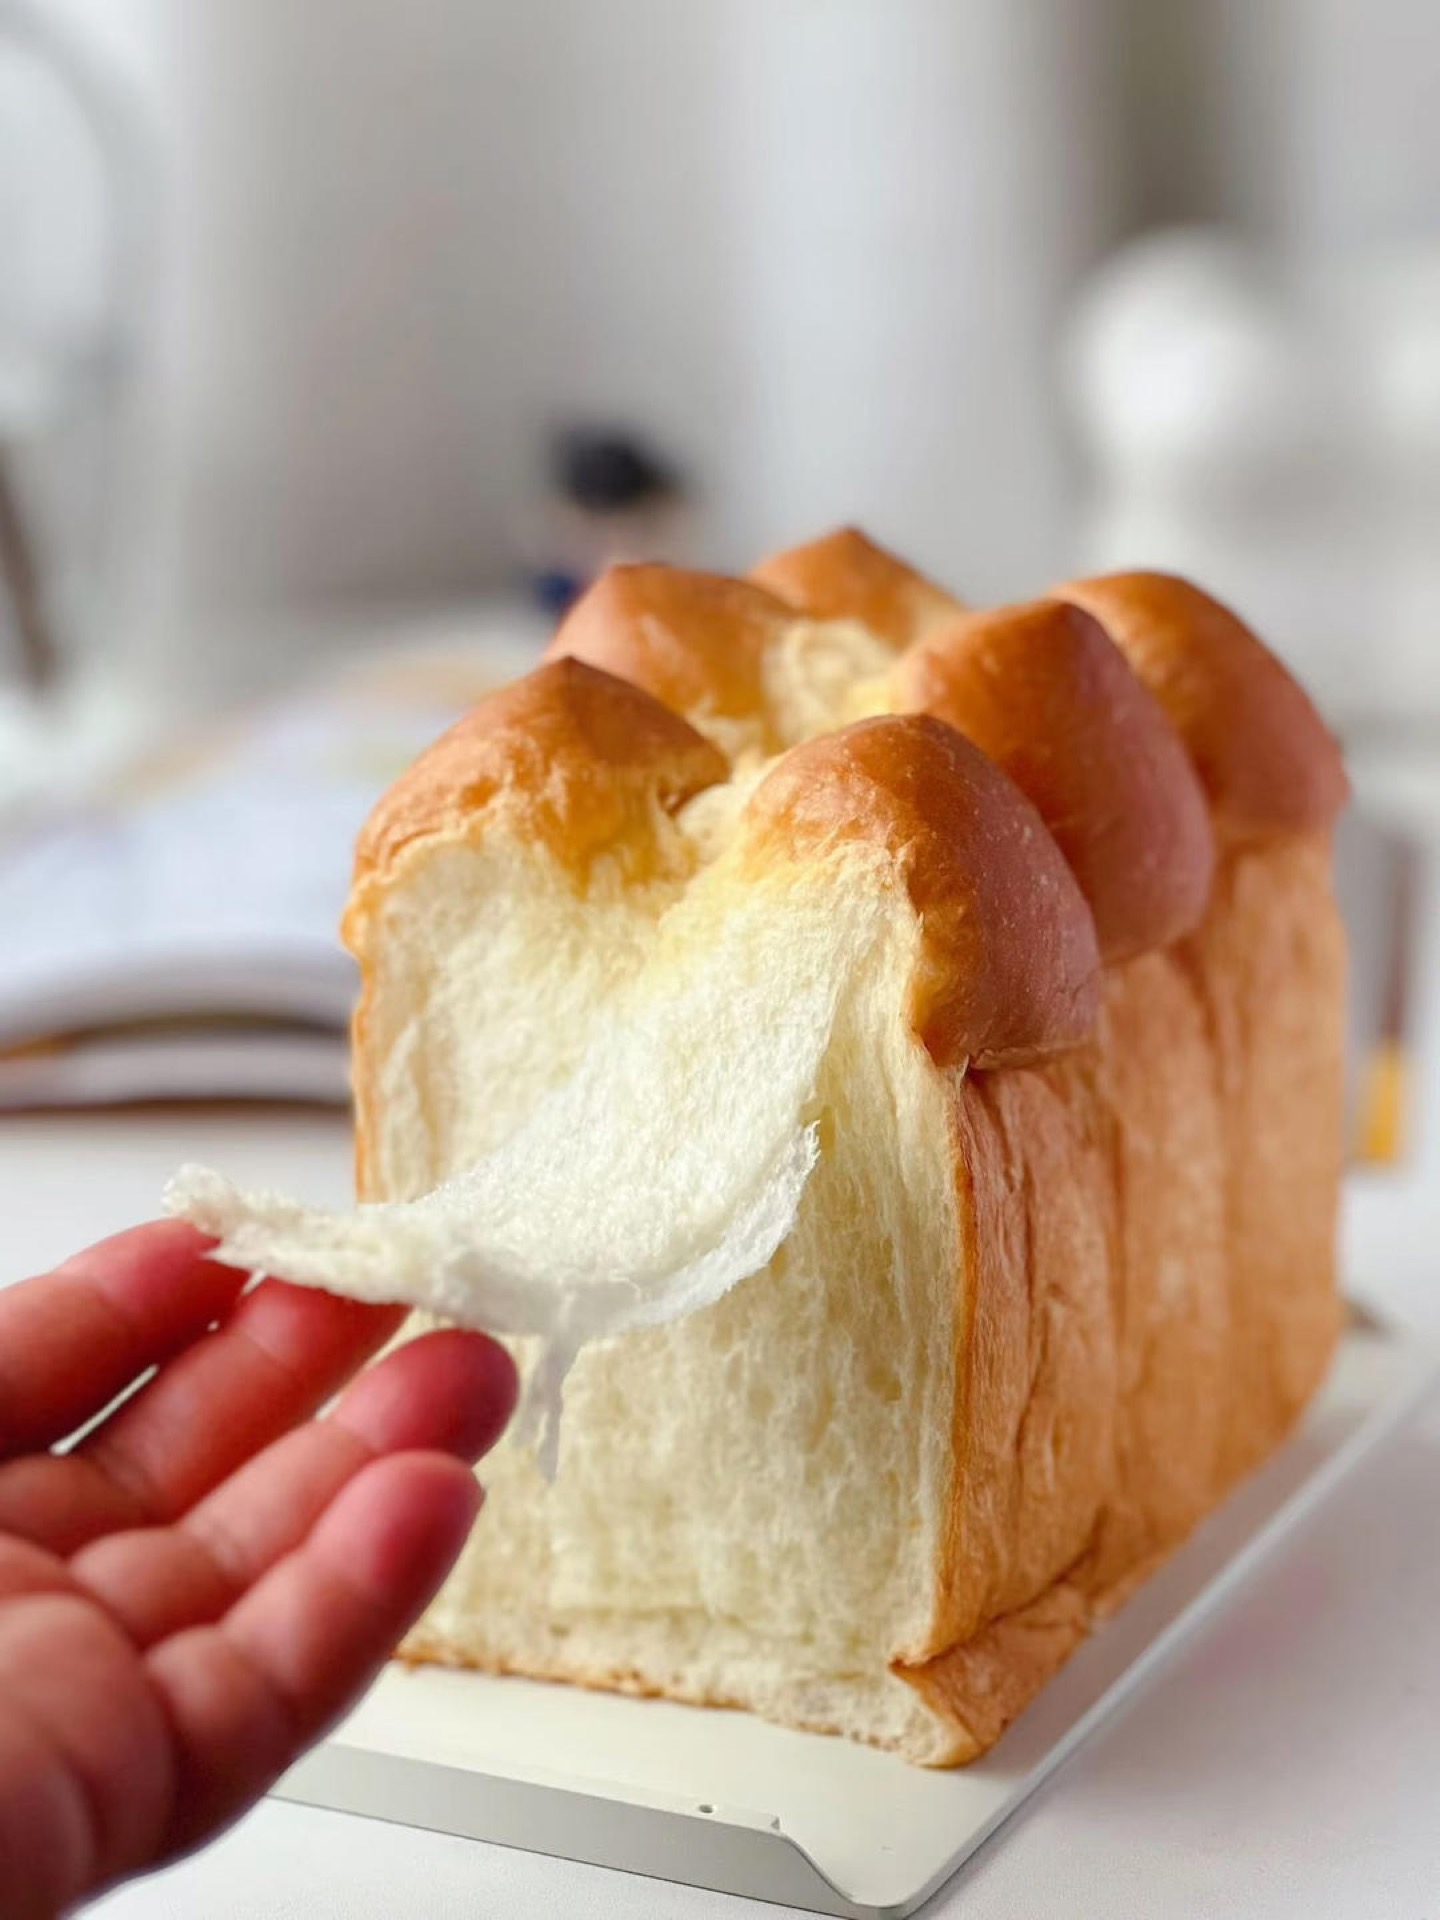
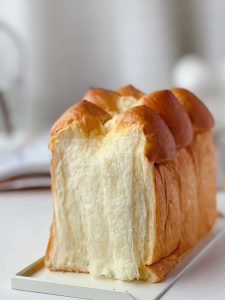
Once fully cool, slice a thin piece and hold it to the light. A properly made crown toast has a fine, even crumb with no large tunnels and a faint sheen from the butter. The crust will be thin, tender, and slightly tacky from the butter snips.
Step 5: Tear and eat
Honestly, the best way to eat this is to skip the knife entirely. Pull the loaf apart along the seams of the eight rolls — each one comes away as a buttery, feathery strand. Eat warm with salted butter, or toast a slice the next morning and let the edges crisp.
Common Mistakes When Making Crown Toast
1. Adding flour because the dough feels sticky. Enriched dough is supposed to be tacky. Adding flour pushes the hydration down and gives you a dry, dense loaf. Use a bench scraper and a light hand instead.
2. Adding butter too early. If you dump the butter in with the flour, the fat coats the gluten proteins and kneading takes twice as long. Wait for the sawtooth membrane first.
3. Under-proofing. A crown toast that goes into the oven at 7/9 height will bake up short and dense. Wait for 8/9, even if it takes 20 minutes longer than the recipe says.
4. Skipping the cold butter in the snips. Room-temperature butter melts and runs off before the crust sets. Cold butter stays in the cut long enough to create that lacquered petal effect.
5. Cutting it warm. I know. I have done it. But the crumb is still setting as it cools, and a warm slice will compress under the knife and look gummy. Wait the hour.
Variations
Matcha crown toast. Replace 8 g of the bread flour with culinary matcha powder. Reduce the milk by 5 g — matcha absorbs more liquid than you’d expect.
Coconut crown toast. Swap the milk powder for coconut milk powder and the whole milk for full-fat coconut milk. The crust takes on a lovely toasted-coconut note.
Cheese crown. After the snip step, tuck a small cube of cold cheddar into each cut alongside the butter. Salty, savory, and dangerously good with a bowl of crab stick tofu stew.
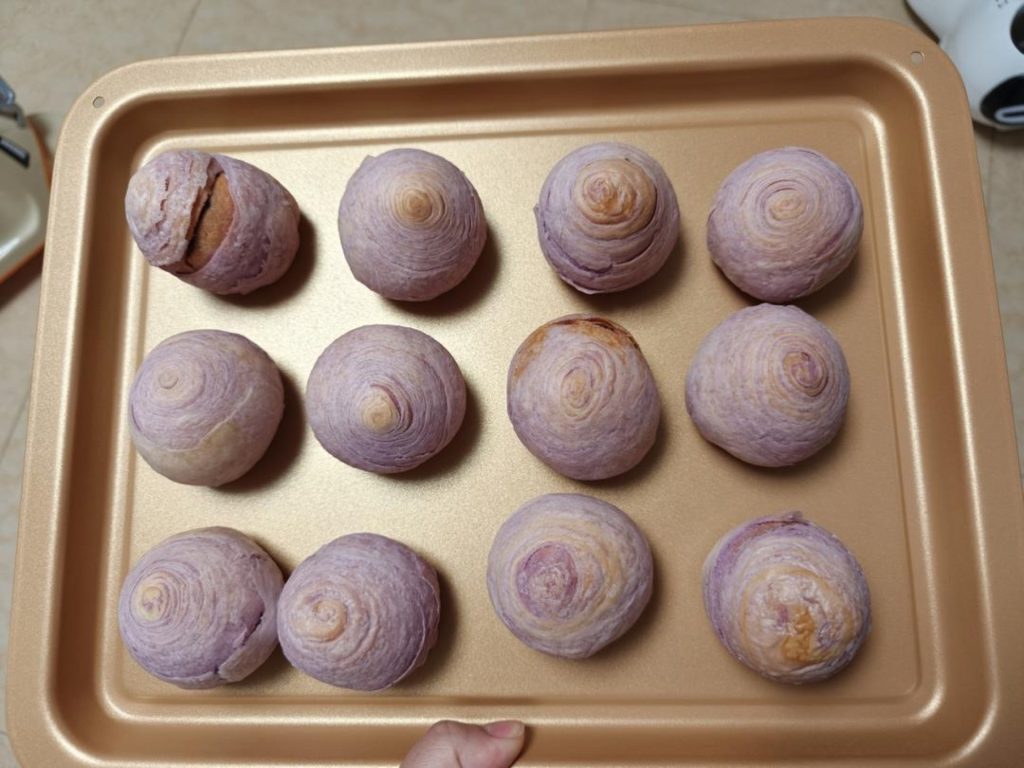
Ube crown toast. Add 15 g ube extract to the wet ingredients. The crumb turns a soft lavender and the flavor is gently sweet — a favorite with my yogurt bowl in the morning.
Frequently Asked Questions
Can I skip the overnight rest? You can, but you will need to knead longer and the flavor will be flatter. The overnight rest is doing real work — hydration and flavor development — not just saving you time.
My dough never reached the windowpane. What went wrong? Almost always under-kneading or butter added too early. Keep kneading. Enriched dough can take 15 minutes in a stand mixer and still be improving.
Can I use active dry yeast instead of instant? Yes — proof it in 2 tablespoons of the warm milk with a pinch of sugar for 10 minutes first, then add it with the rest. Reduce the total milk by 2 tablespoons.
Why did my crown toast collapse after baking? Over-proofing. If the dough went past 9/9 before baking, the gluten structure weakens and the loaf falls. Next time, check earlier.
Can I freeze it? Absolutely. Slice it, wrap tightly in plastic, then foil, and freeze up to 2 months. Reheat slices directly from frozen in a toaster — do not thaw first, or the crumb gets soggy.
How to Serve
Warm, torn by hand, with salted butter and a cup of strong tea. That is the classic. It also makes excellent French toast, a very good bread pudding, and — if you are feeling fancy — the base for a savory sandwich with green pepper scallop stir-fry piled on top. A slice alongside a bowl of savory pumpkin rice is a very good autumn lunch.
Storage & Reheat
Keep the cooled loaf in a paper bag or a bread box at room temperature for up to 3 days. Plastic wrap makes the crust soft and slightly damp — fine if you like that, less fine if you want the buttery crust to stay crisp. For longer storage, slice and freeze as described above. To reheat from room temperature, wrap a slice in a damp paper towel and microwave 15 seconds, or toast it directly.
Allergen Notice
This recipe contains wheat (gluten), eggs, and dairy (milk, milk powder, butter). It is not suitable for anyone with those allergies. If you need a dairy-free version, swap the milk for oat milk and the butter for a high-quality plant butter — the texture will be slightly less tender but still very good.
Nutrition Disclaimer
Nutrition information is estimated from standard ingredient databases and is provided for general guidance only. Actual values will vary based on the specific brands and measurements you use. This is not medical or dietary advice.
About the Author & Recipe Development
I am Lin, and I grew up in my parents’ restaurant kitchen in Chengdu, where every dish on the menu had to earn its place. Bread was not on that menu — but the bakeries down the street from our restaurant were, and I spent years trying to reverse-engineer their crown toast at home. This version is the one that finally worked: overnight rest, patient kneading, and a low, slow bake. I hope it becomes a Sunday ritual in your kitchen the way it has in mine. If you try it, tell me how the crumb turned out.
Authoritative References
- Harold McGee, On Food and Cooking — for the science of gluten development in enriched doughs.
- King Arthur Baking Company — hydration and windowpane test guidance for milk breads.
- USDA FoodData Central — for nutrition estimation.
- Peter Reinhart, The Bread Baker’s Apprentice — for delayed fermentation technique.
Crown Toast (皇冠吐司): Fluffy, Buttery, Tear-and-Share

Equipment
- Stand Mixer with Dough Hook
- 450g pullman loaf pan
- Kitchen Scale
- Bench Scraper
- Kitchen Scissors
- Wire Cooling Rack
Ingredients
Dough
- 495 g bread flour 12.5-13.5% protein
- 25 g milk powder
- 92 g granulated sugar
- 106 g egg about 2 large eggs, beaten
- 283 g whole milk cold
- 16 g instant yeast reduce to 12 g in warm kitchens
- 7 g fine sea salt
- 80 g unsalted butter softened, plus extra cold butter for snipping
Instructions
- The night before, whisk bread flour, milk powder, sugar, egg, and cold milk in the mixer bowl until no dry flour remains. Cover and refrigerate 12-16 hours. The next day, add yeast and knead 3 minutes on medium-low, then 6-8 minutes on medium until a ragged sawtooth membrane forms. Add softened butter and salt; knead 6-8 minutes more until glossy and windowpane-passing. Divide into 8 pieces (about 145 g each), roll into balls, rest 20 minutes. Roll each into an oval, roll up, rest 20 minutes. Roll long again, roll up tightly, and place seam-side down in the loaf pan. Proof at 24-26C until 8/9 up the pan, 60-90 minutes.

- Snip the proofed top in a grid with kitchen scissors, about 8-10 cuts, 2 cm deep. Tuck cold butter batons into each cut. Bake in a preheated convection oven at 150C (300F) for 30 minutes, or 160C (320F) in a conventional oven, until deep golden and 93-96C internally.
- Drop the pan from 10 cm onto a folded towel to release hot air. Cool in the pan 5 minutes, then unmold onto a wire rack and cool completely, at least 1 hour, before slicing.
- Slice a thin piece and hold it to the light. A good crown toast has a fine, even crumb with no large tunnels and a faint buttery sheen.
- Tear the loaf apart along the seams of the eight rolls and eat warm, or toast slices the next morning.





Leave a Reply