The most common frustration I hear from home cooks is that their stir-fry turns into a watery, steamed mess, or their “authentic” sauce tastes like nothing but salt. You follow a recipe, buy the ingredients, and yet the dish lacks that vibrant, “alive” quality you find in a restaurant. This usually happens because Western home stoves lack the intense heat of a professional kitchen, or the preparation order was slightly off.
Quick Answer
The secret to successful Chinese cooking at home isn’t high-BTU burners; it is Mise en Place (everything in its place) and understanding moisture control. By prepping ingredients to uniform sizes and ensuring the pan is sufficiently preheated, you can achieve professional results on any standard electric or gas range.
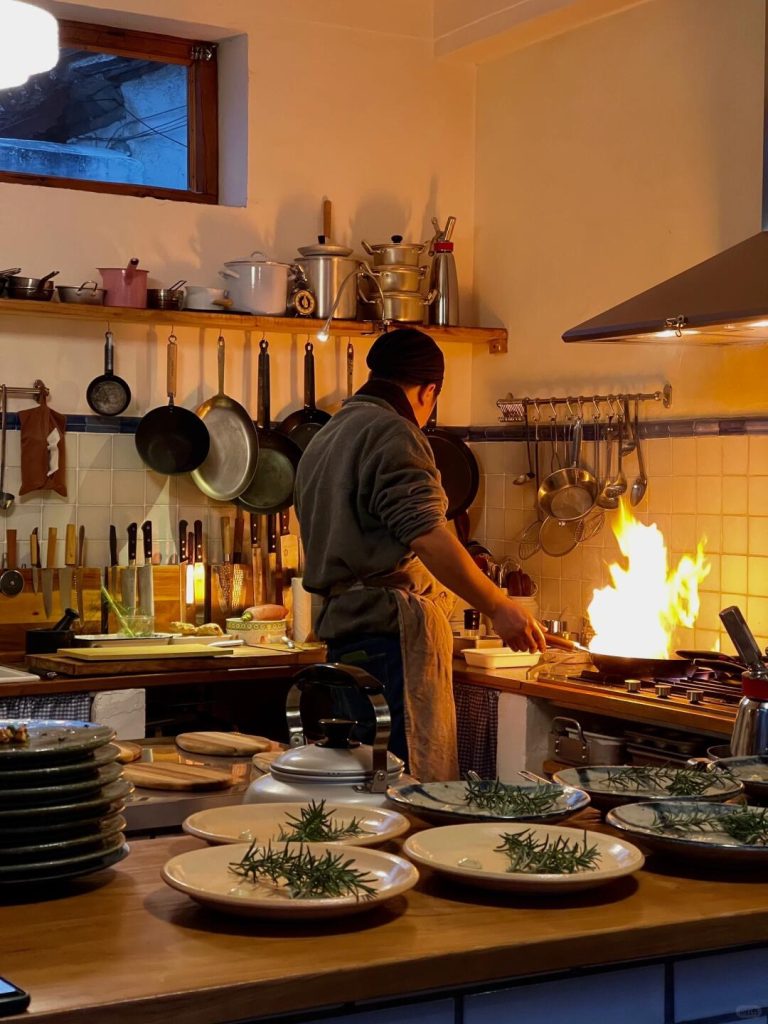
What is Chinese Home Cooking?
Chinese home cooking, or Jiā Cháng Cài, is fundamentally different from the “Wok Hei” heavy style of professional restaurants. While restaurants use burners pumping out 80,000–120,000 BTUs, a typical Western home gas stove only produces 10,000–18,000 BTUs. Home cooking focuses on balanced nutrition, seasonal vegetables, and clever flavor layering rather than sheer fire power.
Why It Works: The Core Mechanisms
Success in the kitchen comes down to managing the relationship between heat, surface area, and moisture:
- Heat vs. Surface Area: A large skillet or wok provides the surface area needed for moisture to evaporate instantly. If the pan is too small, the food releases liquid and boils in its own juices.
- Timing: Adding aromatics like garlic too early leads to bitterness, while adding them too late leaves them raw.
- Oil as a Conductor: In Chinese cooking, oil isn’t just for lubrication; it’s a heat transfer medium that reaches temperatures much higher than water, allowing for the Maillard reaction (browning) to occur quickly.
The Real Kitchen Insight
In my experience, the biggest mistake beginners make is overcrowding the pan. In a restaurant kitchen, we have the luxury of massive heat recovery. At home, every cold piece of broccoli you add drops the pan’s temperature. If you add too much at once, the temperature falls below the boiling point, and you lose that “sear.” What most beginners don’t realize is that it is often better to cook in two small batches than one large, soggy one.
Essential Ingredients & Western Substitutes
You don’t need a specialized pantry to start, but these core items are non-negotiable for that “authentic” profile.
| Ingredient | Purpose | Western-Friendly Substitute |
| Light Soy Sauce | Saltiness & umami | Liquid aminos or all-purpose soy sauce |
| Shaoxing Wine | Removes “gamey” scents | Dry Sherry or Mirin (reduce sugar elsewhere) |
| Toasted Sesame Oil | Finishing aroma | None (it’s unique, but skip if necessary) |
| Cornstarch | Thickening & velveting | Arrowroot powder or potato starch |
| Aromatics | Garlic, Ginger, Scallion | The “Holy Trinity” of Chinese flavor |
To understand the difference between the various liquids, I recommend checking out our guide on light soy sauce to ensure you aren’t accidentally over-salting your food with dark varieties.
Prep Strategy: Mise en Place is Mandatory
Because the actual cooking process for a stir-fry usually takes less than 5 minutes, you cannot be chopping while the stove is on.
- Uniform Cutting: Ensure meat and vegetables are cut to similar sizes. This ensures they finish cooking at the same time.
- Dry Your Greens: Moisture is the enemy of a sear. After washing vegetables, use a salad spinner or paper towels to get them bone-dry.
- The Sauce Slurry: Always mix your sauce in a small bowl beforehand. If you pour in cornstarch directly to a hot pan, it will clump into “glue.”
Step-by-Step Cooking: Your First Stir-Fry
- Preheat the Pan (2–3 mins): Heat your pan until a drop of water flicked onto the surface evaporates instantly. On a home stove, this usually happens around 380–400°F (193–204°C).
- Long Yao (Season the Pan): Add 2 tablespoons of a high smoke point oil. Swirl to coat, then pour out the excess if desired (though for beginners, the extra oil helps prevent sticking).
- Sear the Protein: Spread the meat in a single layer. Let it sit for 30–60 seconds without touching it to develop a crust.
- The Aromatic Bloom: Push the meat to the sides and add garlic and ginger to the center. You should hear a sharp sizzling sound immediately.
- Vegetable Toss: Add the hardiest vegetables first (carrots/broccoli), followed by leafy greens.
- The Finish: Pour the pre-mixed sauce around the edges of the pan (not directly on the food) so it heats up before hitting the ingredients.
Restaurant vs. Home Comparison
| Variable | Professional Kitchen | Your Home Kitchen |
| Burner Output | 80,000–120,000 BTU | 10,000–18,000 BTU |
| Heat Recovery | Instant (<10 sec) | Slow (30–60 sec) |
| Pan Type | Thin Carbon Steel Wok | Heavy Skillet or Flat-Bottom Wok |
| Oil Temp | 400°F+ (204°C+) | 350°F–375°F (177°C–190°C) |
Common Mistakes When Making Stir-Fry
- Mistake: Adding cold meat directly from the fridge.
- Why: It drops the pan temperature instantly, causing the meat to steam.
- Fix: Let the meat sit at room temperature for 15 minutes before cooking.
- Mistake: Using Olive Oil.
- Why: Extra virgin olive oil has a low smoke point and will turn bitter/smoky.
- Fix: Use Grapeseed, Canola, or Peanut oil.
- Mistake: Stirring too much.
- Why: The food needs contact with the hot metal to brown.
- Fix: Be patient. Let the food sear before tossing.
Why This Recipe Works
This method focuses on sequential cooking. By handling the protein first and then the vegetables, we respect the limited heat capacity of home burners. This prevents the “pool of liquid” at the bottom of the pan and ensures every bite has a distinct texture.
Pro Tips for Success
- Velveting: To get that silky restaurant texture, marinate your chicken or beef in a bit of cornstarch, oil, and soy sauce for 20 minutes. This creates a protective barrier. We have a detailed tutorial on how to velvet chicken for those wanting to level up.
- Cutting Against the Grain: Always look for the muscle fibers in meat and cut perpendicular to them. This breaks up the tough tissues, making even cheap cuts tender. See our professional chef’s guide to cutting meat for visual examples.
Mini Recipe: Basic Garlic Chicken Stir-Fry
- Protein: 1/2 lb chicken breast, thinly sliced.
- Aromatics: 3 cloves garlic (minced), 1 tsp ginger (grated).
- Veg: 2 cups broccoli florets.
- Sauce: 1 tbsp soy sauce, 1 tsp sugar, 1 tsp cornstarch, 2 tbsp water.
- Sear chicken in a hot pan with 1 tbsp oil until 80% cooked. Remove.
- Add another splash of oil; sauté garlic and ginger for 10 seconds.
- Add broccoli and 1 tbsp water; cover with a lid for 1 minute to steam-soften.
- Return chicken to the pan, pour in the sauce, and toss until the sauce bubbles and clears.
Variations
- Vegetarian: Replace the protein with extra-firm tofu (pressed dry) and use a mushroom-based “oyster” sauce.
- Spicy: Add 1 tsp of dried chili flakes or a dollop of Chili Garlic Sauce during the aromatic step.
Sources & Standards Referenced
- USDA Food Safety and Inspection Service – Safe Minimum Internal Temperature Chart
- Harvard T.H. Chan School of Public Health – Cooking Oils and Smoke Points
Frequently Asked Questions
- Do I need a wok? No. A large, heavy-bottomed stainless steel or cast iron skillet works perfectly on flat electric or induction stoves.
- Can I make this ahead of time? Stir-fries are best eaten fresh. However, you can prep all the ingredients 24 hours in advance.
- Why is my sauce too thin? The sauce must reach a boil for the cornstarch to activate. If it’s still thin, simmer for 30 more seconds.
- Is this authentic? While simplified for home kitchens, the techniques (velveting, aromatic blooming) are the exact foundations used in China.
- How do I clean my pan if food sticks? De-glaze the hot pan with a little water immediately after cooking to lift the stuck bits.
Storage & Reheat
Store leftovers in an airtight container for up to 3 days. To reheat, avoid the microwave if possible; a quick 2-minute toss in a hot skillet with a teaspoon of water will revive the textures much better.
Allergen Notice
This guide includes Soy (Soy Sauce) and potentially Gluten (Shaoxing wine/Soy sauce). For a gluten-free version, use Tamari and omit the wine or use dry sherry.
Nutrition Disclaimer
Nutrition information is an estimate and provided for informational purposes only. The sodium content is primarily driven by the choice of soy sauce; use low-sodium varieties if you are monitoring salt intake.
About the Author & Recipe Development
I’m Lin, a professional chef with over a decade of experience in both restaurant kitchens and home recipe development. This guide was developed through controlled testing on a standard 12,000 BTU home gas range to ensure that the timing and heat levels provided are achievable for the average home cook. Each step has been refined to eliminate the “steaming” effect common in beginner stir-fries.
Internal Links Used:






Leave a Reply