Growing up in Sichuan, pork belly was a religion in our household. My father, a professional chef, usually braised it (like in our Braised Pork Belly), but for special occasions, he would make Cui Pi Wu Hua Rou (Crispy Skin Pork Belly). Traditionally, this required a specialized charcoal oven and hours of labor.

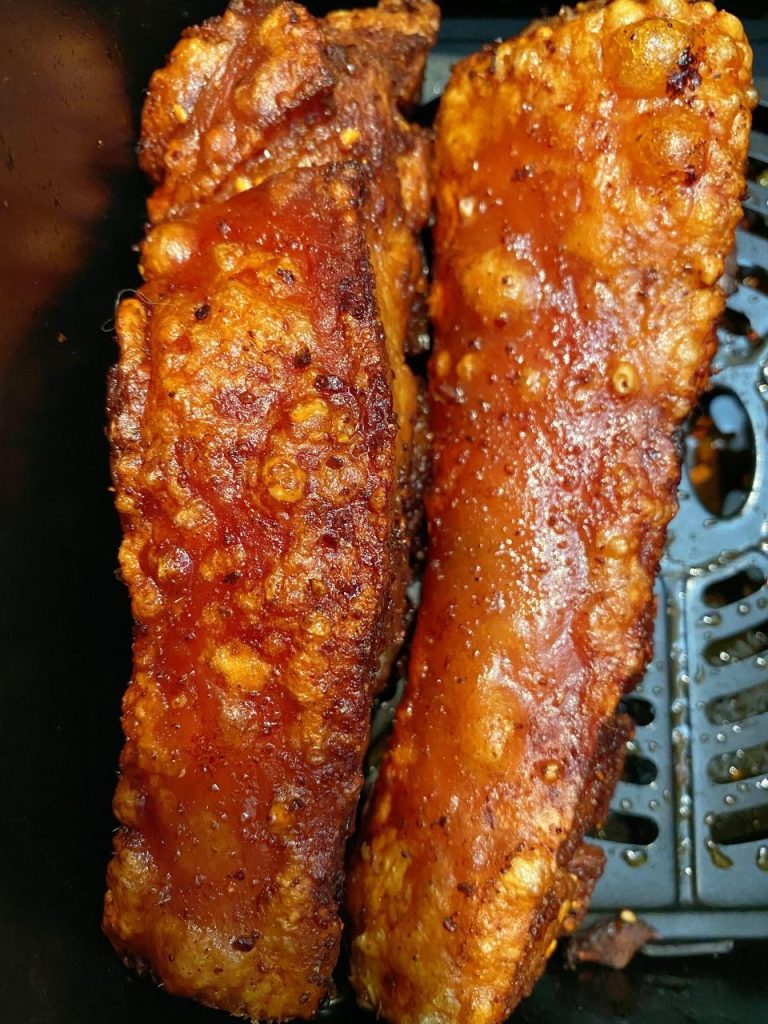
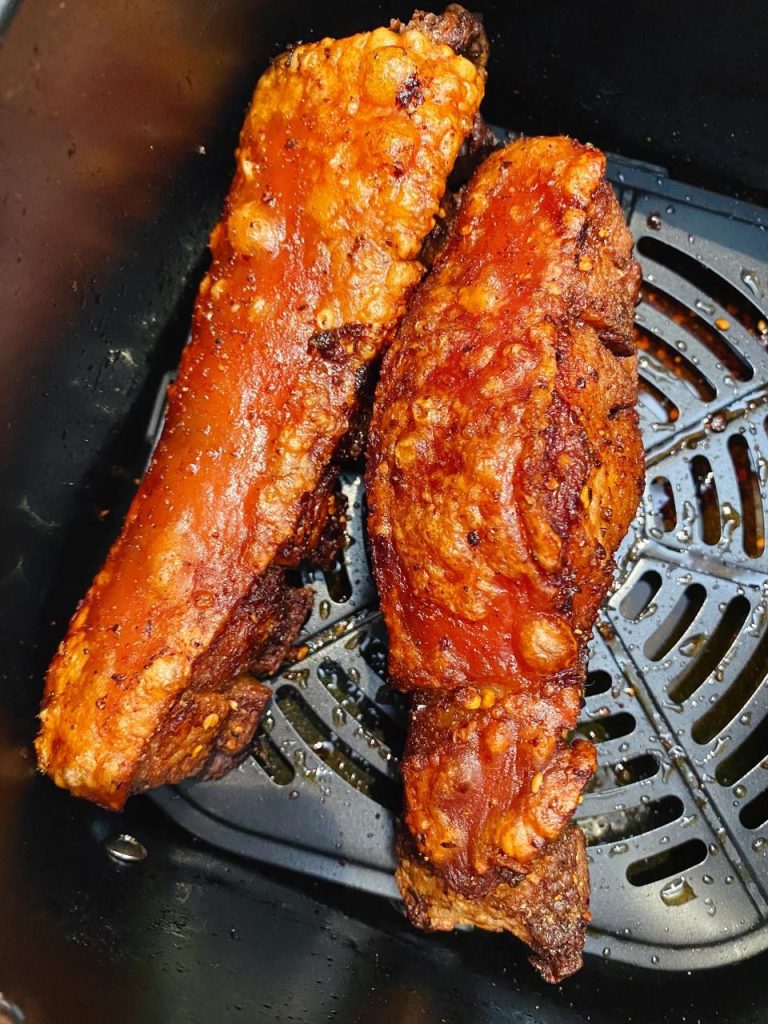
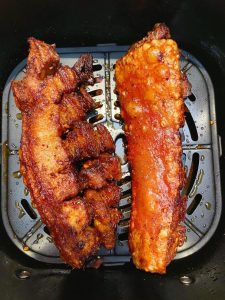
I honestly missed that satisfying crunch followed by the melt-in-your-mouth fat. After many trials in my own kitchen, I’ve adapted this restaurant classic for the home cook using an air fryer. Trust me, this method is a game-changer. It delivers that signature “tiger skin” bubbly crust—golden, airy, and deafeningly crunchy—without the hassle of a commercial oven.
What is Air Fryer Crispy Pork Belly?
This dish is essentially a home-friendly version of the famous Cantonese Siu Yuk (Roasted Pork), but with a Sichuan twist in the seasoning. We use the air fryer to circulate super-heated air around the skin, dehydrating it rapidly to create bubbles (pork crackling).
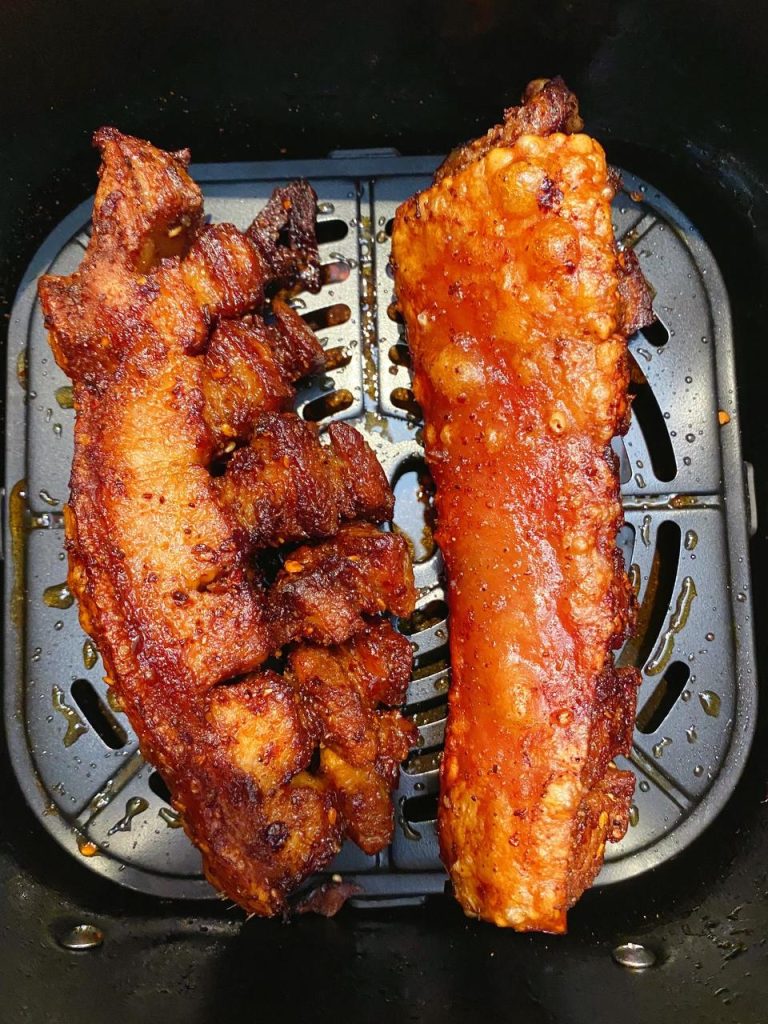
Unlike oven roasting, which can sometimes dry out the meat before the skin crisps, the air fryer is intense and fast. It renders the fat beautifully, keeping the meat succulent while the skin turns into a savory cracker.
Why This Recipe Works
- The Par-boil: We simmer the meat first. This removes impurities (scum), keeps the meat moist, and softens the skin so we can poke holes in it.
- The “Thousand Holes” Technique: By piercing the skin repeatedly, we allow fat to bubble up through the skin during frying. This frying effect is what creates the bubbly, crispy texture.
- The Salt Crust: Covering the skin with salt during the first stage of air frying draws out excess moisture. Dry skin = Crispy skin.
- Vinegar Wash: The acid in the vinegar helps break down the skin slightly and promotes browning and crisping.
Key Ingredients & Substitutions
- Pork Belly: You must use a slab with the skin on. Try to find a piece with even layers of fat and meat (the “five flowers” or Wu Hua).
- Selection Tip: Look for a flat piece; if it’s uneven, the skin won’t crisp evenly.
- Sichuan Dry Dish Dip (Gan Die): The original recipe calls for “Gan Die” chili powder. This is a specific Sichuan mix of ground chilies, crushed peanuts, sesame seeds, cumin, and MSG.
- Substitution: If you can’t find it, mix 2 tbsp chili flakes, 1 tsp cumin powder, 1/2 tsp salt, and a pinch of sugar.
- Shaoxing Wine: Used for boiling to remove gaminess.
- Substitution: Dry sherry or gin works well.
- Rock Sugar or Granulated Sugar: Just a pinch to balance the savory marinade.
- Coarse Sea Salt: Essential for the crust layer. Do not use fine table salt for the crust, or it will be too salty and hard to remove.
Recipe Notes Before You Start
- Equipment: You need an Air Fryer (basket style works best) and a dedicated meat pricking tool or a sharp bundle of skewers.
- Prep Time: While the cooking is fast, allow at least 1 hour for marinating the meat layer to ensure flavor penetration.
- Safety Note: Pork fat can smoke at high temperatures. If your air fryer starts smoking, add a small piece of bread or a splash of water to the drip pan below the basket to catch the grease.
Ingredients
For the Boiling Pot:
- 1.3 lb (600g) Pork belly, skin-on (one solid piece)
- 1-inch piece Ginger, smashed
- 1 Star Anise
- 1 tbsp Shaoxing wine
- Water (enough to cover the pork)
For the Marinade (Meat Side Only):
- 1 tbsp Oyster sauce
- 2 tbsp Light soy sauce
- 1 tbsp Cooking oil (neutral oil like canola or vegetable)
- 3 tbsp Sichuan chili powder mix (Gan Die) or spicy chili flakes
- ½ tsp Salt
- ½ tsp Chicken essence (optional)
- ½ Onion, sliced roughly
For the Skin Treatment:
- 1 tbsp White vinegar
- ½ cup Coarse salt (approximate amount to cover the skin)
How to Make Air Fryer Crispy Pork Belly
Step 1: Par-boil the Pork
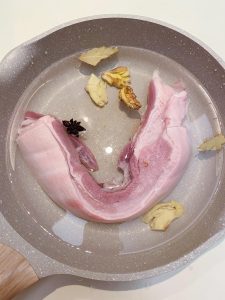
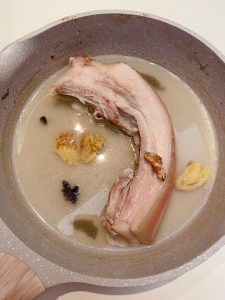
Place the pork belly in a pot of cold water. Add the smashed ginger, star anise, and Shaoxing wine. Bring to a boil, then reduce heat and simmer for 20 to 30 minutes.
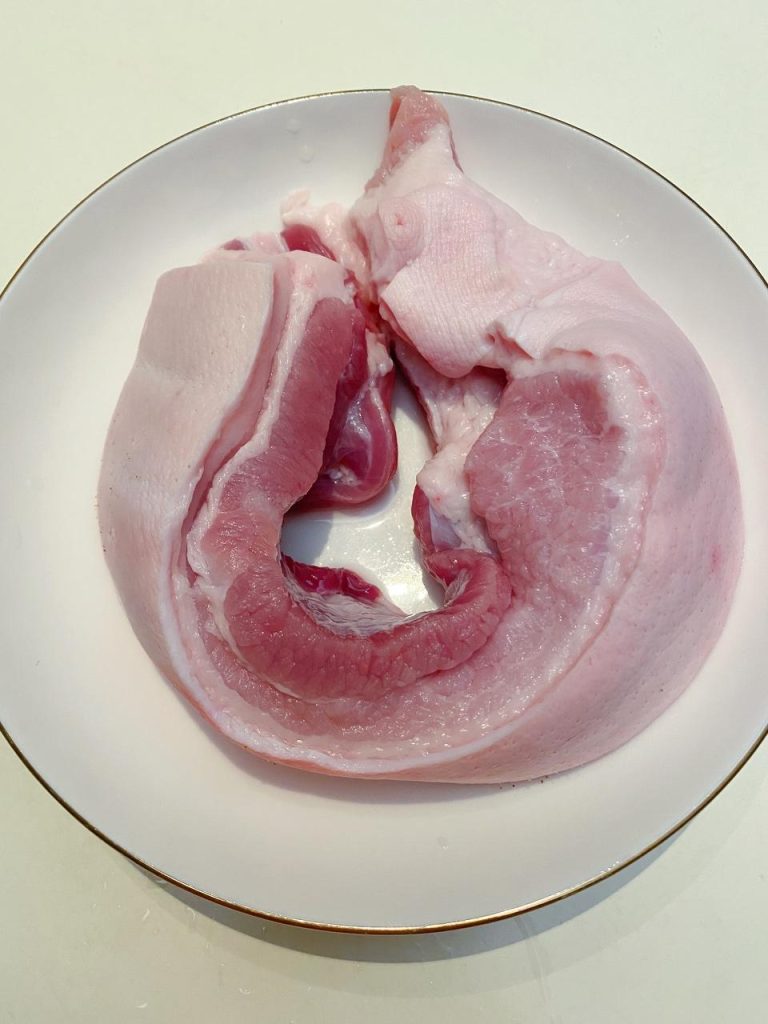
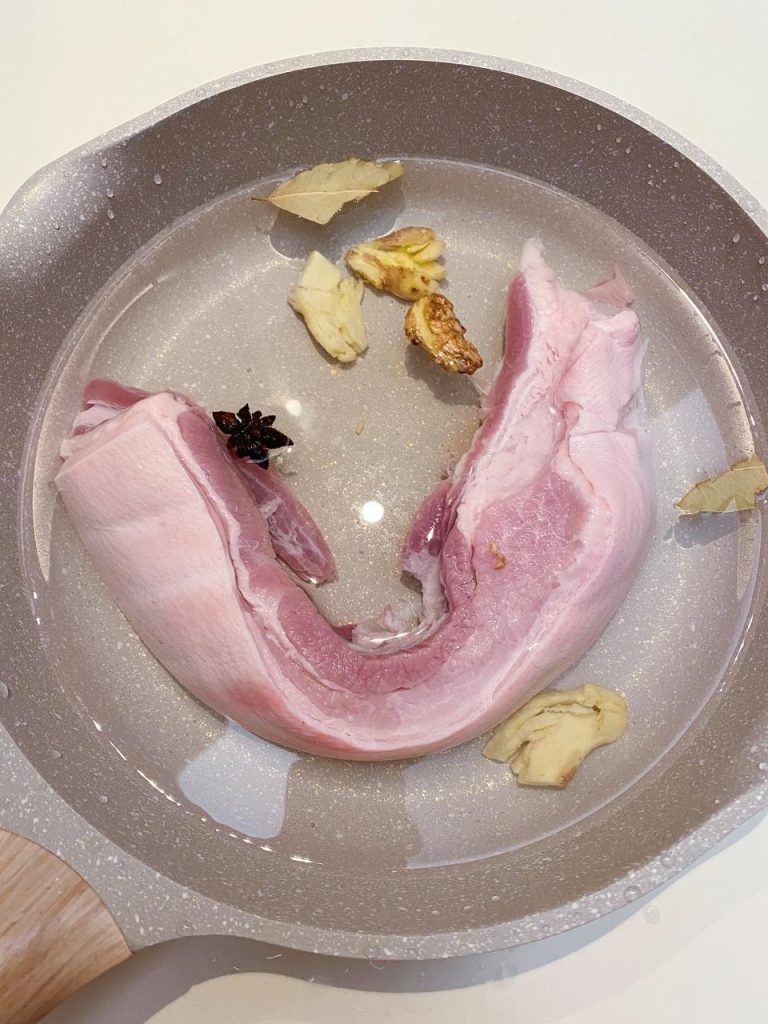
Why? You want the pork to be firm and cooked through, but not falling apart. This makes the skin soft enough to pierce.
Step 2: Poke the Holes (Crucial Step!)
Remove the pork and pat it completely dry with paper towels. Using a meat pricker, a fork, or a bundle of bamboo skewers, prick the skin all over.

Expert Tip: You need hundreds of tiny holes. Do not stab deep into the meat; just pierce the skin and fat layer. The more holes you have, the crispier the skin will be.
Step 3: Marinate the Meat
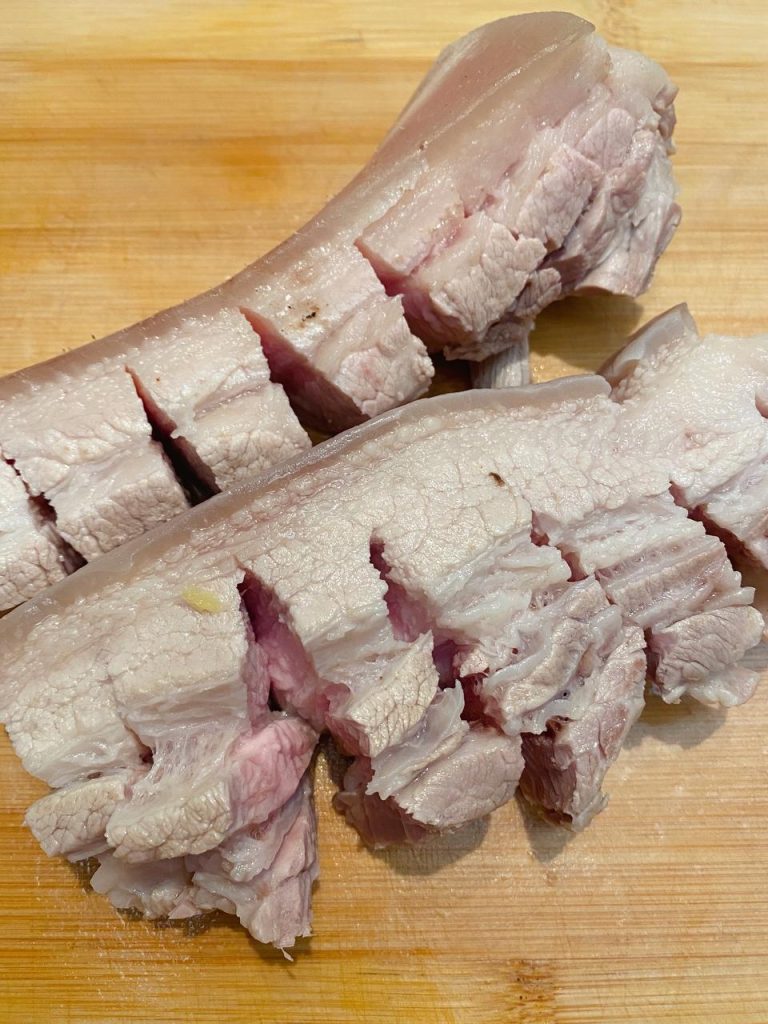
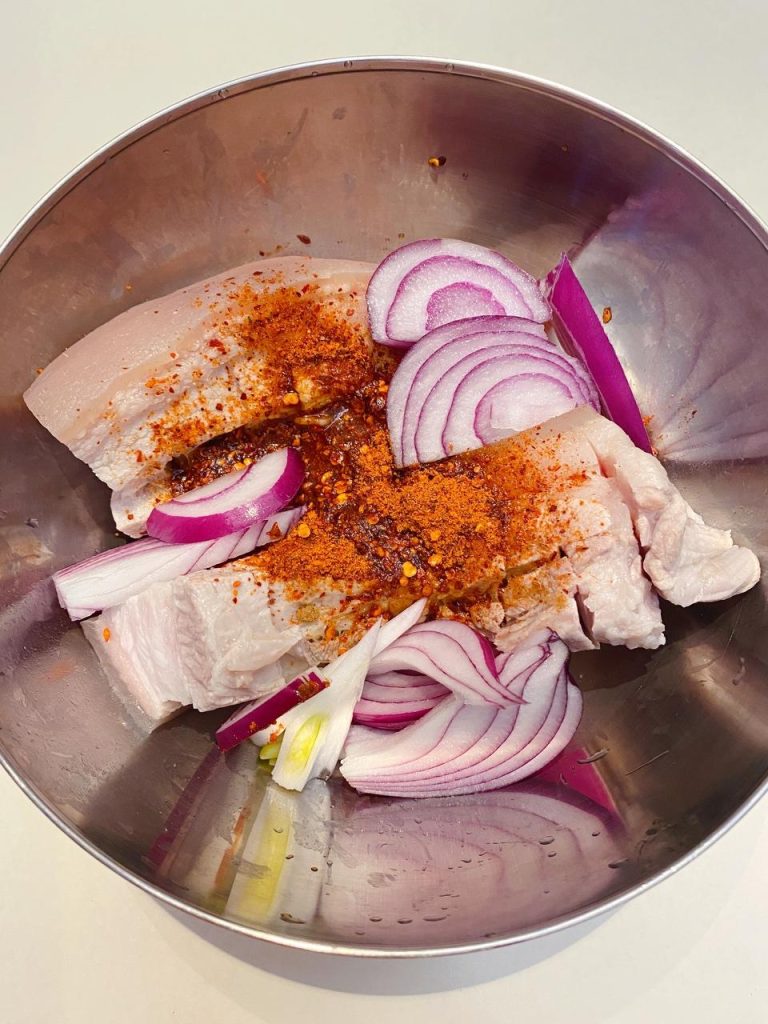
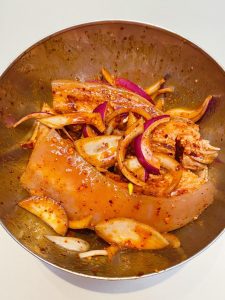
Flip the pork so the meat side is facing up (skin down). Use a knife to slice through the meat layers about 1-inch deep, but do not cut through the skin. This allows the marinade to penetrate.
Rub the meat side with the oyster sauce, soy sauce, chili powder, salt, chicken essence, and oil. Place the onion slices in the cuts.
- Warning: Keep the skin clean and dry. If sauce gets on the skin, wipe it off immediately, or it will burn.
Wrap the sides and bottom of the pork with aluminum foil, creating a “boat” where the skin is exposed at the top. Let it marinate at room temperature for at least 30 minutes (or refrigerate for 2+ hours for better flavor).

Step 4: The Salt Crust
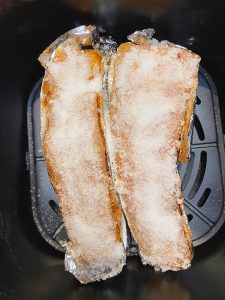
Preheat your air fryer to 390°F (200°C). Brush the exposed skin with the white vinegar. Then, pack a layer of coarse salt over the skin. You want to cover the skin completely so you can’t see it.
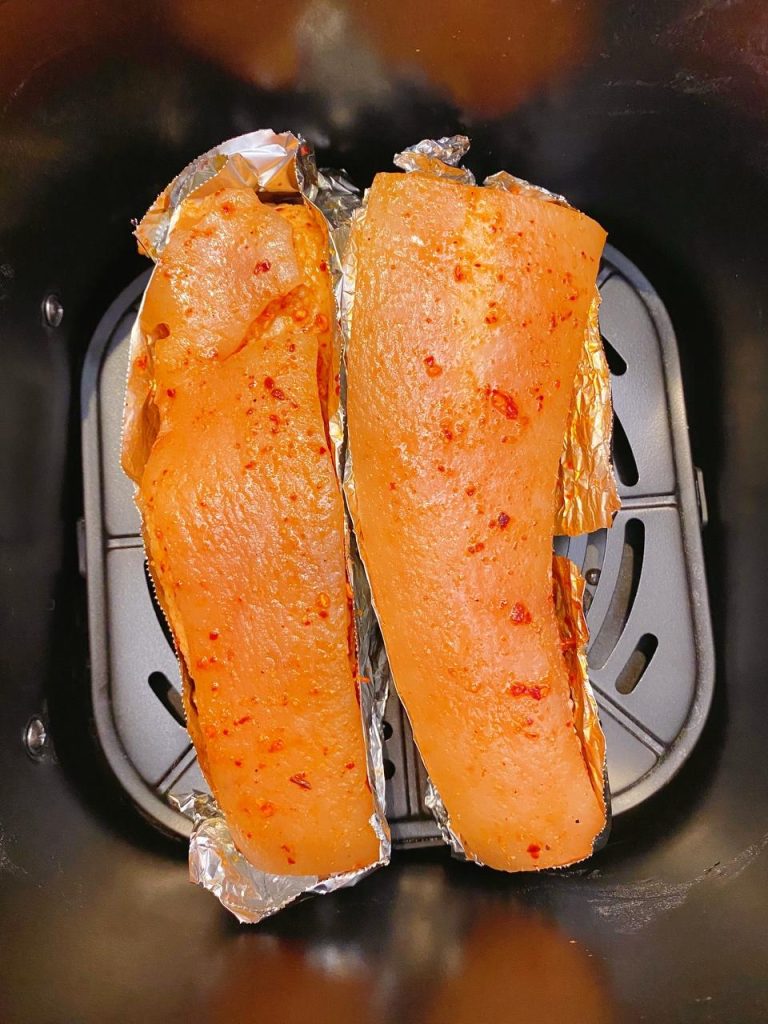
Science Check: The salt pulls moisture out of the skin while protecting it from burning during the initial high heat.
Step 5: The First Bake
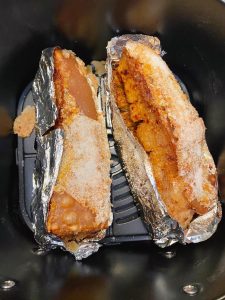
Place the foil-wrapped pork into the air fryer basket. Cook at 390°F (200°C) for 15 minutes. Remove the pork from the fryer. The salt should form a hard crust. Carefully discard the salt crust and peel away the foil. Brush off any remaining salt grains.

Step 6: The Crisping (The Pop)
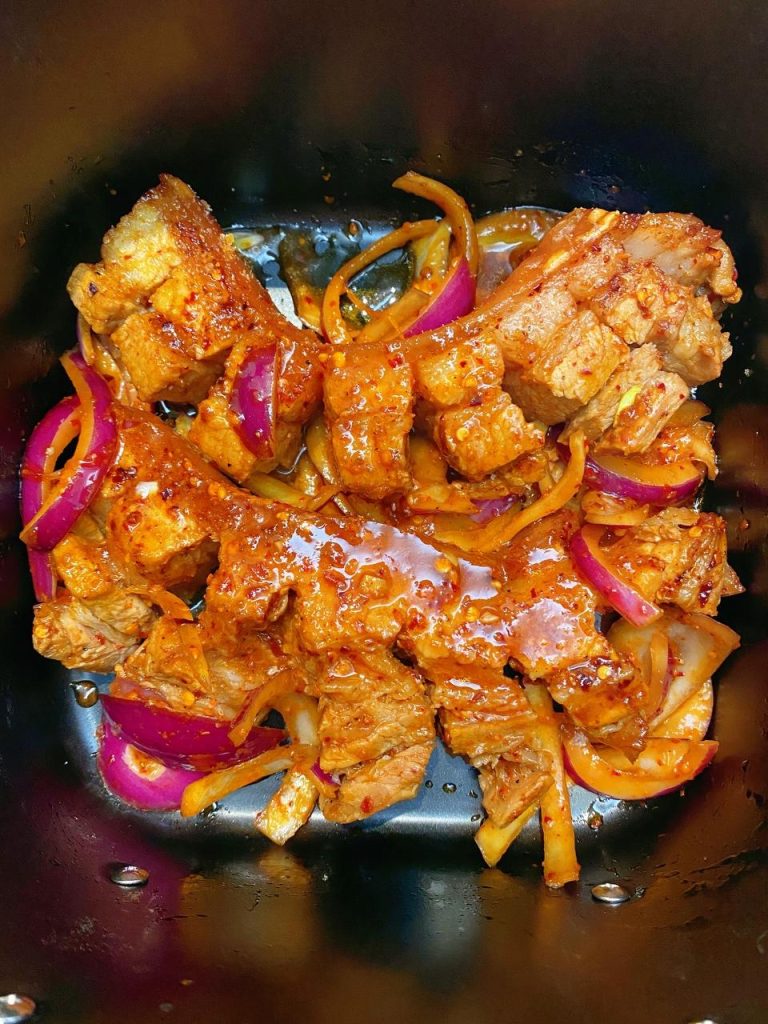
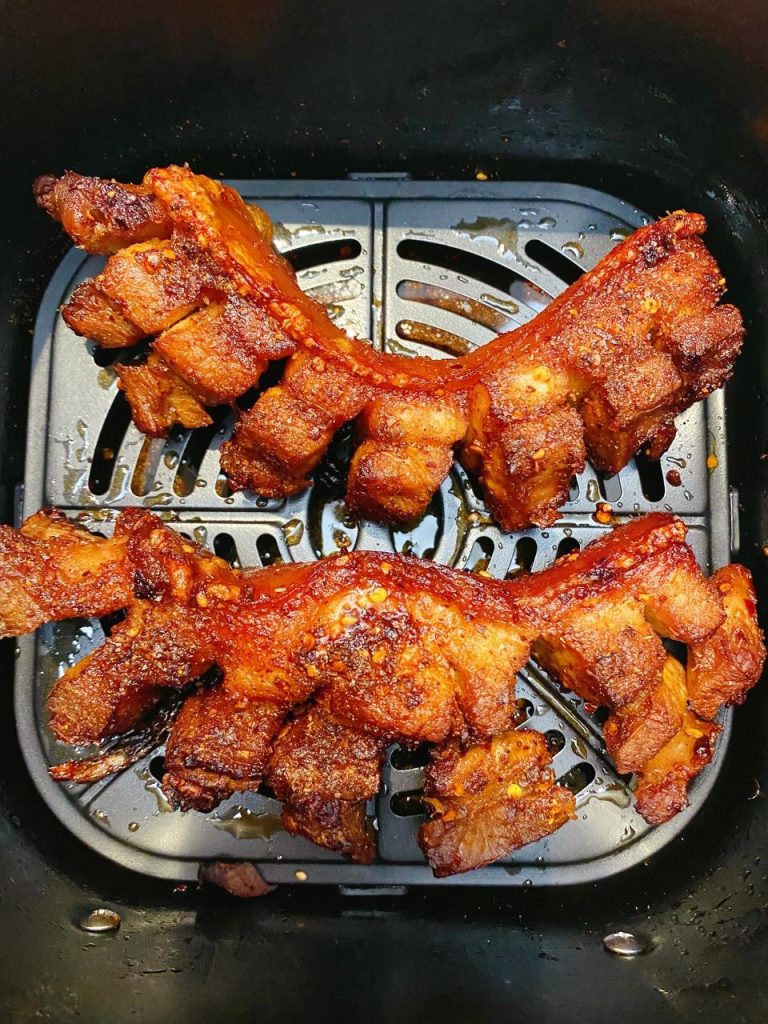
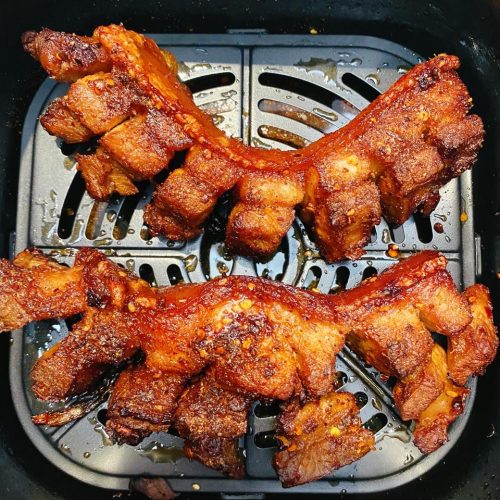
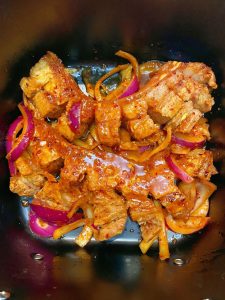
Place the pork back into the air fryer without foil, resting it on top of the onions (you can toss the onions from the marinade into the basket to roast alongside). Air fry at 390°F (200°C) for another 20 to 25 minutes.
- Visual Cue: Keep an eye on it after 15 minutes. The skin should bubble up and turn golden brown. If one spot is getting too dark, cover that spot with a tiny piece of foil.

Step 7: Rest and Serve
Remove from the air fryer and let it rest for 10 minutes. This allows the juices to redistribute and ensures the skin stays crisp. Turn the pork skin-side down on a cutting board (easier to cut) and slice into bite-sized cubes.
Tips for Success & Troubleshooting
- My skin is chewy, not crispy: This usually means the skin wasn’t dry enough or didn’t have enough holes poked in it. Next time, prick it more and ensure the salt crust step is done properly.
- The meat is dry: You may have overcooked it during the boiling phase. Simmer just until the meat is firm. Also, don’t skip the resting period after air frying.
- Comparison – Oven vs. Air Fryer: An oven takes longer (usually 45 mins to 1 hour for the crisping phase) and tends to dry out the meat more. The air fryer is superior for this specific cut because the intense convection mimics deep-frying.
Serving Suggestions
This pork is rich and savory. To balance the grease, I strongly recommend serving it with something acidic and refreshing.
- Wraps: As mentioned in the original recipe, wrapping a piece of crispy pork in fresh lettuce leaves is traditional and cuts the fat.
- Side Dish: Pair this with our Smashed Cucumber Salad. The garlic and vinegar in the cucumbers perfectly complement the roast pork.
- Sauce: Dip simply in sugar (traditional Cantonese style) or extra chili powder.
Frequently Asked Questions (FAQ)
Why is my pork skin chewy instead of crispy? This usually happens for two reasons: either the skin was not dry enough before cooking, or you didn’t poke enough holes in it. The holes are essential for the fat to escape and fry the skin. Next time, prick the skin until it feels rough like sandpaper, and ensure you pat it completely dry before adding the vinegar and salt.
Can I make this in a standard oven if I don’t have an air fryer? Yes, but the timing will change. In a standard oven, roast at 400°F (200°C). The salt-crust phase may take 30-40 minutes, and the final crisping phase (salt removed) may take another 30-40 minutes. The air fryer is faster and often produces a crispier result due to the intense air circulation.
What is “Gan Die” chili powder, and what if I can’t find it? “Gan Die” (Dry Dish) is a Sichuan dipping spice blend typically made of ground dried chilies, Sichuan peppercorns, cumin, soybean flour, peanuts, and sesame seeds. It has a savory, nutty, and spicy profile. If you cannot find it, you can make a simple substitute by mixing chili flakes, cumin powder, salt, and a pinch of sugar.
How do I reheat leftovers without them getting soggy? Do not microwave crispy pork belly, or the skin will become rubbery. Reheat it in the air fryer or toaster oven at 350°F (175°C) for about 5-8 minutes. This will bring the crunch back to the skin and warm the meat through.
My air fryer is smoking a lot, what should I do? This is common when cooking fatty meats like pork belly at high temperatures. To prevent this, you can add a small amount of water (about 2 tablespoons) or a slice of sandwich bread to the bottom drip pan of your air fryer before cooking. This catches the grease and prevents it from burning and smoking.
Nutrition Information (Per Serving):
- Calories: 350 kcal
- Carbohydrates: 2g
- Protein: 18g
- Fat: 30g
- Saturated Fat: 10g
- Sodium: 800mg
- Fiber: 0g
- Sugar: 0g
Allergen Info: This recipe contains Soy and Gluten (found in soy sauce and oyster sauce). For a gluten-free version, substitute with Tamari and a gluten-free oyster sauce.
Nutrition Disclaimer: Nutrition information is calculated using an ingredient database and should be considered an estimate. Garnishes and optional ingredients are not included. Actual values may vary depending on the specific cut of pork belly (fat-to-meat ratio) and how much fat renders out during the air frying process.
Food Safety & Preparation:
- Internal Temperature: Pork is safe to eat when it reaches an internal temperature of 145°F (63°C), but for pork belly, we cook it much longer to render the fat and tenderize the meat.
- Air Fryer Safety: Pork belly releases a significant amount of grease. If your air fryer begins to smoke, pause the machine and carefully wipe out excess grease from the bottom tray, or place a slice of bread in the bottom tray to absorb the dripping oil.
- Handling: When pricking the skin, be careful with the sharp tools. Ensure the pork is cool enough to handle after the boiling step before you start poking holes.
Chef’s Tips for the Perfect Crackling:
- The “Thousand Holes” are Key: Do not rush the skin-pricking step. You literally want hundreds of tiny holes covering every millimeter of the skin. These holes allow the subcutaneous fat to bubble up and fry the skin from the top, creating that airy, crunchy texture. If you miss spots, those areas will remain hard and chewy rather than crispy.
- Dry Skin is Mandatory: Moisture is the enemy of crispiness. After boiling and pricking, paper towel the skin thoroughly. If you have time, leaving the pork uncovered in the fridge overnight (skin side up) dries it out even better than the salt crust method alone.
- Leveling the Meat: Try to buy a piece of pork belly that is flat and even in thickness. If the meat is uneven, the skin will roast at different rates, leading to some burnt spots and some chewy spots. You can trim the bottom meat to level it out (use the scraps for stir-fry!).
- The Salt Crust: Do not use fine table salt for the crust; it will be too salty and difficult to scrape off. Coarse sea salt or Kosher salt is essential because it forms a cake that lifts off easily after the first stage of cooking.
Air Fryer Crispy Pork Belly

Equipment
- Air Fryer Basket style recommended
- Meat Pricker or Skewers Essential for crispy skin
- Aluminum Foil
Ingredients
For Boiling
- 1.3 lbs pork belly approx 600g, skin-on slab
- 1 inch ginger smashed
- 1 whole star anise
- 1 tbsp Shaoxing wine or dry sherry
Marinade
- 3 tbsp Sichuan chili powder (Gan Die) or mix of chili flakes, cumin, and salt
- 1 tbsp oyster sauce
- 2 tbsp light soy sauce
- 1 tbsp cooking oil
- 0.5 tsp salt
- 0.5 tsp chicken essence optional
- 0.5 whole onion sliced
Skin Crust
- 1 tbsp white vinegar
- 0.5 cup coarse sea salt enough to cover skin
Instructions
- Place the pork belly in a pot with cold water, ginger, star anise, and Shaoxing wine. Bring to a boil and simmer for 20-30 minutes until firm. Remove and pat completely dry.

- Use a meat pricker or skewers to poke hundreds of tiny holes all over the skin. Do not penetrate deep into the meat layer.
- Flip the pork meat-side up. Make vertical cuts into the meat about 1 inch apart (do not cut through skin). Rub the marinade ingredients (oyster sauce, soy sauce, chili powder, oil, salt, chicken essence) into the meat. Place onion slices in the cuts.
- Wrap the bottom and sides of the pork with aluminum foil, leaving the skin exposed at the top. Brush the skin with white vinegar and cover with a thick layer of coarse salt.
- Preheat Air Fryer to 390°F (200°C). Place the foil-wrapped pork in the basket and cook for 15 minutes.
- Remove pork, discard the salt crust, and remove the foil. Place the pork back in the air fryer (you can add the onions to the basket now). Cook at 390°F (200°C) for another 20-25 minutes until skin is bubbly and crispy.
- Let rest for 10 minutes before slicing. Serve with lettuce wraps.
Notes
Safety & Tips
- Food Safety: Pork should reach an internal temperature of at least 145°F (63°C), though pork belly benefits from higher temps to render fat.
- Allergens: Contains Soy and Gluten (from Soy Sauce). Use Tamari for a Gluten-Free option.
- Nutrition Disclaimer: Nutrition information is calculated using an ingredient database and should be considered an estimate. Garnishes and optional items are not included. Actual values vary.






Leave a Reply